I made an intro in the SEM section but the build has begun. I'd like to document it somewhere people can give me good useful input, this looks like the place.
Basics:
1988 Audi 90Q Originally 20v
Friend swapped stock 1.8T in and I bought it this way
I swapped in built motor, BT and some Eurodyne software
Suspension refresh + other little upgrades
Some little wiring issues driving me crazy/tune won't let me stretch the legs of this turbo so time for a change
So, the change list:
MS3
New body harness
Gut a lot of interior
Custom brake and clutch pedal assembly
Some metal work in the bay
Clean up underside
Bunch of new components, engine related. Fuel system, intake, intercooler, oil cooler etc.
And here is an overall plan of attack:
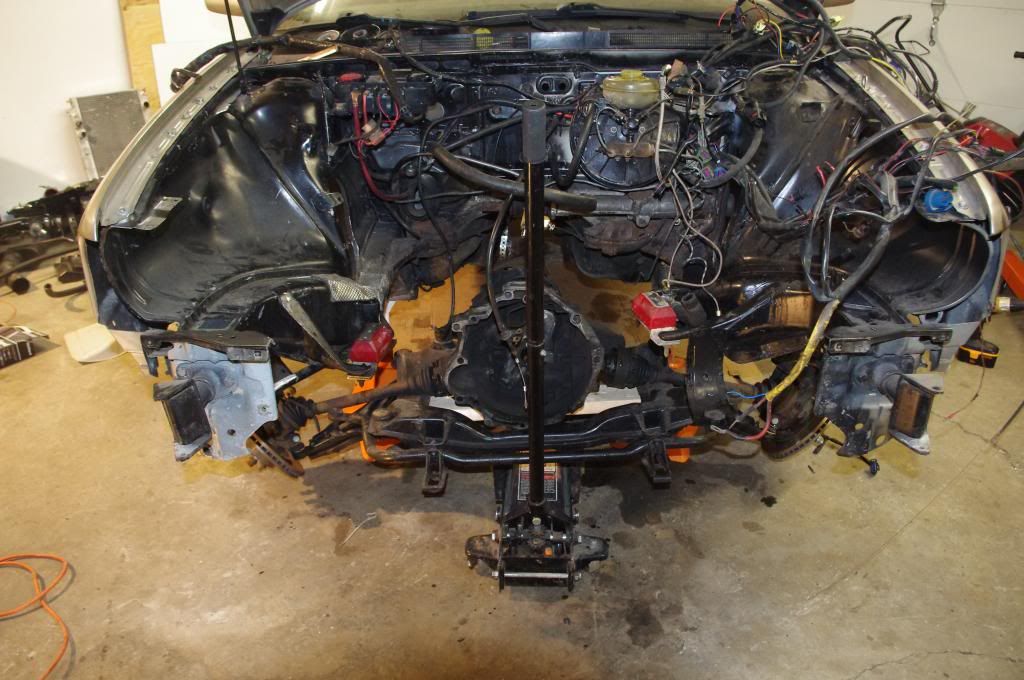
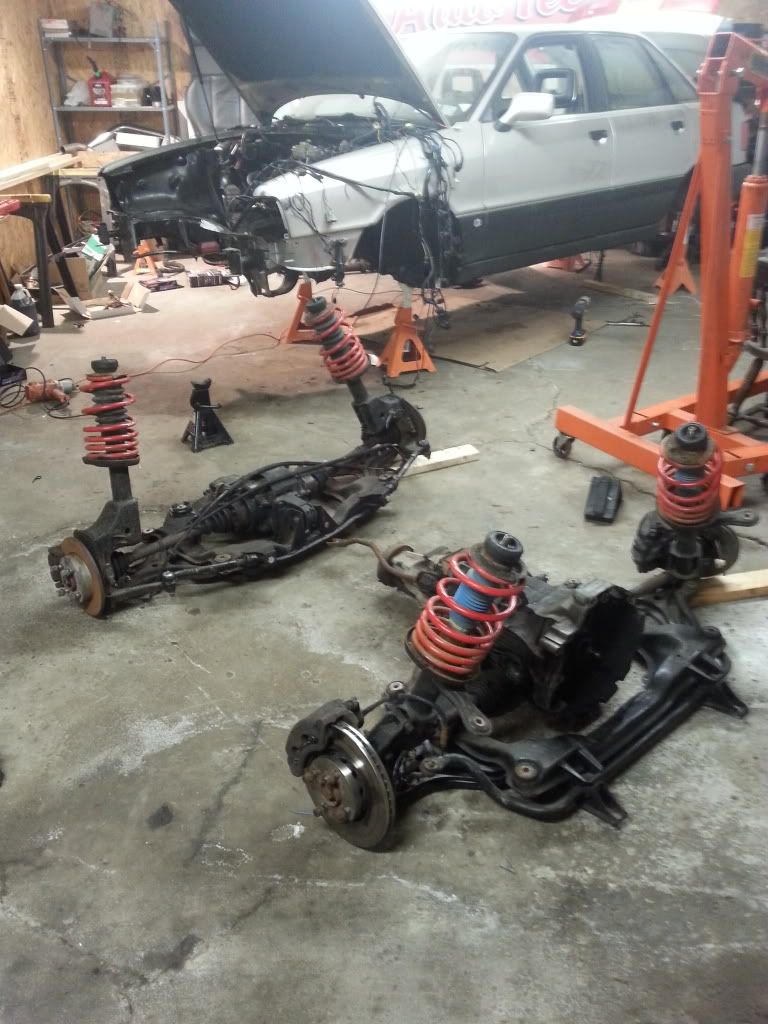
1. Strip the entire car of everything. (motor, trans, brakes, suspension, subframes literally everything) DONE
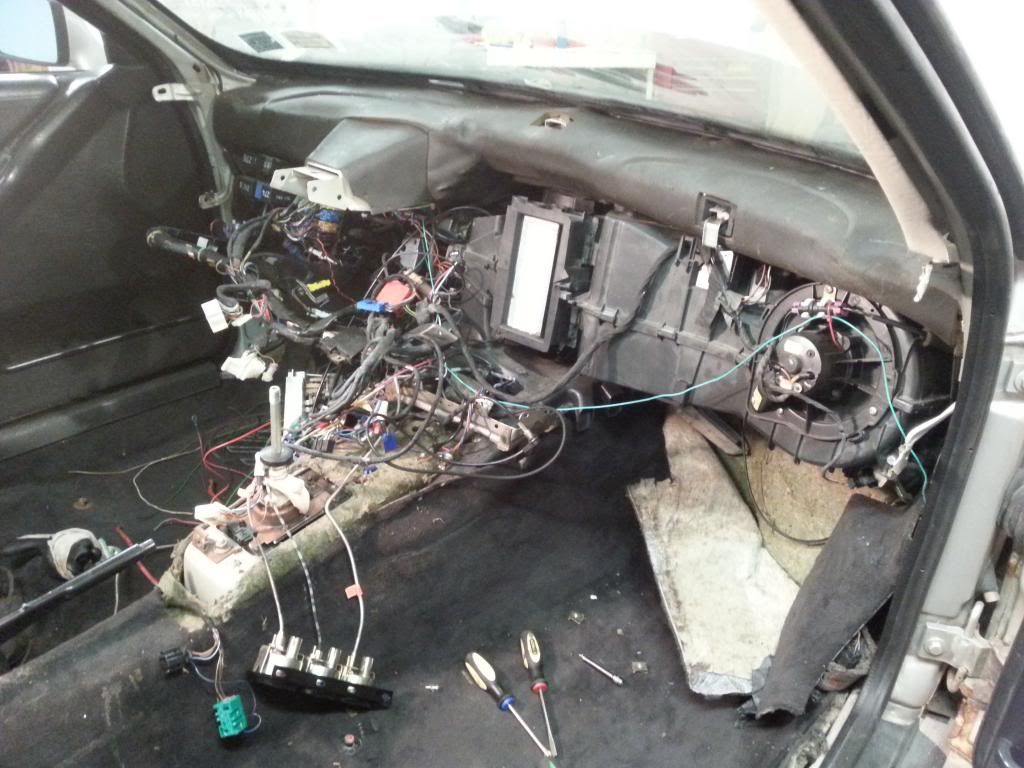
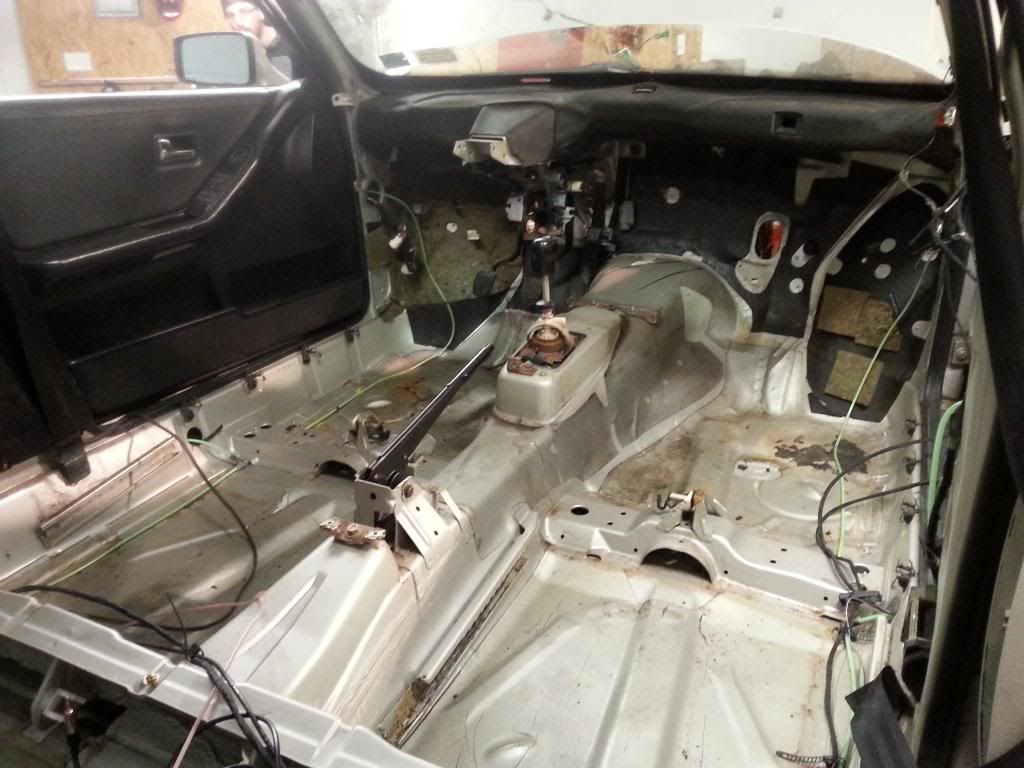
2. Strip interior of all wiring and trim etc DONE
3. Sand/grind/repair all metal work on the floors and paint/POR15 top/bottom of floors. (Leave/install mounting points for fuel system/lines, brake lines and exhaust hangers. DONE (what a relief)
4. Work on engine bay and mount pedal assembly. Figure out mounting of all 'liquid containers', begin work on the custom core support and structural bracing. Smooth and paint. DONE
5. Disassembly subframes, clean, seam weld, paint and re-assemble/install. DONE
6. Run engine harness and interior body harness. (Using this, or something similar http://www.leashelectronics.com/Pro-Str ... PS2012.htm and then also for my display I am going to use Bluetooth and a tablet in conjunction with stock gauges.)
7. Run new brake lines
8. Re-install motor, and re-do all plumbing of coolant/oil/air (motor is back in!)
9. Install fuel pump/filter and run new lines.
10. Finish tubular radiator support for mounting of oil cooler, radiator and intercooler. DONE, wating on paint.
11. Re-install bumpers, carpet seats, some interior trim (keep hvac and stock body harness out)
I need the most help with how crazy to get with the bay. I love the functionality, strength and look of hacking a large seciton off in front of strut towers and doing round tube. BUT if I do that, my mounts won't work and for my purposes it won't be super benificial.
What I'm planning on doing is welding on some mounting plates where the bumper supports currently attach then from there make all the other stuff. Like a split mounting system. One section on top to hange litterally everying off of, and a bottom portion for added strength and securtiy. AKA the whole assembly with come apart like this:
Bumper first using stock ish mounting.
Bottom support will come off leaving the rad, intercooler and oil cooler suspended only by the top bar. I couldn't drive like this but it won't be falling off the car with the bottom removed.
In order to remove top support most all lines, air water and oil will be disconnect or the cooler will have to be unbolted from main support.
Anyone have a solidworks model of a 90 chassis engine bay? I was thinking about just drawing up what I'm thinking, but if there was a starting model around it would help a lot.
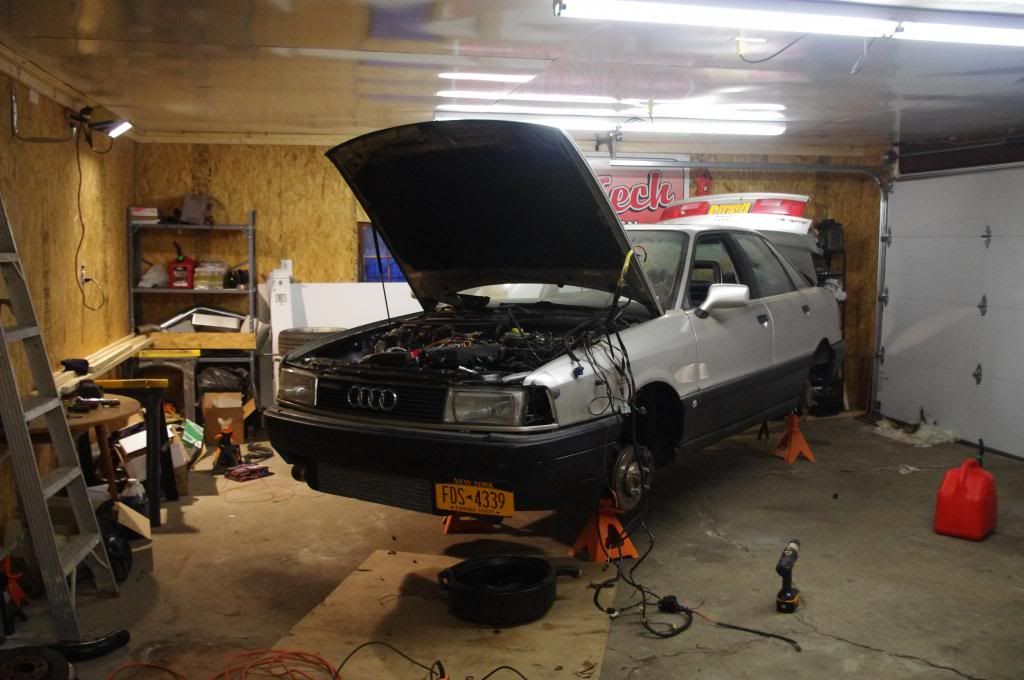
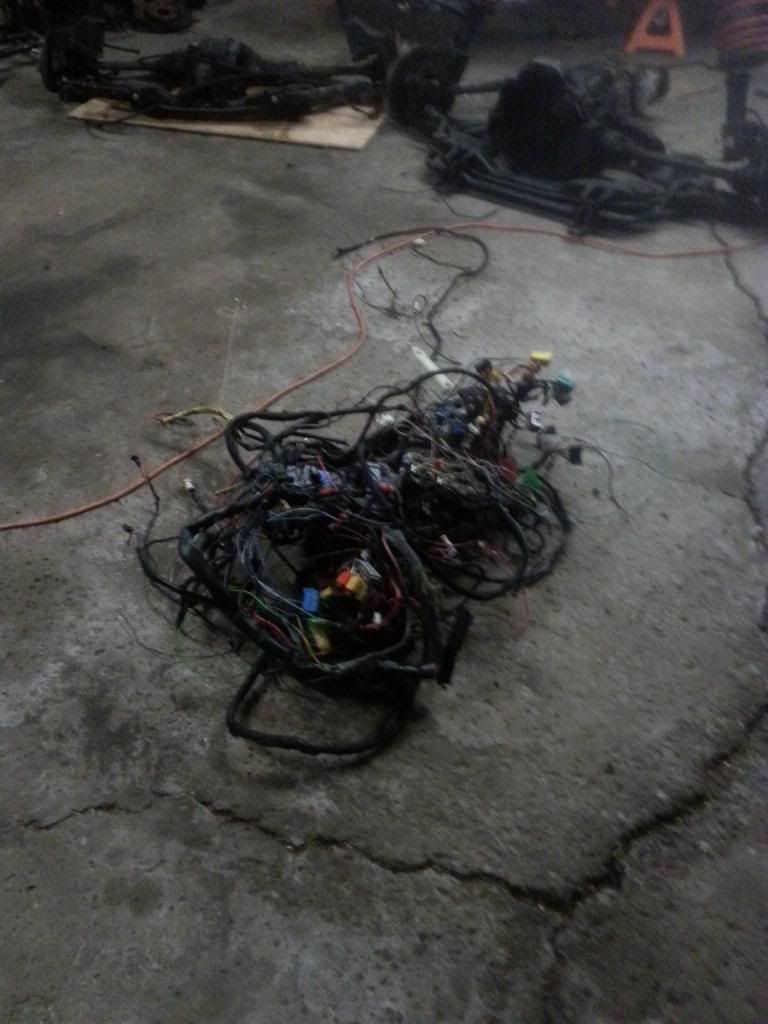
Enough words, here are some pictures.
Interior
So much crap:
Tonight I am going to start stripping everything, should be fun.
Re: 88' 90Q 1.8T Swap - billet 5858 time!
Posted: Wed Mar 12, 2014 10:07 am
by Dave
my 1.8t swap feels very un-ambitious now.
Nice work, hope it comes together fast for you!
Re: 88' 90Q 1.8T Swap - billet 5858 time!
Posted: Wed Mar 12, 2014 11:24 am
by PRY4SNO
Your link for the harness didn't work. Doing that is somewhat intimidating but I've been considering it (vs. chasing gremlins) for my black coupe.
Cool project, I'll be watching for sure
Re: 88' 90Q 1.8T Swap - billet 5858 time!
Posted: Wed Mar 12, 2014 11:34 am
by lorge1989
Fixed that link. New harnesses all around will in the end give me a better understanding of the car, save some weight and just simplify everything.
Im really trying to find a crank window option...
Re: 88' 90Q 1.8T Swap - billet 5858 time!
Posted: Wed Mar 12, 2014 5:36 pm
by PRY4SNO
lorge1989 wrote:Fixed that link. New harnesses all around will in the end give me a better understanding of the car, save some weight and just simplify everything.
Im really trying to find a crank window option...
Cool thanks, I've been thinking the same. So far I've come across Painless Harnesses thanks to Adam (ads) but it's nice to have more that one option.
I am also looking into crank window options. Save the weight and hassle associated with shipping replacement window frames/regulators for when they eventually do fail. And up here they can be a bitch in the freezing weather. Unfortunately they're about as rare as rocking horse shit. As an alternative, I've been thinking mk3 jetta or something similar might work well?
Re: 88' 90Q 1.8T Swap - billet 5858 time!
Posted: Wed Mar 12, 2014 6:21 pm
by lorge1989
PRY4SNO wrote:
Cool thanks, I've been thinking the same. So far I've come across Painless Harnesses thanks to Adam (ads) but it's nice to have more that one option.
I am also looking into crank window options. Save the weight and hassle associated with shipping replacement window frames/regulators for when they eventually do fail. And up here they can be a bitch in the freezing weather. Unfortunately they're about as rare as rocking horse shit. As an alternative, I've been thinking mk3 jetta or something similar might work well?
My problem isnt so much finding something that can work, mostly because i can go to the yard and grab some MK3 stuff like you said and make it work, but rather making it look good. Sounds dumb in a car like this but my dash and door cards are super mint and i want to use them. Cutting a hole in the door card seems like a bad idea to me.
Also leash electronics has a bigger board for street/strip applications. I might go that route if is decide to keep the power windows, sunroof and locks.
Locks, thats another thing. Currently my drivers side one is broken. I cant open that door with my key, only the passenger side. My best bet here to grab some other assemblies with a key and put them in? Or can i repair this one.
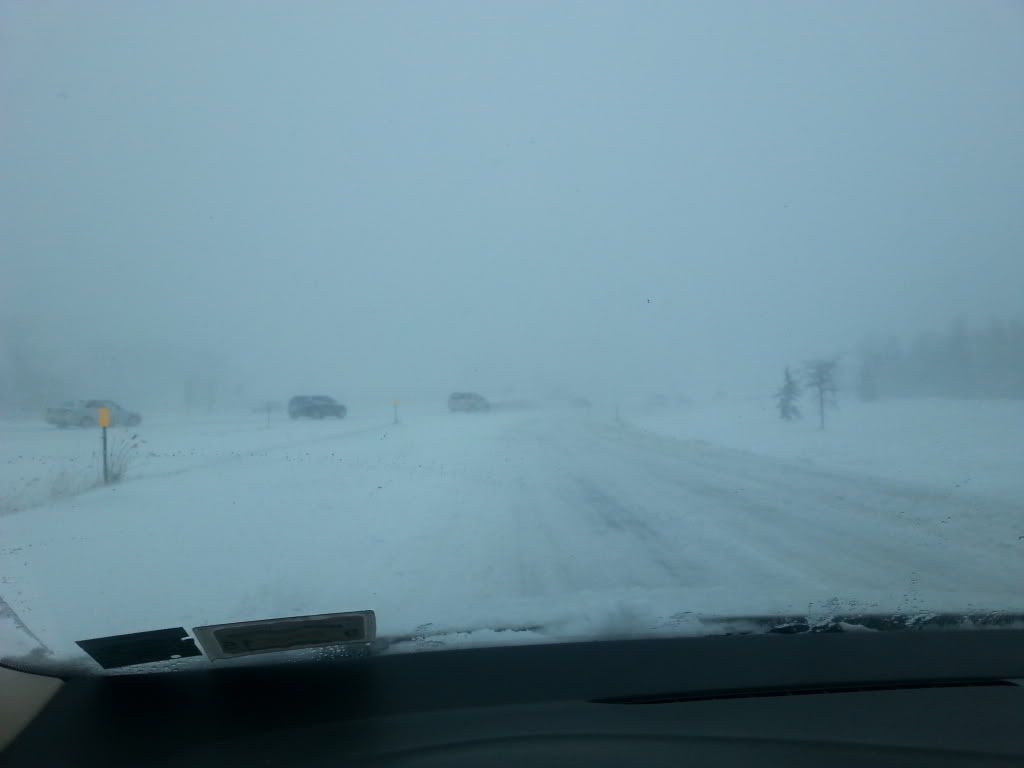
On a good note I got sent home from work early today because of a blizzard, 5hrs in the garage allowed me to get that tar like stuff off the interior floors and attempt, but fail, at finding a good way to strip the bottom. Any input?
Here's the blizzard at its mildest.
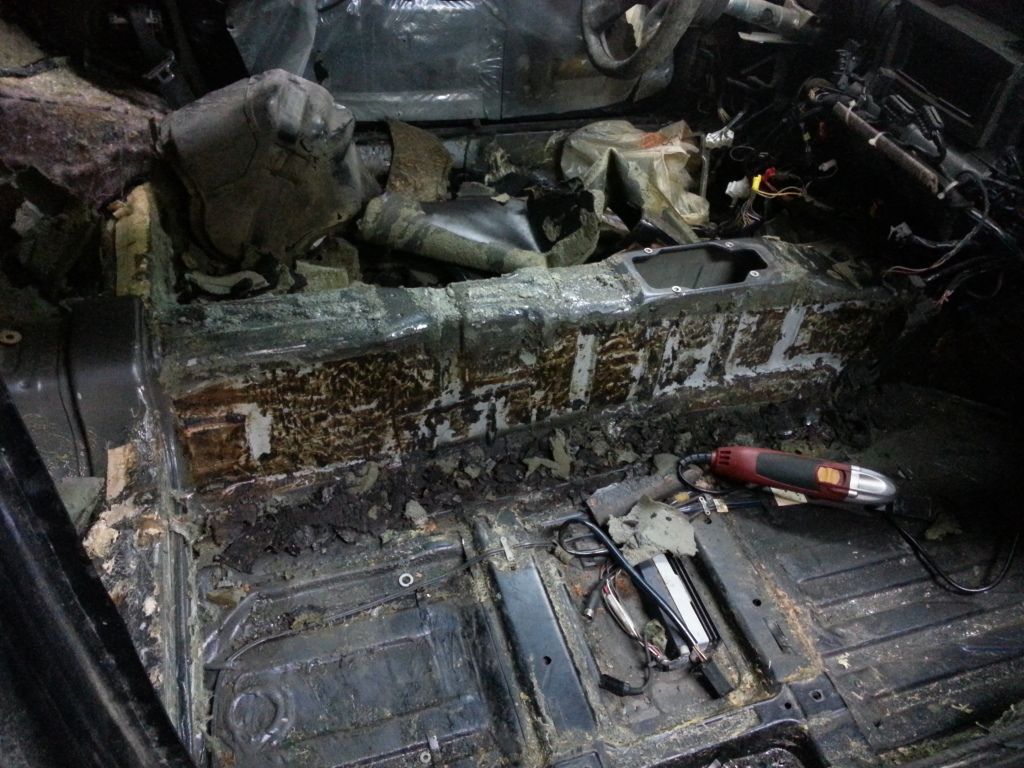
And what the floors look like.
Would have kept going but i sliced my finger pretty bad and also my flapper disc got a bit beat up and every hardware store is closed around here so im done for now.
Re: 88' 90Q 1.8T Swap - billet 5858 time!
Posted: Mon Mar 17, 2014 2:14 pm
by lorge1989
Still stripping away. If I had to guess I'd say I'm about 30% done with the bottom. This is just a terrible process... Still haven't found an 'easy' way to do it.
Using a multi tool to get the big chunks off first then a flap disc on an angle grinder to get down to shiny metal. Its working, just being under the car while doing it makes it very dirty, and tiring.
Ugh, must keep motivation!
On another note, I will be picking up MS3 with all the goodies from a friend of mine. It has a base file on it and he will be supplying a harness too. IMO MS is going to be a harder, just because I don't know much about it, but I'm sure once I get the hang of it, it will be sweet.
Re: 88' 90Q 1.8T Swap - billet 5858 time!
Posted: Tue Mar 18, 2014 6:23 am
by lorge1989
More updates for myself I guess.
Might be the worst pictures in the world but its tough to take em and by the end of the night I don't have the patience to get better ones.
Underside maybe 40-50% stripped. Only one wheel well done though.
Its all pretty clean aside from some surface rust.
Getting ready to weld up the firewall holes, and re-enforce some stuff.
Re: 88' 90Q 1.8T Swap - billet 5858 time!
Posted: Thu Mar 20, 2014 4:46 pm
by lorge1989
So I've settled on a process to strip the bottom. Its still painful, but it works.
First use this, with some heat to make it easier.
After that you will have paint and some undercoating left over.
To get that off I've tried a few different angle grinder attachments. The areas I used each on, correspond to the other picture below.
Quick summary after using them all for 15-20 seconds side by side.
Twisted wire wheel will last the longest for sure and also will be great for getting in seams and crevices. But for large areas it is not my first choice.
Turbo Disc (coarse), or clean and strip disc worked really well without digging into the metal at all. But seems like it was wearing kind of fast.
Flapper Disc (40 grit), quickest way to take this stuff off when there is only a little of the undercoat material left. When there is a lot of undercoat it will probably get gummed up. This brand is far superior to the Harbor Freight ones I was using before. Pic below. HF one is on bottom and cost nearly double of what the other one was.
Still have a lot of stripping left to do, but its getting there.
Re: 88' 90Q 1.8T Swap - billet 5858 time!
Posted: Fri Mar 21, 2014 7:05 pm
by chaloux
Man. That seriously sucks. Can't you just dip the whole thing in acid or something?
Re: 88' 90Q 1.8T Swap - billet 5858 time!
Posted: Fri Mar 21, 2014 8:35 pm
by alxdgr8
The "turbo" discs are nice, but they make a LOT of dust and don't last too long. Definitely wear a mask. Looks like we bought our discs from the same place, great prices! I ordered a large variety last time I made an order.
I feel your pain! I've spent many hours with the oscillating tool and grinder and I feel like I've only made a dent. Dry ice didn't work well at all for me, but some have had success. My biggest problem has been the adhesive on the interior. Underbody coating is easy compared to that! I still can't get all of the seam sealer out, I might have to torch it or just seal over it.
My 968
Re: 88' 90Q 1.8T Swap - billet 5858 time!
Posted: Fri Mar 21, 2014 8:37 pm
by alxdgr8
chaloux wrote:Man. That seriously sucks. Can't you just dip the whole thing in acid or something?
Dipping works, but it requires a completely bare chassis. And the acid will work it's way into places you'll never reach with a spray gun/seam sealer so it will rust a lot easier. The only proper way is to have the car dipped in primer after you acid dip it.
Re: 88' 90Q 1.8T Swap - billet 5858 time!
Posted: Mon Mar 24, 2014 2:57 pm
by lorge1989
Acid would be sweet, but this isn't a show car, so I don't care that much. Also at least we are coming up with similar solutions, makes me a bit more confident I am attacking it in the best way. My interior glue stuff was super easy to get off wit a little heat, sanding the remnants off isn't too big of a deal either. The bottom just sucks though.
I worked a bunch more hours on this thing and came to the conclusion that its rather silly for me to try to get every spec of paint/undercoat off the bottom of the car. If I had to guess, there is probably 1 squ. ft of area in total that hasn't been hit with the scraper/flap disc combo, thats it. I would say 70% is stripped clean and the rest has some combination of a small amount of paint/undercoat still on it. Most of those spots are in hard to reach places, so its going to be huge paint to get to all them.
The thought is that the difference in quality between using POR15 and paint over some small areas with sanded paint still on it, and stripping the entire thing completely and epoxy coating it, will be minimal. And the time spent will be much greater for the latter. Because of that, I decided I'll will use POR15 then undercoat it.
So on the to do list:
-Weld in studs to mount hose line hangers, brake line hangers, exhaust mounts and fuel pump/filter assembly
-Weld in patches for the small sections where the rust has came through the floor, mainly in the back
-Finish interior floor and body prep
-Run fuel lines, and mount everything to make sure its 100%
-POR 15 underside and inside floors
-Finish mounting points in engine bay and all other metal work
-POR 15 any trouble spots in there, sand/prep then paint
-Clean up subframes
-Engine, subframes, fuel system, new brake lines all put in the car
-Fabricate front light/intercooler/rad/oil cooler support
-Run engine harness
-Make body harness/switch panel
-inteior back in
Still have lots to do but it feels good knowing I will be moving on to a different task, since I have been stuck on the same 'step' for weeks.
Ordered all my fuel system parts today, ordered my clutch/brake pedal assembly as well. Here's what my fuel system will look like:
All -8AN lines, with my own little custom fuel rail. Should be good!
Re: 88' 90Q 1.8T Swap - billet 5858 time!
Posted: Mon Mar 24, 2014 11:04 pm
by PRY4SNO
Really digging on the detail, keep up the good work!
Re: 88' 90Q 1.8T Swap - billet 5858 time!
Posted: Tue Mar 25, 2014 12:35 pm
by lorge1989
PRY4SNO wrote:Really digging on the detail, keep up the good work!
Thanks for the support, at least someone is reading! haha.
Also I decided to make my own relay board, simply for a cost savings. Digging into that soon as well!
Re: 88' 90Q 1.8T Swap - billet 5858 time!
Posted: Tue Mar 25, 2014 1:42 pm
by vt10vt
Aw yeah, another MS powered Audi!
If you're talking a relay board for the MS, my entire setup is driven off one 30a relay that splits to 2x 5a injector 12v feeds, a 2a fuse for the ECU switched 12v+ and then another 10a fuse in the bay that powers my ISV, boost control solenoid and switches my coil relays. I would just breadboard it up and use another DB or similar connector as the B&G relay board is of questionable design IMHO.
Other than that it looks awesome, loving these 1.8t/small chassis projects! And good luck with the undercoating removal haha
Re: 88' 90Q 1.8T Swap - billet 5858 time!
Posted: Wed Mar 26, 2014 8:39 am
by lorge1989
vt10vt wrote:Aw yeah, another MS powered Audi!
If you're talking a relay board for the MS, my entire setup is driven off one 30a relay that splits to 2x 5a injector 12v feeds, a 2a fuse for the ECU switched 12v+ and then another 10a fuse in the bay that powers my ISV, boost control solenoid and switches my coil relays. I would just breadboard it up and use another DB or similar connector as the B&G relay board is of questionable design IMHO.
Other than that it looks awesome, loving these 1.8t/small chassis projects! And good luck with the undercoating removal haha
Thanks and I was actually speaking of the body harness. I'm going to be making my own, very simple, one. Still a bit intimidating. Still having second thoughts about it though. The other option that I was considering was one of these that I posted earlier.
I still really like it, its just another $400, ha.
Got some of fuel components in, Summit rocks.
Interior is coming along. I'm not stripping everything, just the floors and maybe under the back seat. Terrible pic.
A few months ago I resprayed the inside of the wheel wells, so they are pretty much done now too.
Little MIG action
And I added the two braces just because all the factory brackets I took out. The front radiator support will ad a bunch of strength as well.
And this snow needs to stop!
Re: 88' 90Q 1.8T Swap, MS3 and a lot of wire wheeling.
Posted: Tue Apr 08, 2014 6:52 am
by lorge1989
Its been a while, lots of sanding, wire wheeling and welding.
Got my pedal assembly in:
No mount pics just yet.
Made part of my fuel pump mounting bracket, I know my tigging sucks.
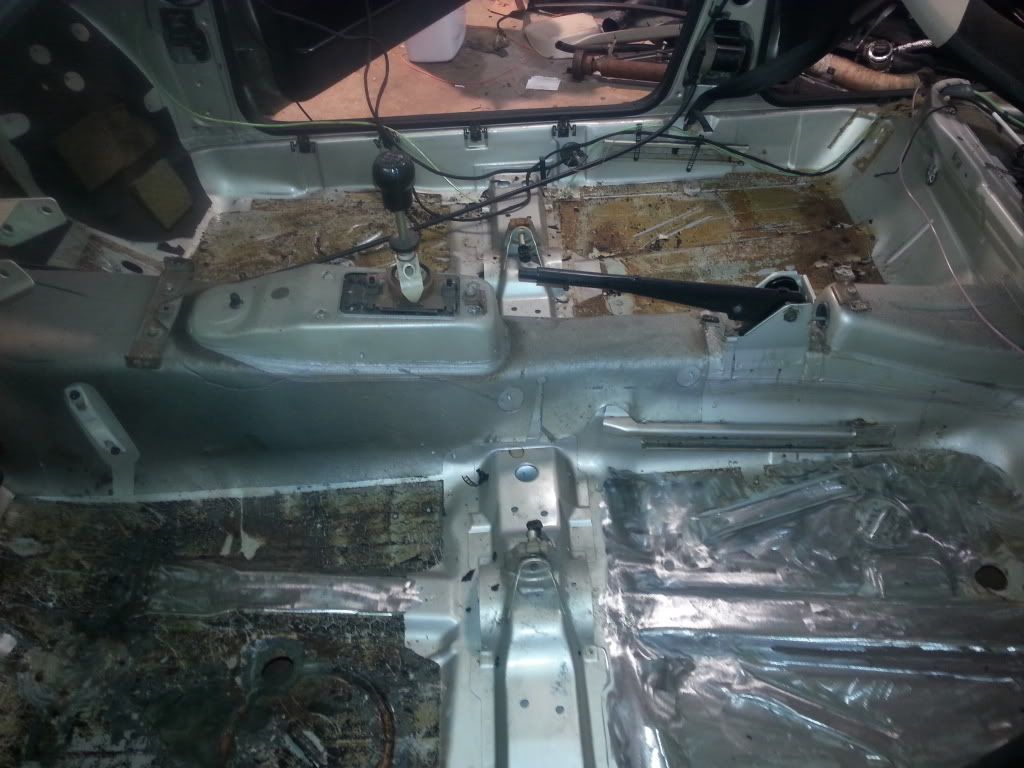
Inside is done, I have since painted it silver.
I finally said enough sanding and stuff and painted the bottom with POR15.
Then I undercoated the whole thing, what a mess.
All in all I had to make 6 or so patch panels, biggest being the drivers side rear of the car. Looks like a PO covered up the drain hole with a rivited in peice of sheetmetal, then bondo/fiber glassed over that. Once all that stuff was removed it revealed a bunch of rot. I cut it out and welded in a new panel.
Still on the to-do list paint/undercoat wise is put another coat of undercoat on the recently done sections (its still pretty thin, even with 6 big cans), finish sanding the trunk (almost done), the front wheel wells and finish all the metal work in the bay. After that stuff is done I'll POR15 the rest and start putting stuff back on the car!
The next few days will consist of mounting the pedals, power washing the subframes and then seam welding them and then all the stuff I mentioned above. Feels good to move onto something new, thats for sure.
Re: 88' 90Q 1.8T Swap, MS3 and a lot of wire wheeling.
Posted: Tue Apr 08, 2014 11:00 am
by PRY4SNO
Looks great underneath, nice work!
Seam welding the SFs is a bitch...
Re: 88' 90Q 1.8T Swap, MS3 and a lot of wire wheeling.
Posted: Tue Apr 08, 2014 12:08 pm
by scubagli
Kudos looks good.
Re: 88' 90Q 1.8T Swap, MS3 and a lot of wire wheeling.
Posted: Tue Apr 08, 2014 1:06 pm
by lorge1989
PRY4SNO wrote:Looks great underneath, nice work!
Seam welding the SFs is a bitch...
Why do you say that? My plan was dis-assemble, degrease and power wash, sand blast the seams I wanted to weld, weld, paint, re-assemble.
Maybe I just think that's easy because I'm comparin it to doing rust repair welding on my back under the car.
scubagli wrote:Kudos looks good.
Thanks!
Here are a couple of vids, my friends and I have put together.
When I first got the car with the chip tuned stock turbo 1.8T.
Latest rev. at about 13-15 psi. (I think)
Yeah they arn't the greatest but still fun.
Re: 88' 90Q 1.8T Swap, MS3 and a lot of wire wheeling.
Posted: Tue Apr 08, 2014 3:57 pm
by PRY4SNO
Just because I'm not used to the thin sheet metal, more experience welding pipe and fittings.
It's a PITA to stitch it together slowly and build up weldment on the larger gaps, tho once I got everything dialled in properly it went lots smoother.
Re: 88' 90Q 1.8T Swap, MS3 and a lot of wire wheeling.
Posted: Tue Apr 08, 2014 11:00 pm
by chaloux
Yeah that looks great underneath, nice work.
Re: 88' 90Q 1.8T Swap, MS3 and a lot of wire wheeling.
Posted: Wed Apr 09, 2014 7:32 am
by lorge1989
Thanks.
Started getting some ideas to mount my pedals. I chopped up the stock cast pedal mount assembly and was hoping to tie into that somehow. I'm not sure its going to work.
I know the brake and clutch need to go up higher to give me the ability to heel toe, but other than that I don't really know the 'right' way to set up the pedals.
I plan on putting the seat in tonight or tomorrow and seeing how they feel. Any advice on horizontal spacing and how far they should stick out relative to one another? What I mean is the brake and clutch supposed to be closer to the driver or are all the pedals best when in the same plan at rest.
Re: 88' 90Q 1.8T Swap, MS3 and a lot of wire wheeling.
Posted: Wed Apr 09, 2014 10:45 am
by PRY4SNO
Those are really nice for top mount pedals, have a PN or link?
This is totally a guess, but I'd wager that with your driving position all set you'd want the pedals to accommodate heel-toeing at full throw.