Page 14 of 17
Re: 24vVR6T CQ Project: EATSGTR, chassis FAB
Posted: Sat Feb 01, 2014 7:49 am
by chaloux
Holy. Nice update. This is gonna be a beast
Re: 24vVR6T CQ Project: EATSGTR, chassis FAB
Posted: Sun Feb 09, 2014 1:08 pm
by my2000apb
All_Euro wrote:Another awesome update - great work.
Done any test runs with the meth injection on your intake mani? Just curious about the depth of the meth bungs... seems like the conical spray would hit the sides before it reaches into the runners. I plan to inject w/m into my runners too - nothing fancy though, just drilling holes and threading them.
I will be doing testing prior to seam welding the intake manifold. the bungs have larger,counter sunk holes on the runner side. the depth of threadable bung is long for the 1/8" NPT nozzles. so if they aren't quite far enough into the runners I can send the tap back in and get them closer, so there wont be any spray on the side on the bung.
good looking out

Re: 24vVR6T CQ Project: EATSGTR, chassis FAB
Posted: Mon Feb 10, 2014 12:52 pm
by my2000apb
UPDATE!!!!!
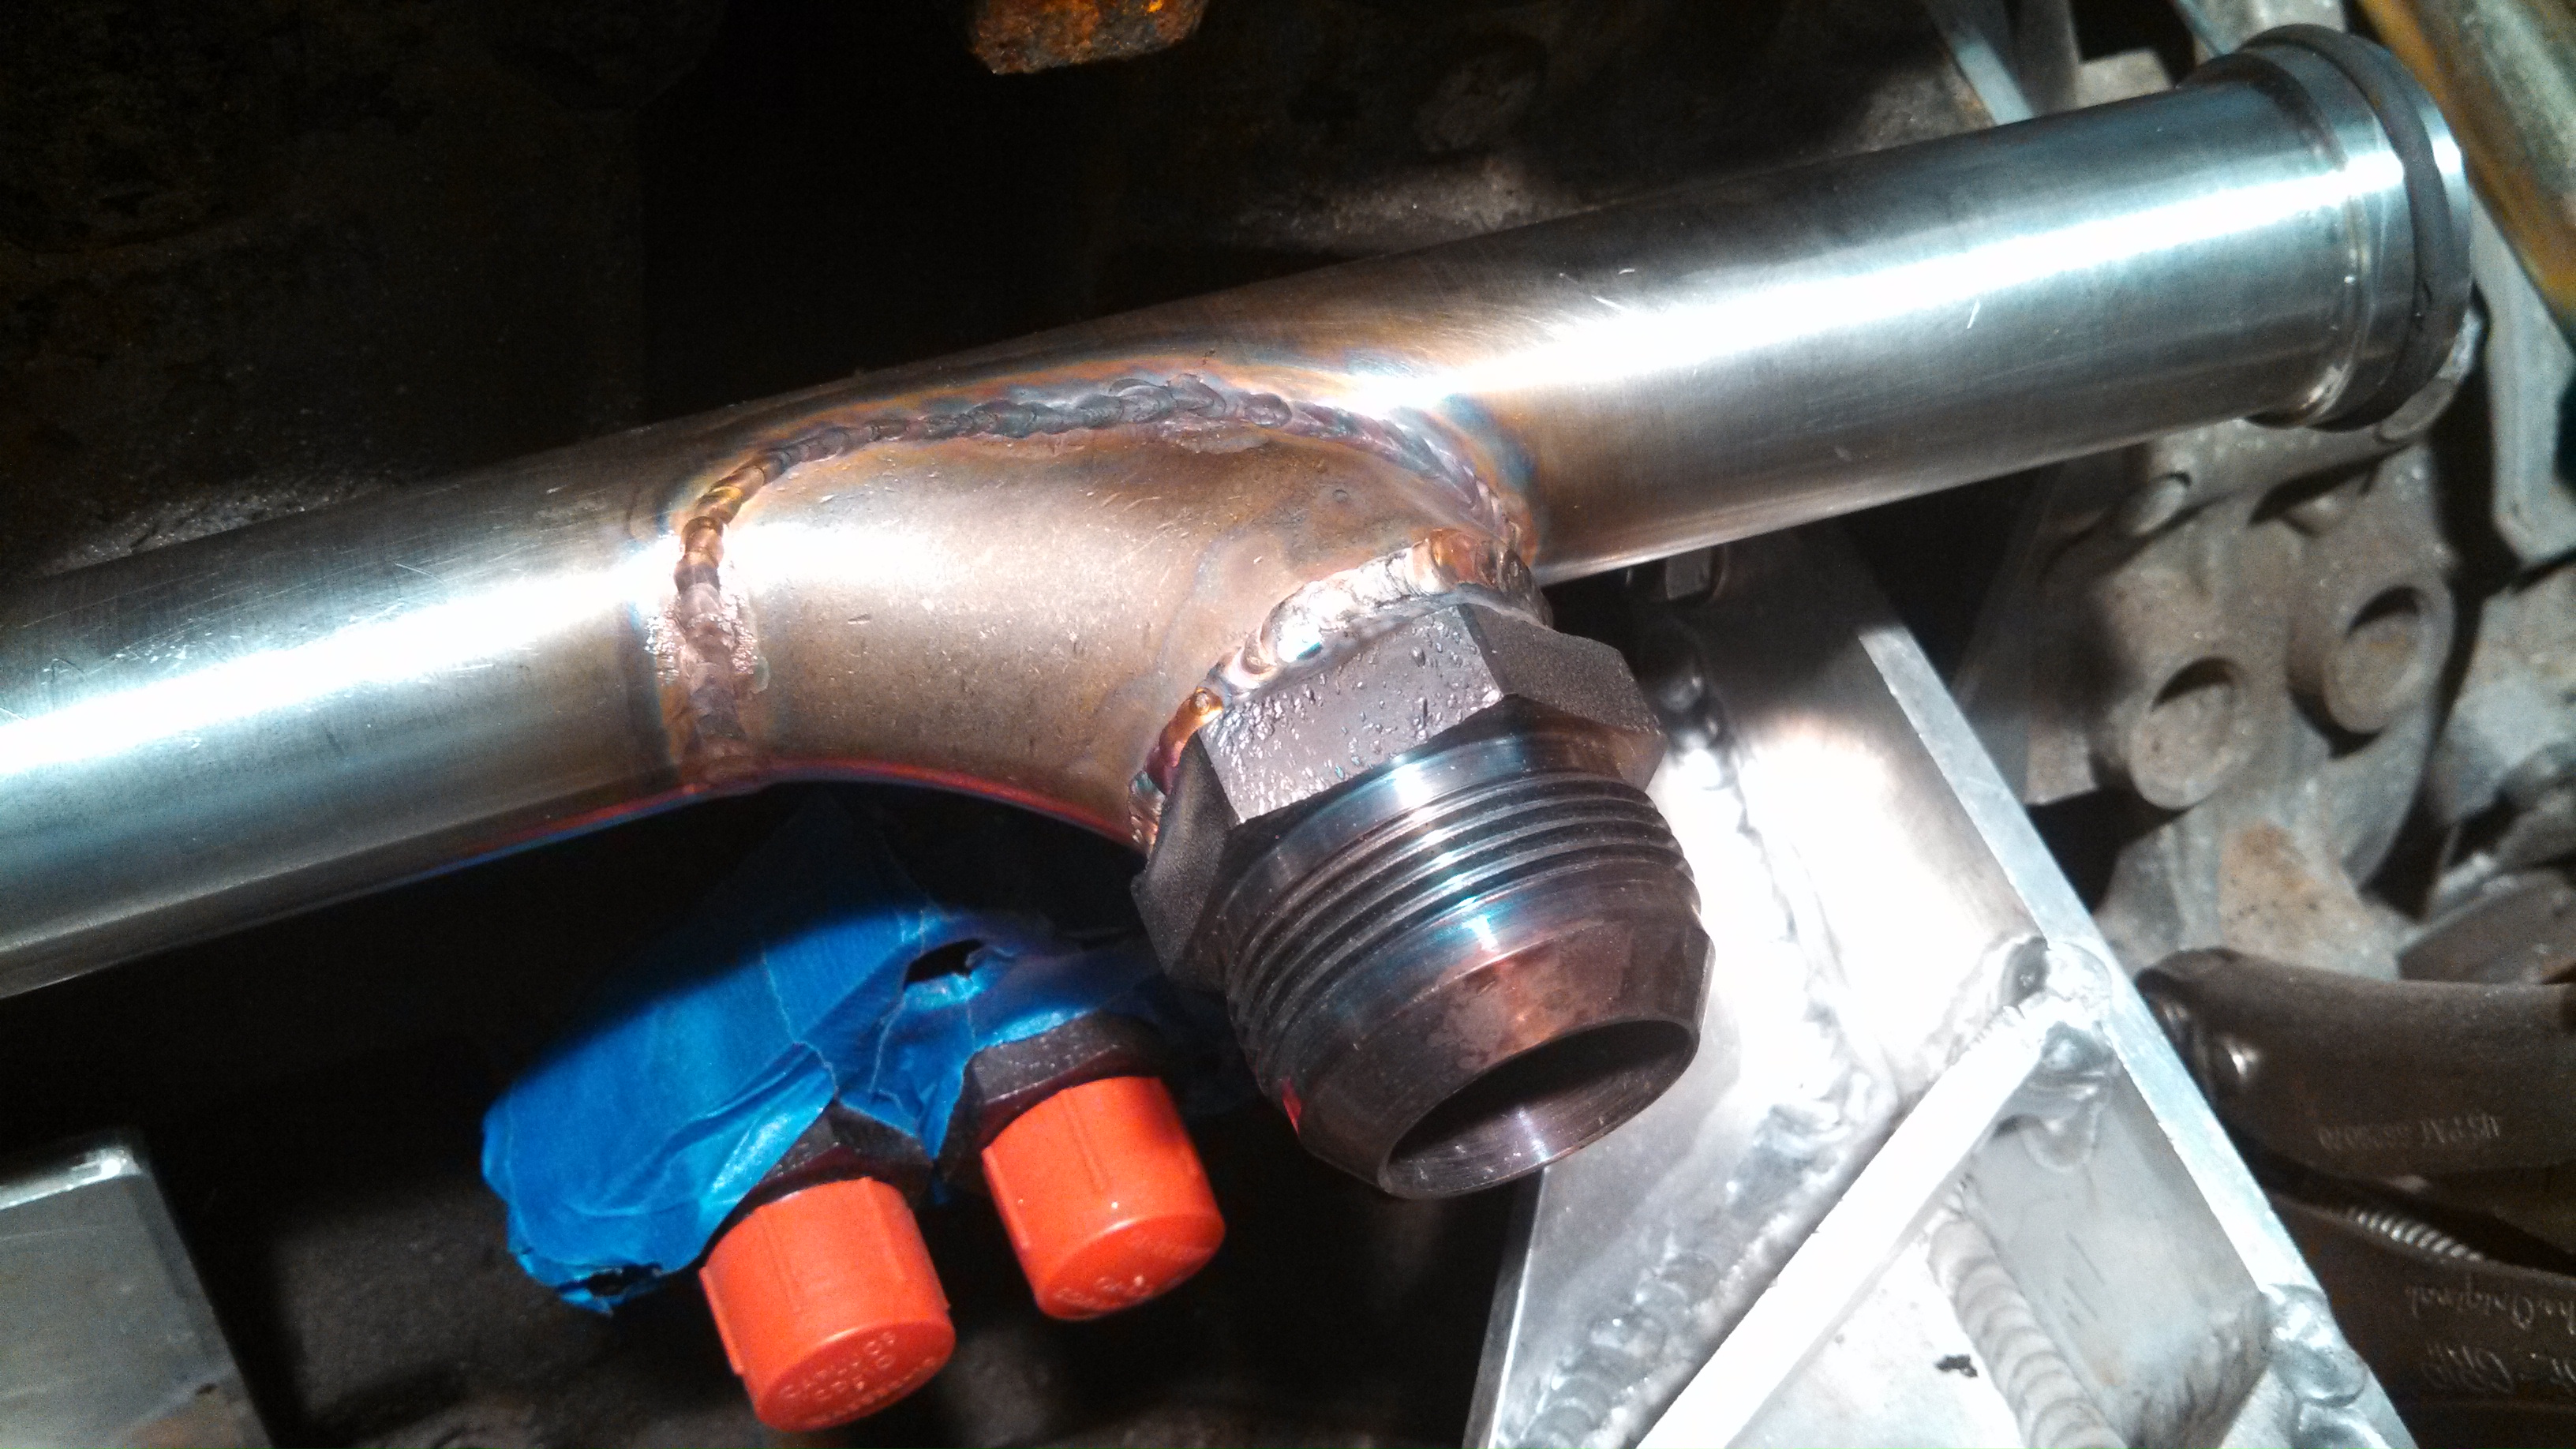
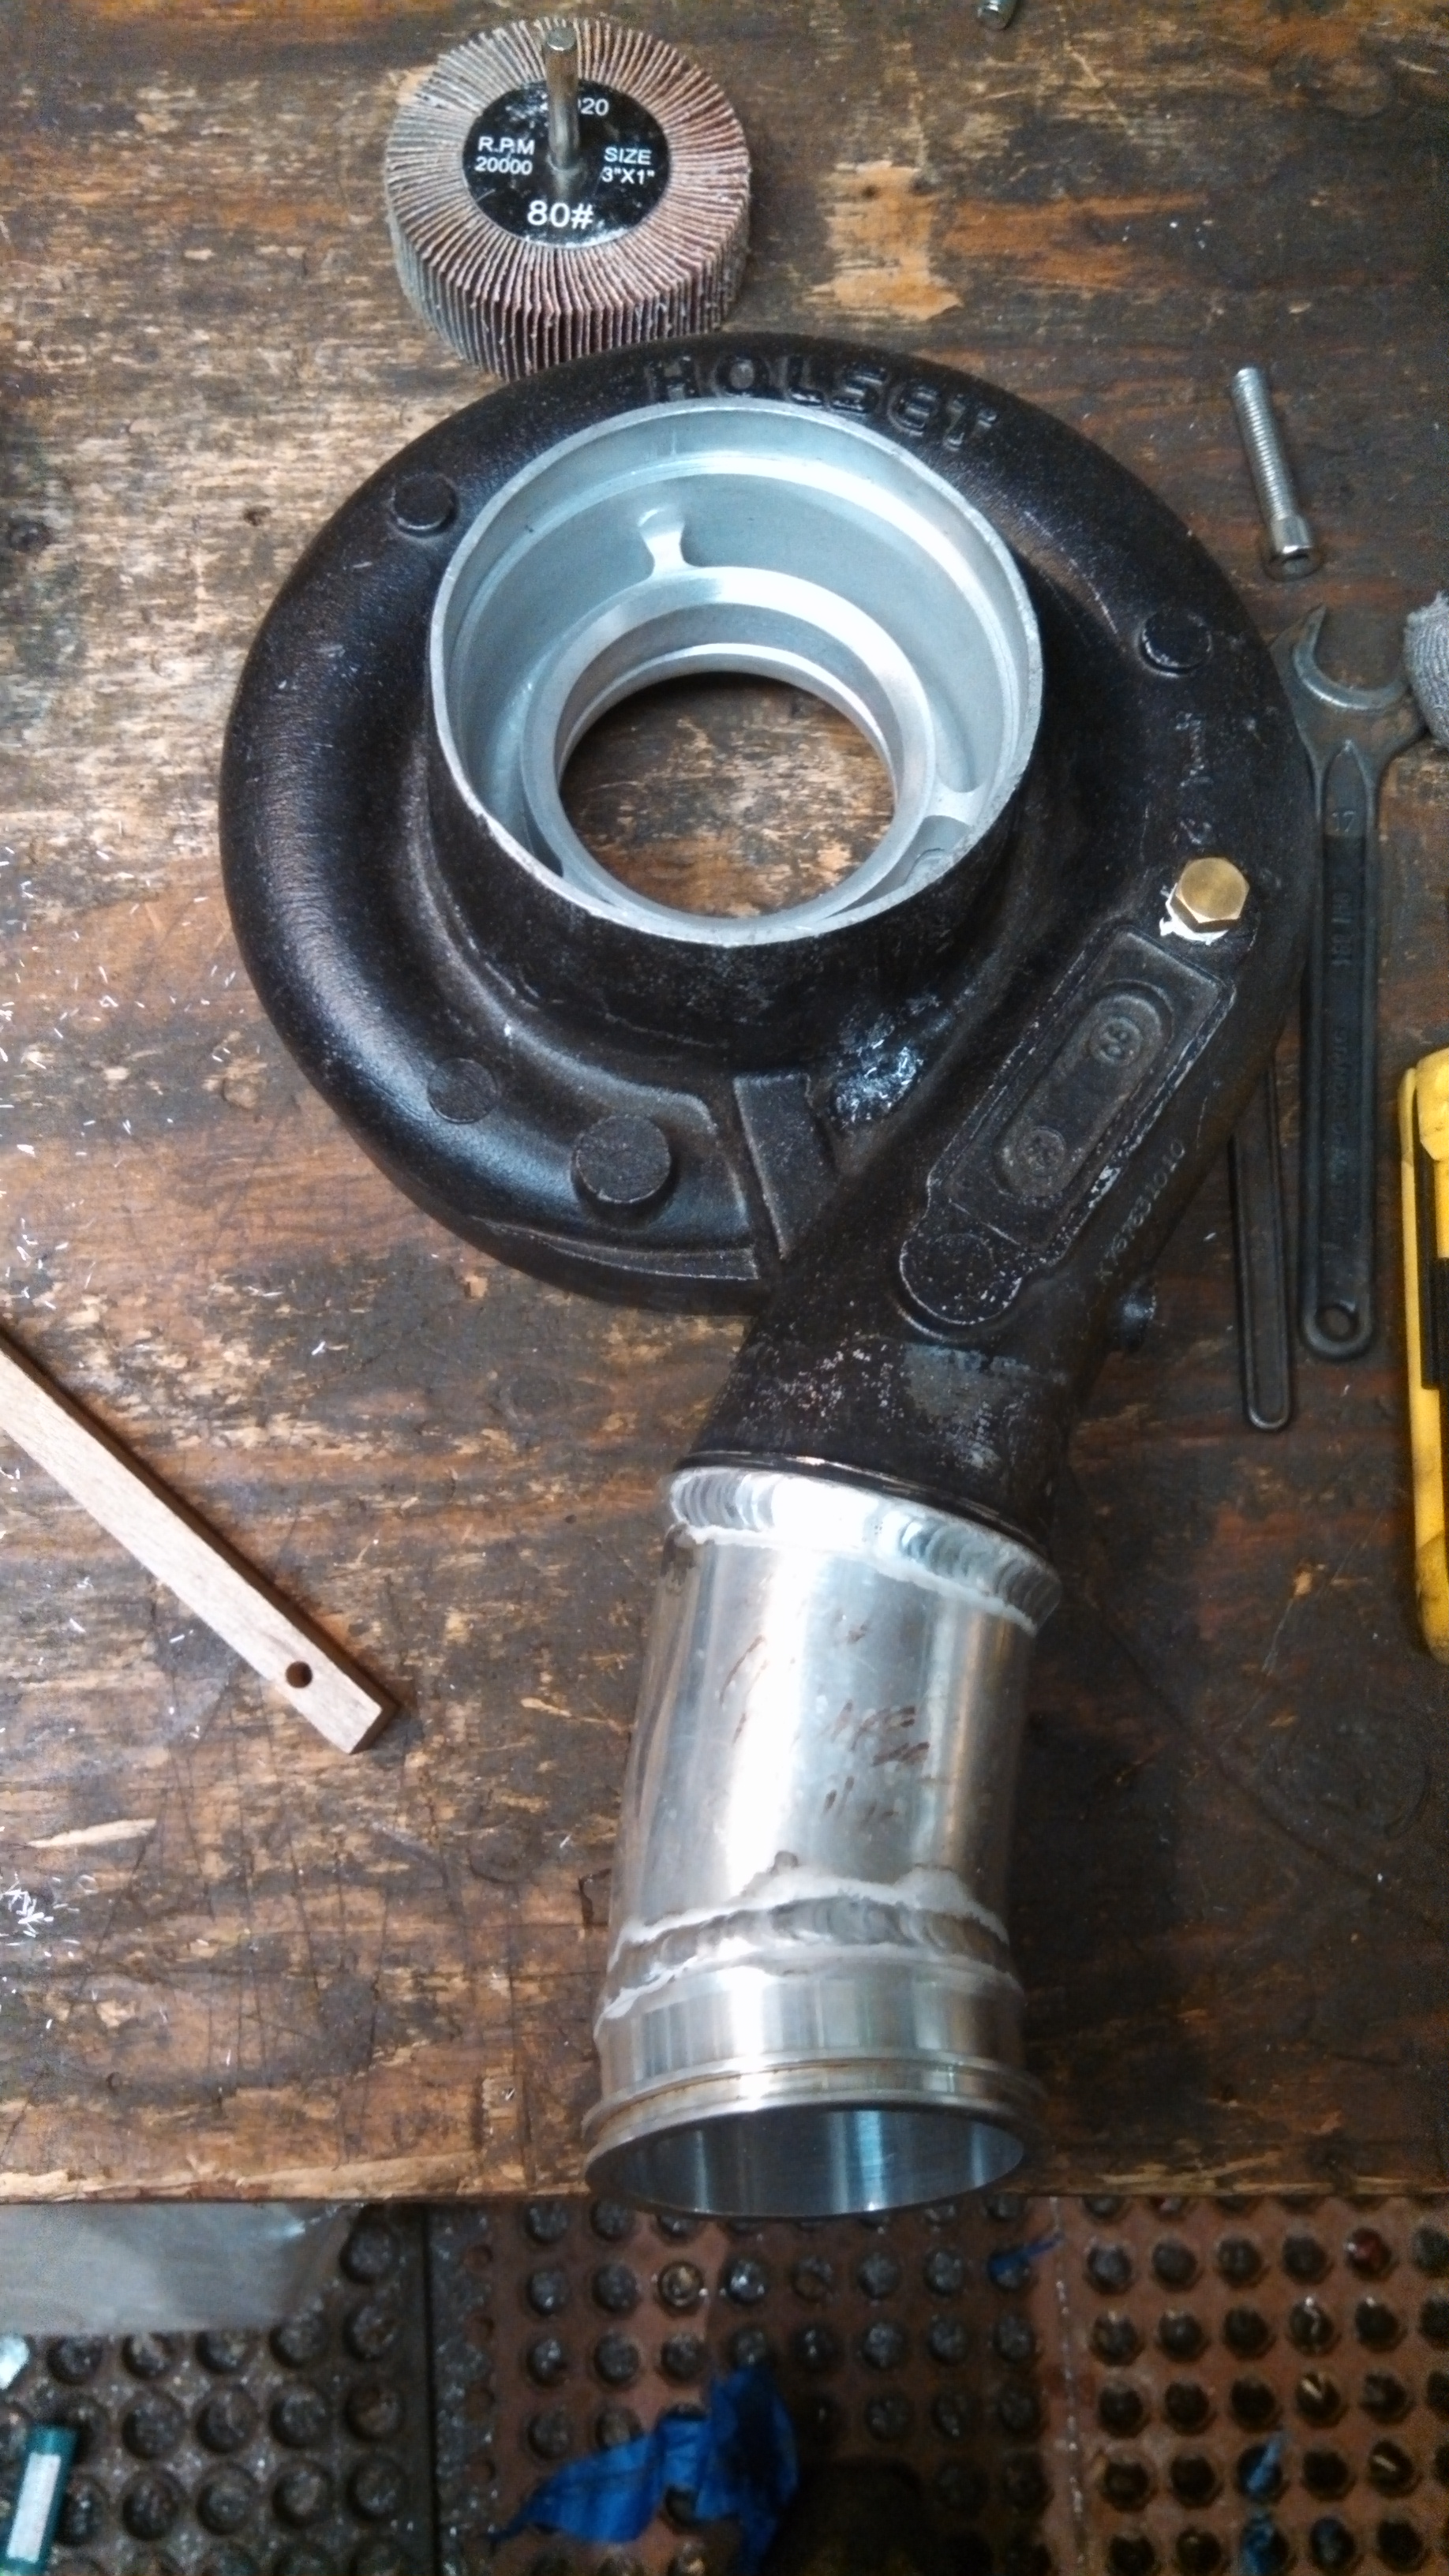
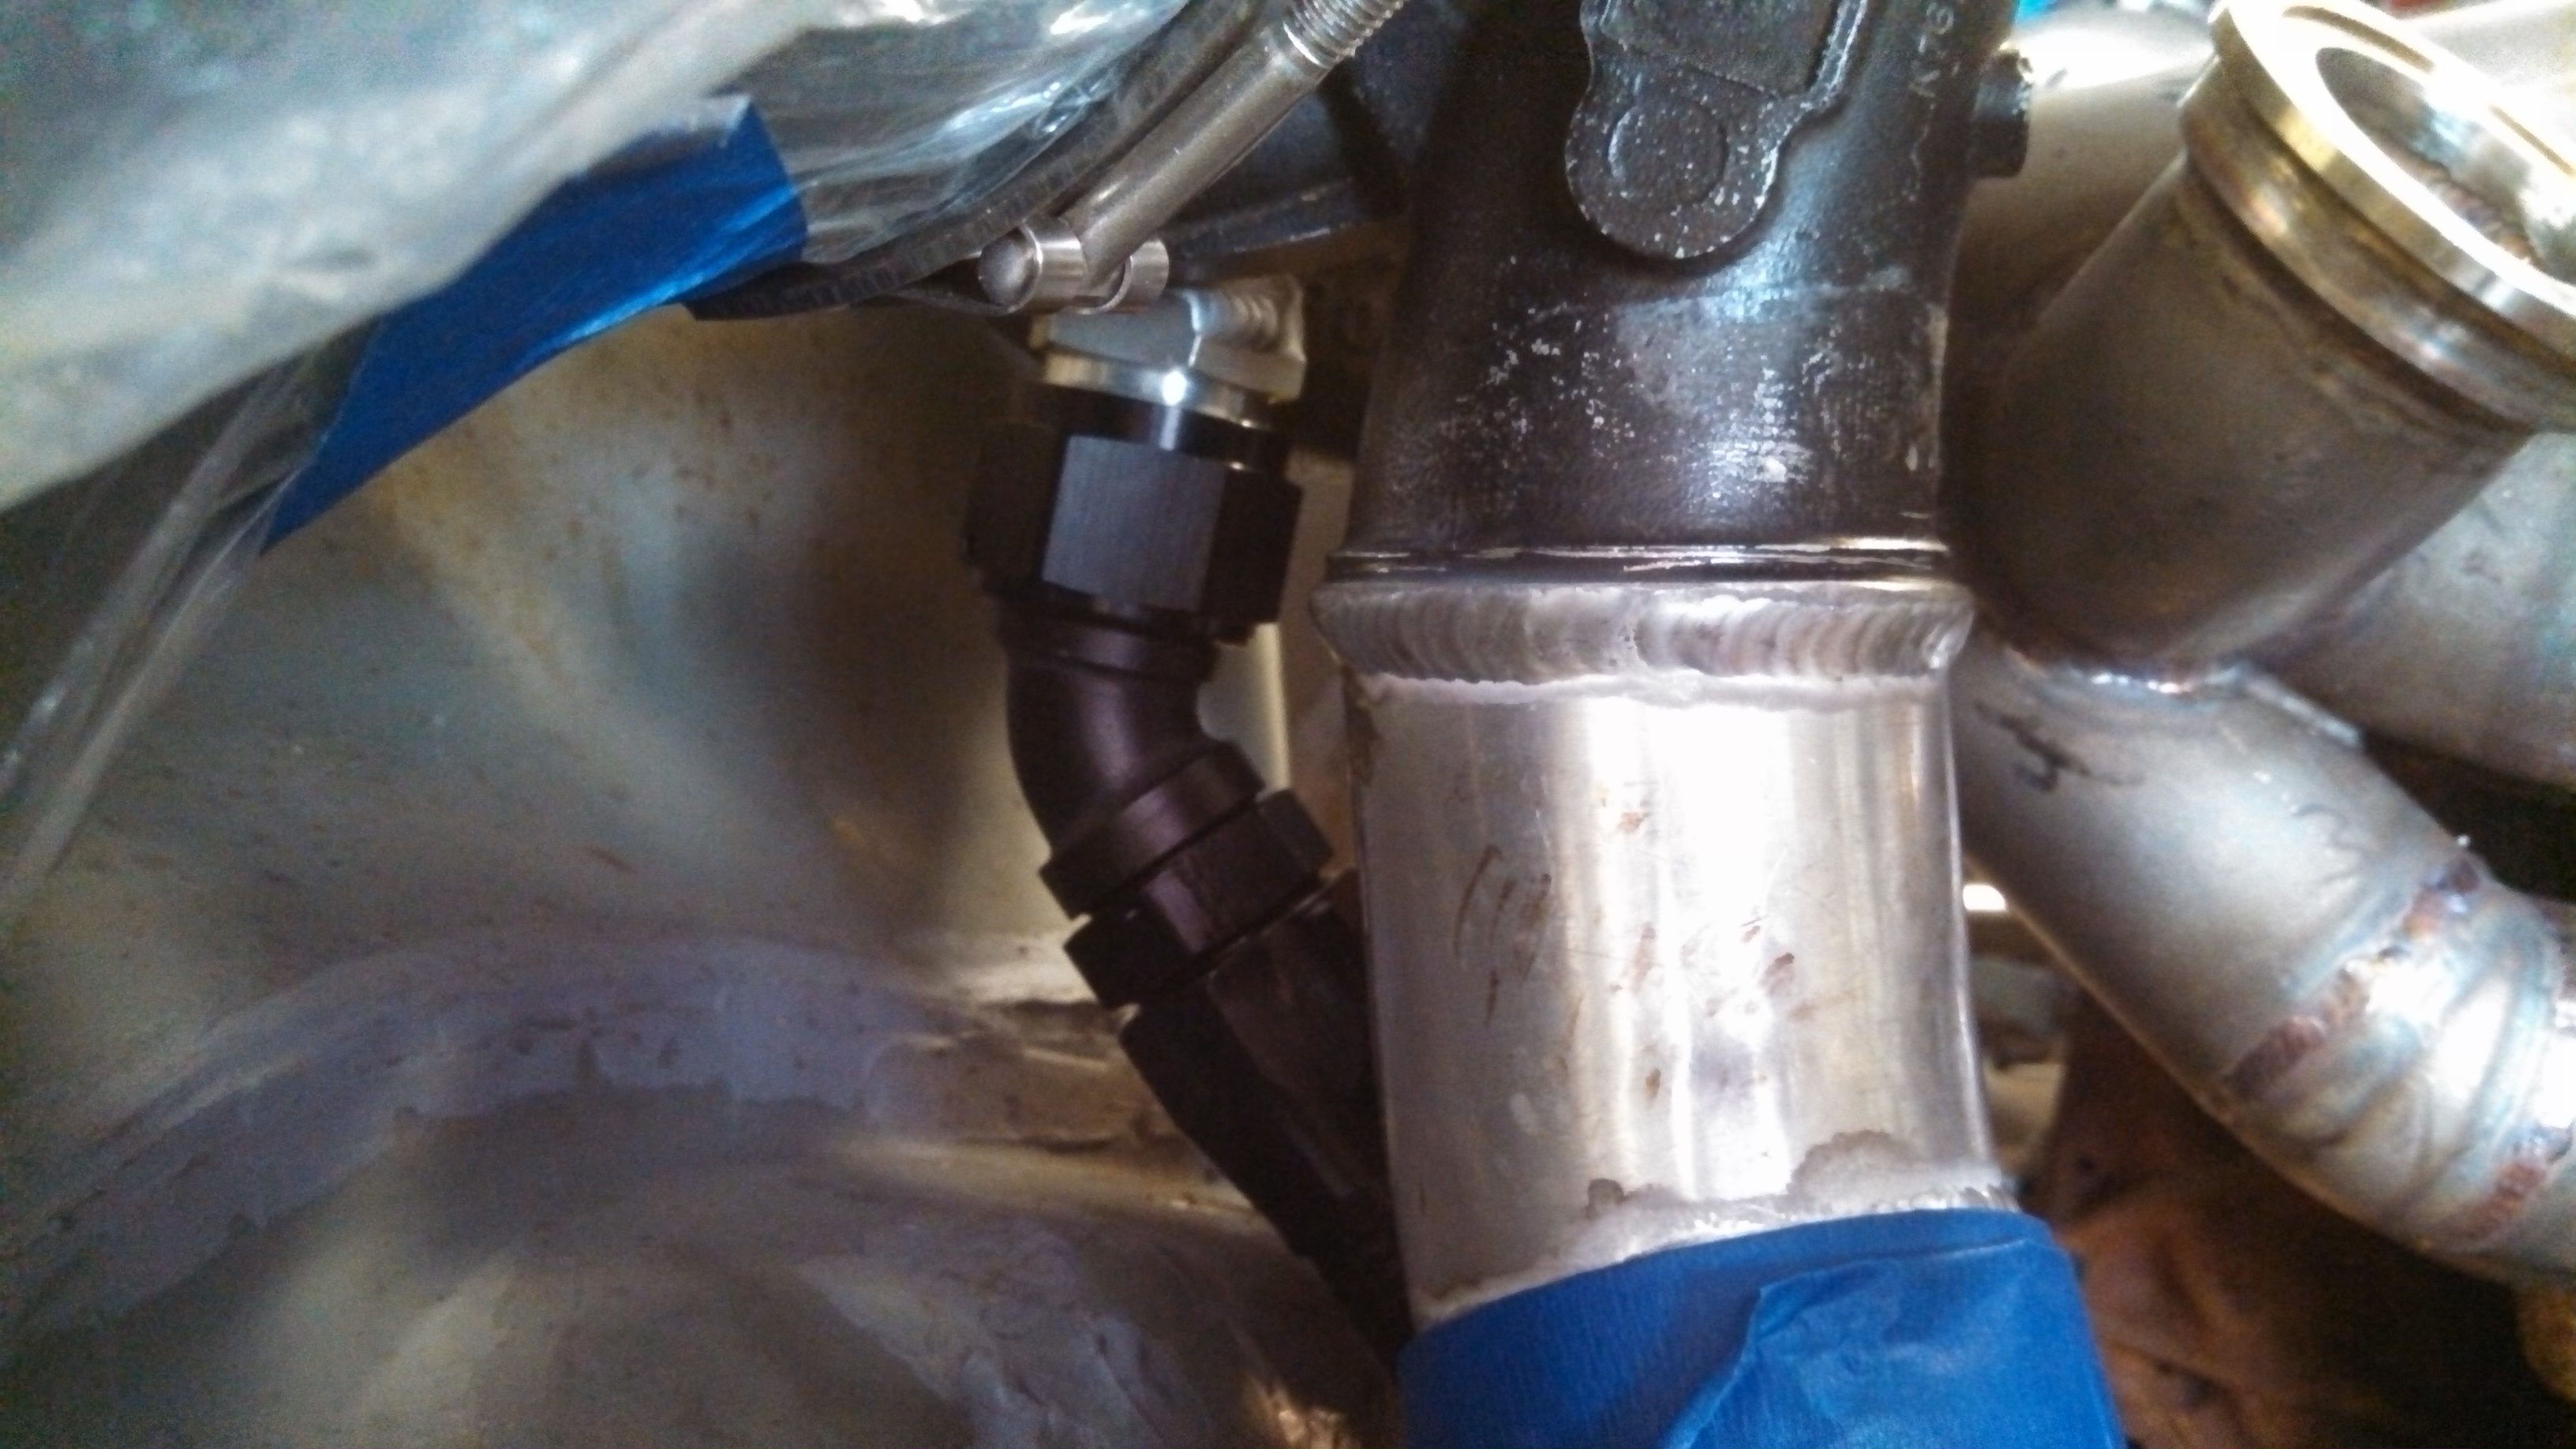
ok, back to the cooling system. I built a nice transition from the crackpipe to the remote thermostat return.
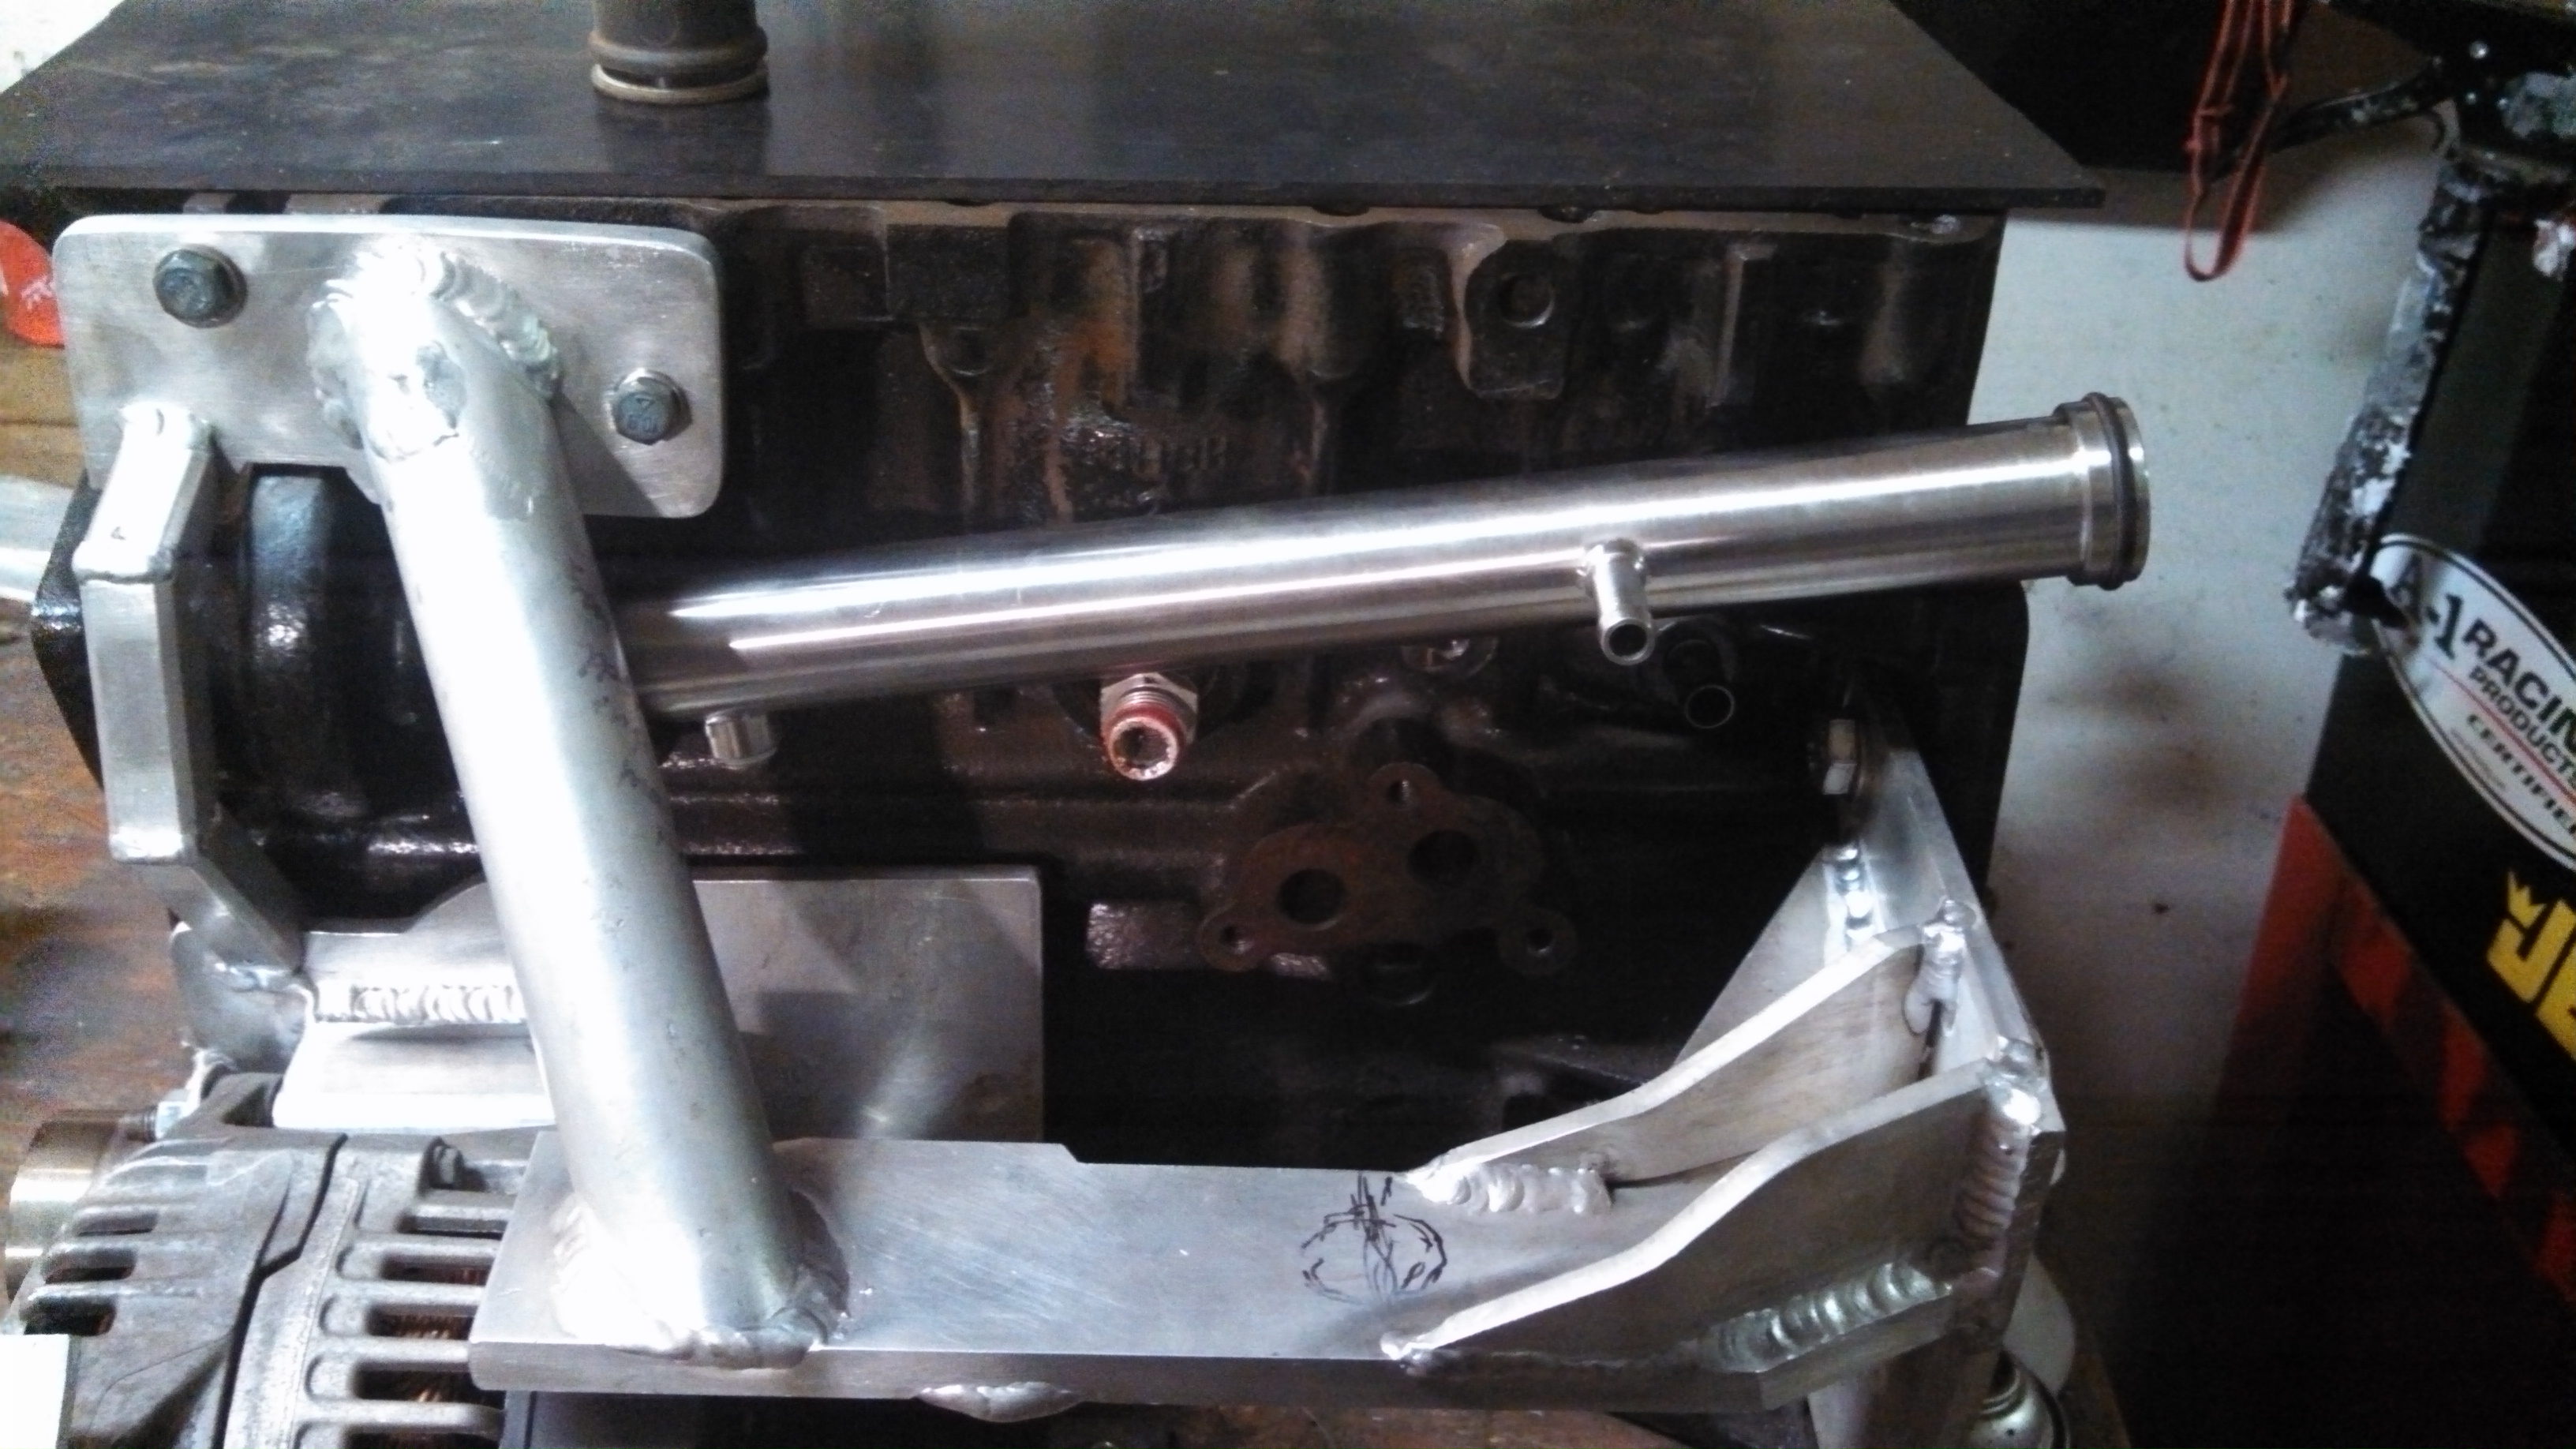
- eng mount and crackpipe work.jpg (1.4 MiB) Viewed 52476 times
The remote thermostat will be plumbed in a manner that will get the thermostat itself a good warm water source while still allowing excellent from from the t-stat th the waterpump.
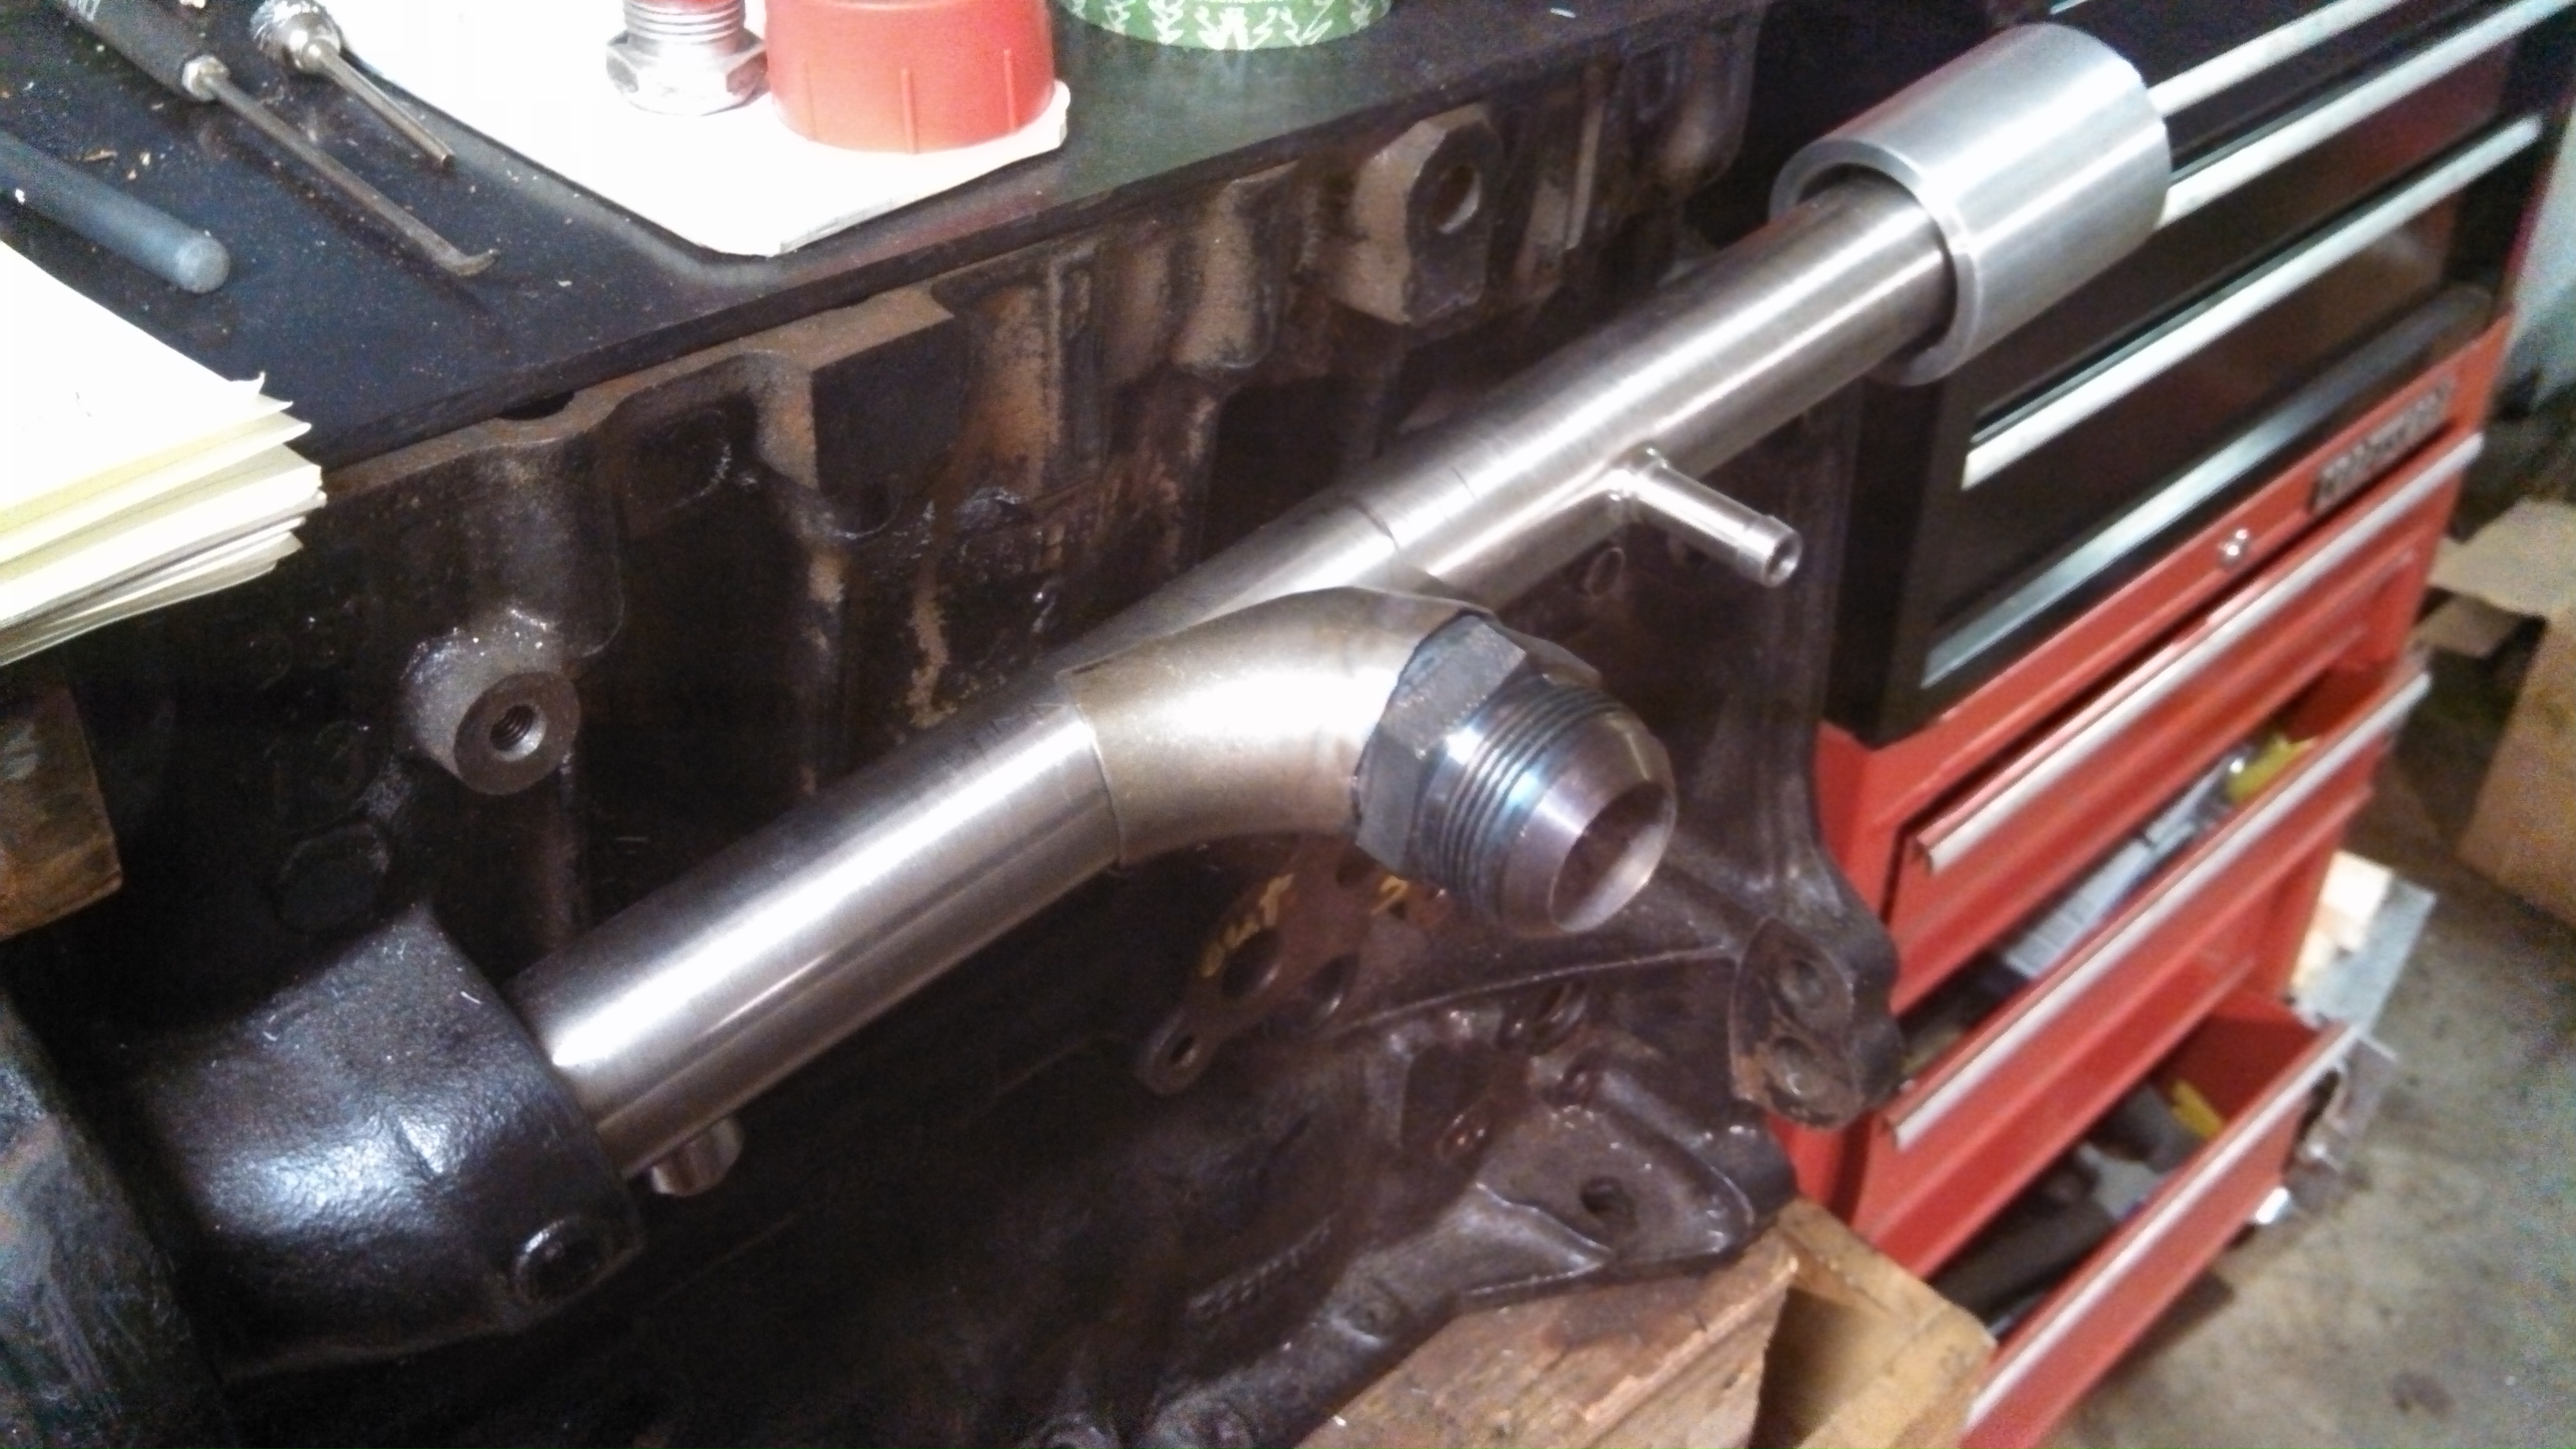
- crackpipe to thermostat bung mockup.jpg (1.39 MiB) Viewed 52476 times
- crackpipe to thermostat bung mockup2.jpg (1.28 MiB) Viewed 52476 times
Re: 24vVR6T CQ Project: EATSGTR, chassis FAB
Posted: Mon Feb 10, 2014 12:54 pm
by my2000apb
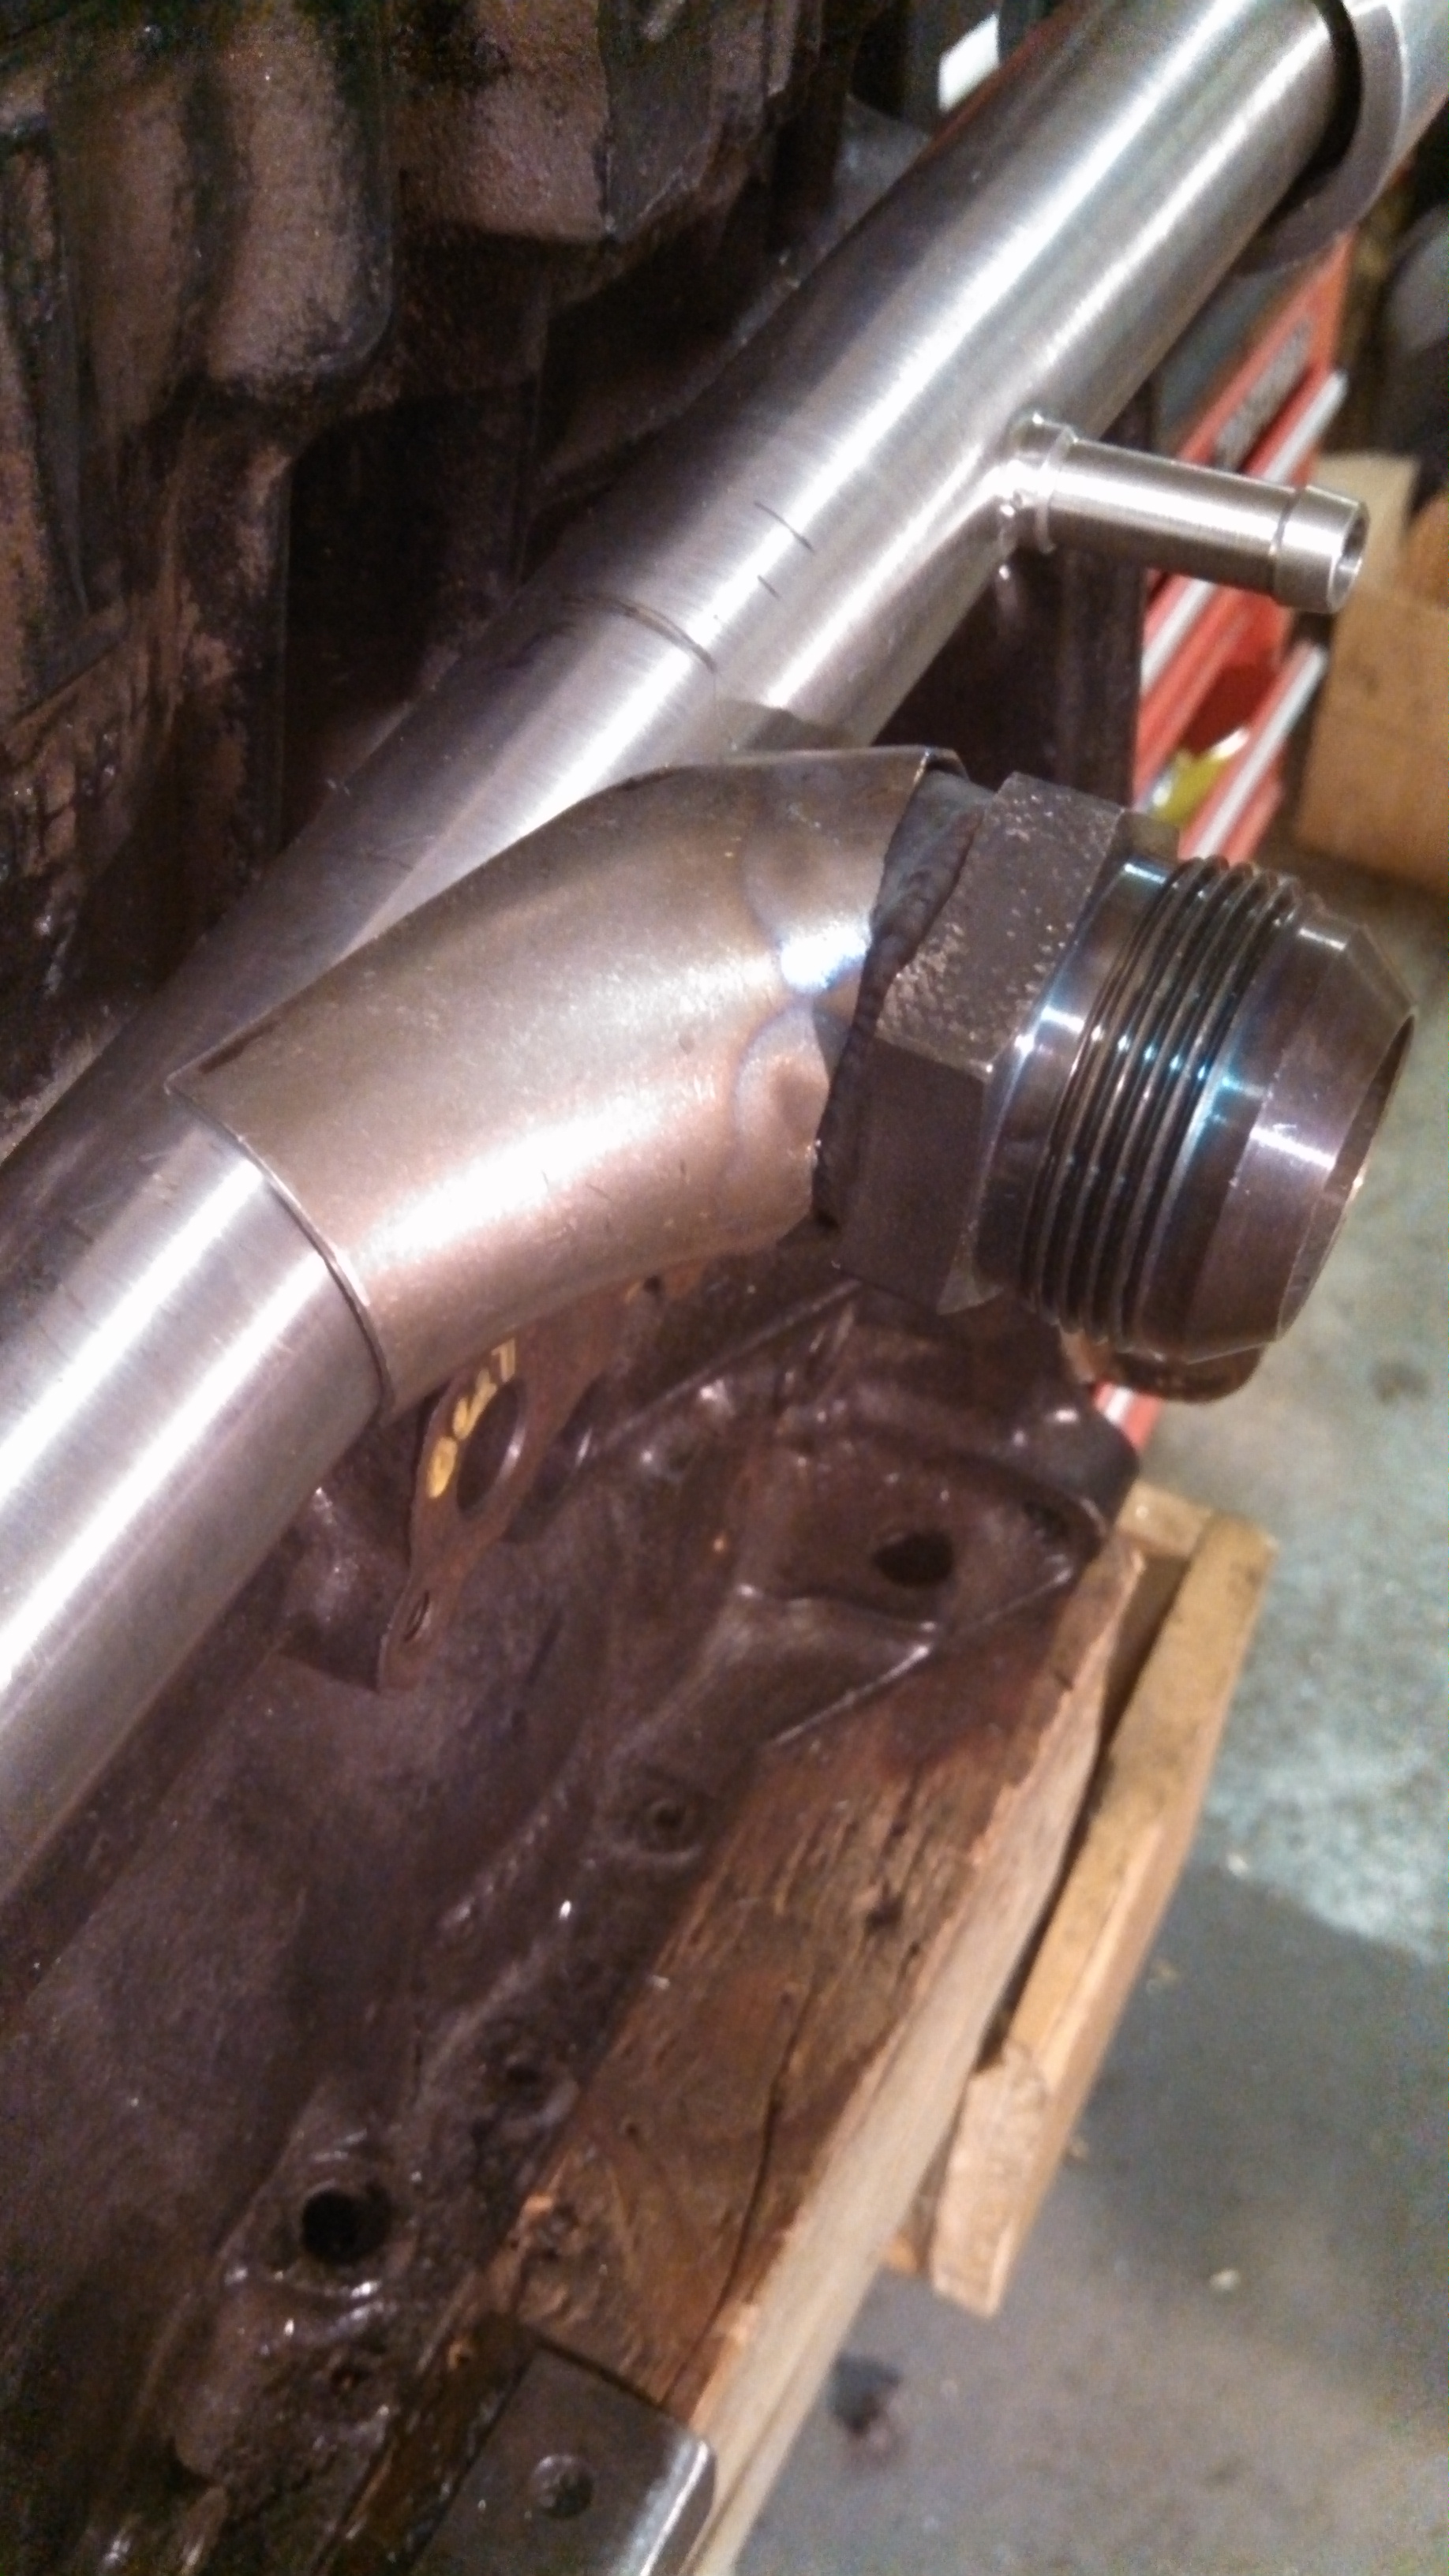
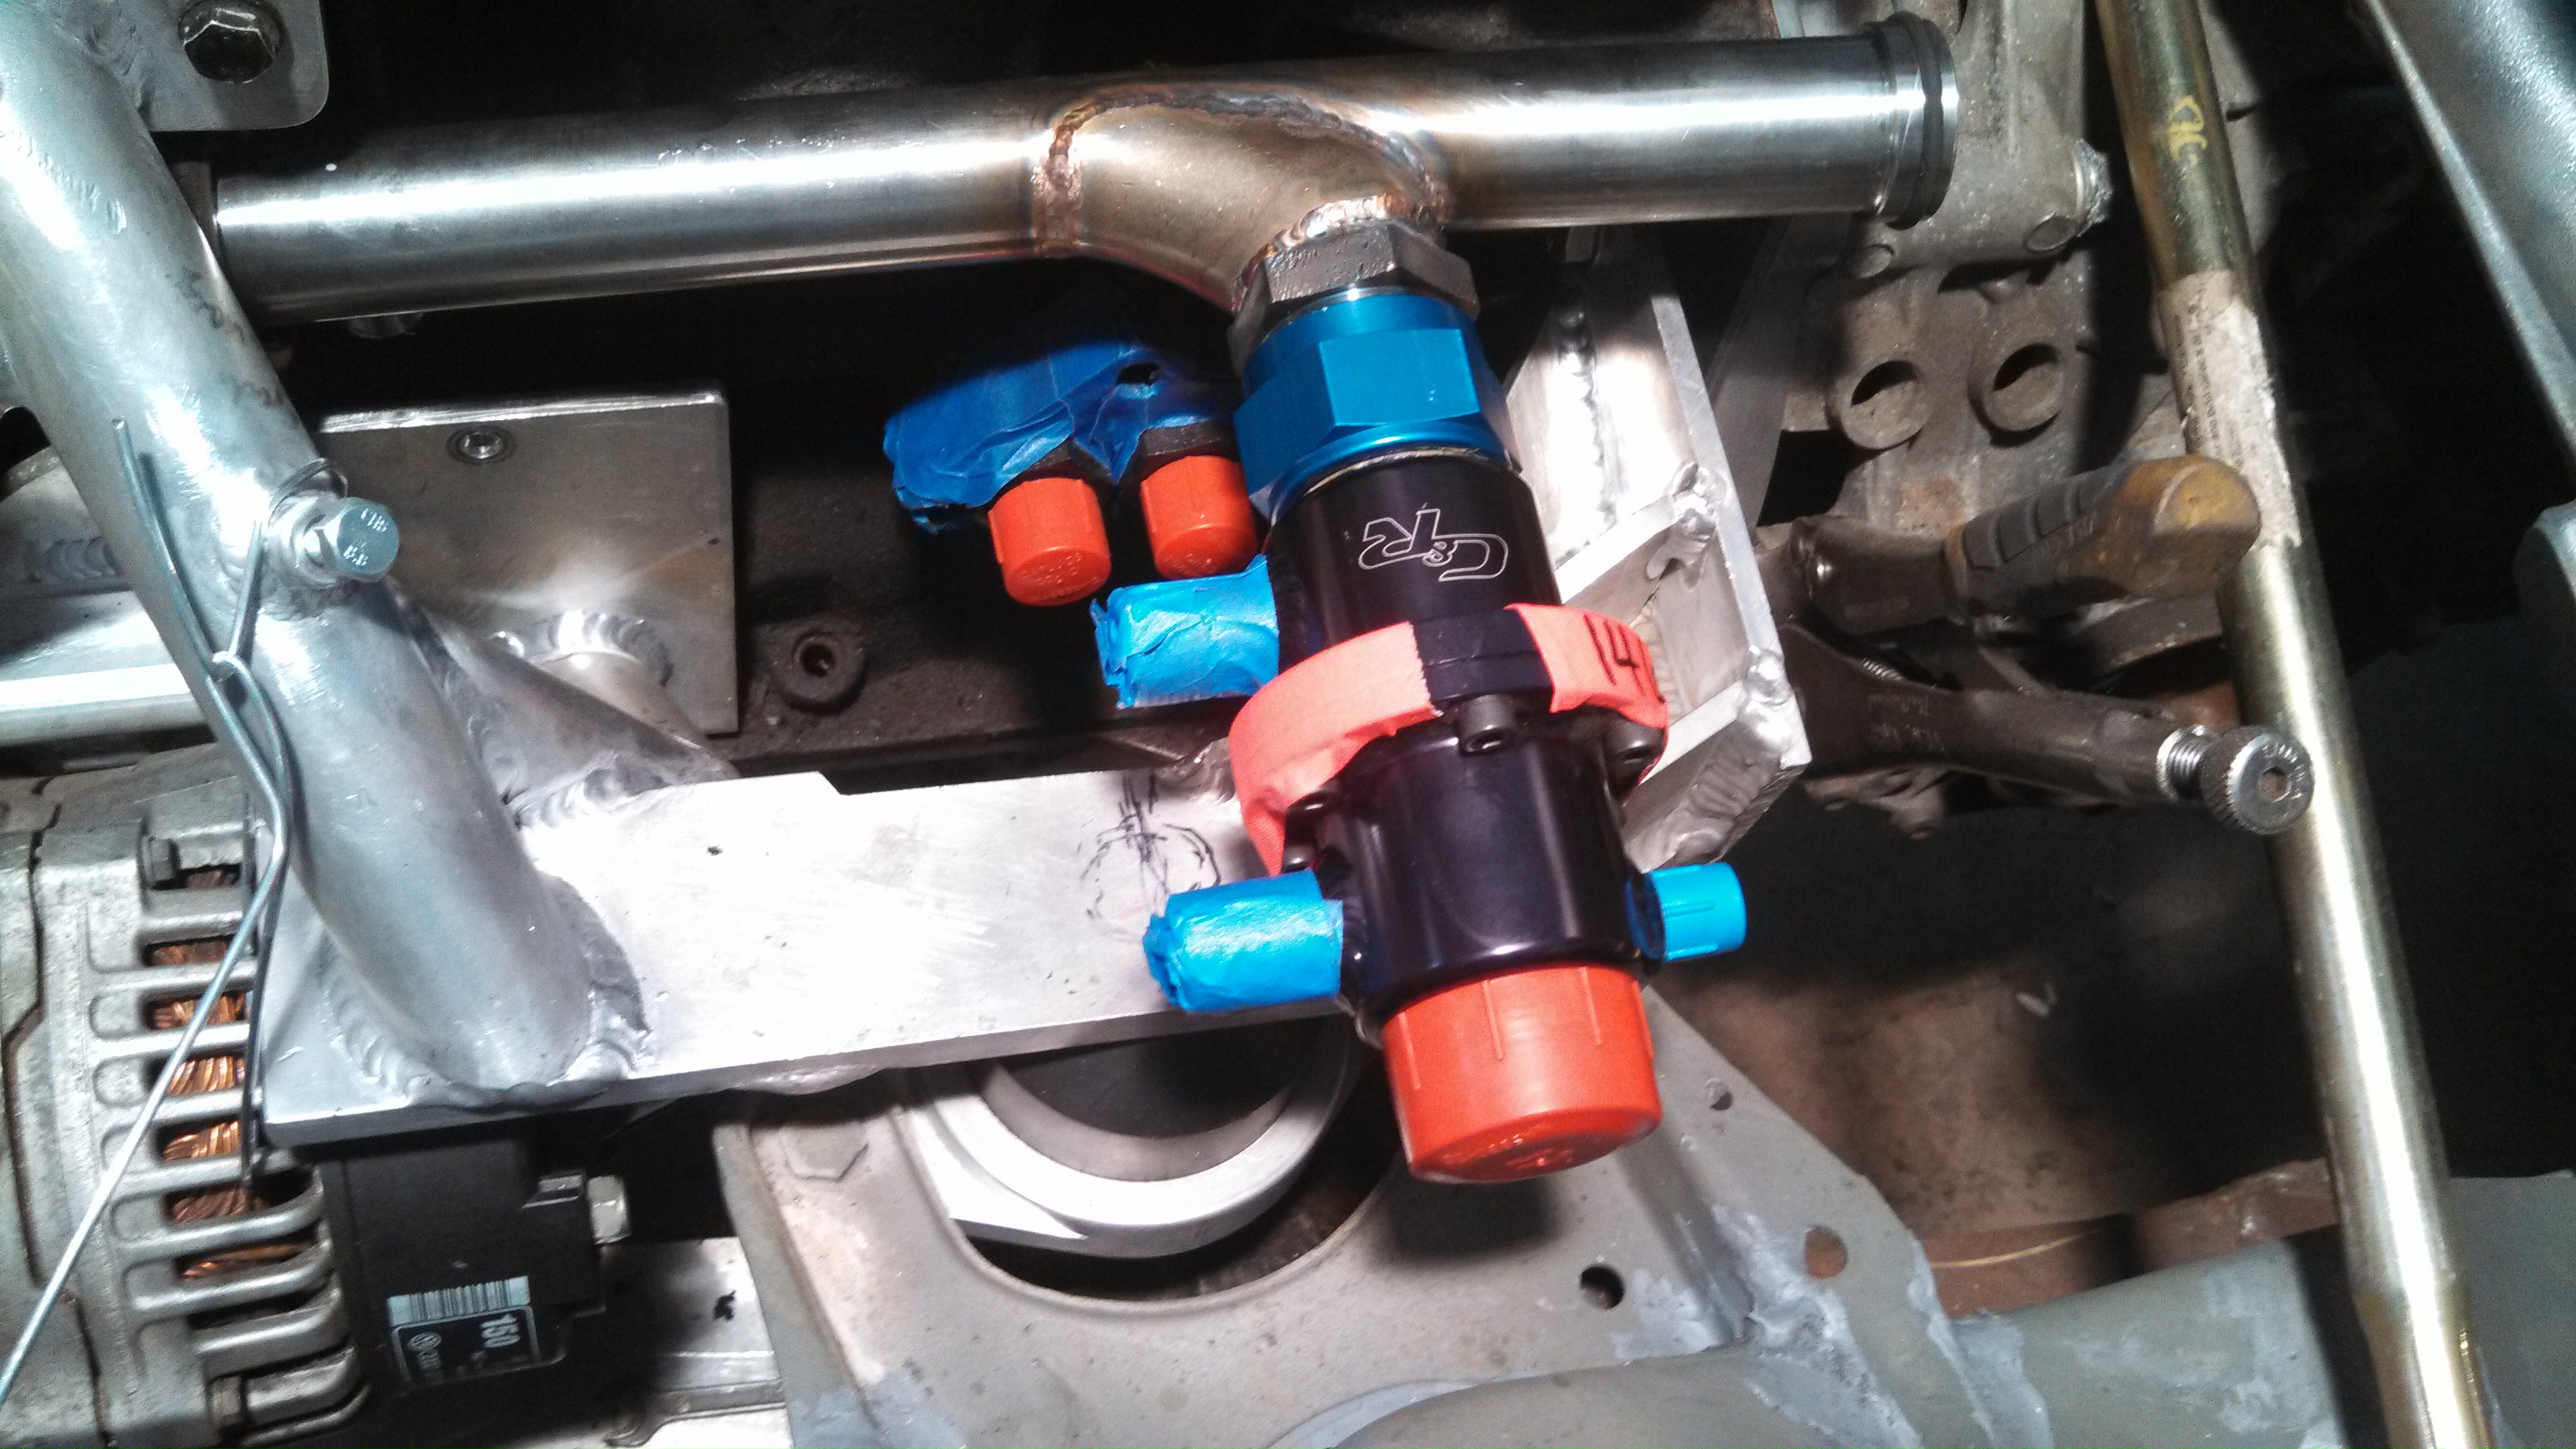
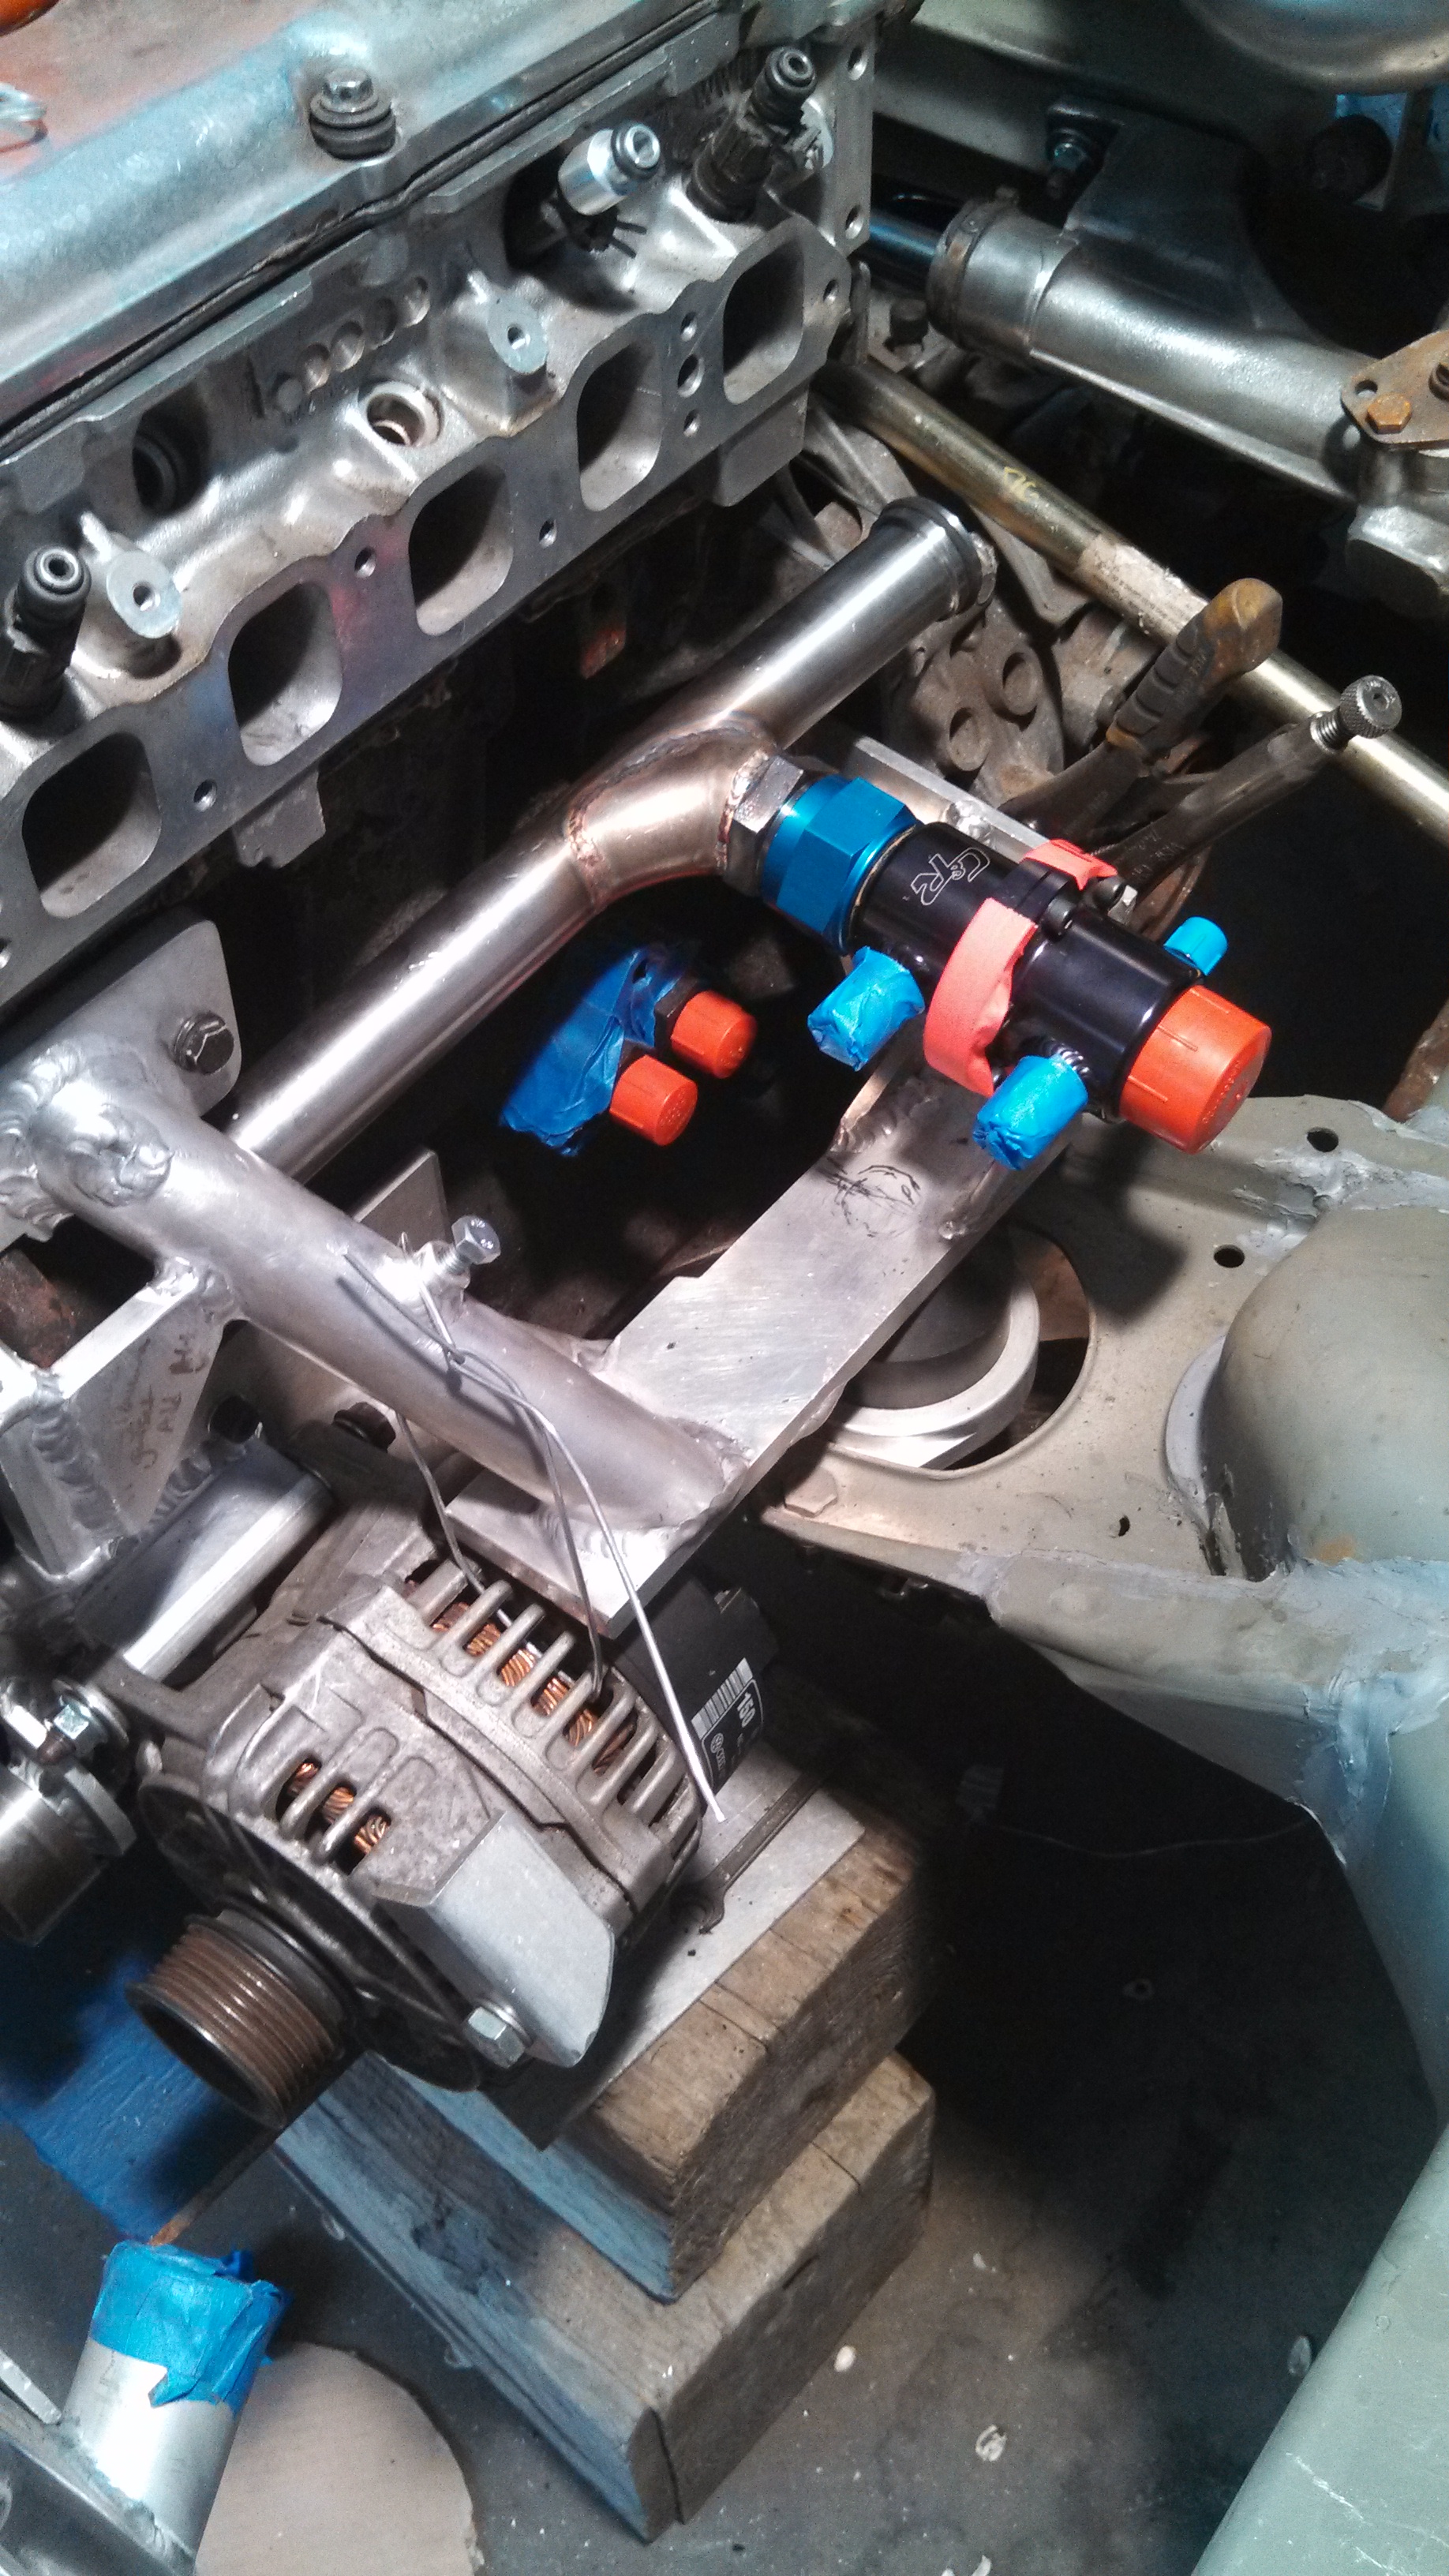
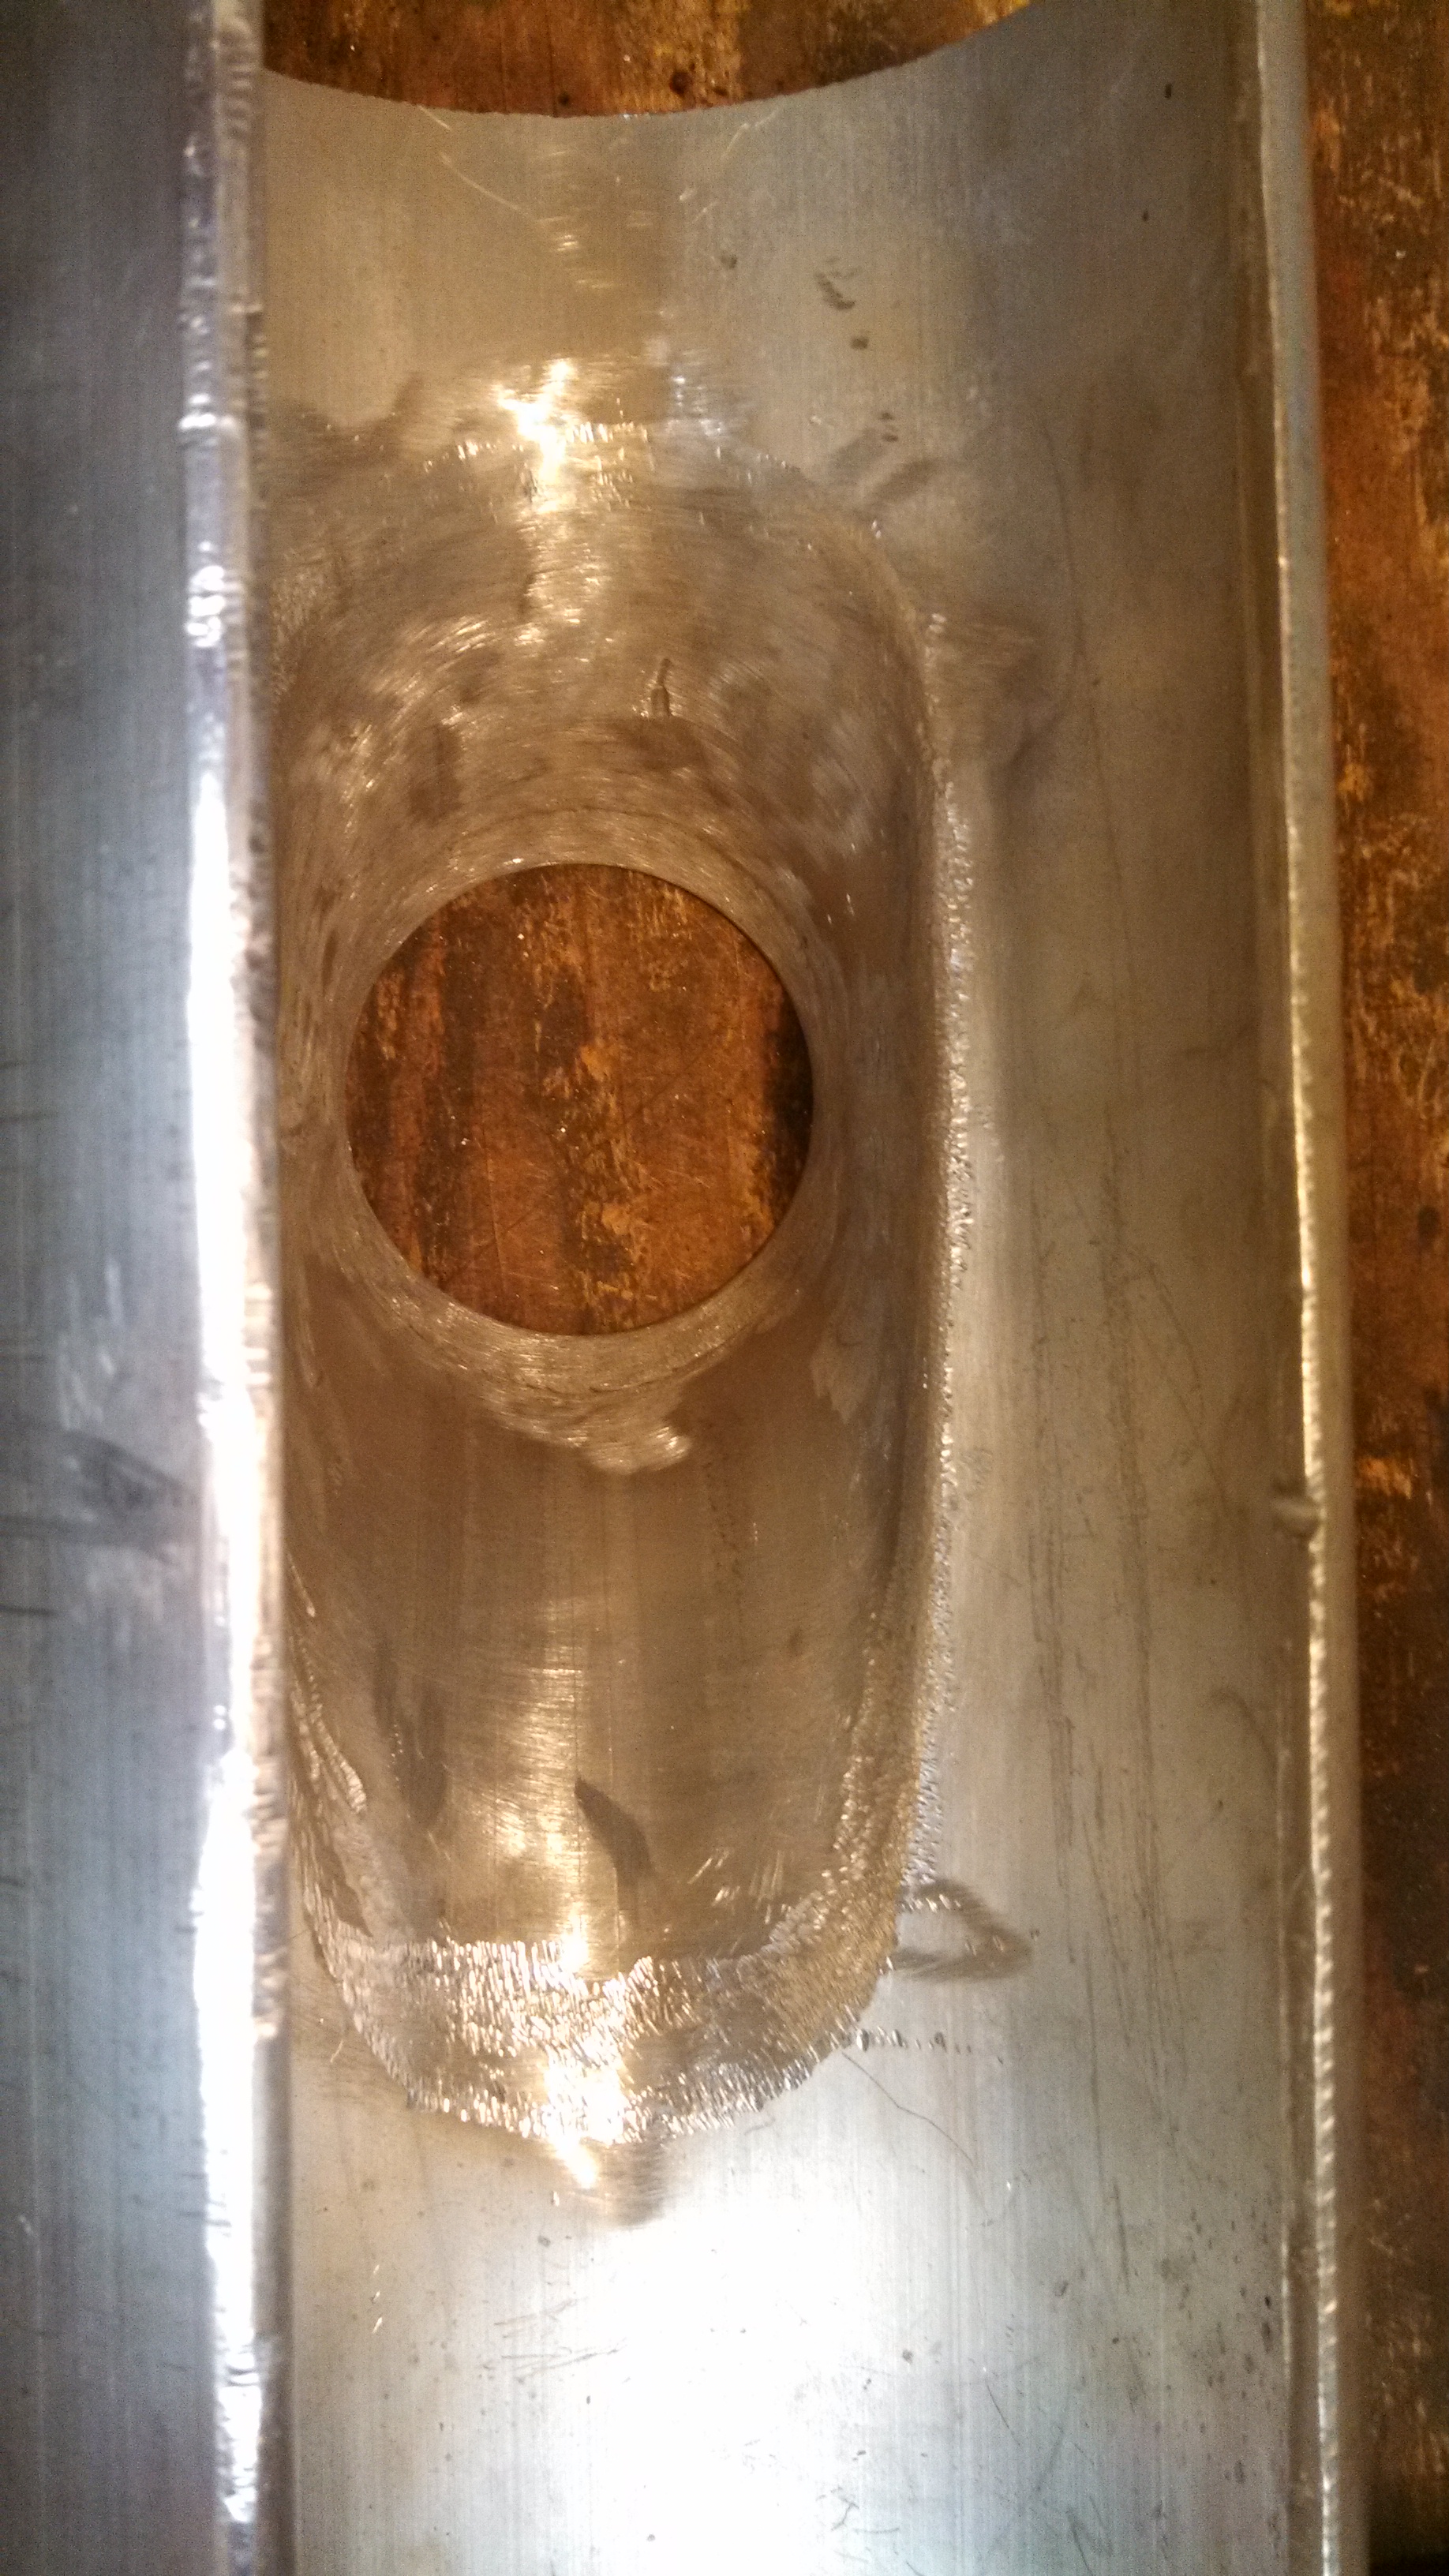
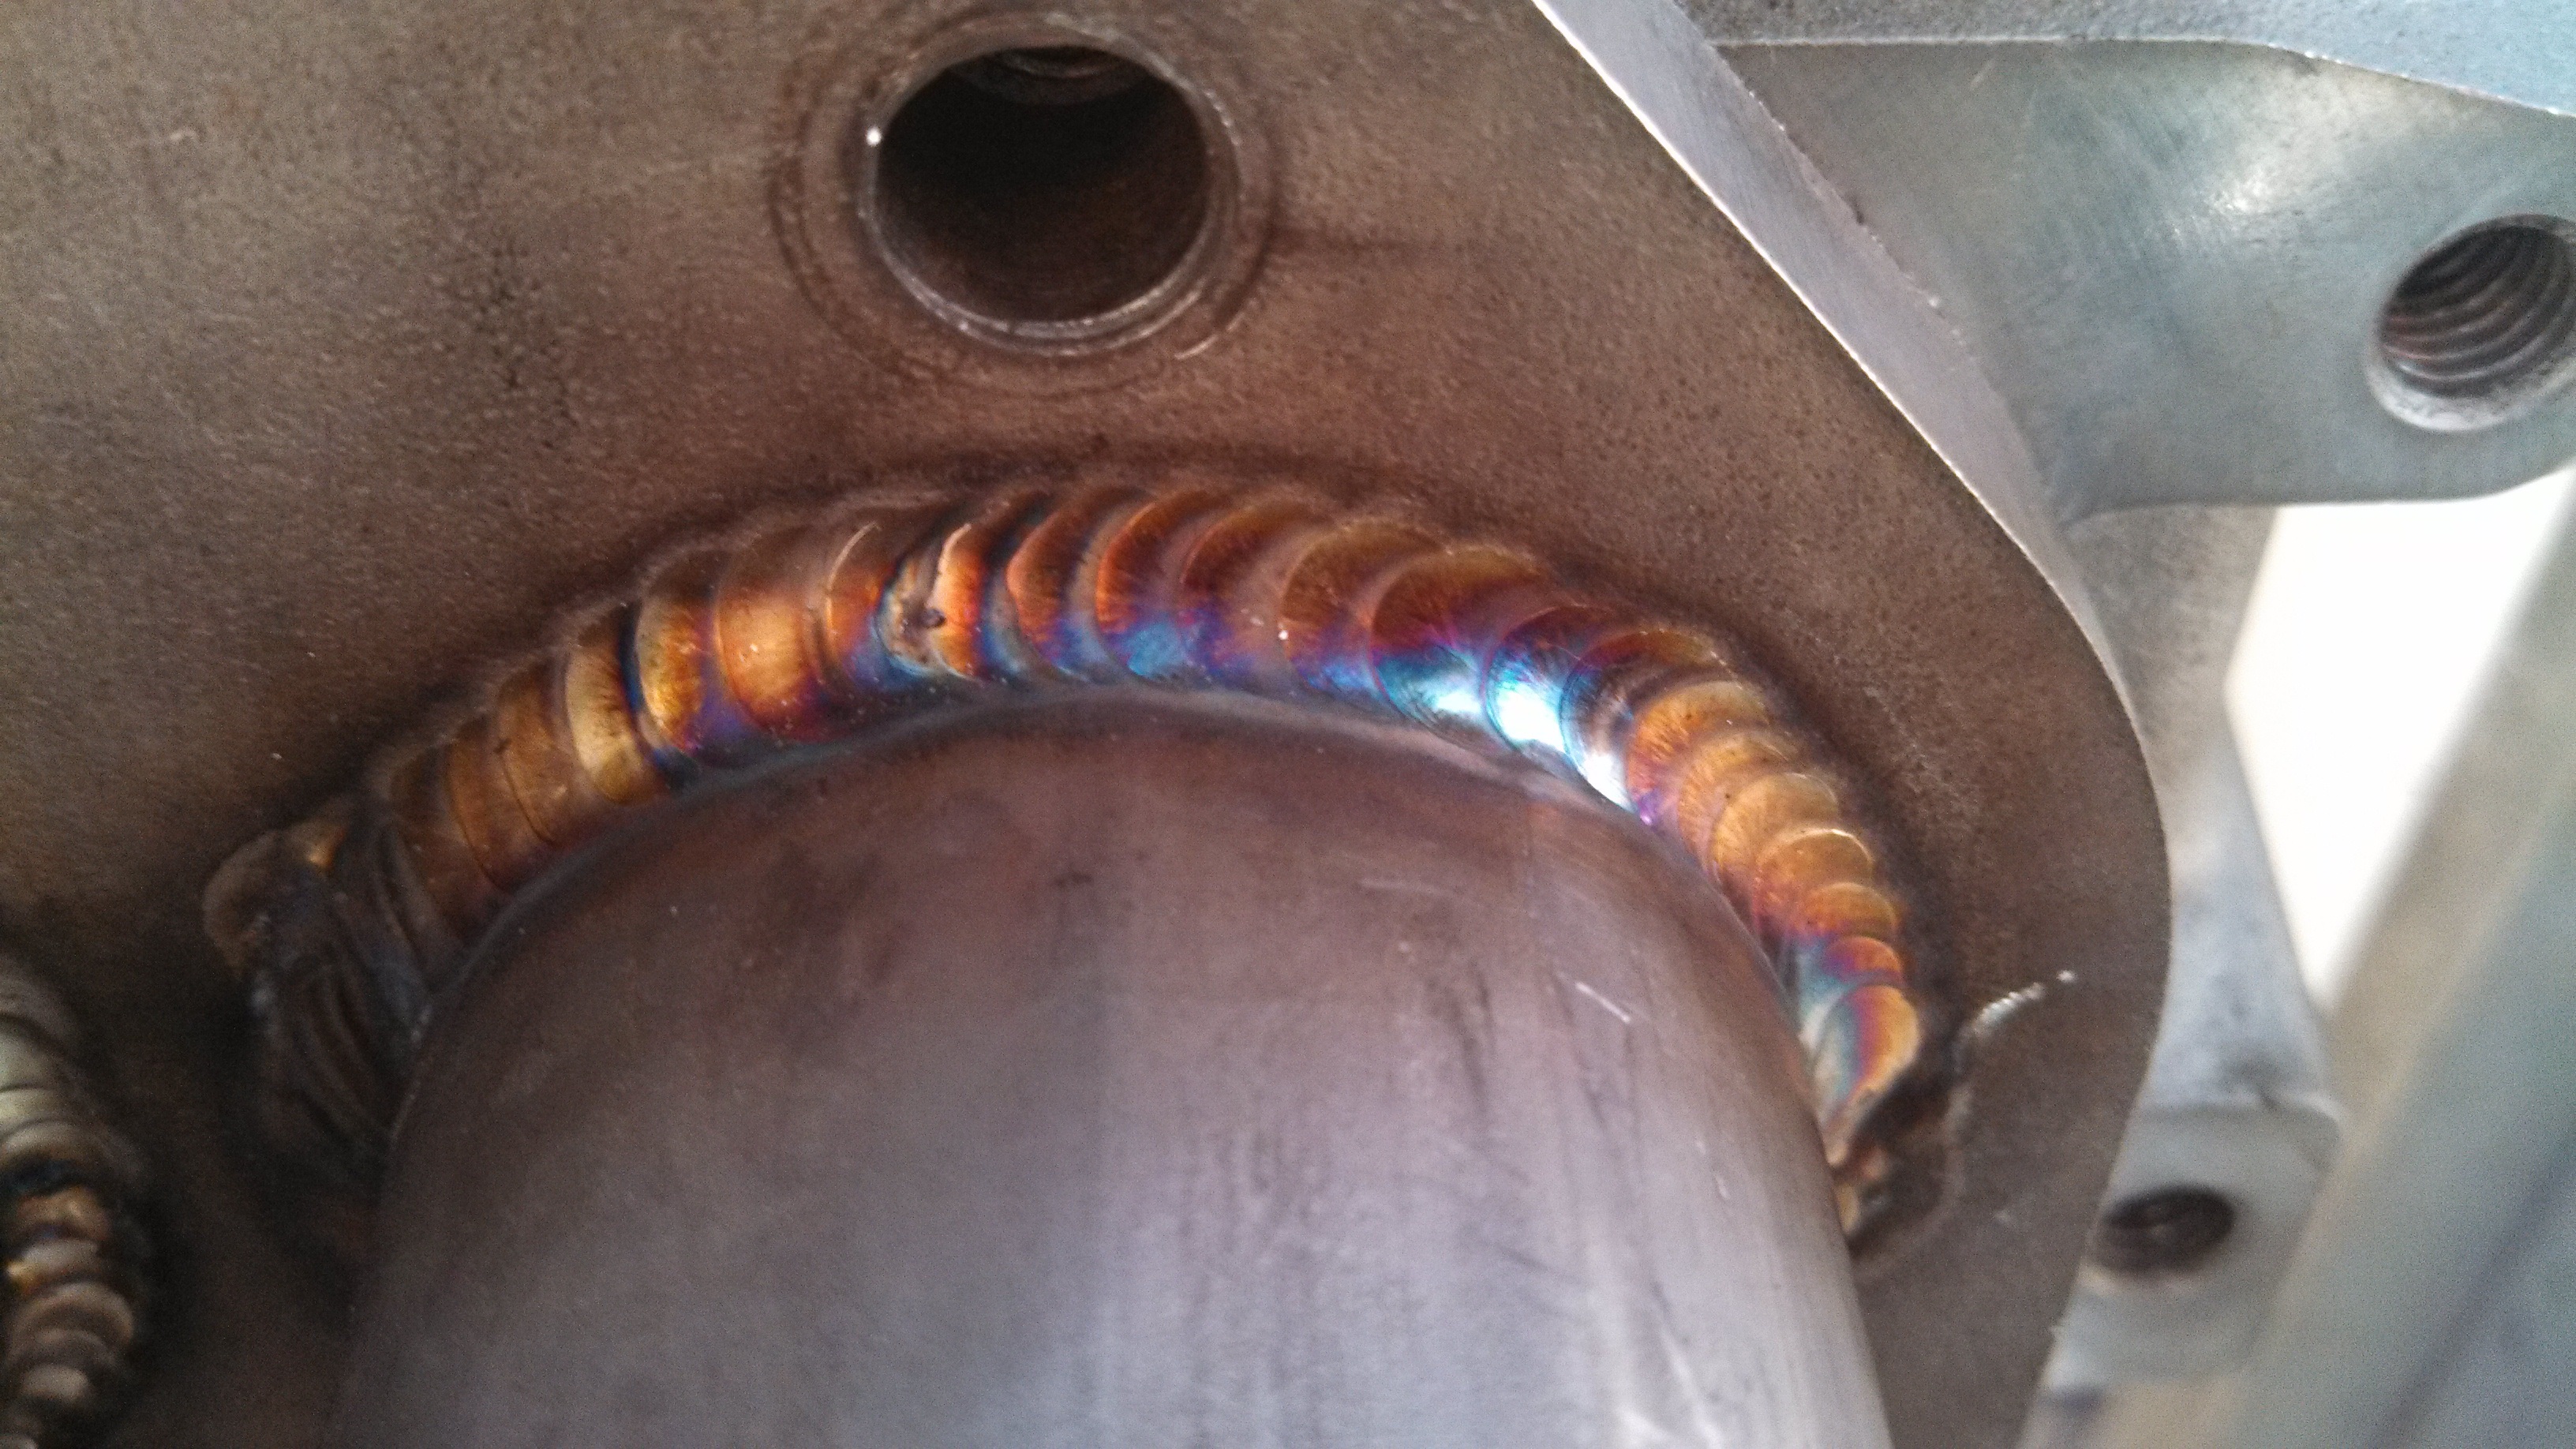
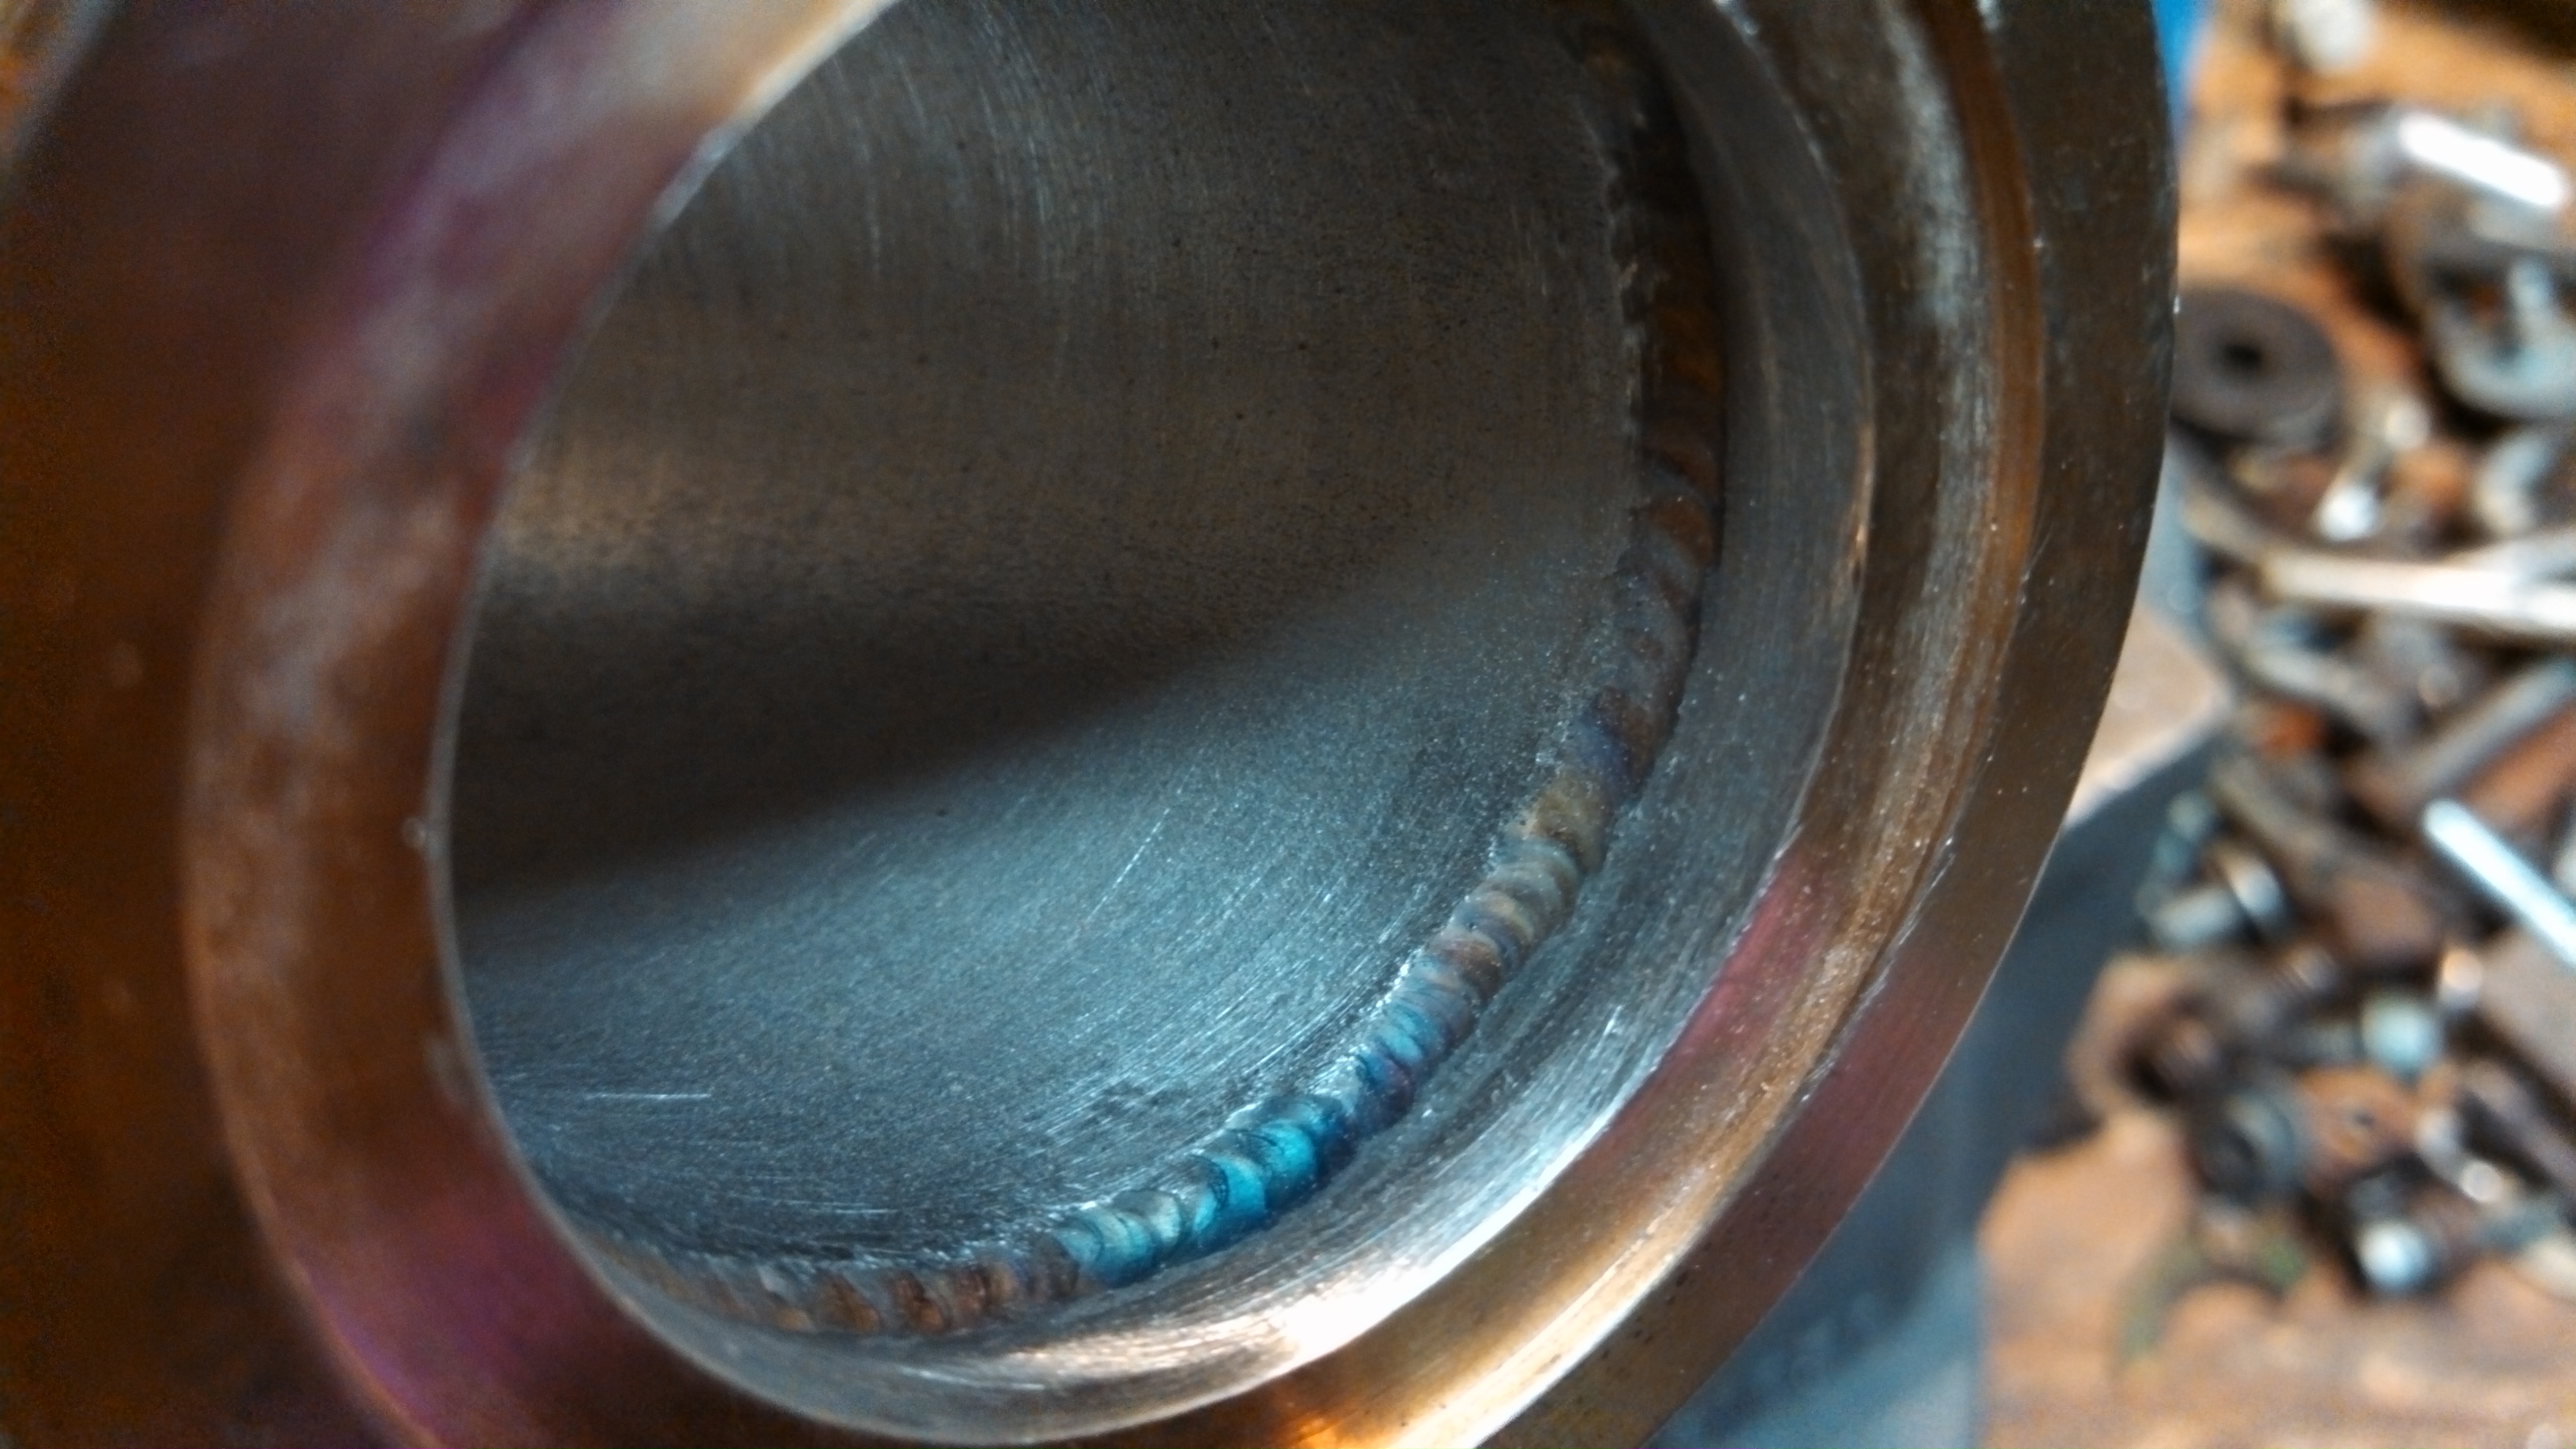
Welded
- crackpipe bung welded.jpg (1.74 MiB) Viewed 52476 times
- crackpipe bung welded upclose.jpg (1.7 MiB) Viewed 52476 times
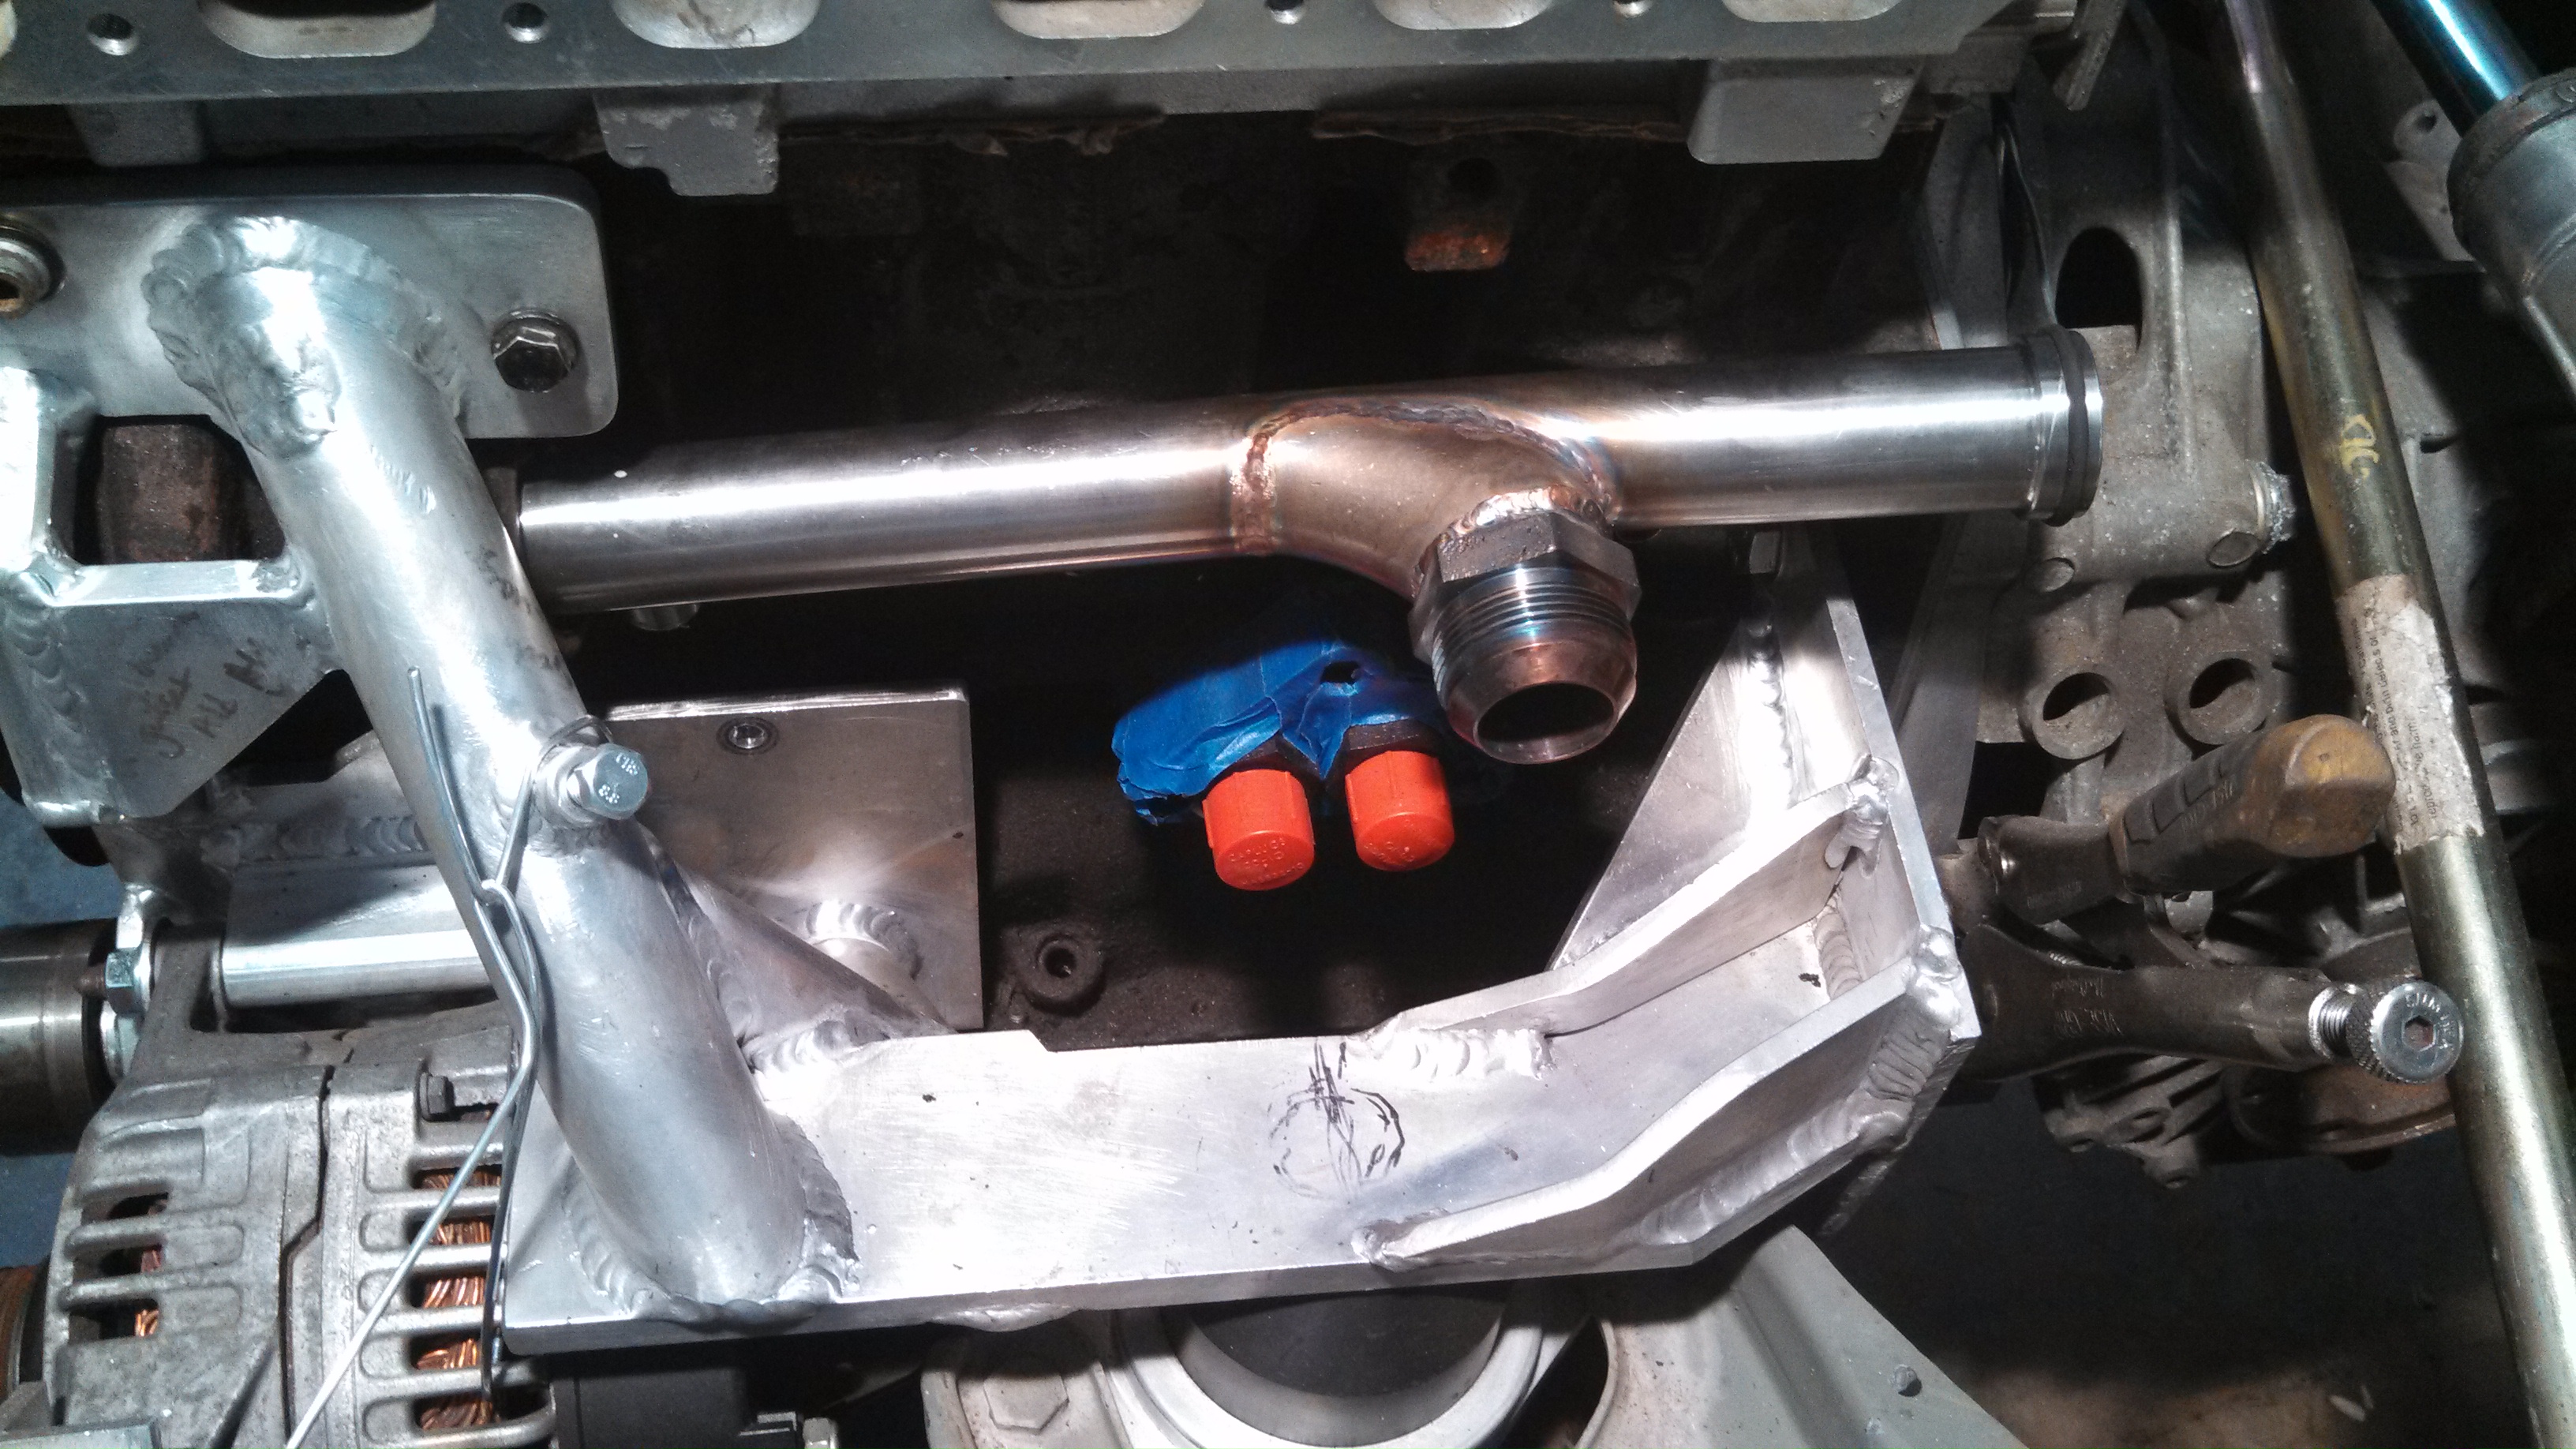
And here is the remote thermo housing installed.
- modified crackpipe and remote thermostat.jpg (1.72 MiB) Viewed 52476 times
- modified crackpipe and remote thermostat2.jpg (1.87 MiB) Viewed 52476 times
The radiator outlet hose will be a nice easy bend to a 90 deg. fitting from the t-stat housing.
I still need to make some tabs to help support the crackpipe and remote t-stat
Re: 24vVR6T CQ Project: EATSGTR, chassis FAB
Posted: Mon Feb 10, 2014 12:55 pm
by my2000apb
I also got a chance to get back into the AIR plumbing.
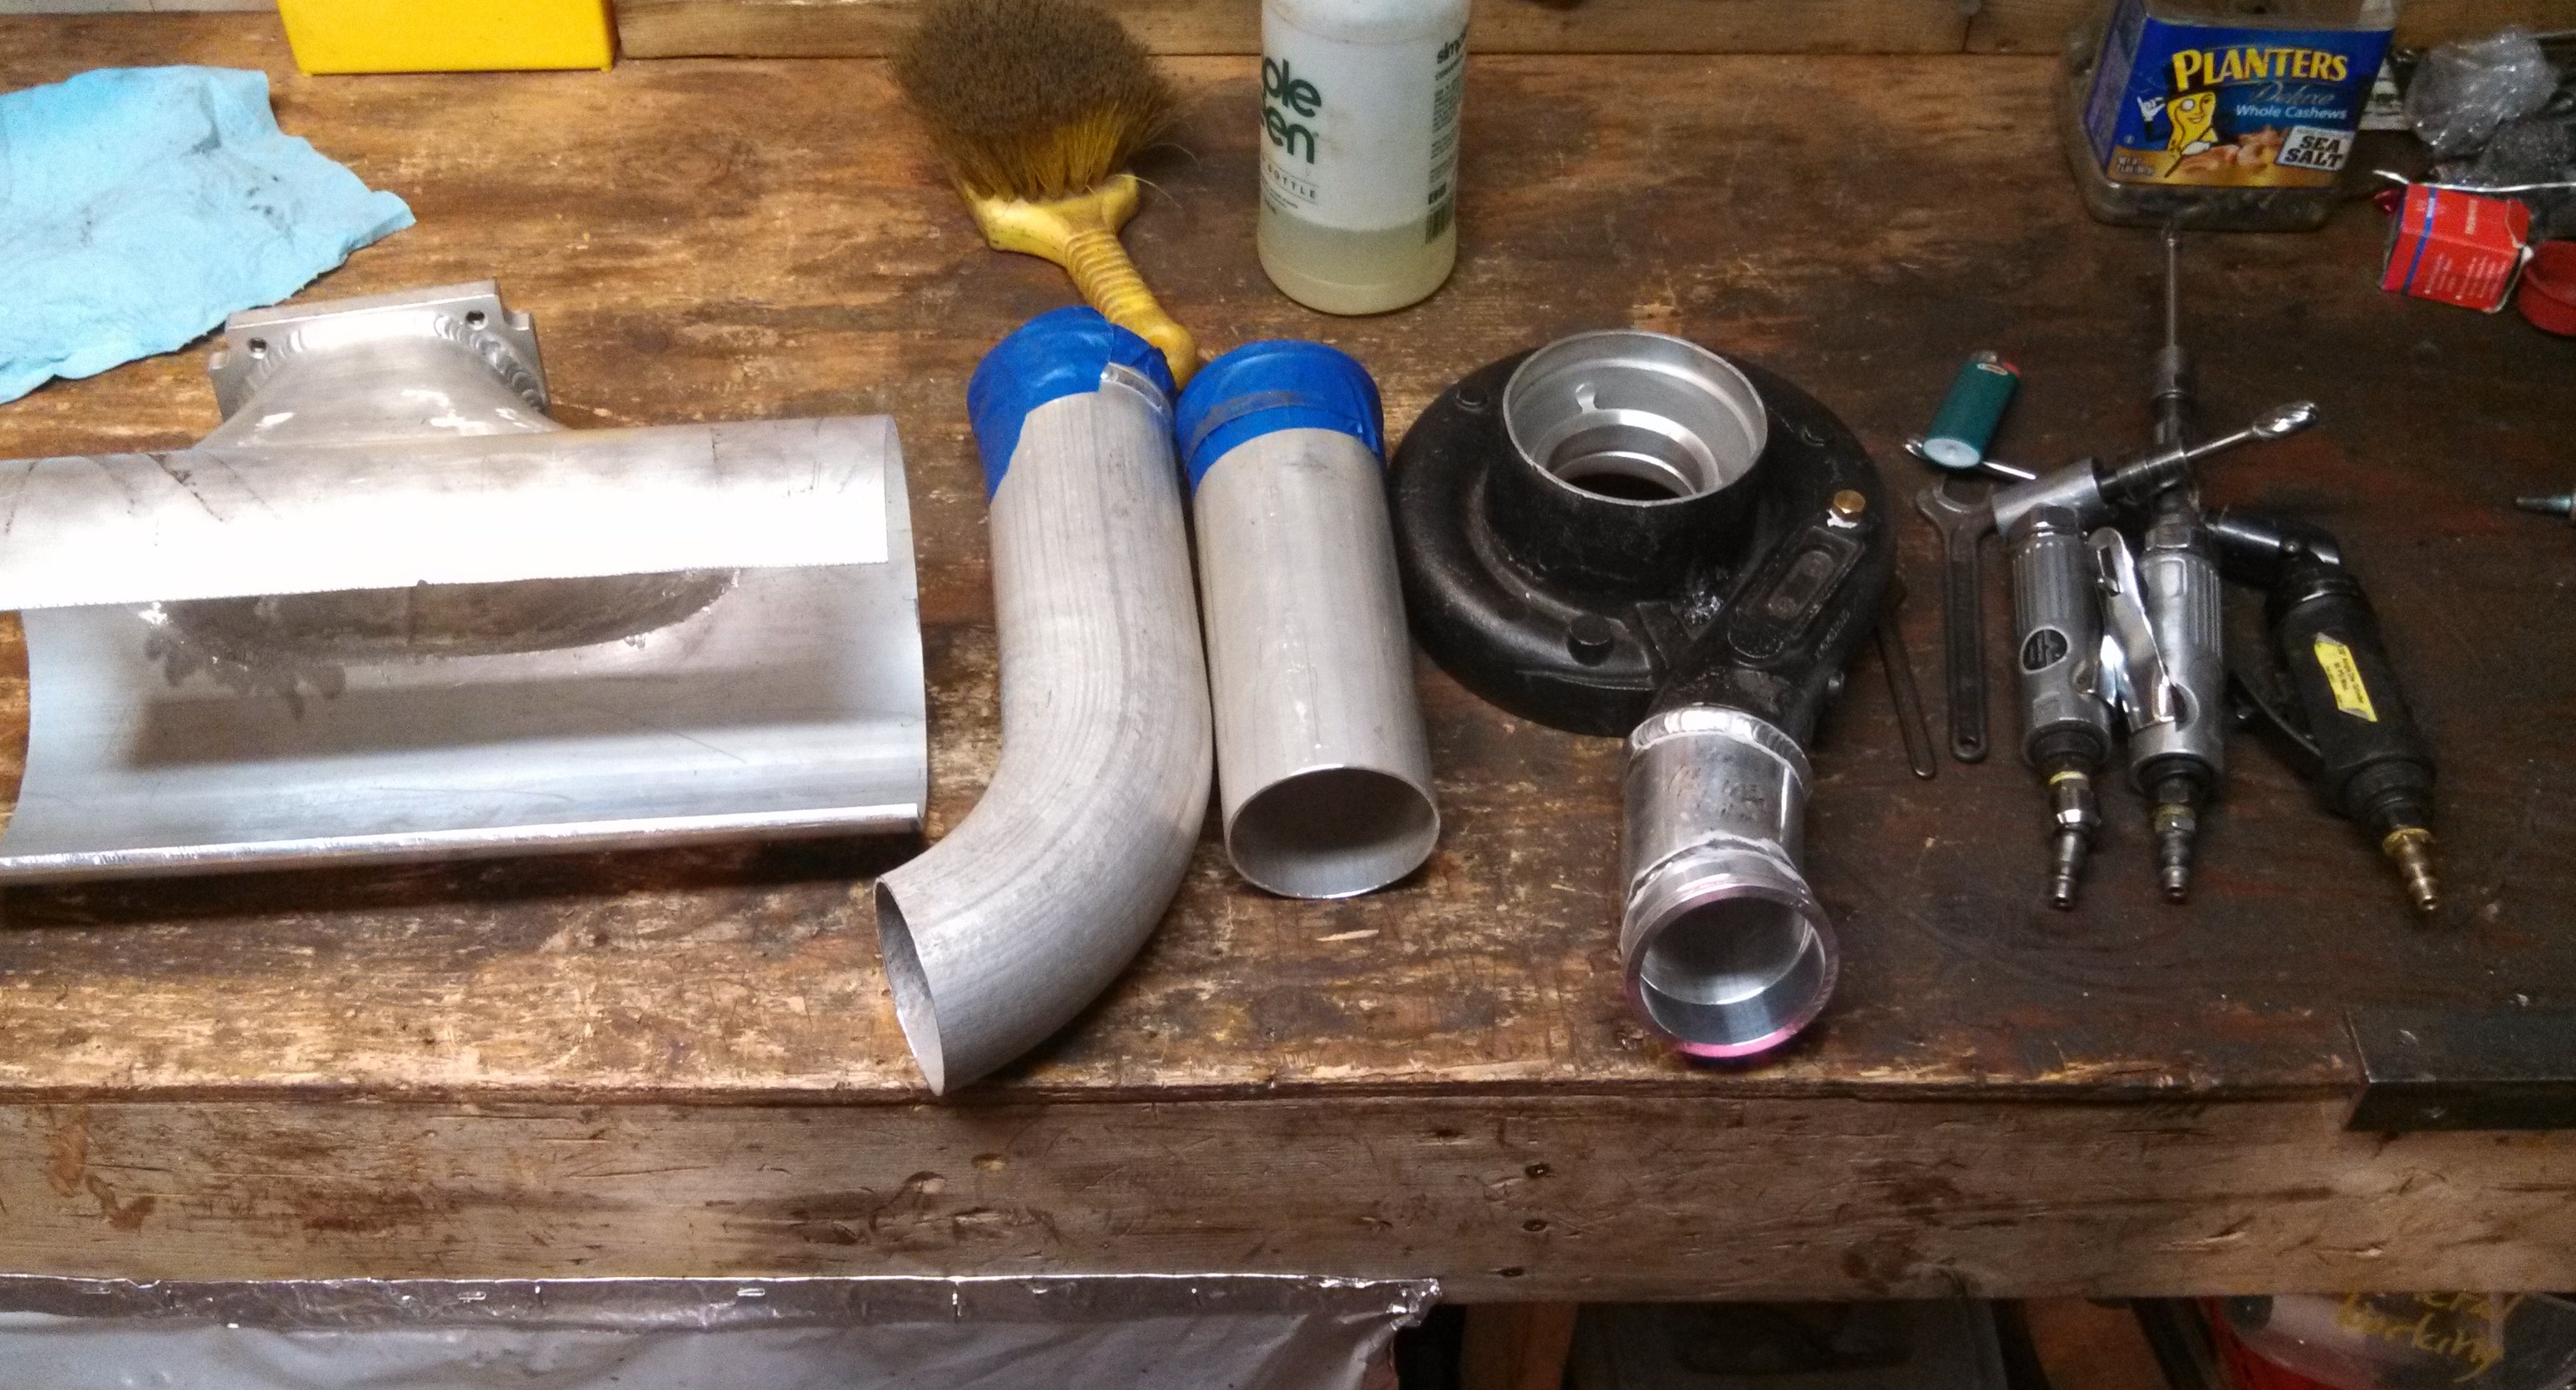
- making air plumbing.jpg (1.58 MiB) Viewed 52476 times
I got a lot of the vanjen flanges welded on, and some of the intake piping done, all the weds came out very clean with little to no, melt through. I went ahead and carbide cleaned and flapper drummed them nice and smooth.

- cleaned up tb to vanjen flange.jpg (1.92 MiB) Viewed 52476 times
I also added a small extension and bend to the compressor outlet to aid in clearing the hot exhaust manifold and Wastegate dump.
- compressor outlet extension and vanjen flange.jpg (1.73 MiB) Viewed 52476 times
I also cleaned up the inside of the intake manifold plenum feed, with some 60/80 grit flapper drums.
- smooth inner plenum transition.jpg (1.95 MiB) Viewed 52476 times
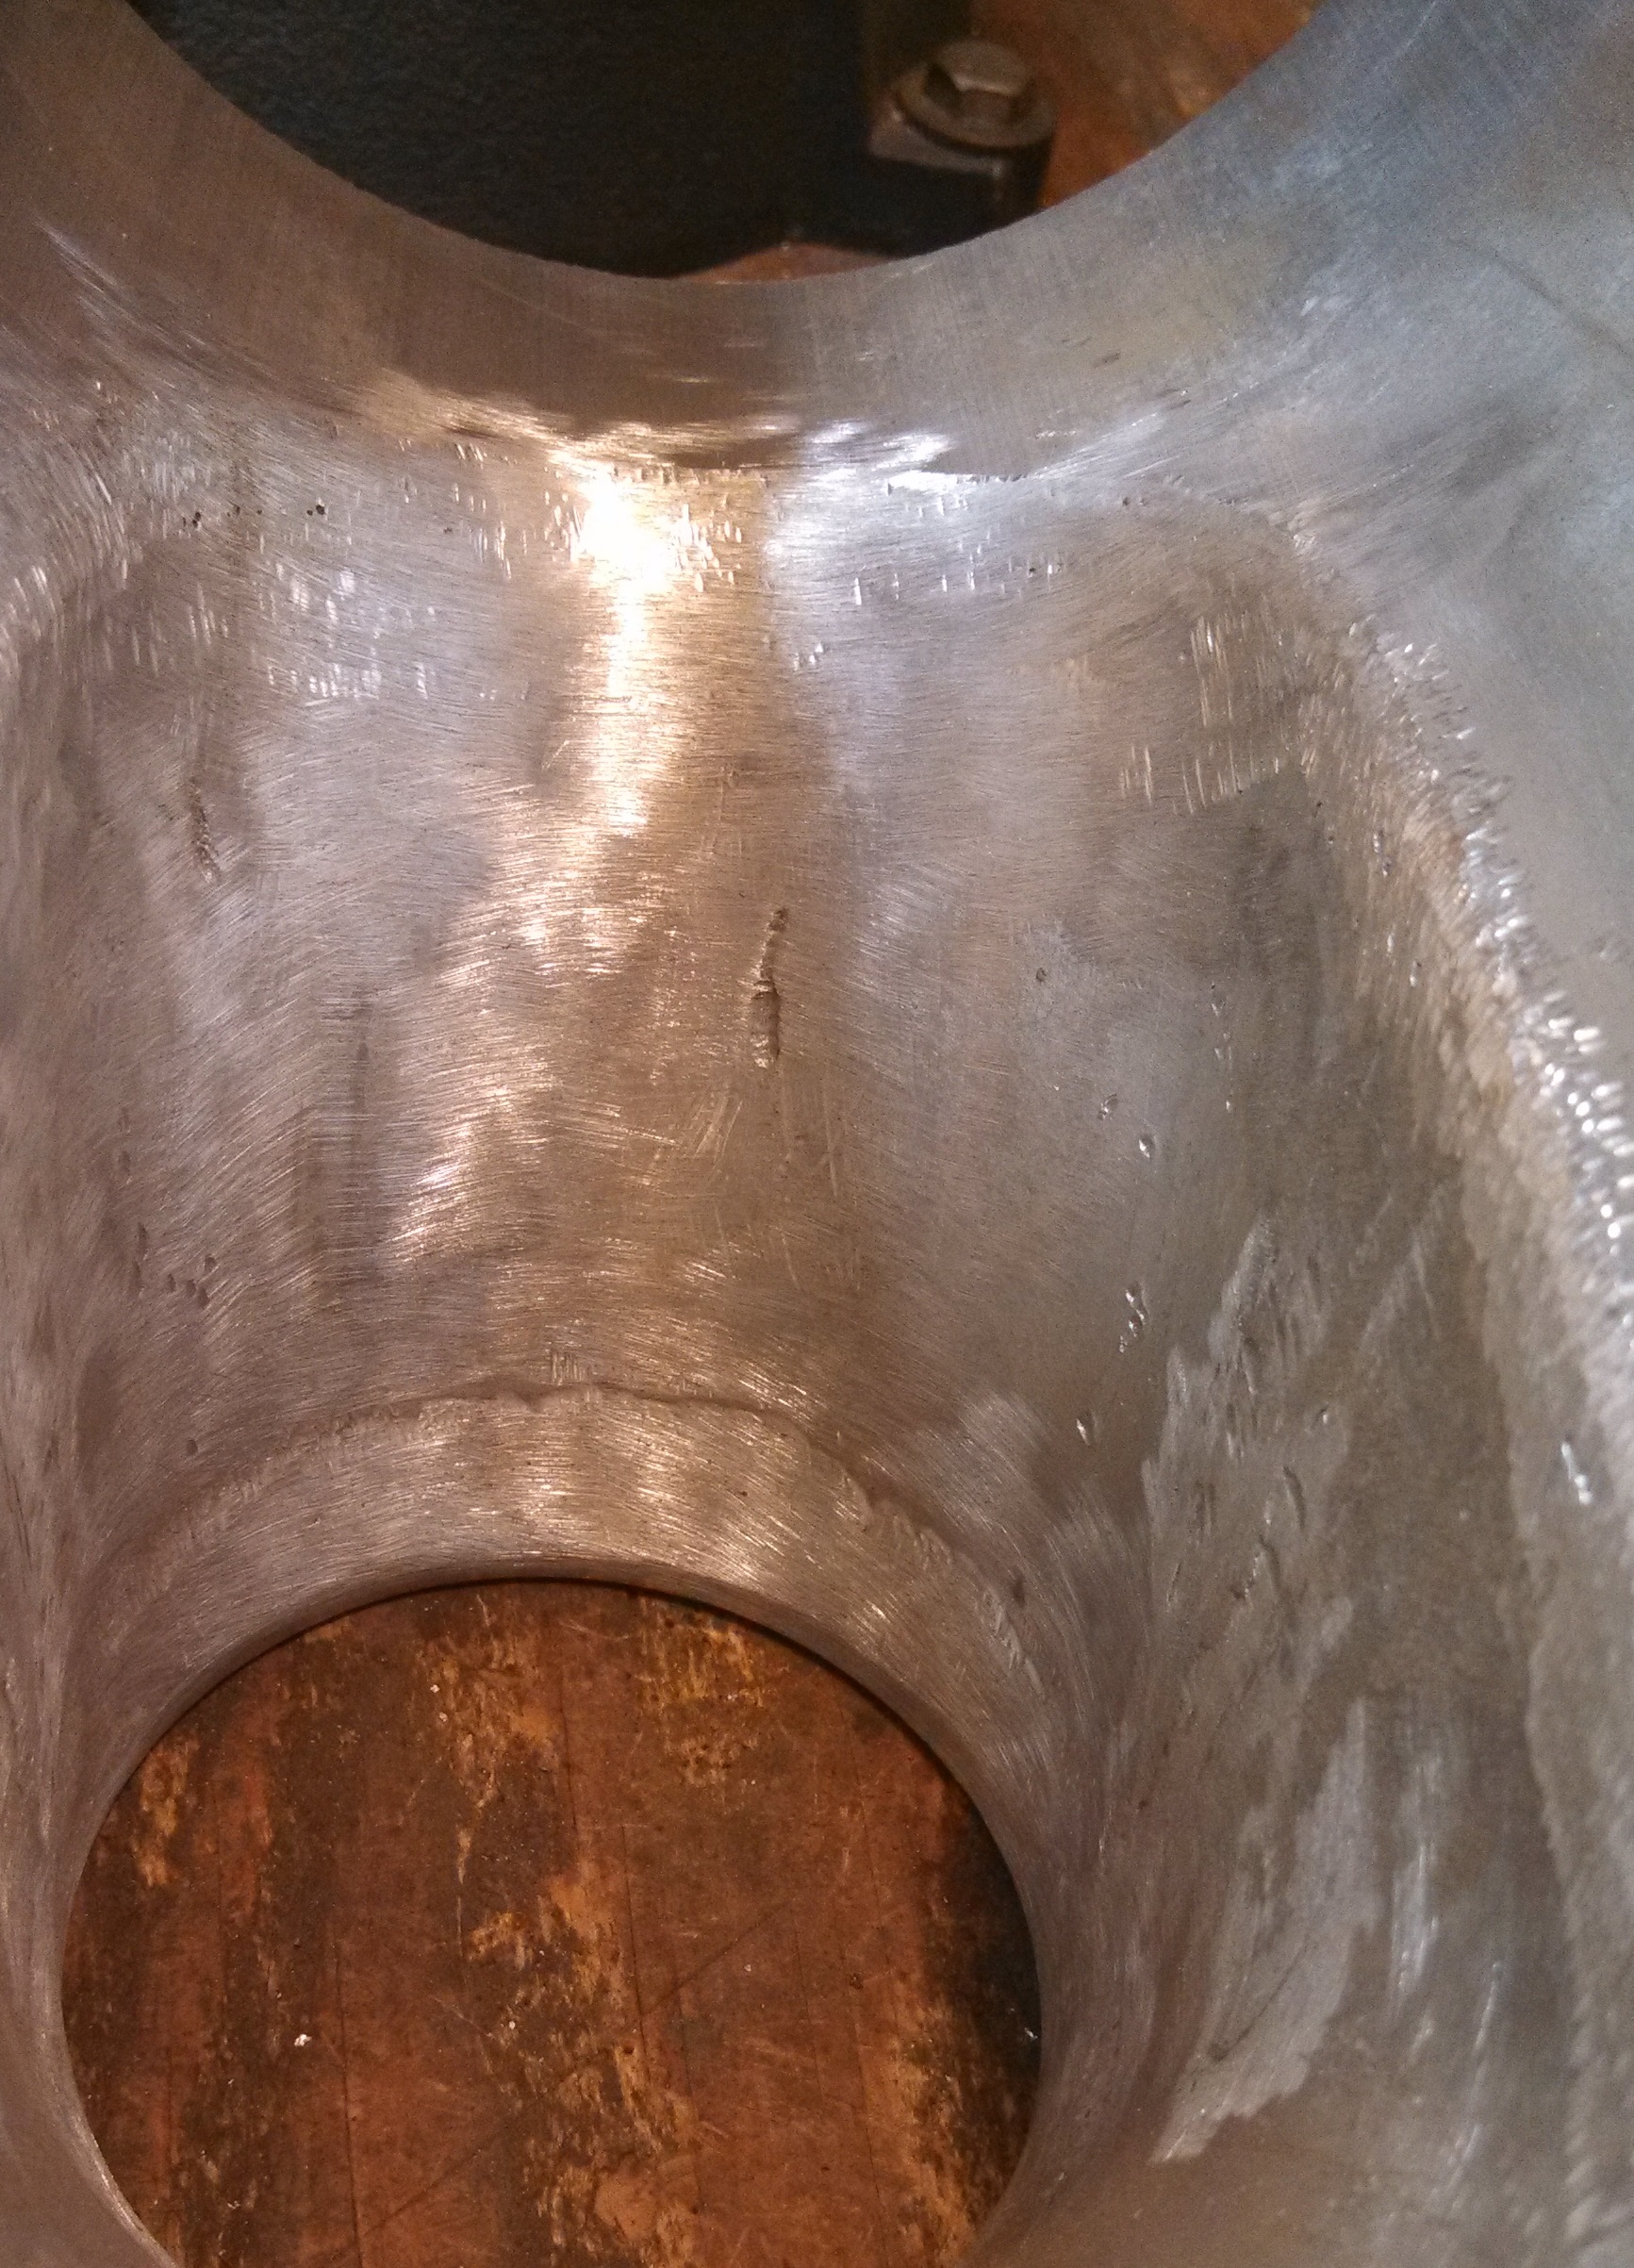
- smooth inner plenum transition2.jpg (1.35 MiB) Viewed 52476 times
Re: 24vVR6T CQ Project: EATSGTR, chassis FAB
Posted: Mon Feb 10, 2014 1:19 pm
by my2000apb
MORE!!!
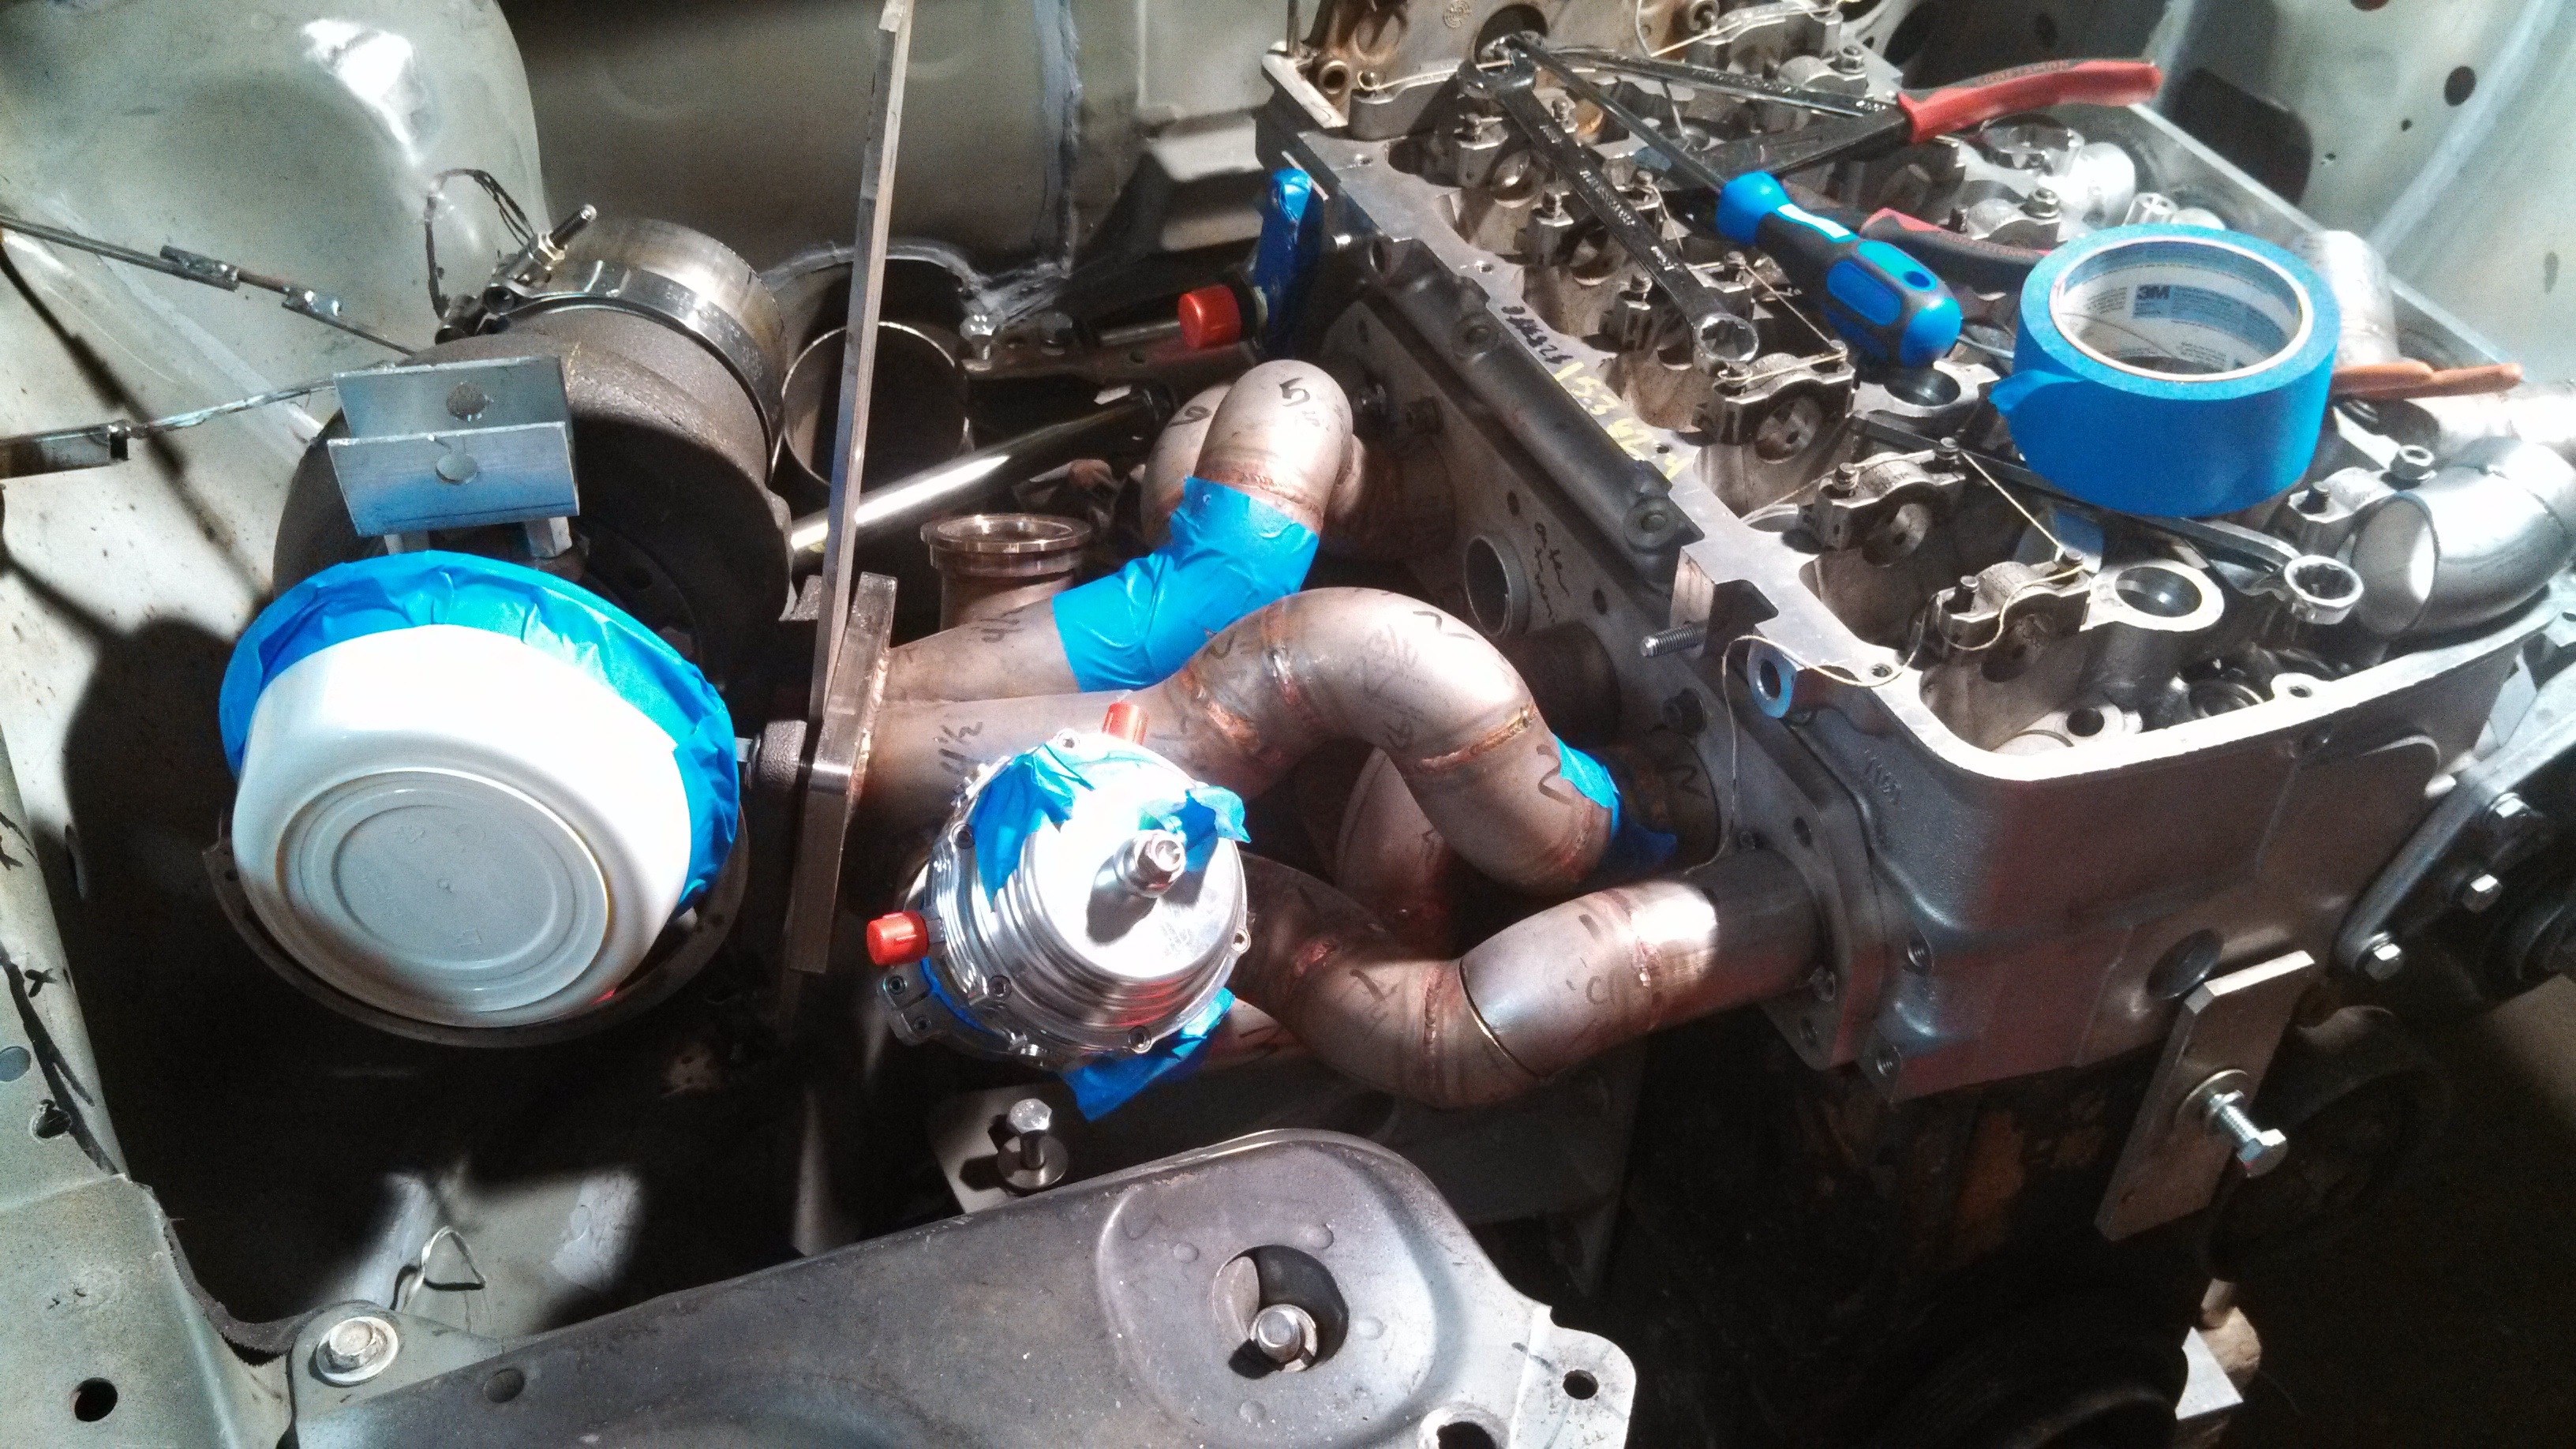
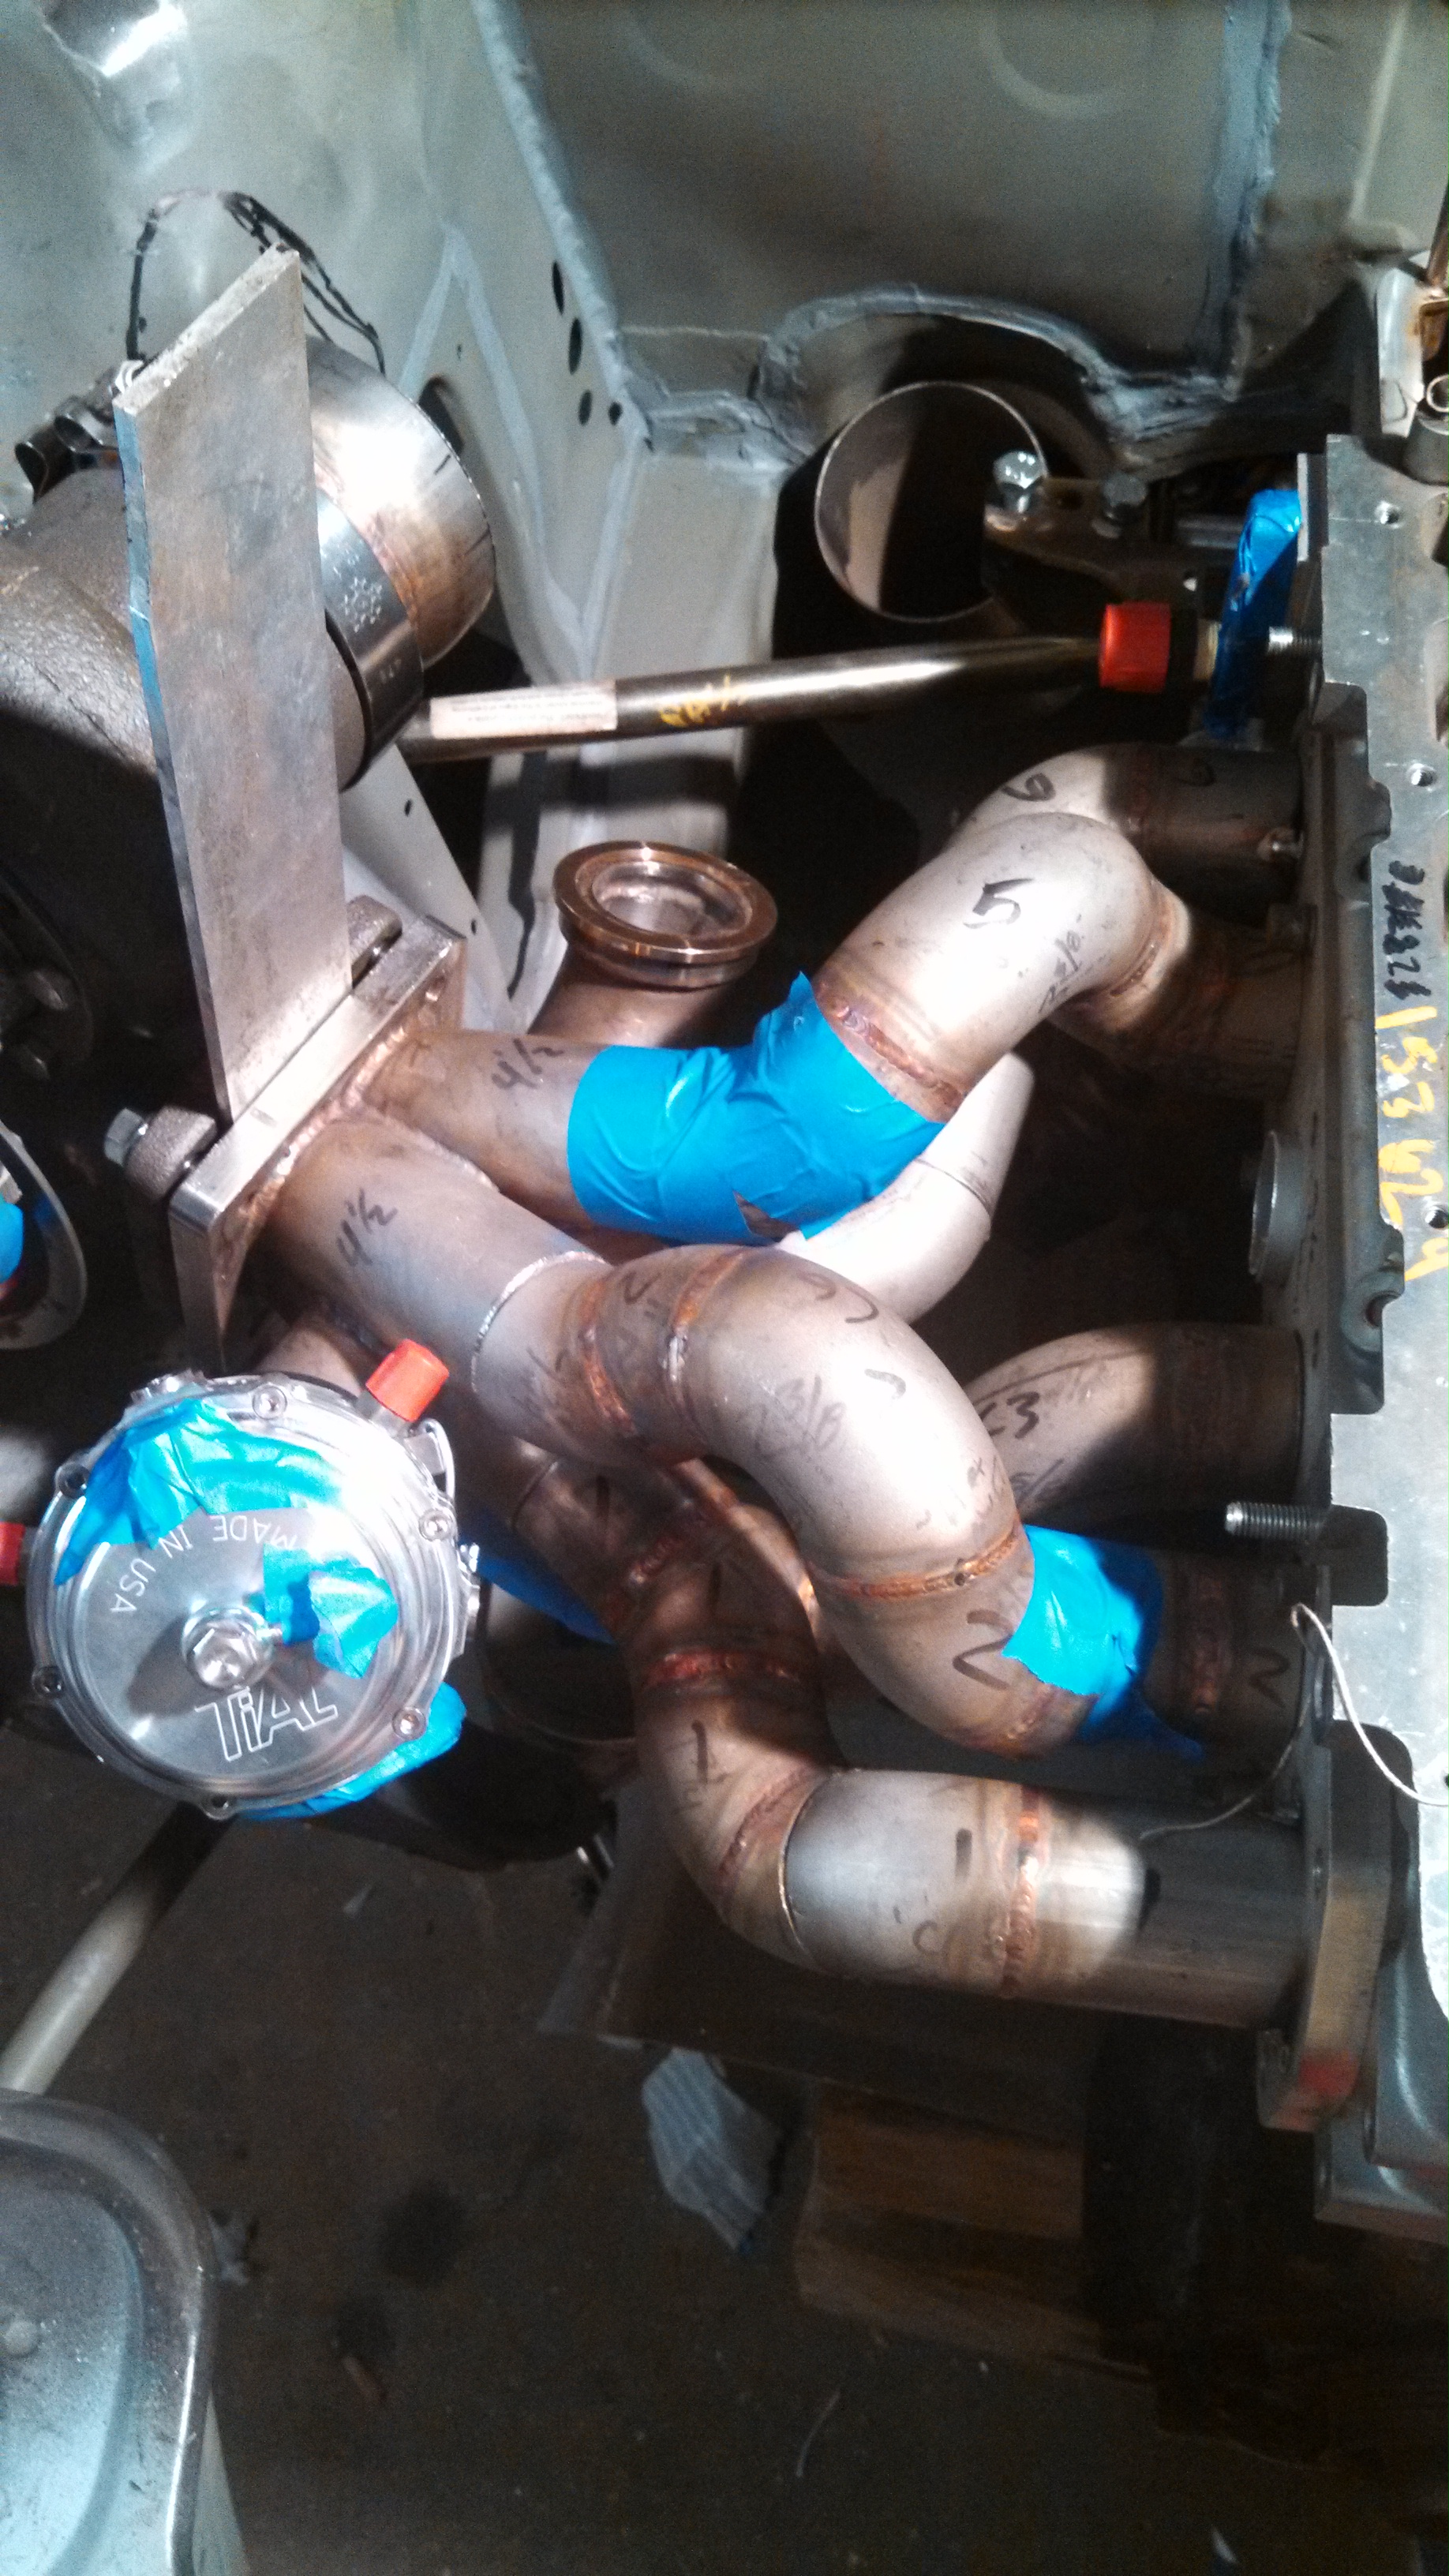
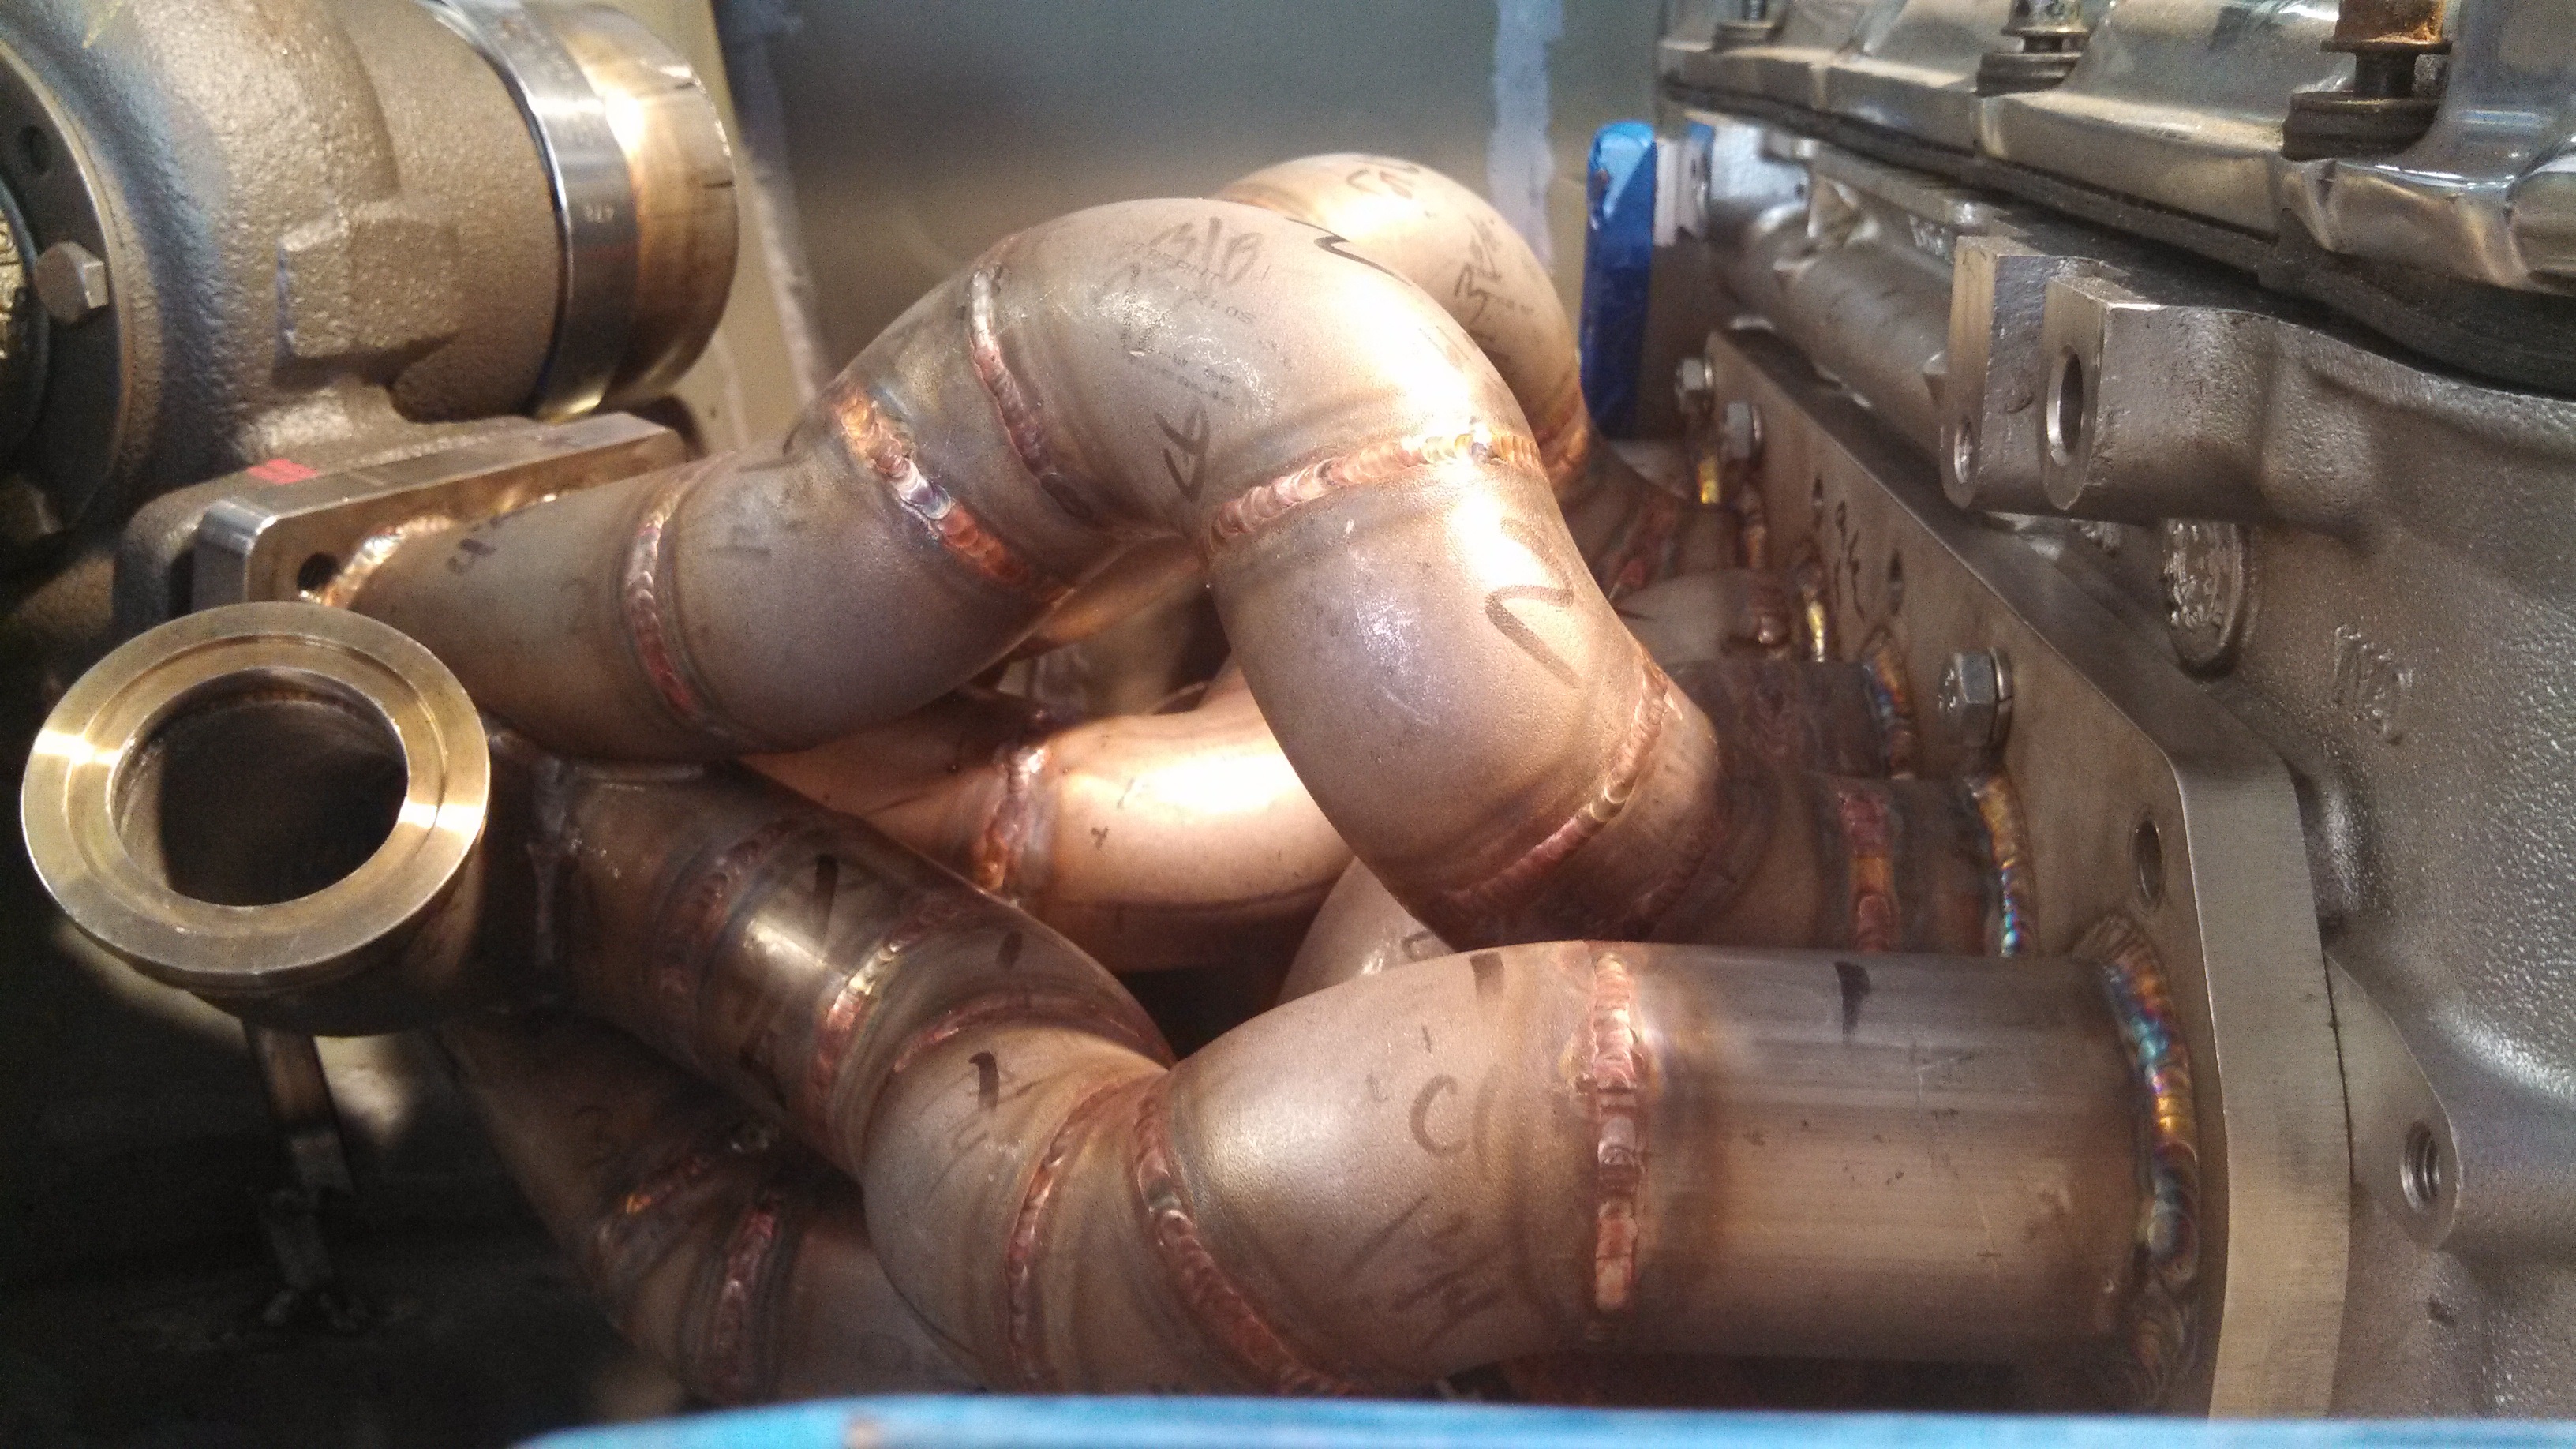
Ok back to this sexy exhaust manifold!!!
I picked up all of the individual runners from ryan. He welded all of the runners together except for the last elbow on the head or collector side, and has not yet welded the runners to the flange or collector. So I brought all of the pieces home and proceeded to reassemble/check fitment.
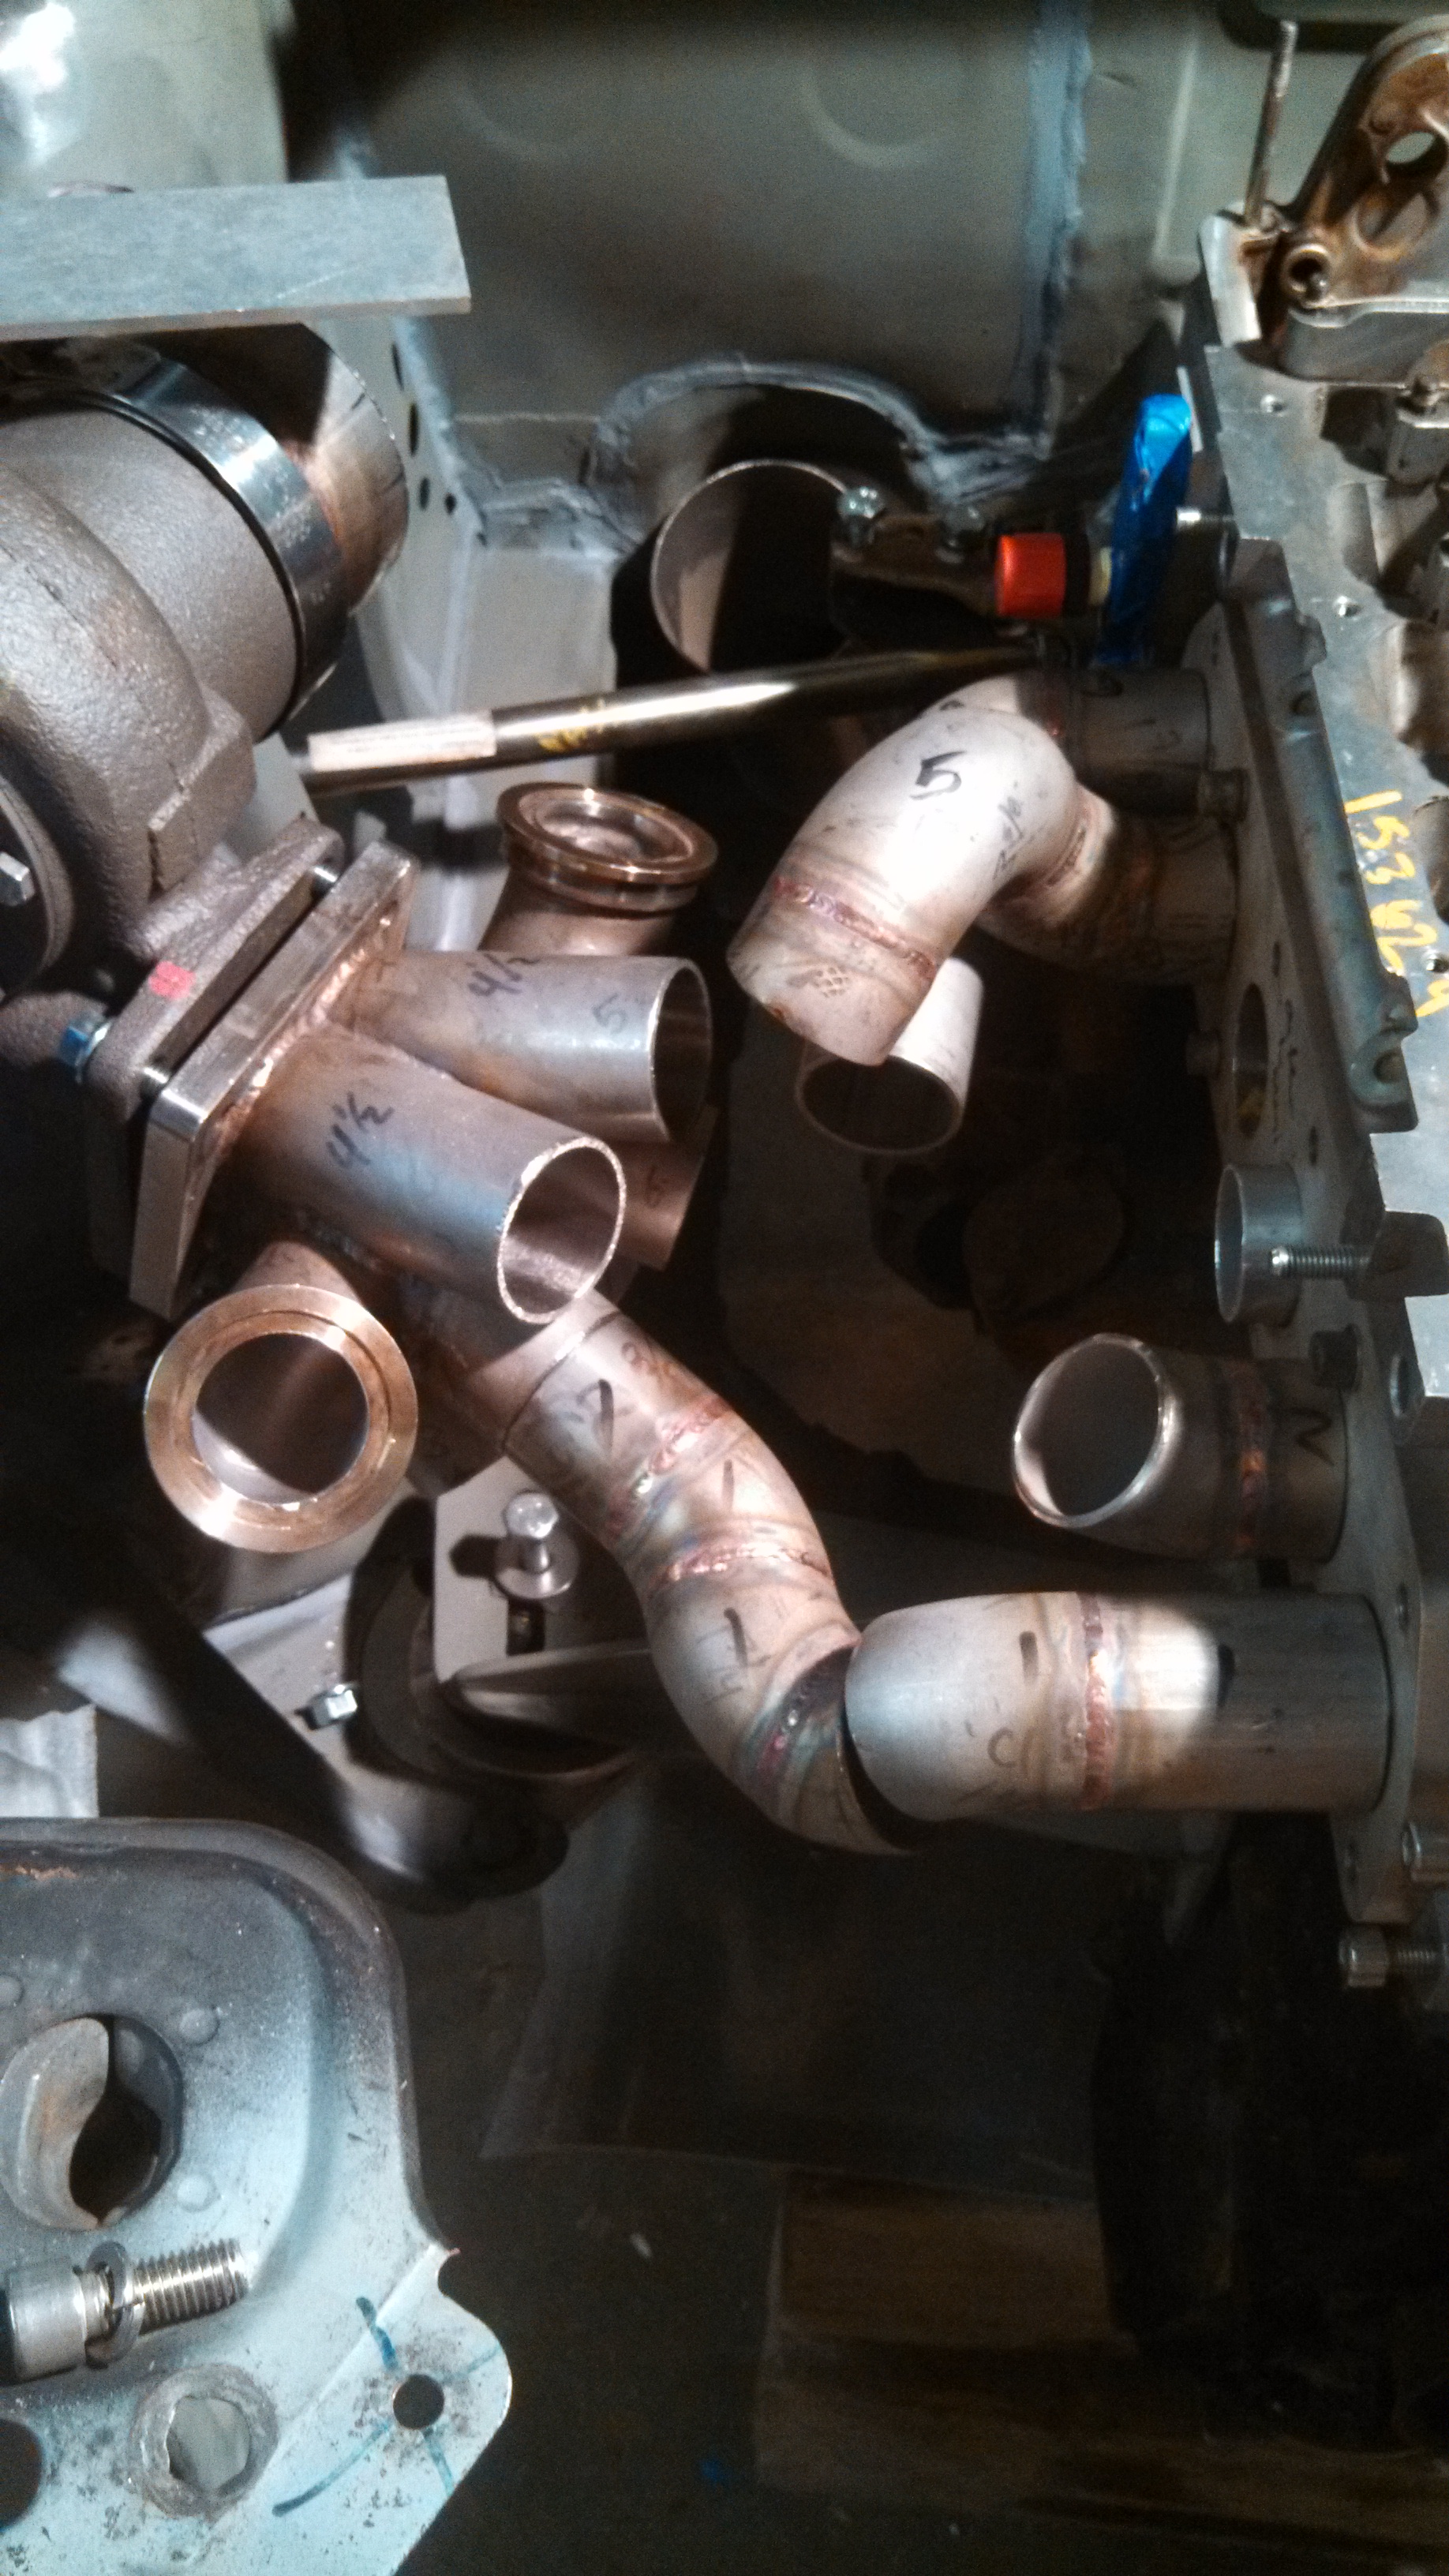
- runner welded now reassemble.jpg (1.82 MiB) Viewed 52482 times
All told each runner shrunk about 1/8”. I know this is exact because the hot-side was welded to the inner fender and obv. would not bolt back together if it’s all tacked back up. So I slid a piece of 1/8” thick alu. between the manifold flange and hot-side flange and tightened it back up. Then it went back together like Legos hahaha.
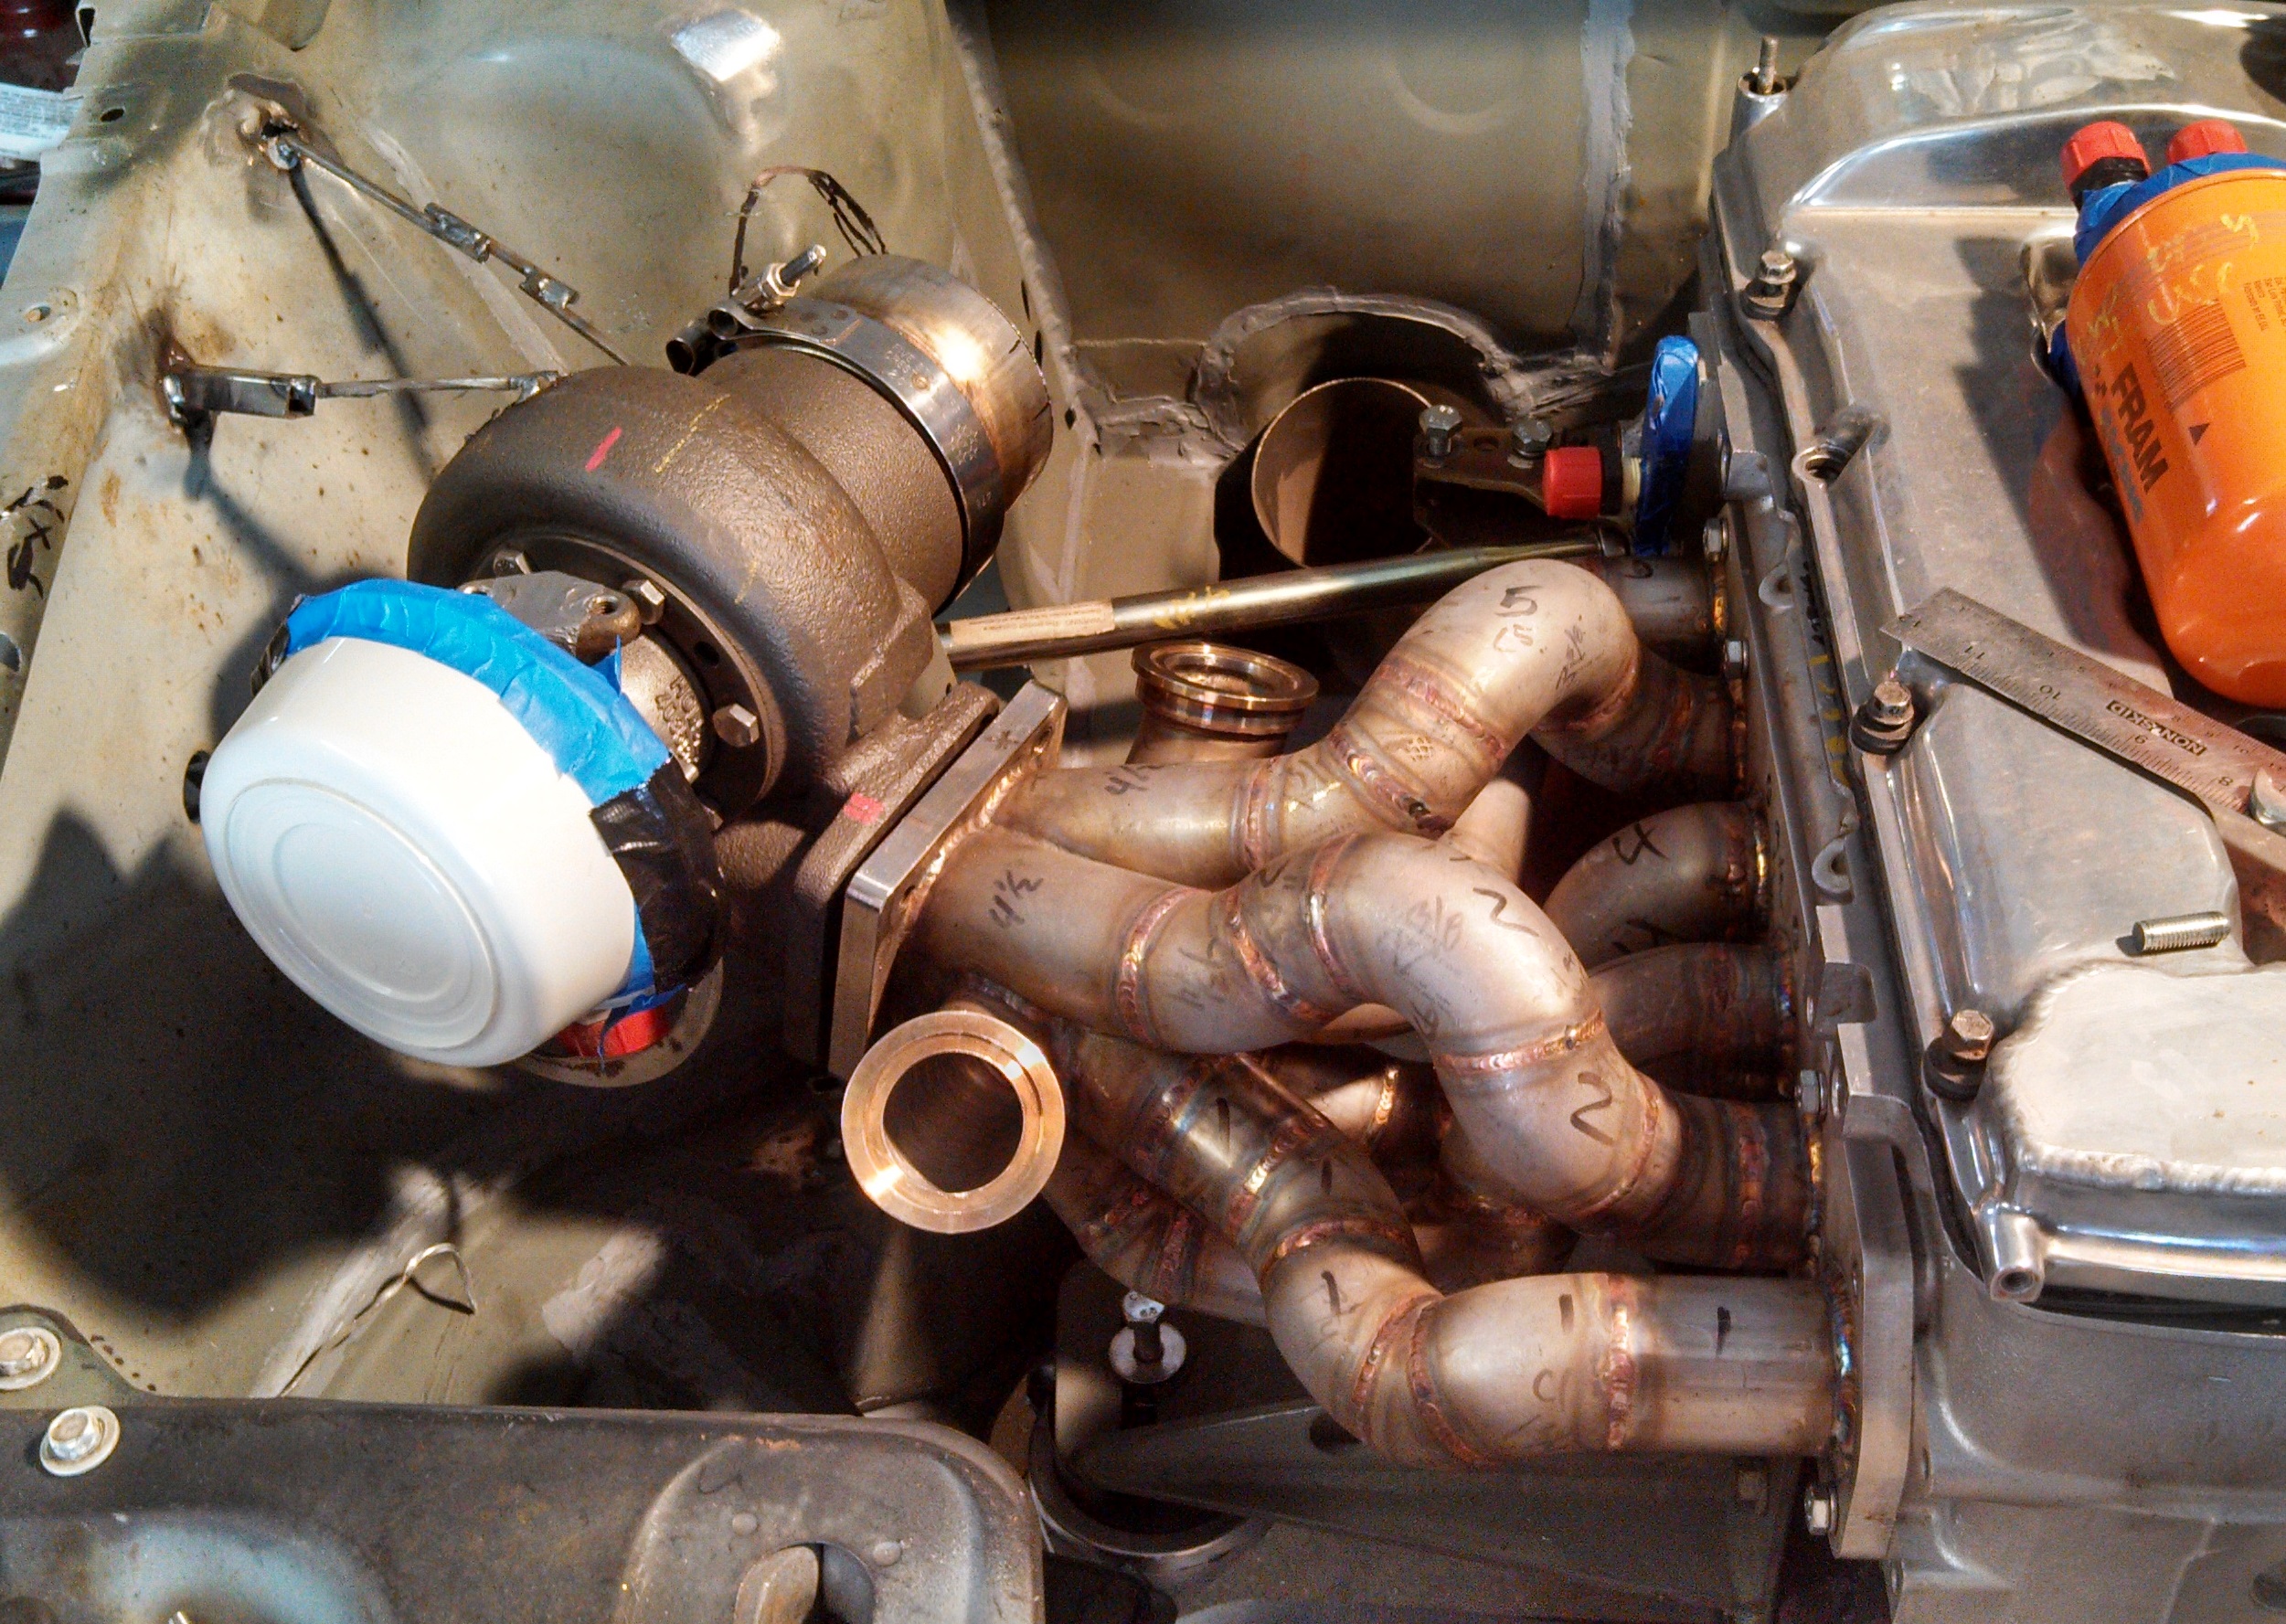
- runners welded reassembly.jpg (1.97 MiB) Viewed 52482 times
- runners welded reassembly2.jpg (1.88 MiB) Viewed 52482 times
Ryan had me tack on one runner for either side of the divided collector, to locate everything, but still allow him to assemble it as welded. This gives him good access to all sides of the runners as it comes together.
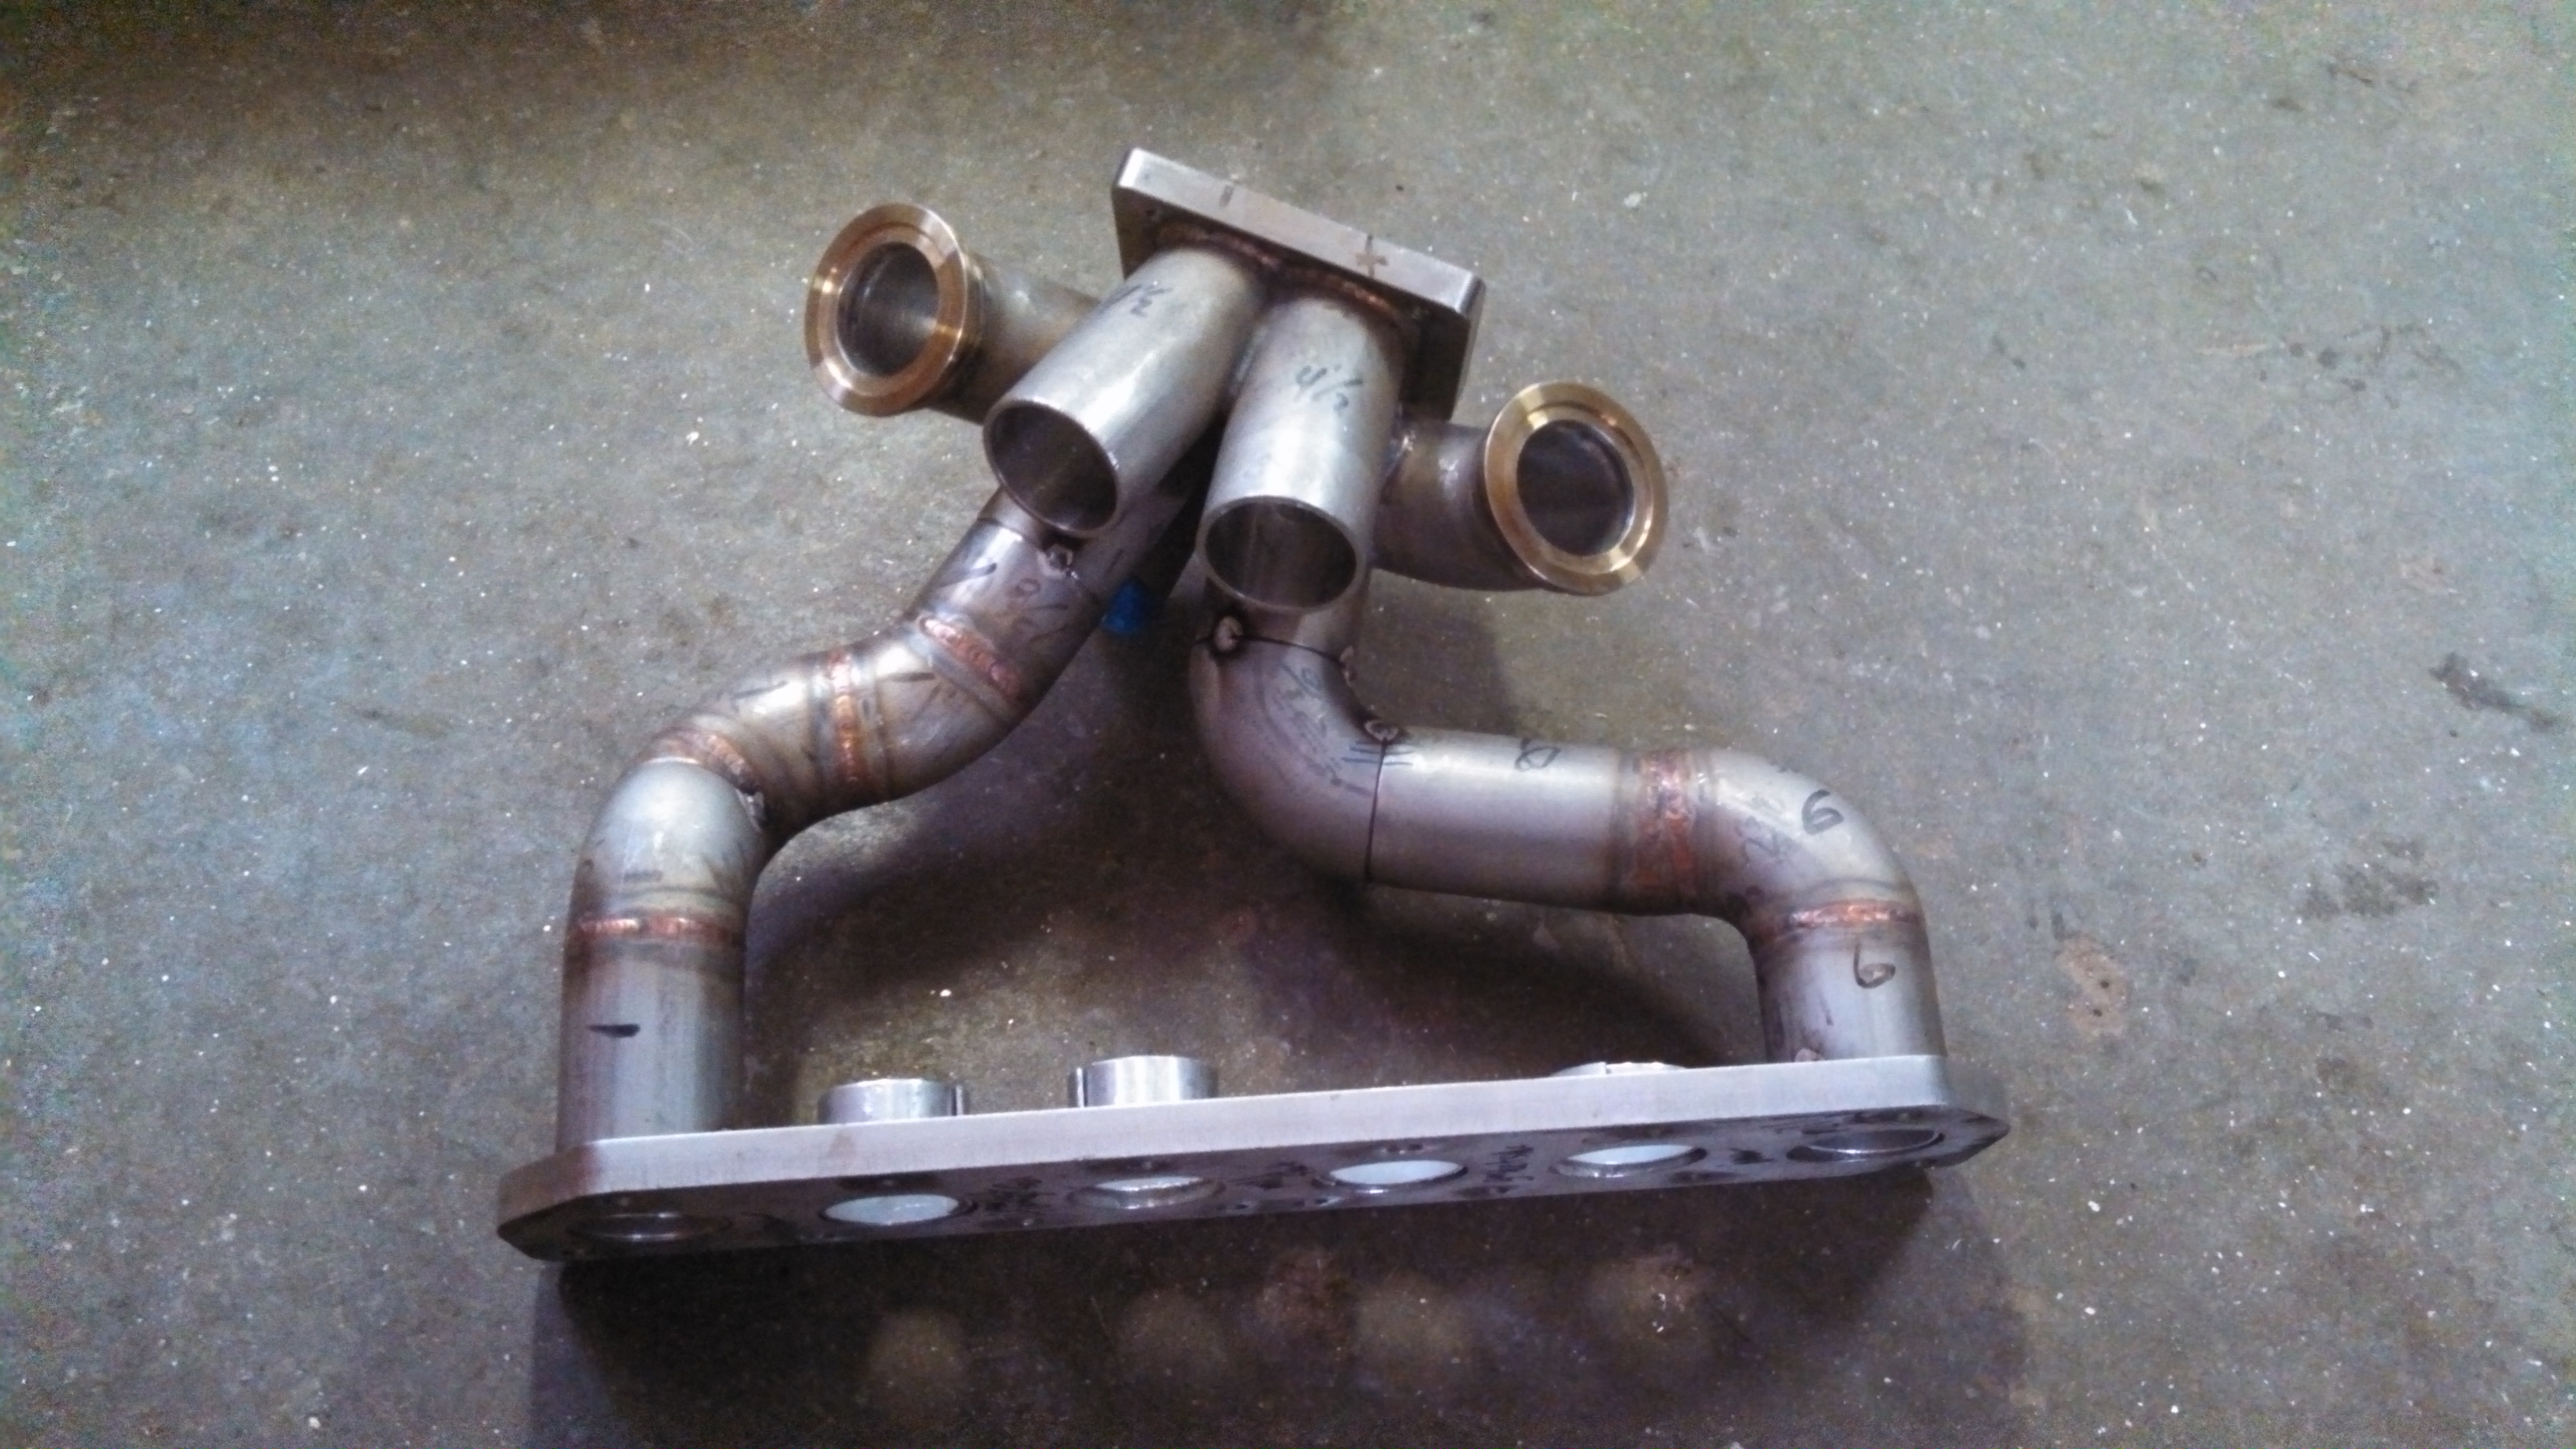
- tacked and ready for ryan.jpg (1.54 MiB) Viewed 52482 times
I also got to start the Wastegate dump in the front, once the second WG comes in I can merge the two outlets together and run a short 2.5” section back into the downpipe between the front halfshaft and the steering rods.
- WG dumps being built.jpg (1.89 MiB) Viewed 52482 times
Re: 24vVR6T CQ Project: EATSGTR, chassis FAB
Posted: Mon Feb 10, 2014 1:51 pm
by my2000apb
MORE!
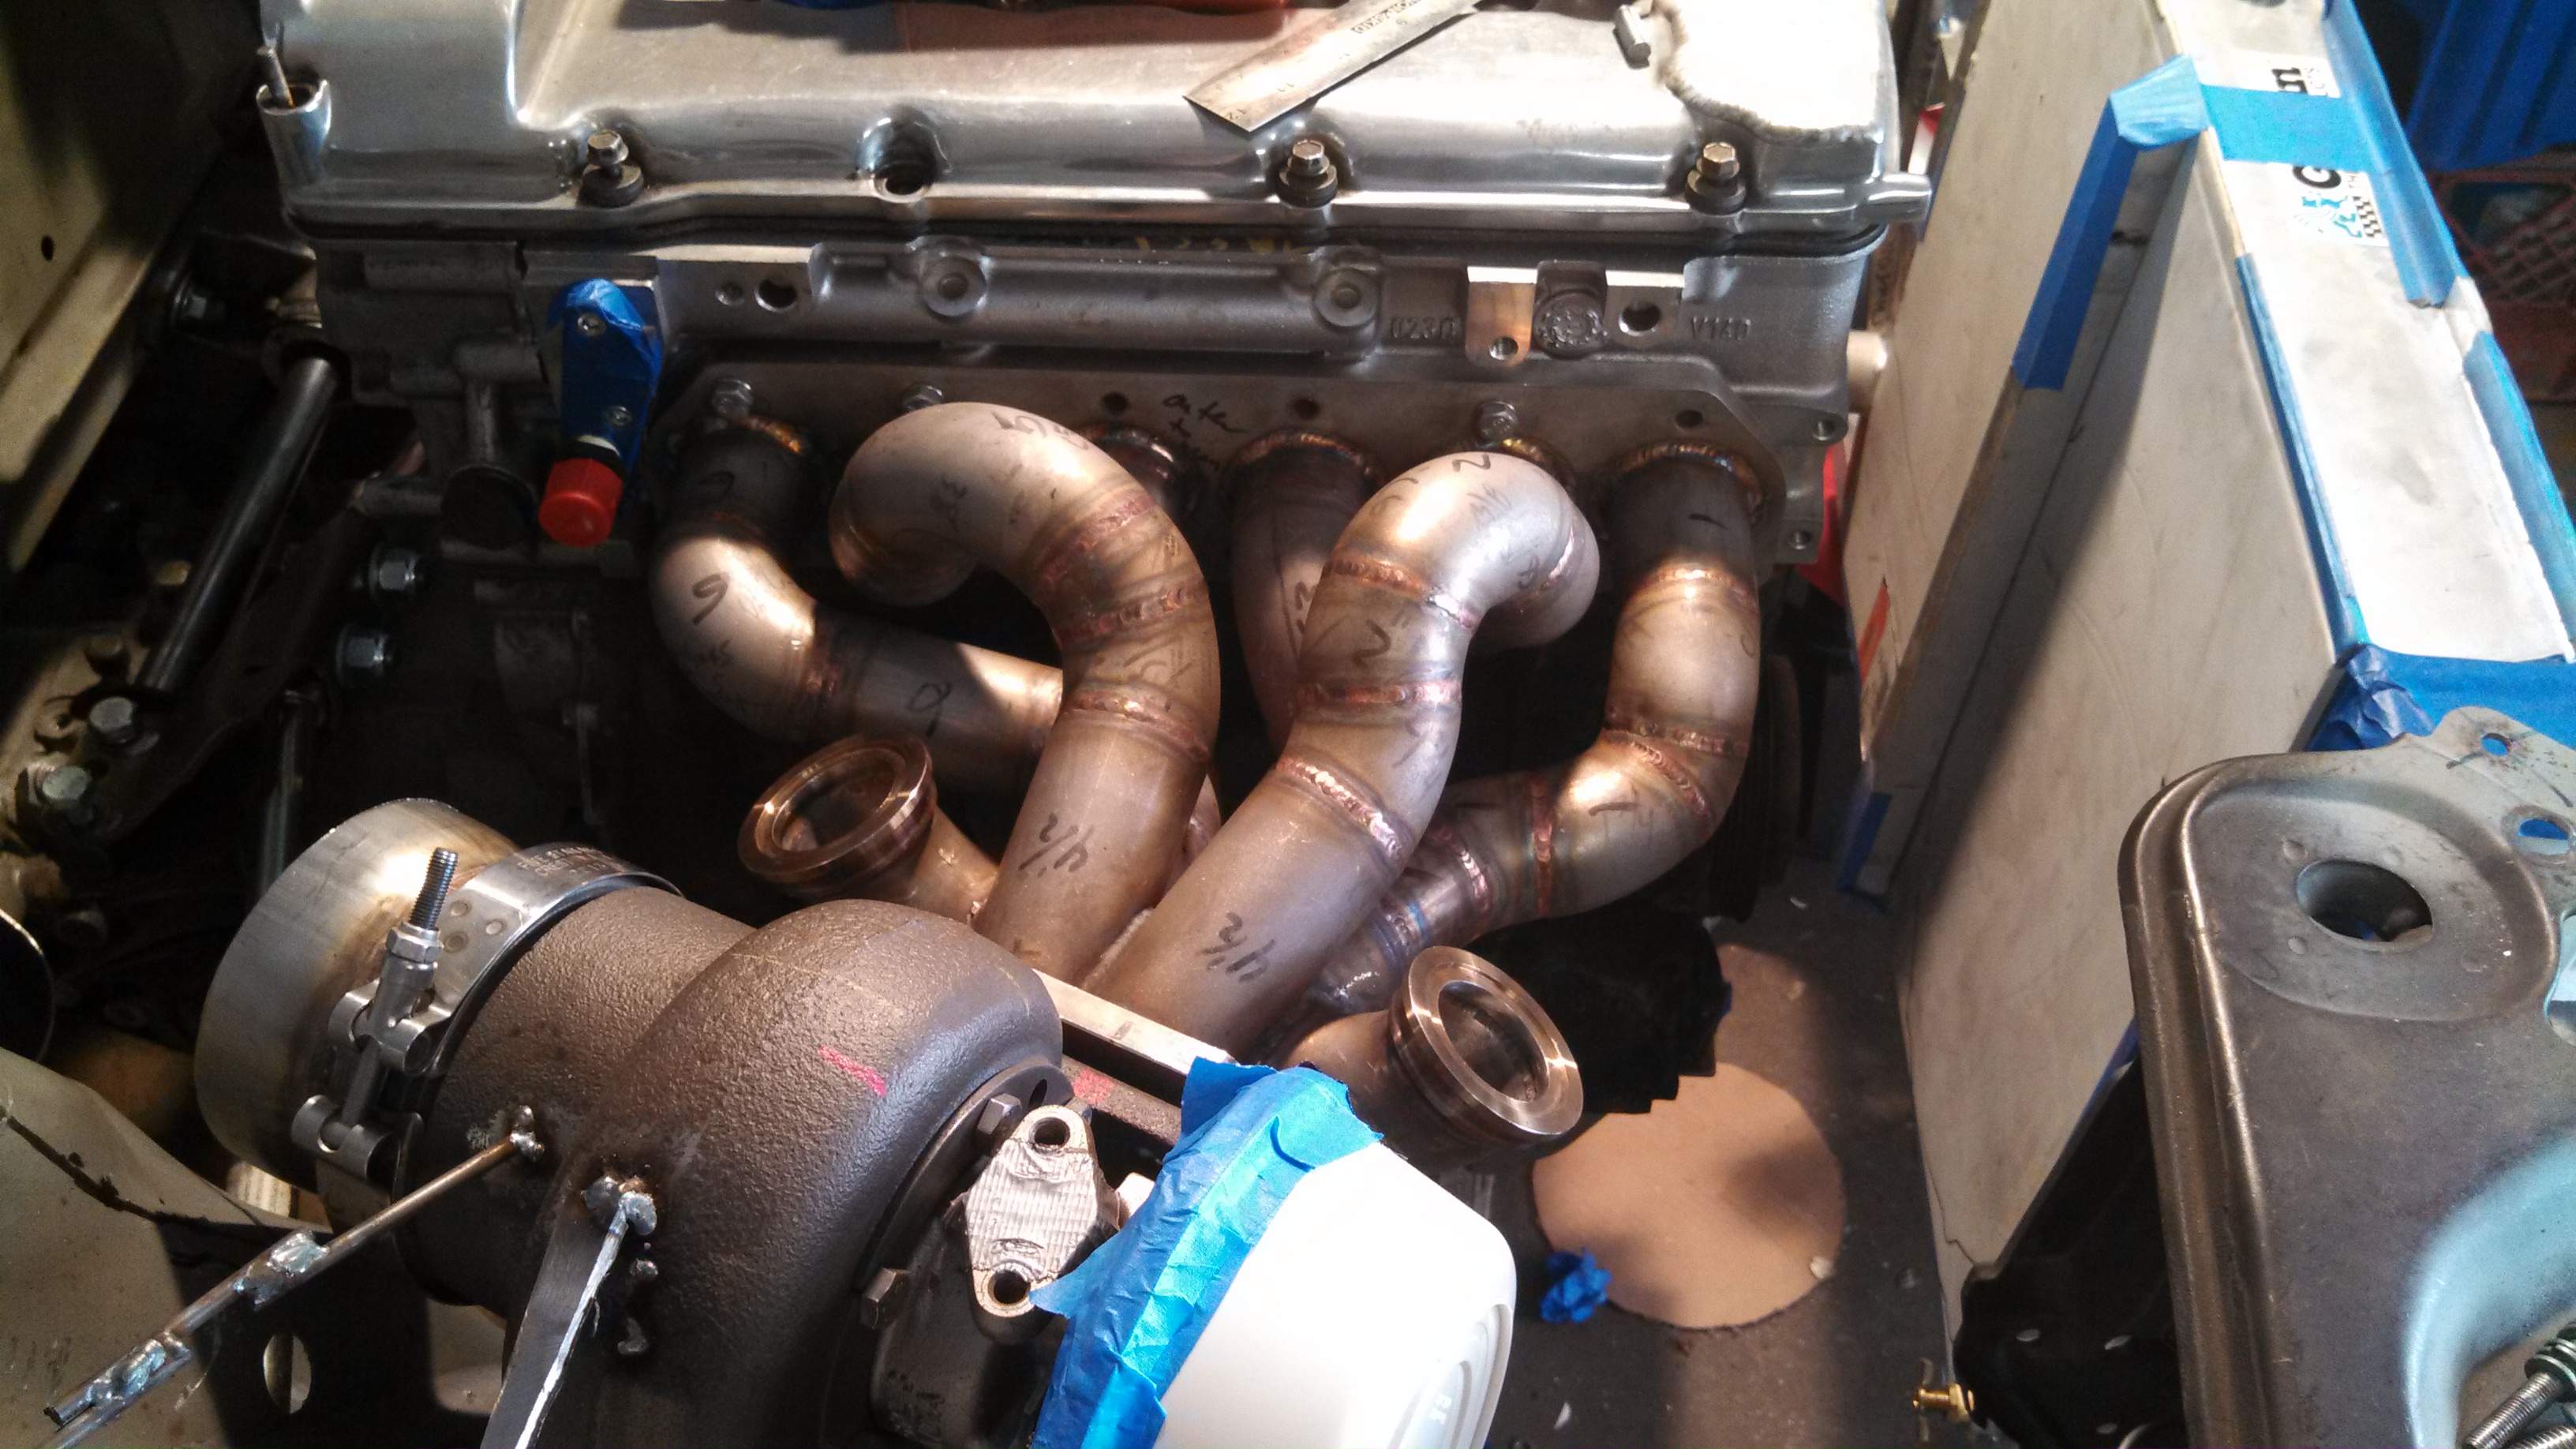
AND ITS DONE!!!!!!!! Well sans EGT bungs anyway, but quite close
- front of exh mani.jpg (1.87 MiB) Viewed 52479 times
He welded one runner above then one below, and back and forth. END RESULT the head flange is flat to well under 0.01”!!!!!!!!
Dead flat.
And here it is re-installed on the head.
- exh manifold reinstalled.jpg (1.55 MiB) Viewed 52479 times
- exh manifold reinstalled2.jpg (1.66 MiB) Viewed 52479 times
And DANG!! Ryan can put down a pretty sweet bead.
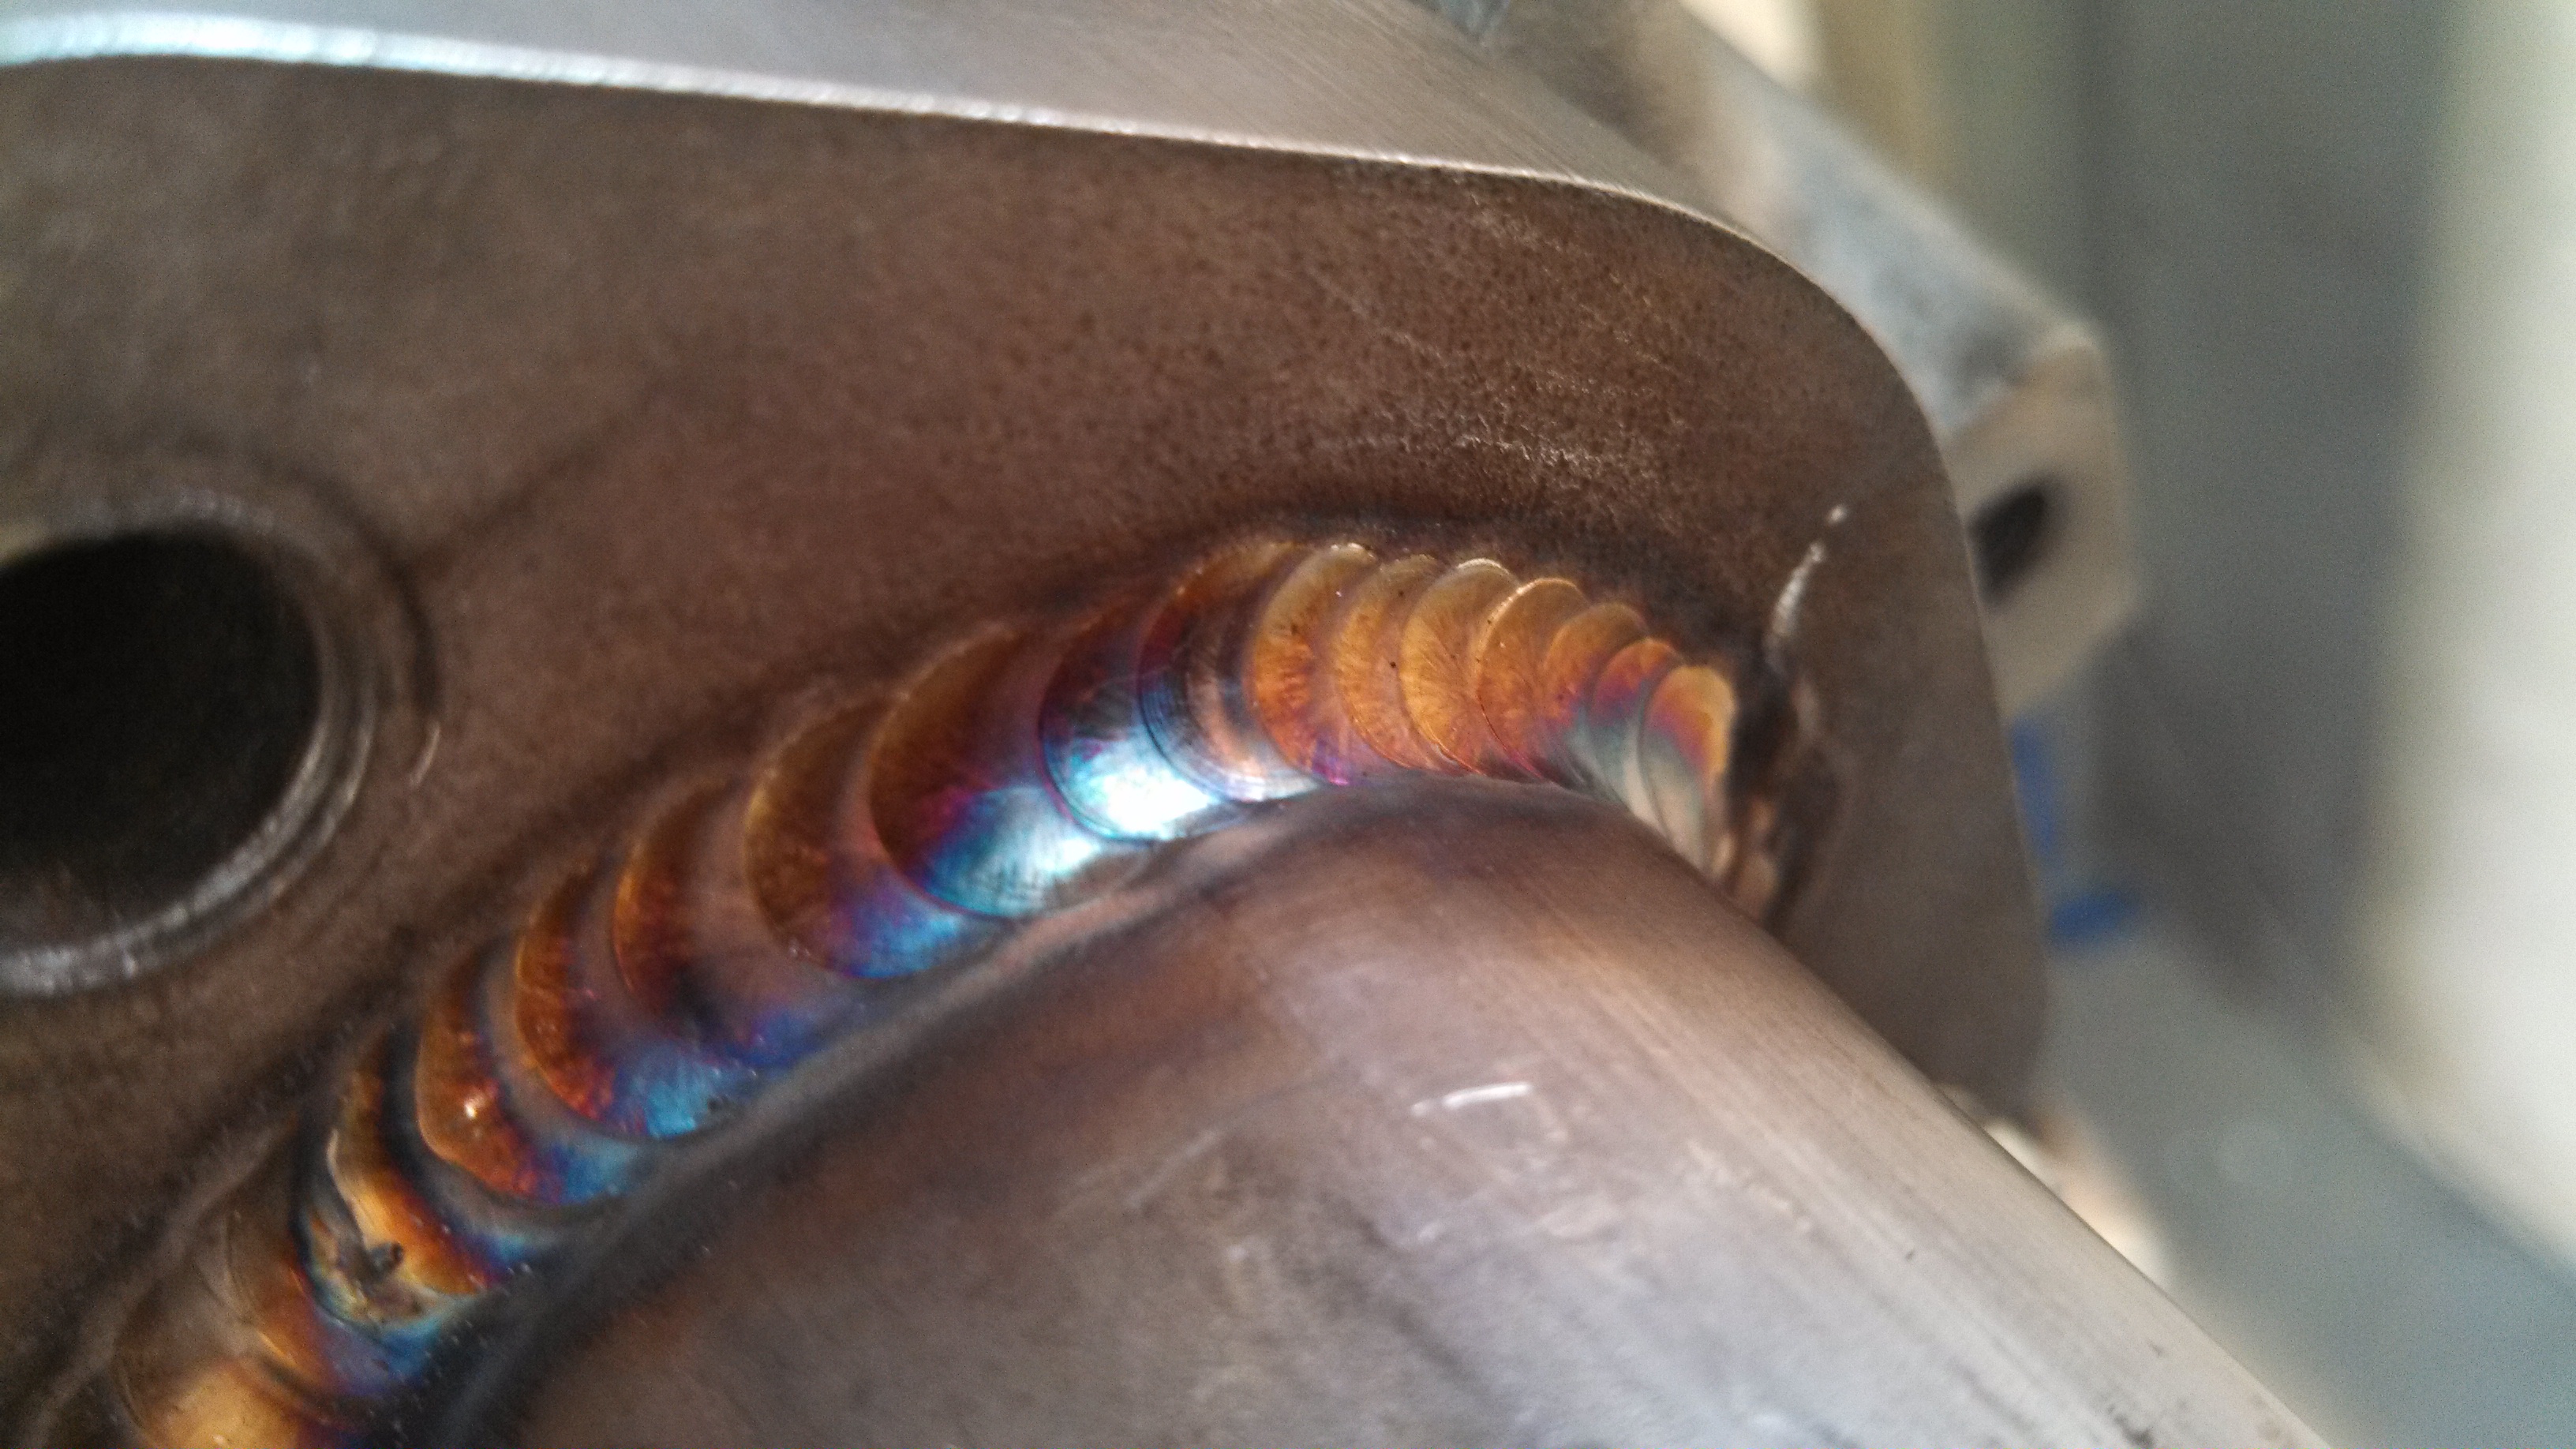
- manifold bead2.jpg (1.75 MiB) Viewed 52479 times
- manifold bead.jpg (1.86 MiB) Viewed 52479 times
Re: 24vVR6T CQ Project: EATSGTR, chassis FAB
Posted: Mon Feb 10, 2014 2:06 pm
by my2000apb
Re: 24vVR6T CQ Project: EATSGTR, chassis FAB
Posted: Thu Feb 13, 2014 1:36 am
by my2000apb
Re: 24vVR6T CQ Project: EATSGTR, chassis FAB
Posted: Thu Feb 13, 2014 1:38 am
by my2000apb
and one of the wastegate outlet
- wg outlets.jpg (1.37 MiB) Viewed 52404 times
Re: 24vVR6T CQ Project: EATSGTR, chassis FAB
Posted: Thu Mar 06, 2014 1:19 pm
by lorge1989
Great update.
The manifold looks really nice, especially the profile in the collector after it was cleaned up.
Quick question, what type of thermostat is that and where did you get it? I assume this will replace the stocker.
Re: 24vVR6T CQ Project: EATSGTR, chassis FAB
Posted: Thu Mar 06, 2014 1:23 pm
by my2000apb
lorge1989 wrote:Great update.
The manifold looks really nice, especially the profile in the collector after it was cleaned up.
Quick question, what type of thermostat is that and where did you get it? I assume this will replace the stocker.
thanks, tons of hours into the manifold!
the thermostat is a C&R racing unit, they are popular with the oval/circle track guys as well as a lot of cup cars.
I found it on ebay actually lol
there is NOOOO room for the stock assembly with the motor pushed down and back. its going to be tight with the steering arms, but we'll make it work
Re: 24vVR6T CQ Project: EATSGTR, chassis FAB
Posted: Thu Mar 06, 2014 6:04 pm
by Mcstiff
So I have put 0 thought into this but, if you ran a electric water pump controlled by thermostat, would you need an actual thermostat (of course you'd have some thermal circulation with the pump off).
Re: 24vVR6T CQ Project: EATSGTR, chassis FAB
Posted: Fri Apr 04, 2014 3:59 pm
by my2000apb
Mcstiff wrote:So I have put 0 thought into this but, if you ran a electric water pump controlled by thermostat, would you need an actual thermostat (of course you'd have some thermal circulation with the pump off).
I spent a TON of time talking to the tech guys at Meziere, and it was their opinion that I should stay with a mechanical pump. basically citing that the car will be used for long road course sessions vs drag/show.cruise etc. we did talk about adding a "booster"pump to help cycle coolant in pits/waiting etc, which I will most likely do, as I can also purpose it as an after run pump as well
back to work on the old beast, update to come later
fancy machined parts
cooling system stuff
airbox and airbox feed
Re: 24vVR6T CQ Project: EATSGTR, chassis FAB
Posted: Fri Apr 04, 2014 6:12 pm
by PRY4SNO
Finally got caught up on your progress, one update surpasses the next.
If you're willing to sell subframes, I may be willing to pay (well rear for sure lol)!
Re: 24vVR6T CQ Project: EATSGTR, chassis FAB
Posted: Tue May 06, 2014 1:19 am
by my2000apb
UPDATE!!!
Ok lets get caught up! Theres no way the stock thermostat housing / coolant sensor housing is ever going to fit with the motor pushed back.
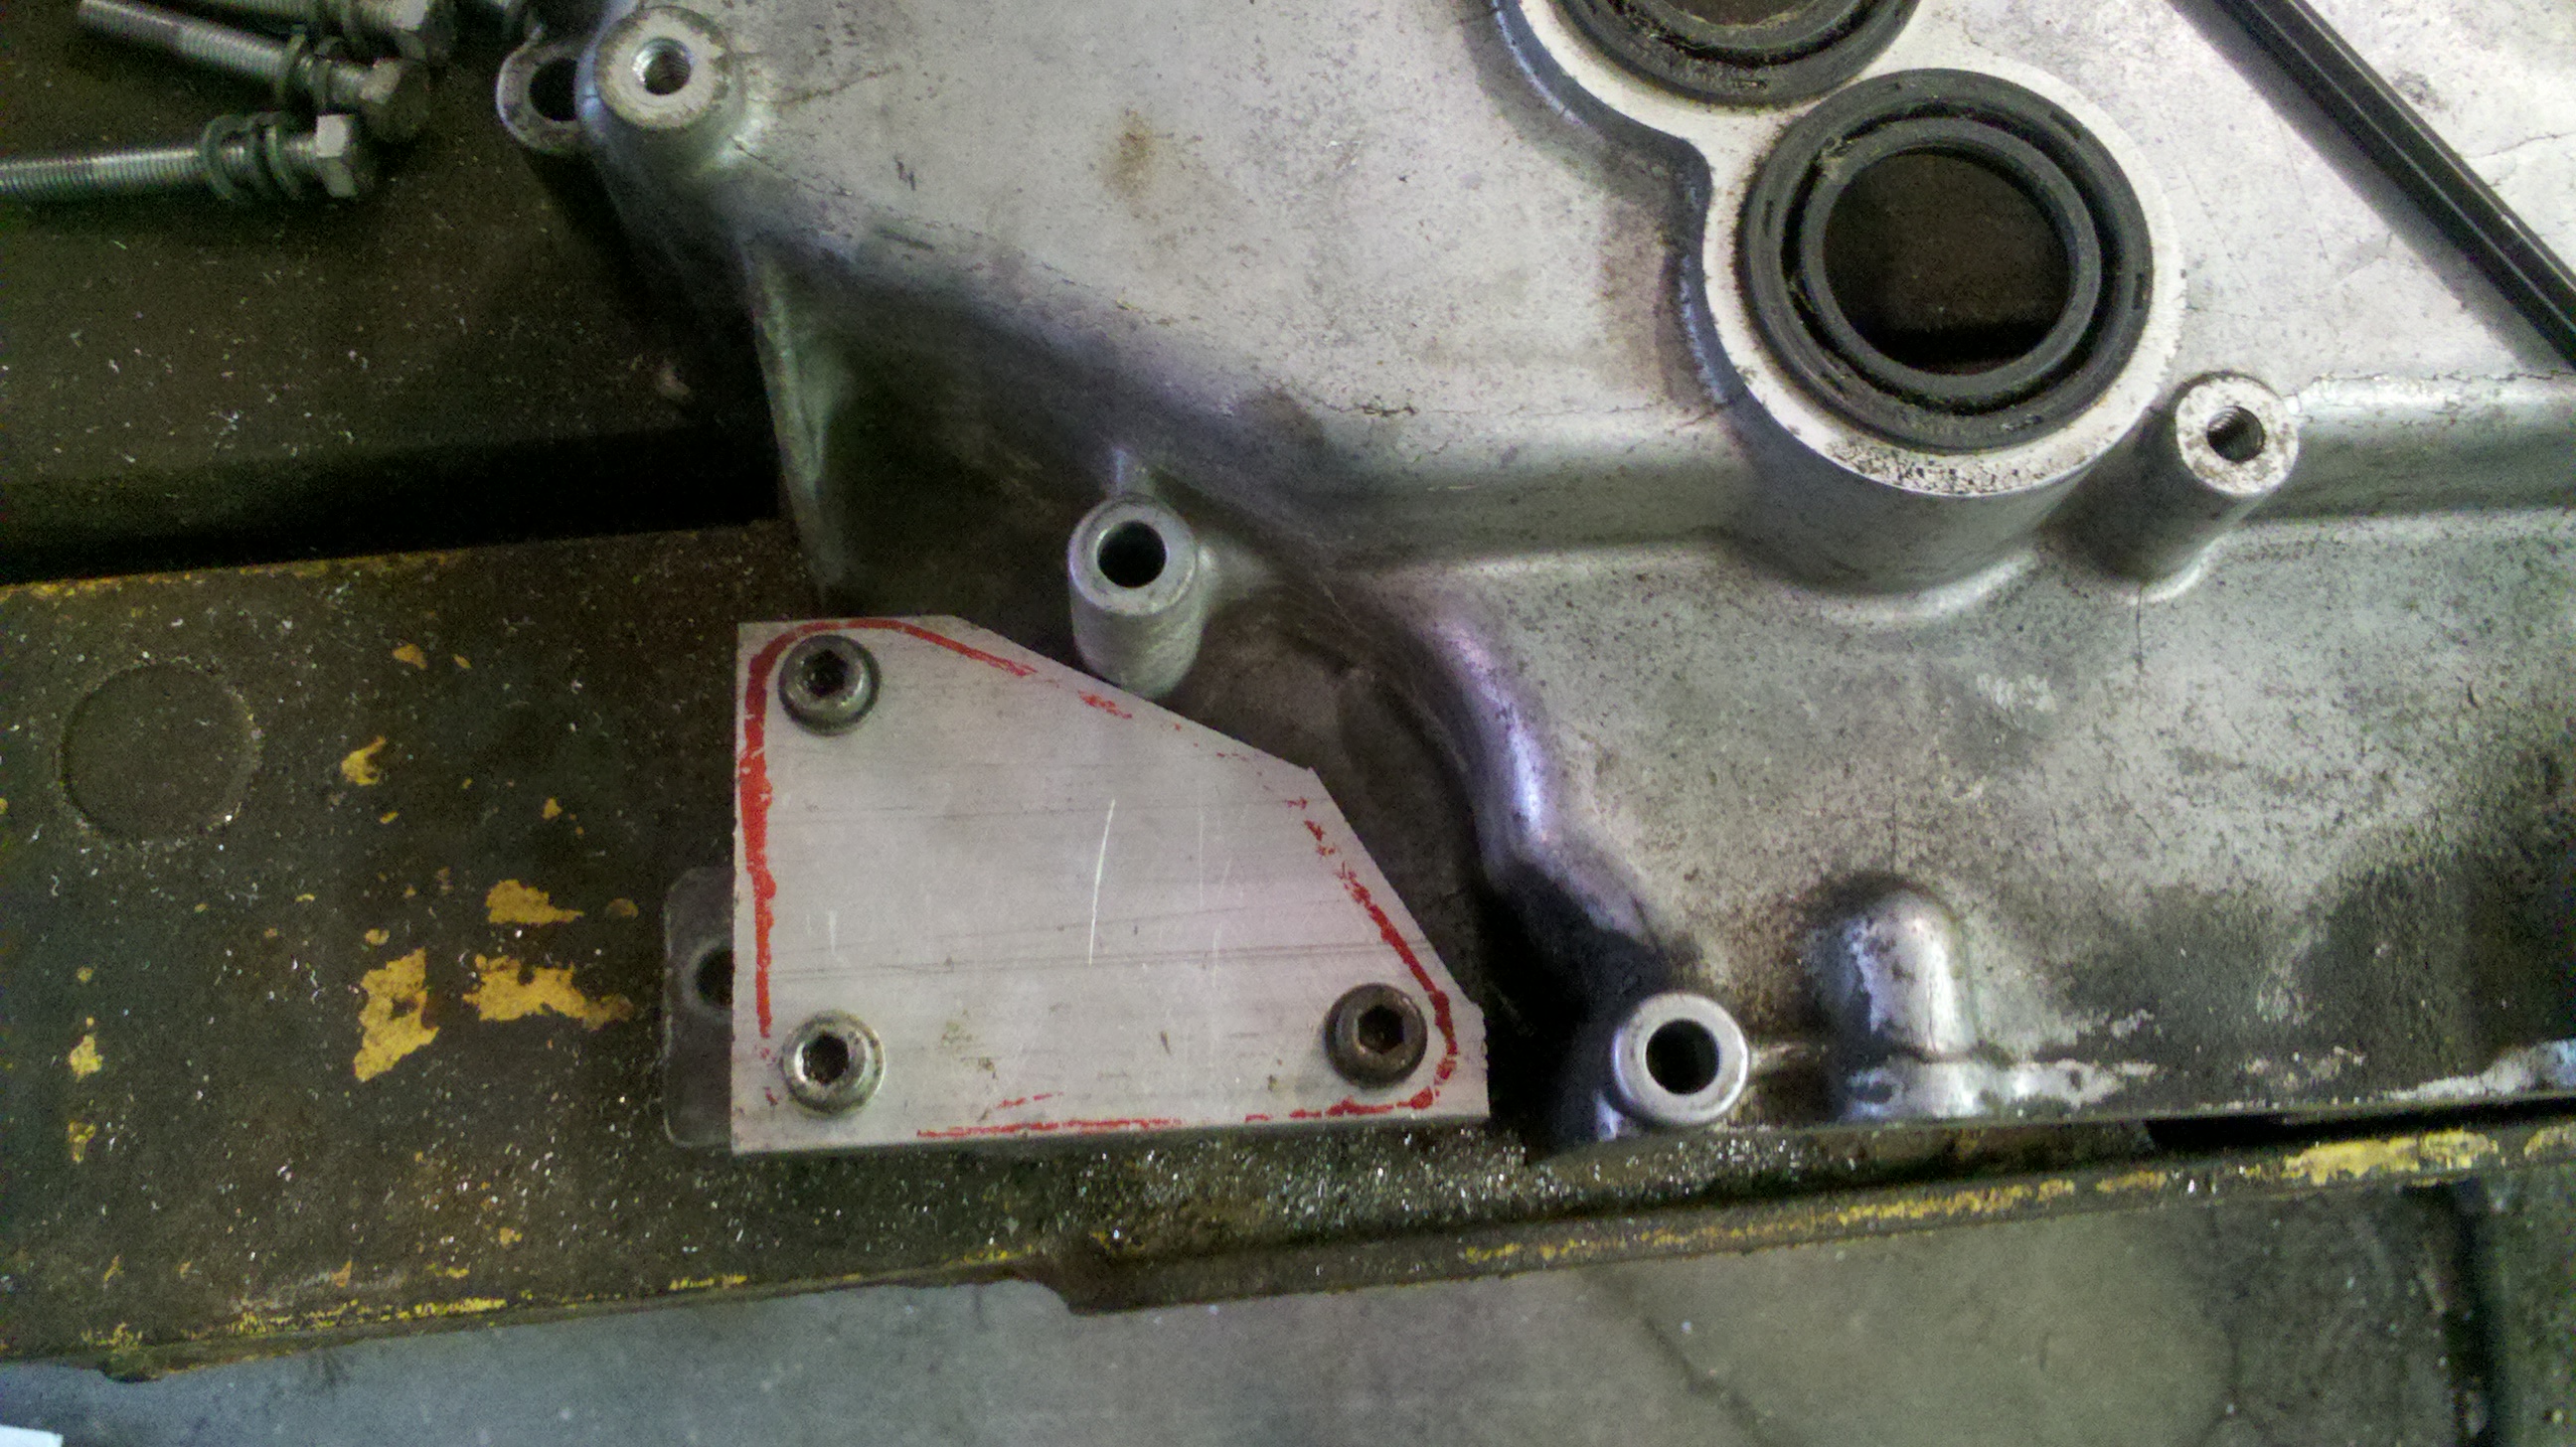
- bdf coolant outlet at cylinder head.jpg (1.3 MiB) Viewed 51988 times

- coolant bung steering rack interference.jpg (1.29 MiB) Viewed 51988 times
I had this coolant “crack” pipe receiver made up to fit to my fabricated coolant outlet on the back of the head.
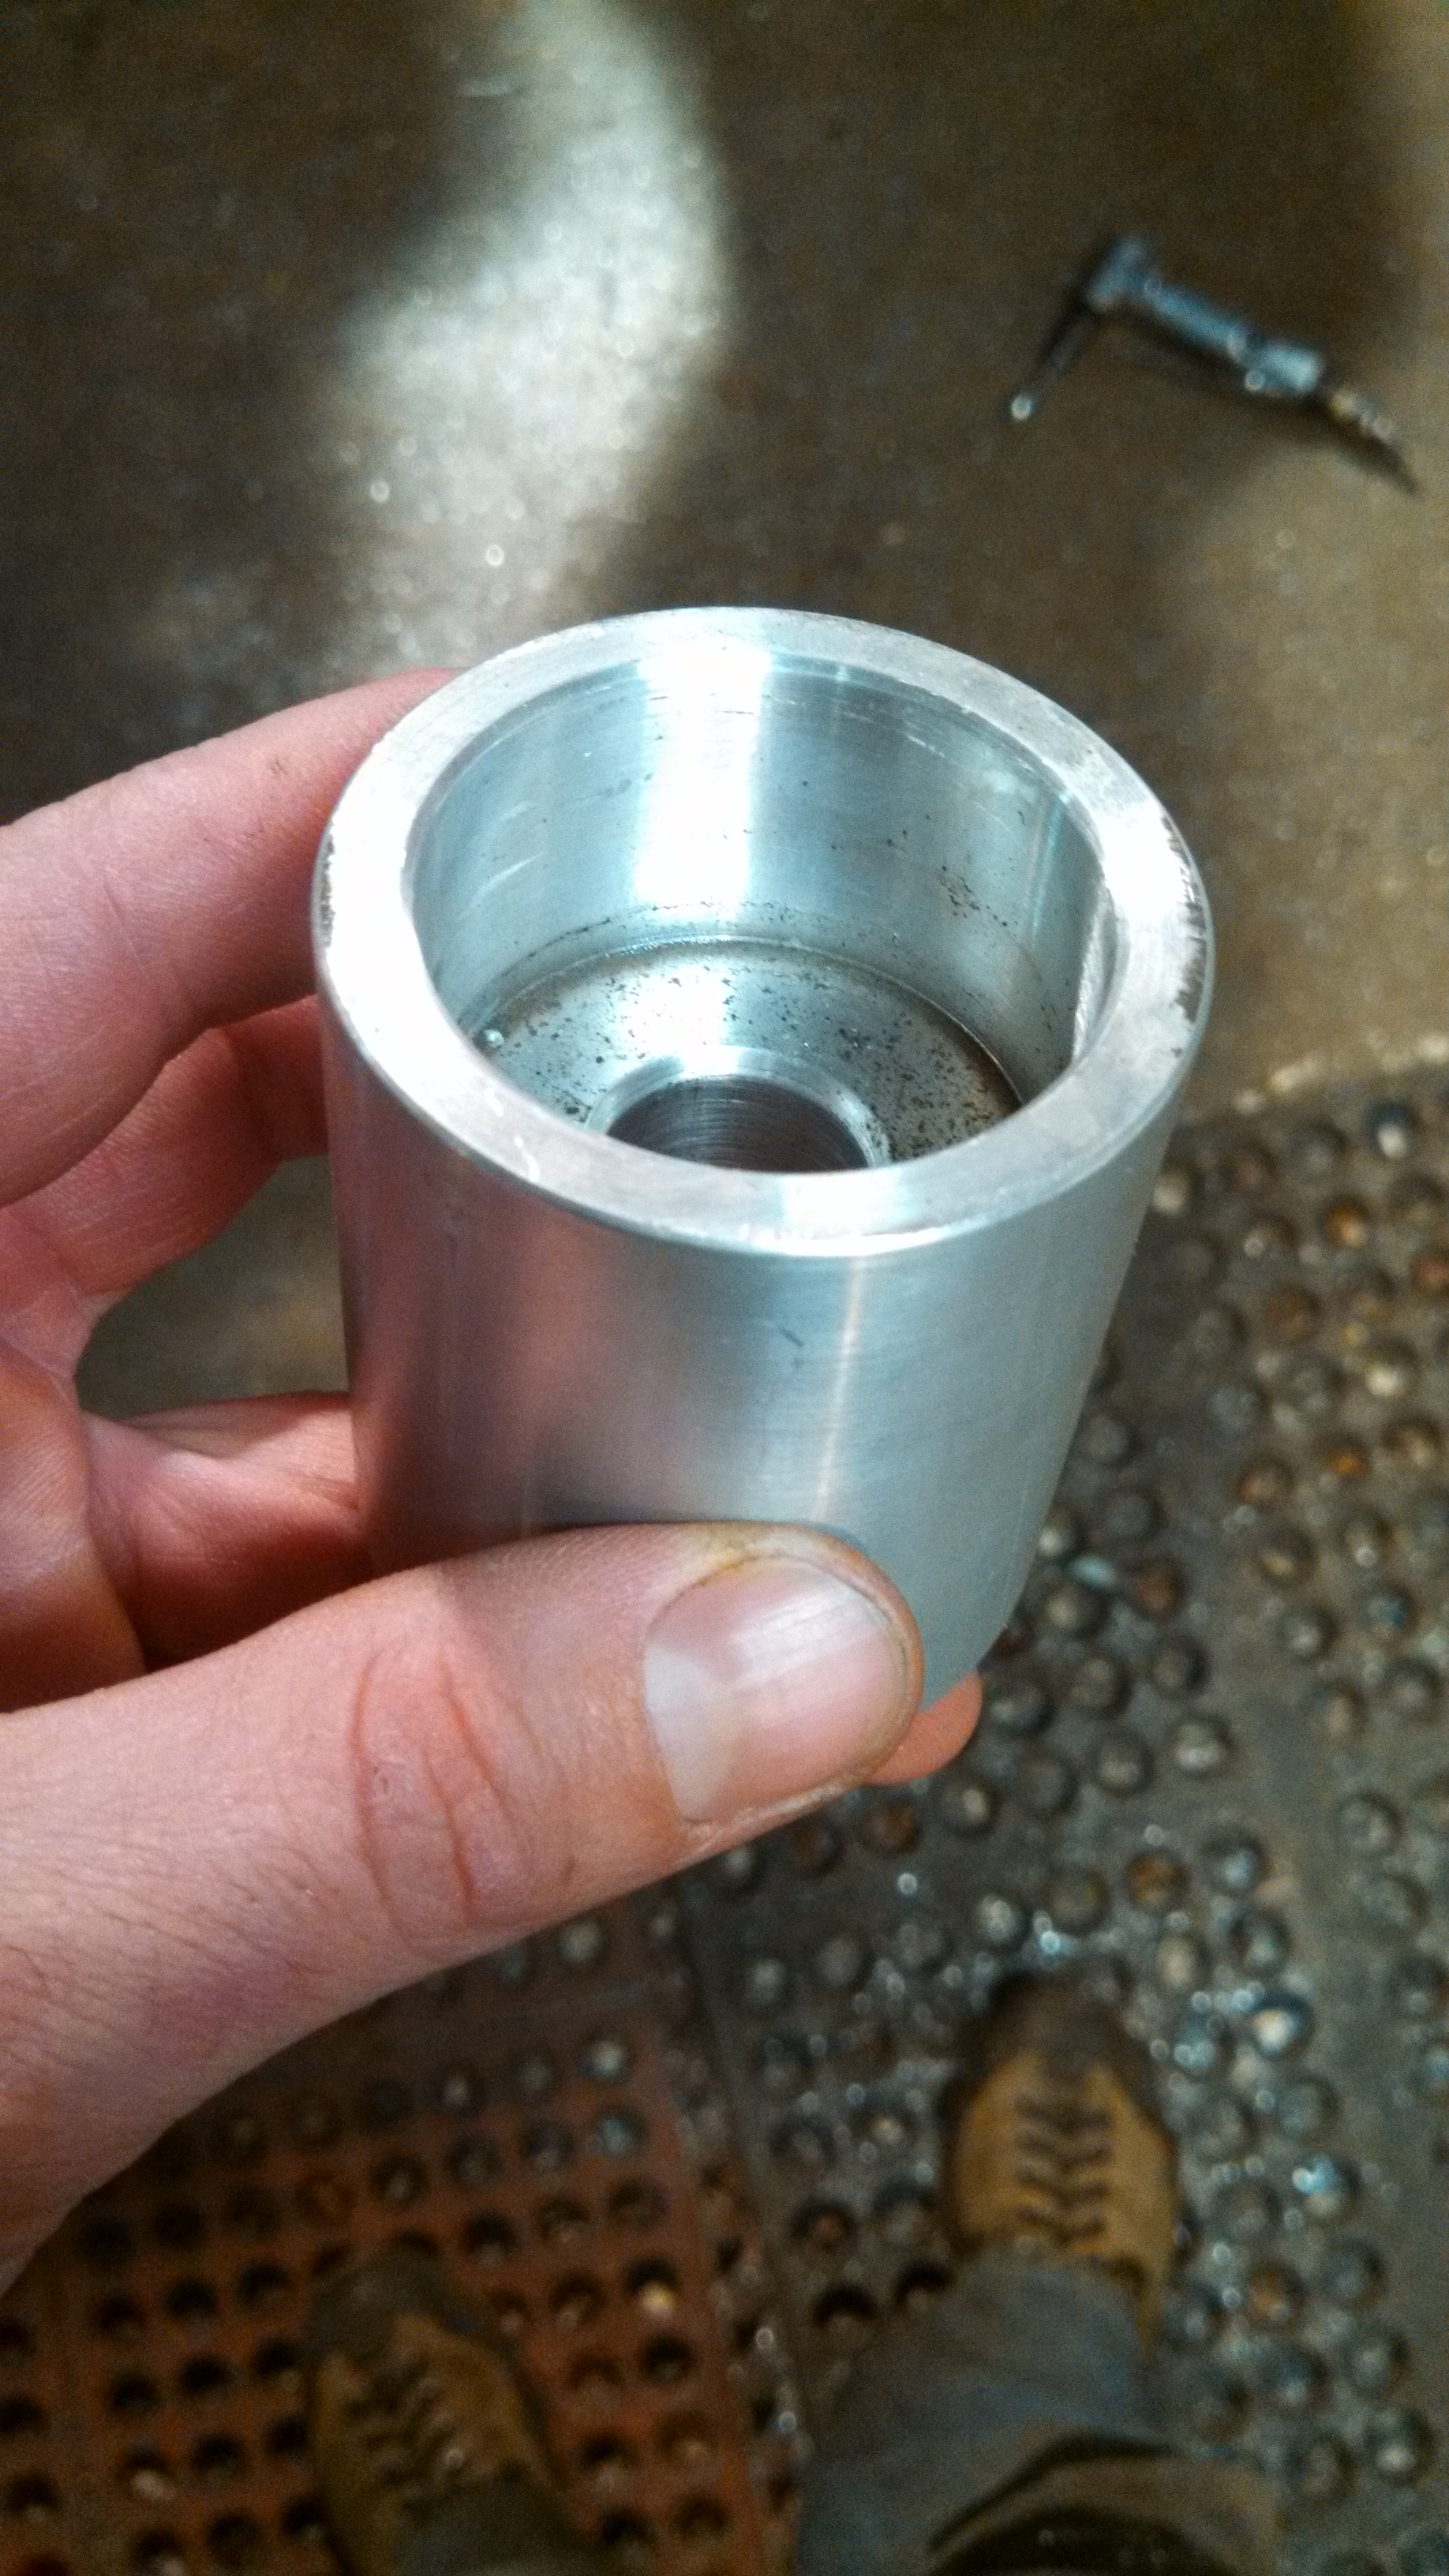
- coolant pipe reciever.jpg (1.97 MiB) Viewed 51988 times
Re: 24vVR6T CQ Project: EATSGTR, chassis FAB
Posted: Tue May 06, 2014 1:20 am
by my2000apb
Re: 24vVR6T CQ Project: EATSGTR, chassis FAB
Posted: Tue May 06, 2014 1:37 am
by my2000apb
Re: 24vVR6T CQ Project: EATSGTR, chassis FAB
Posted: Tue May 06, 2014 1:52 am
by my2000apb
Re: 24vVR6T CQ Project: EATSGTR, chassis FAB
Posted: Tue May 06, 2014 1:54 am
by my2000apb
The top is mounted by 4, m6 bolts.
The airbox is completely mounted on jegs silicone snapper grommets.

- airbox feed flange detail.jpg (1.36 MiB) Viewed 51988 times
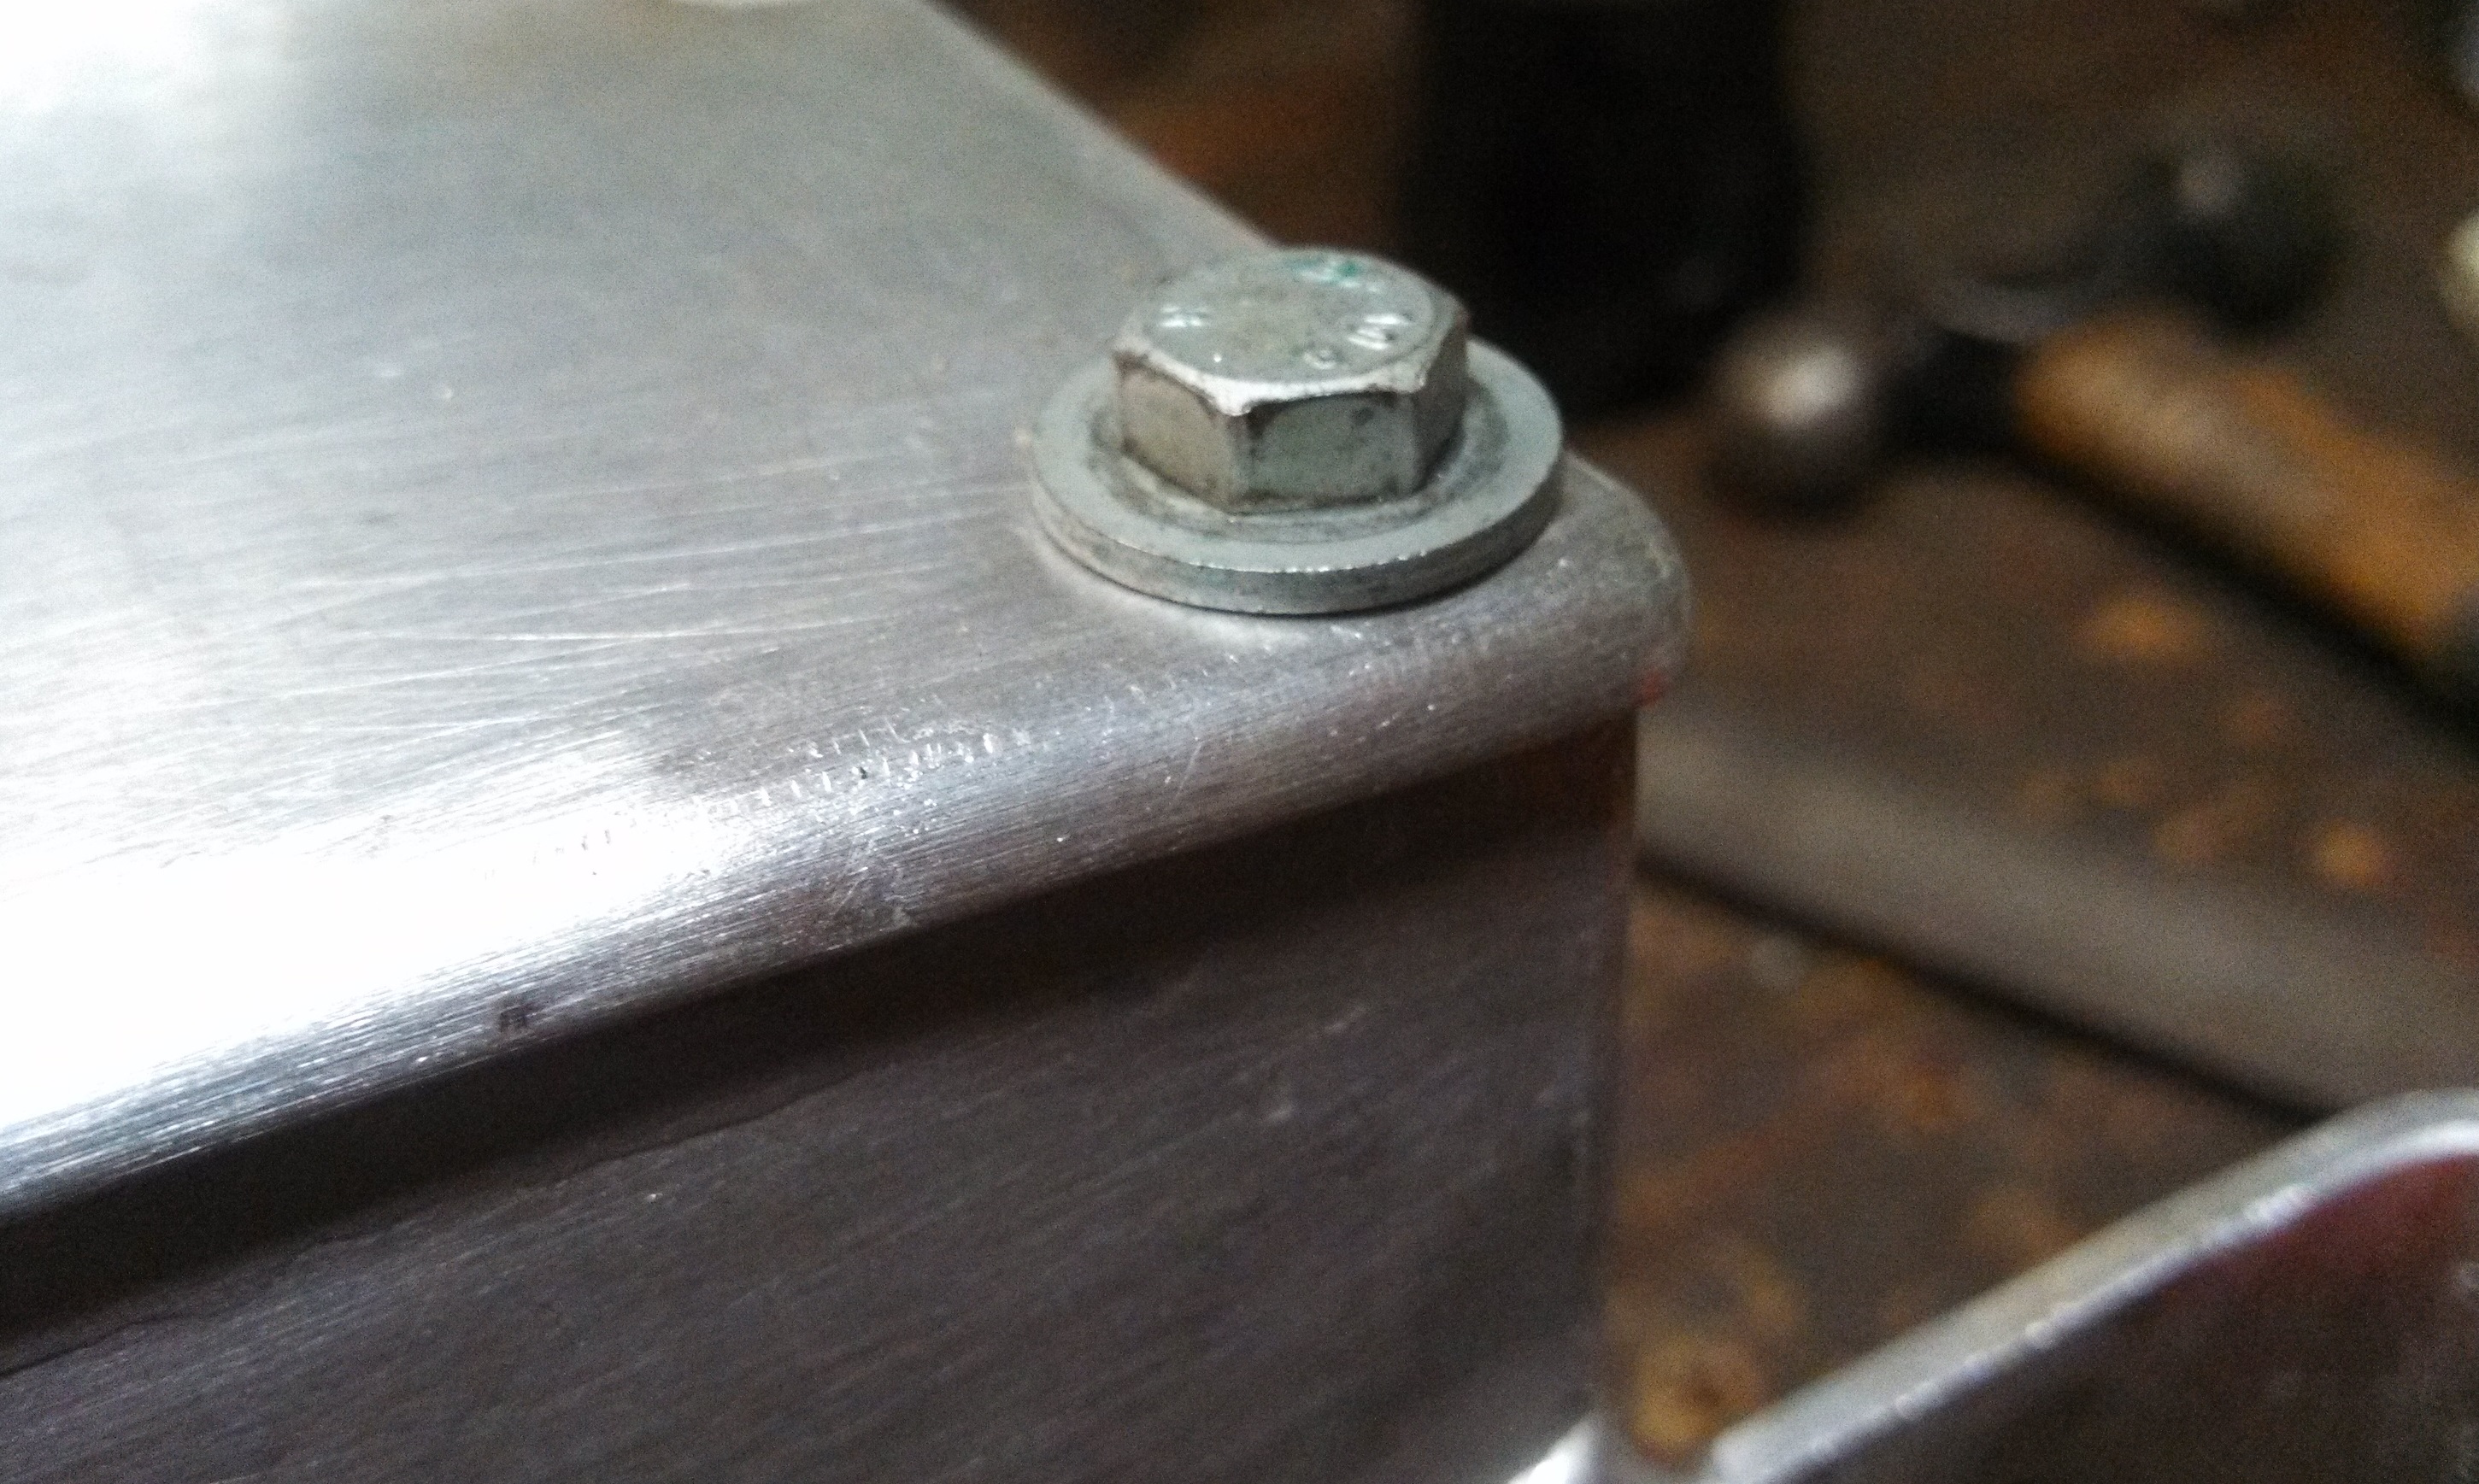
- airbox feed flange detail2.jpg (1.54 MiB) Viewed 51988 times
Re: 24vVR6T CQ Project: EATSGTR, chassis FAB
Posted: Tue May 06, 2014 2:01 am
by my2000apb
Re: 24vVR6T CQ Project: EATSGTR, chassis FAB
Posted: Tue May 06, 2014 2:09 am
by my2000apb
UPDATE!!!
In order to fit the airbox feed right where I wanted, I needed to make a new passenger side headlight bucket. Its fabricated out of 16 gauge mild steel. With some dimple dies and a lot of hammer work. It fits the back of the headlight with ½ - ¾” clearance, I’ll probably have to pop the headlight out to swap the high beam bulb, but that’s not big deal.
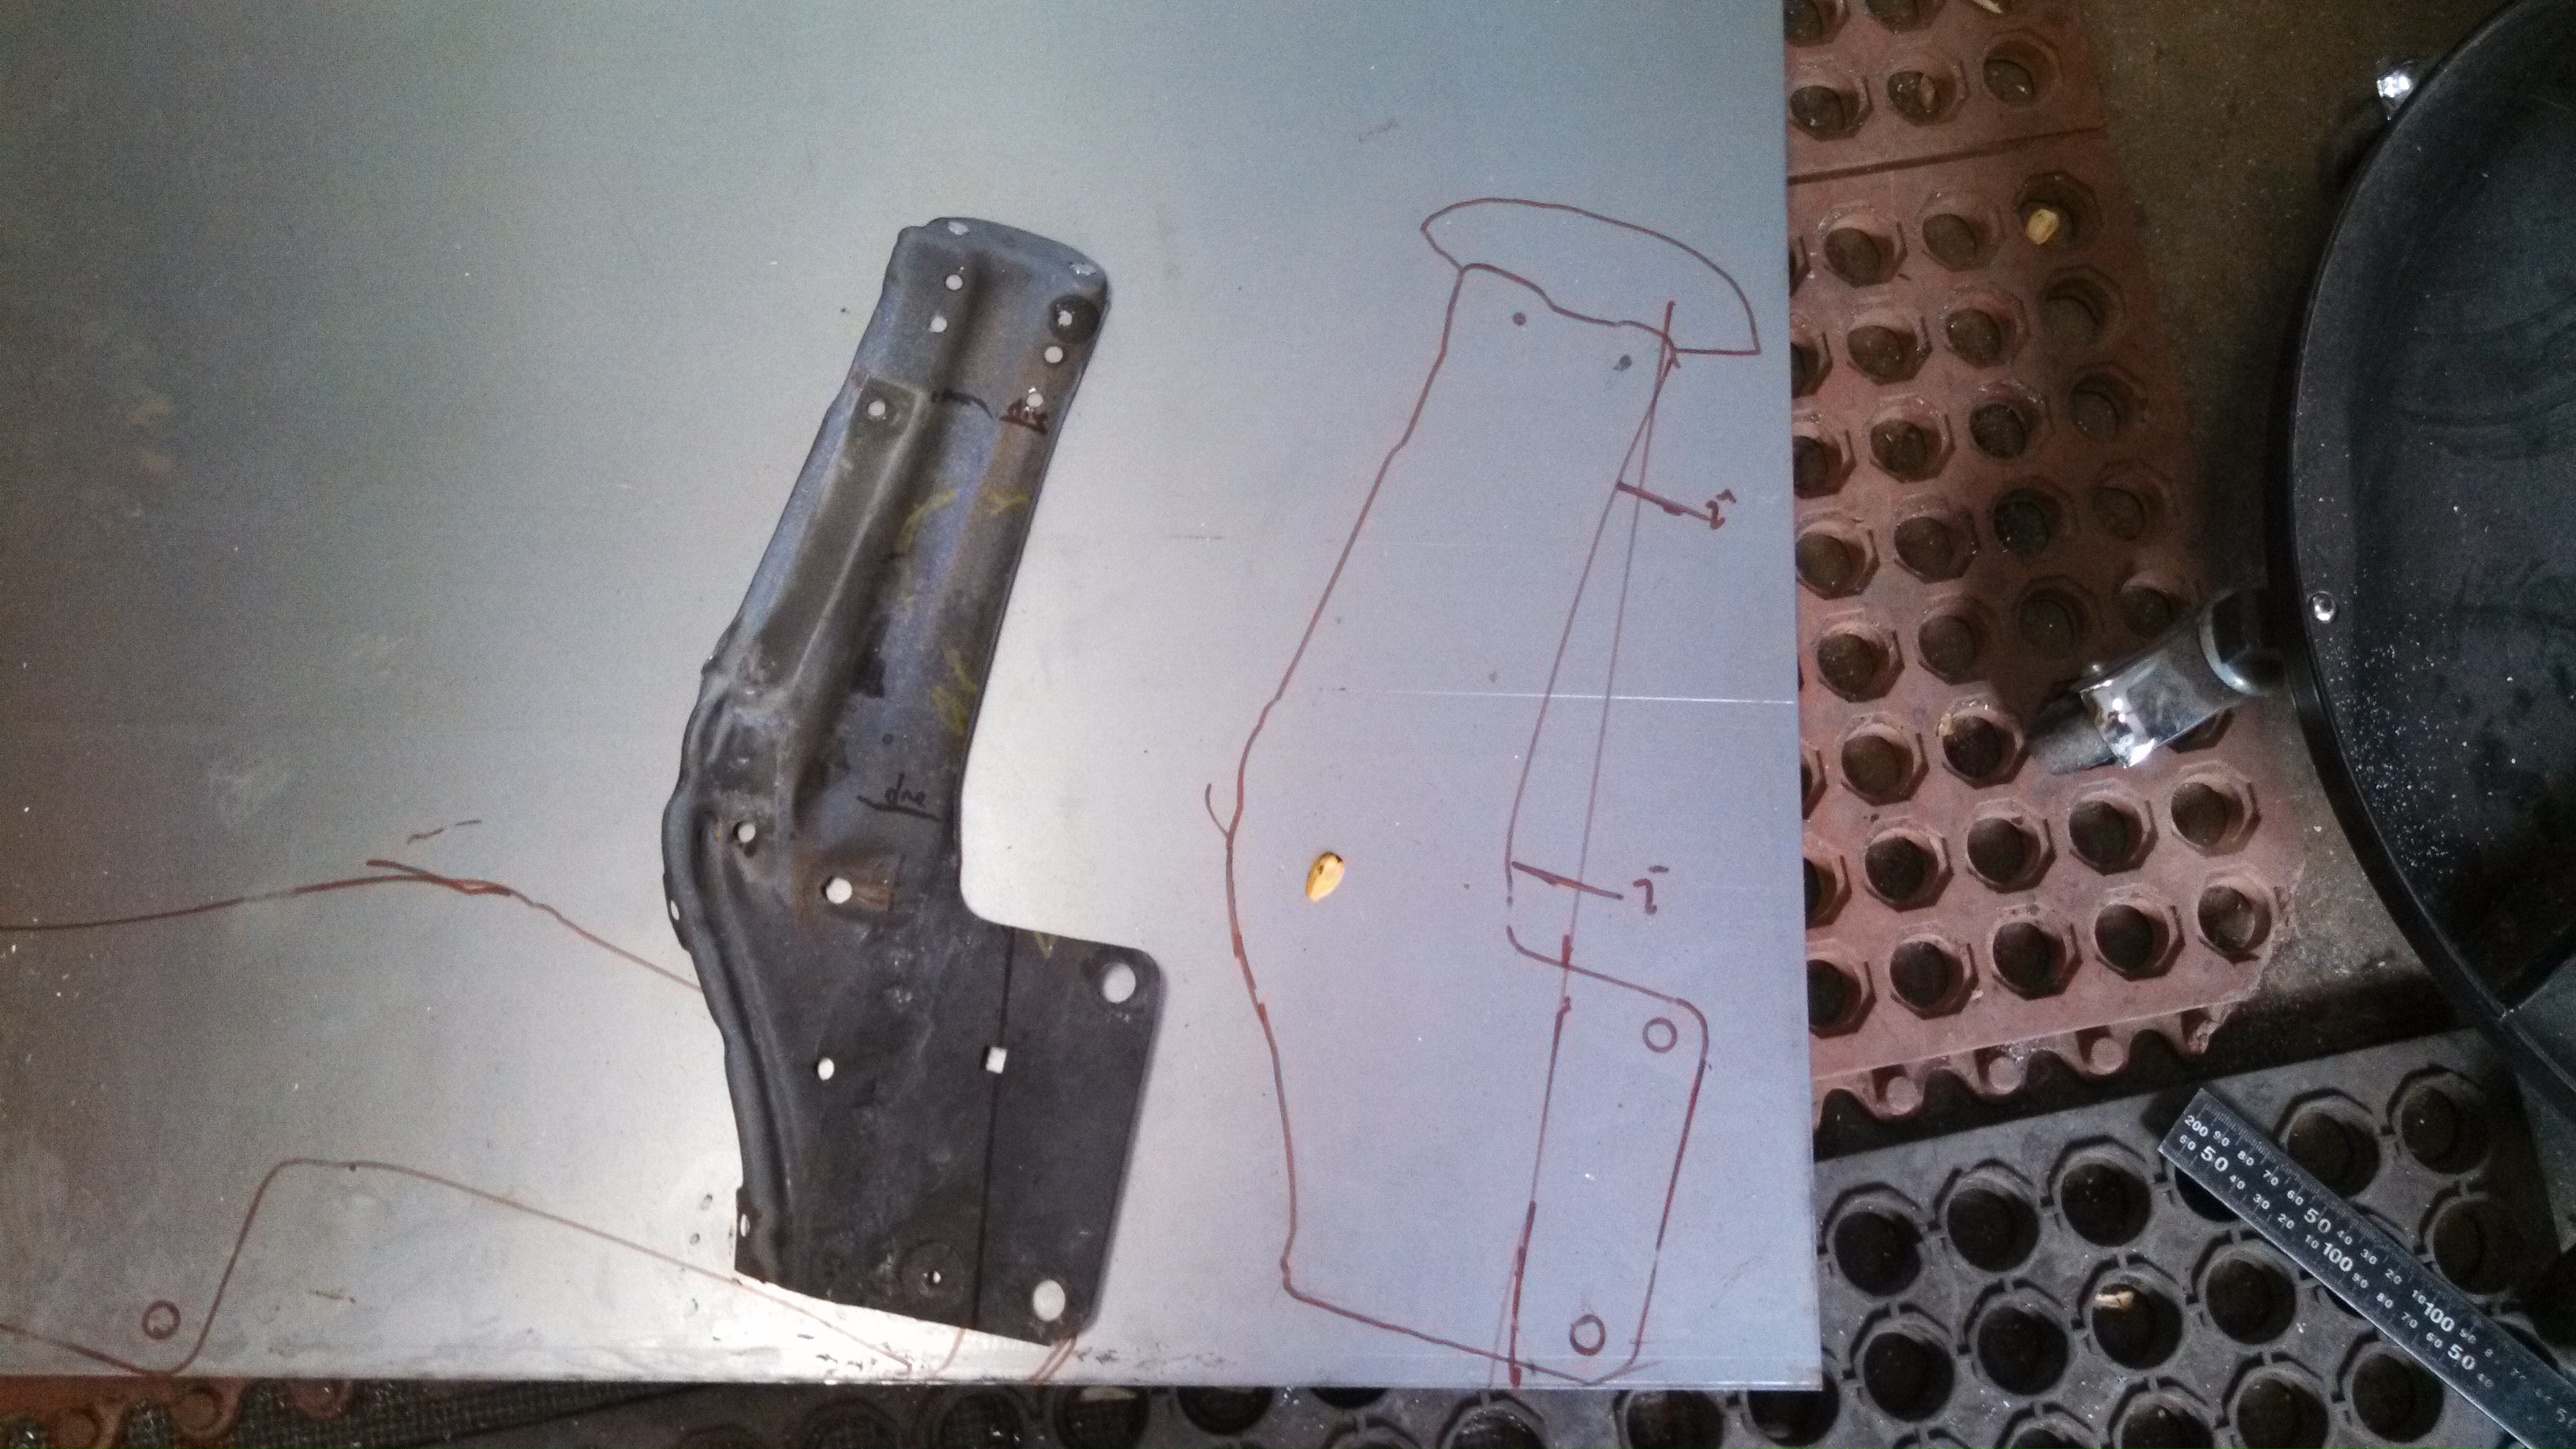
- headlight bucket template.jpg (1.92 MiB) Viewed 51988 times
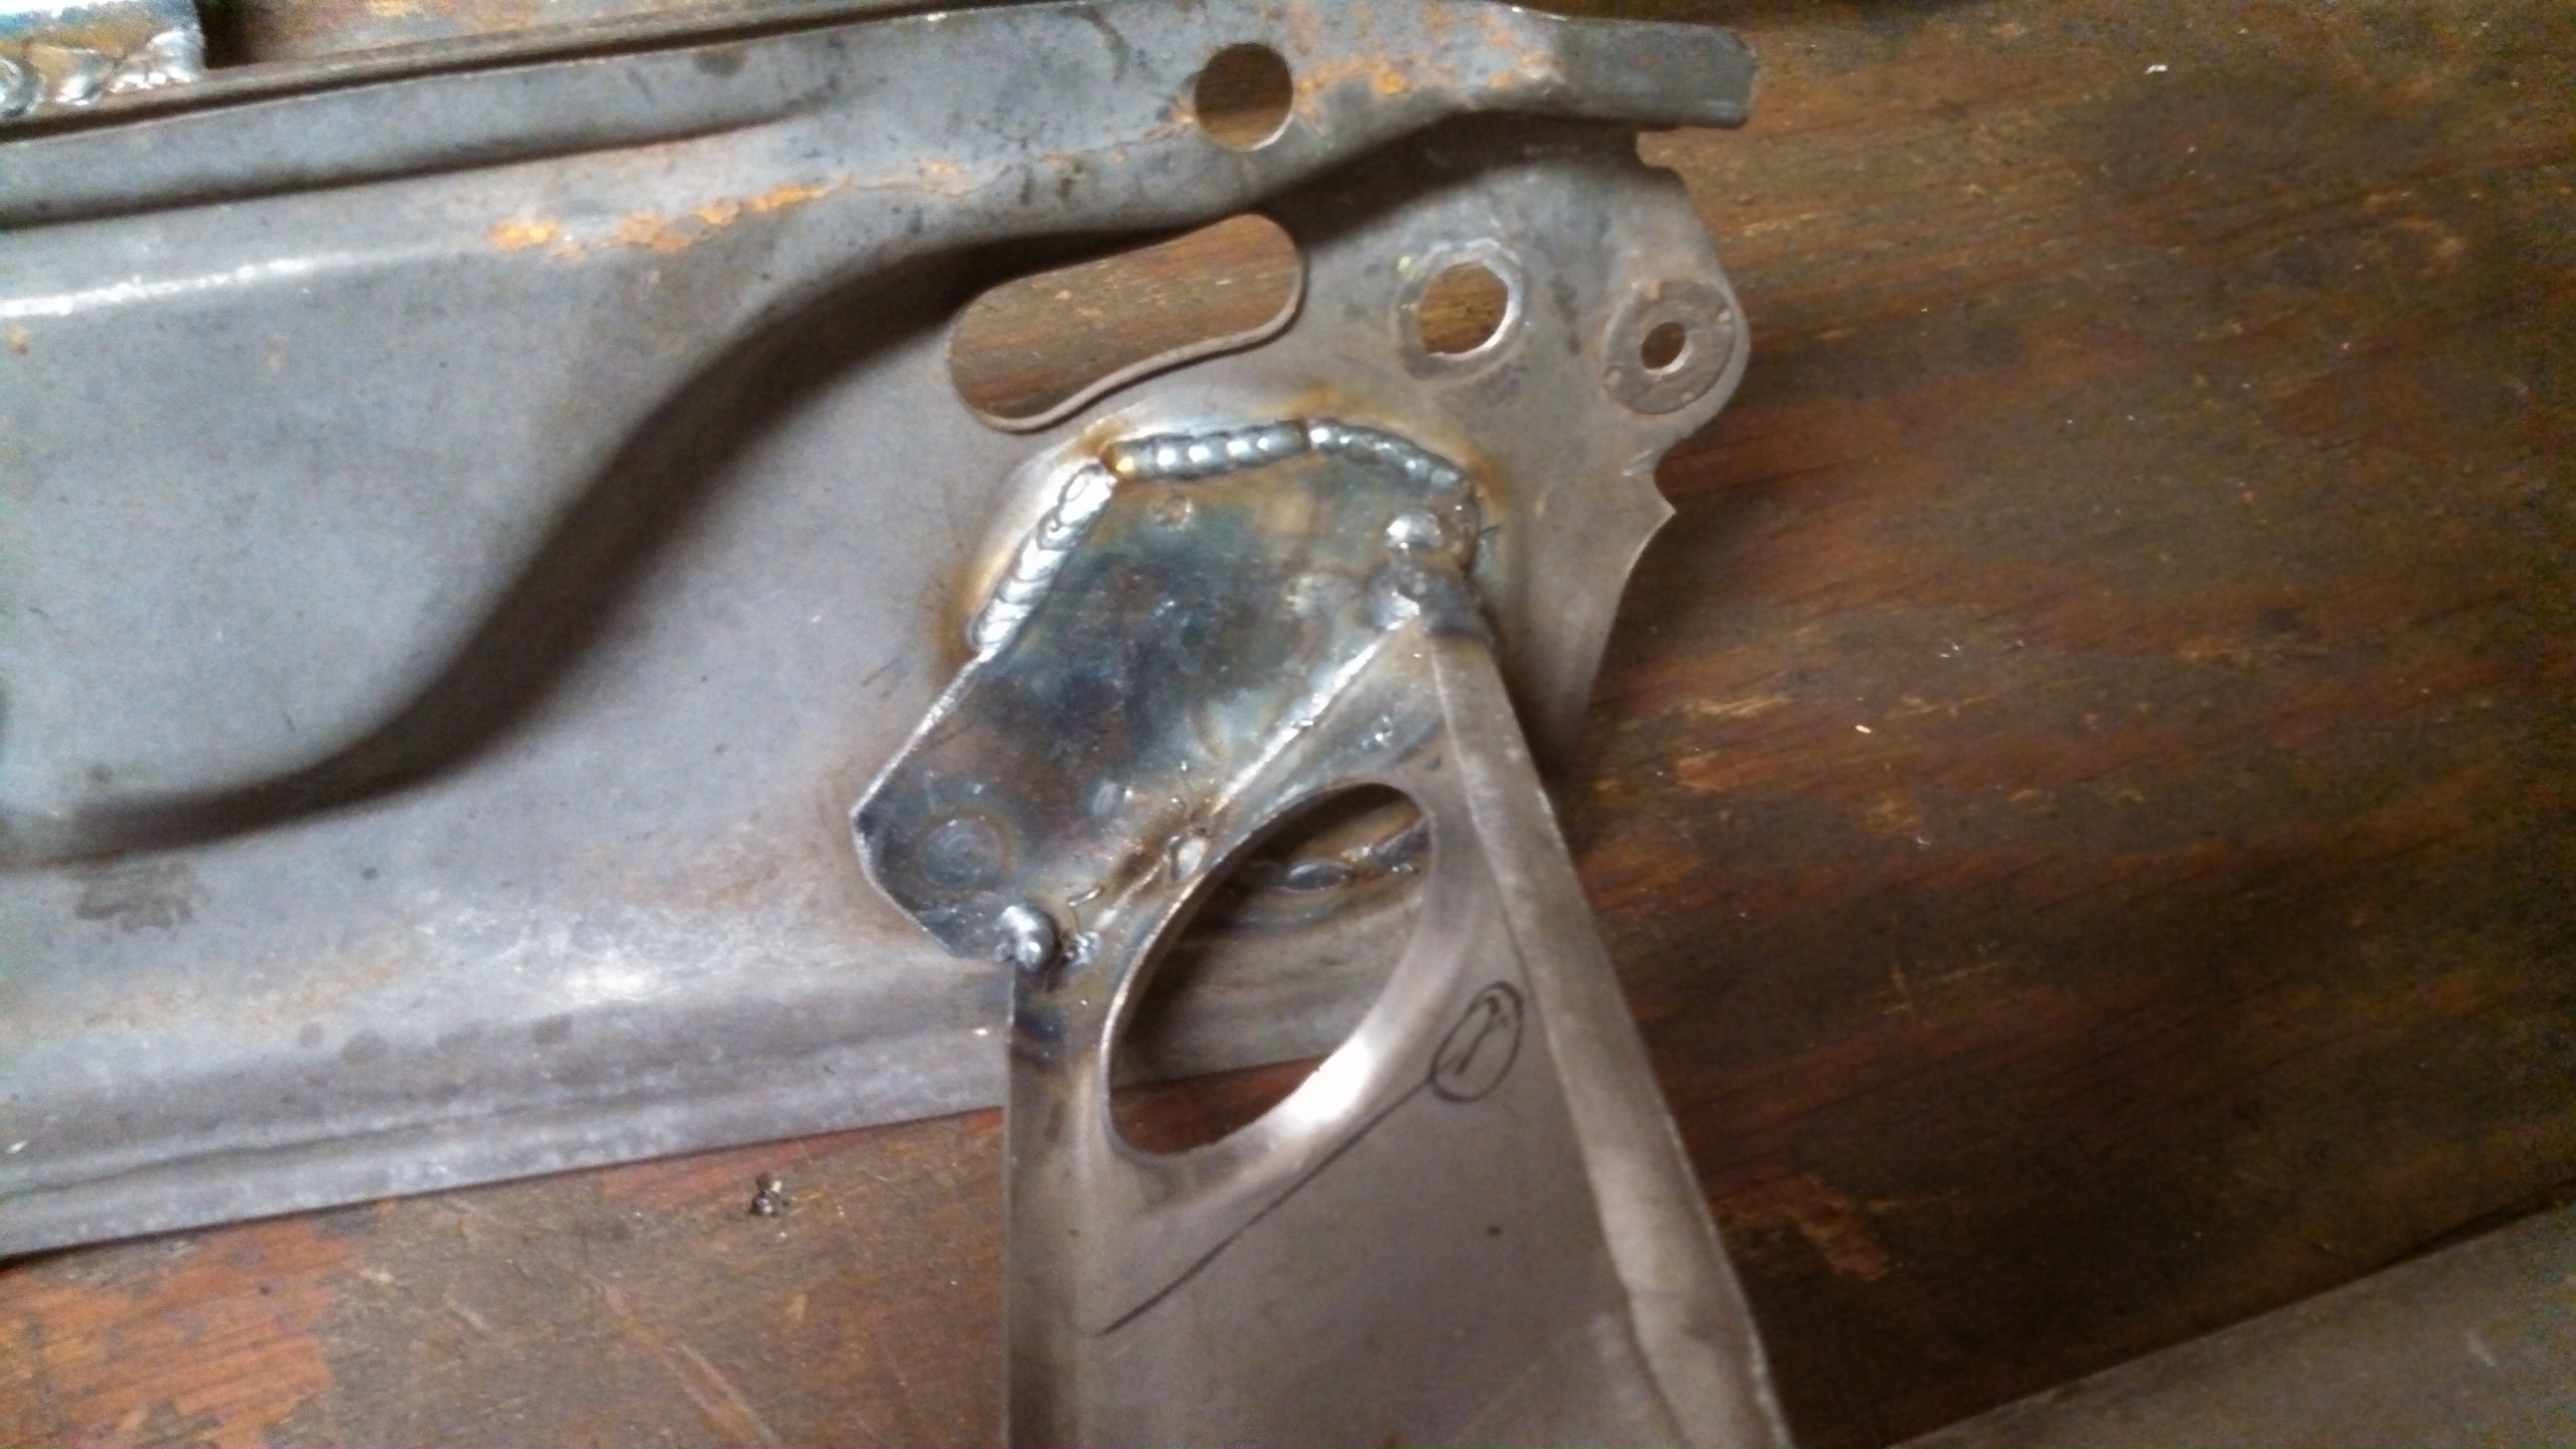
- headlight bucket underneath.jpg (1.31 MiB) Viewed 51988 times
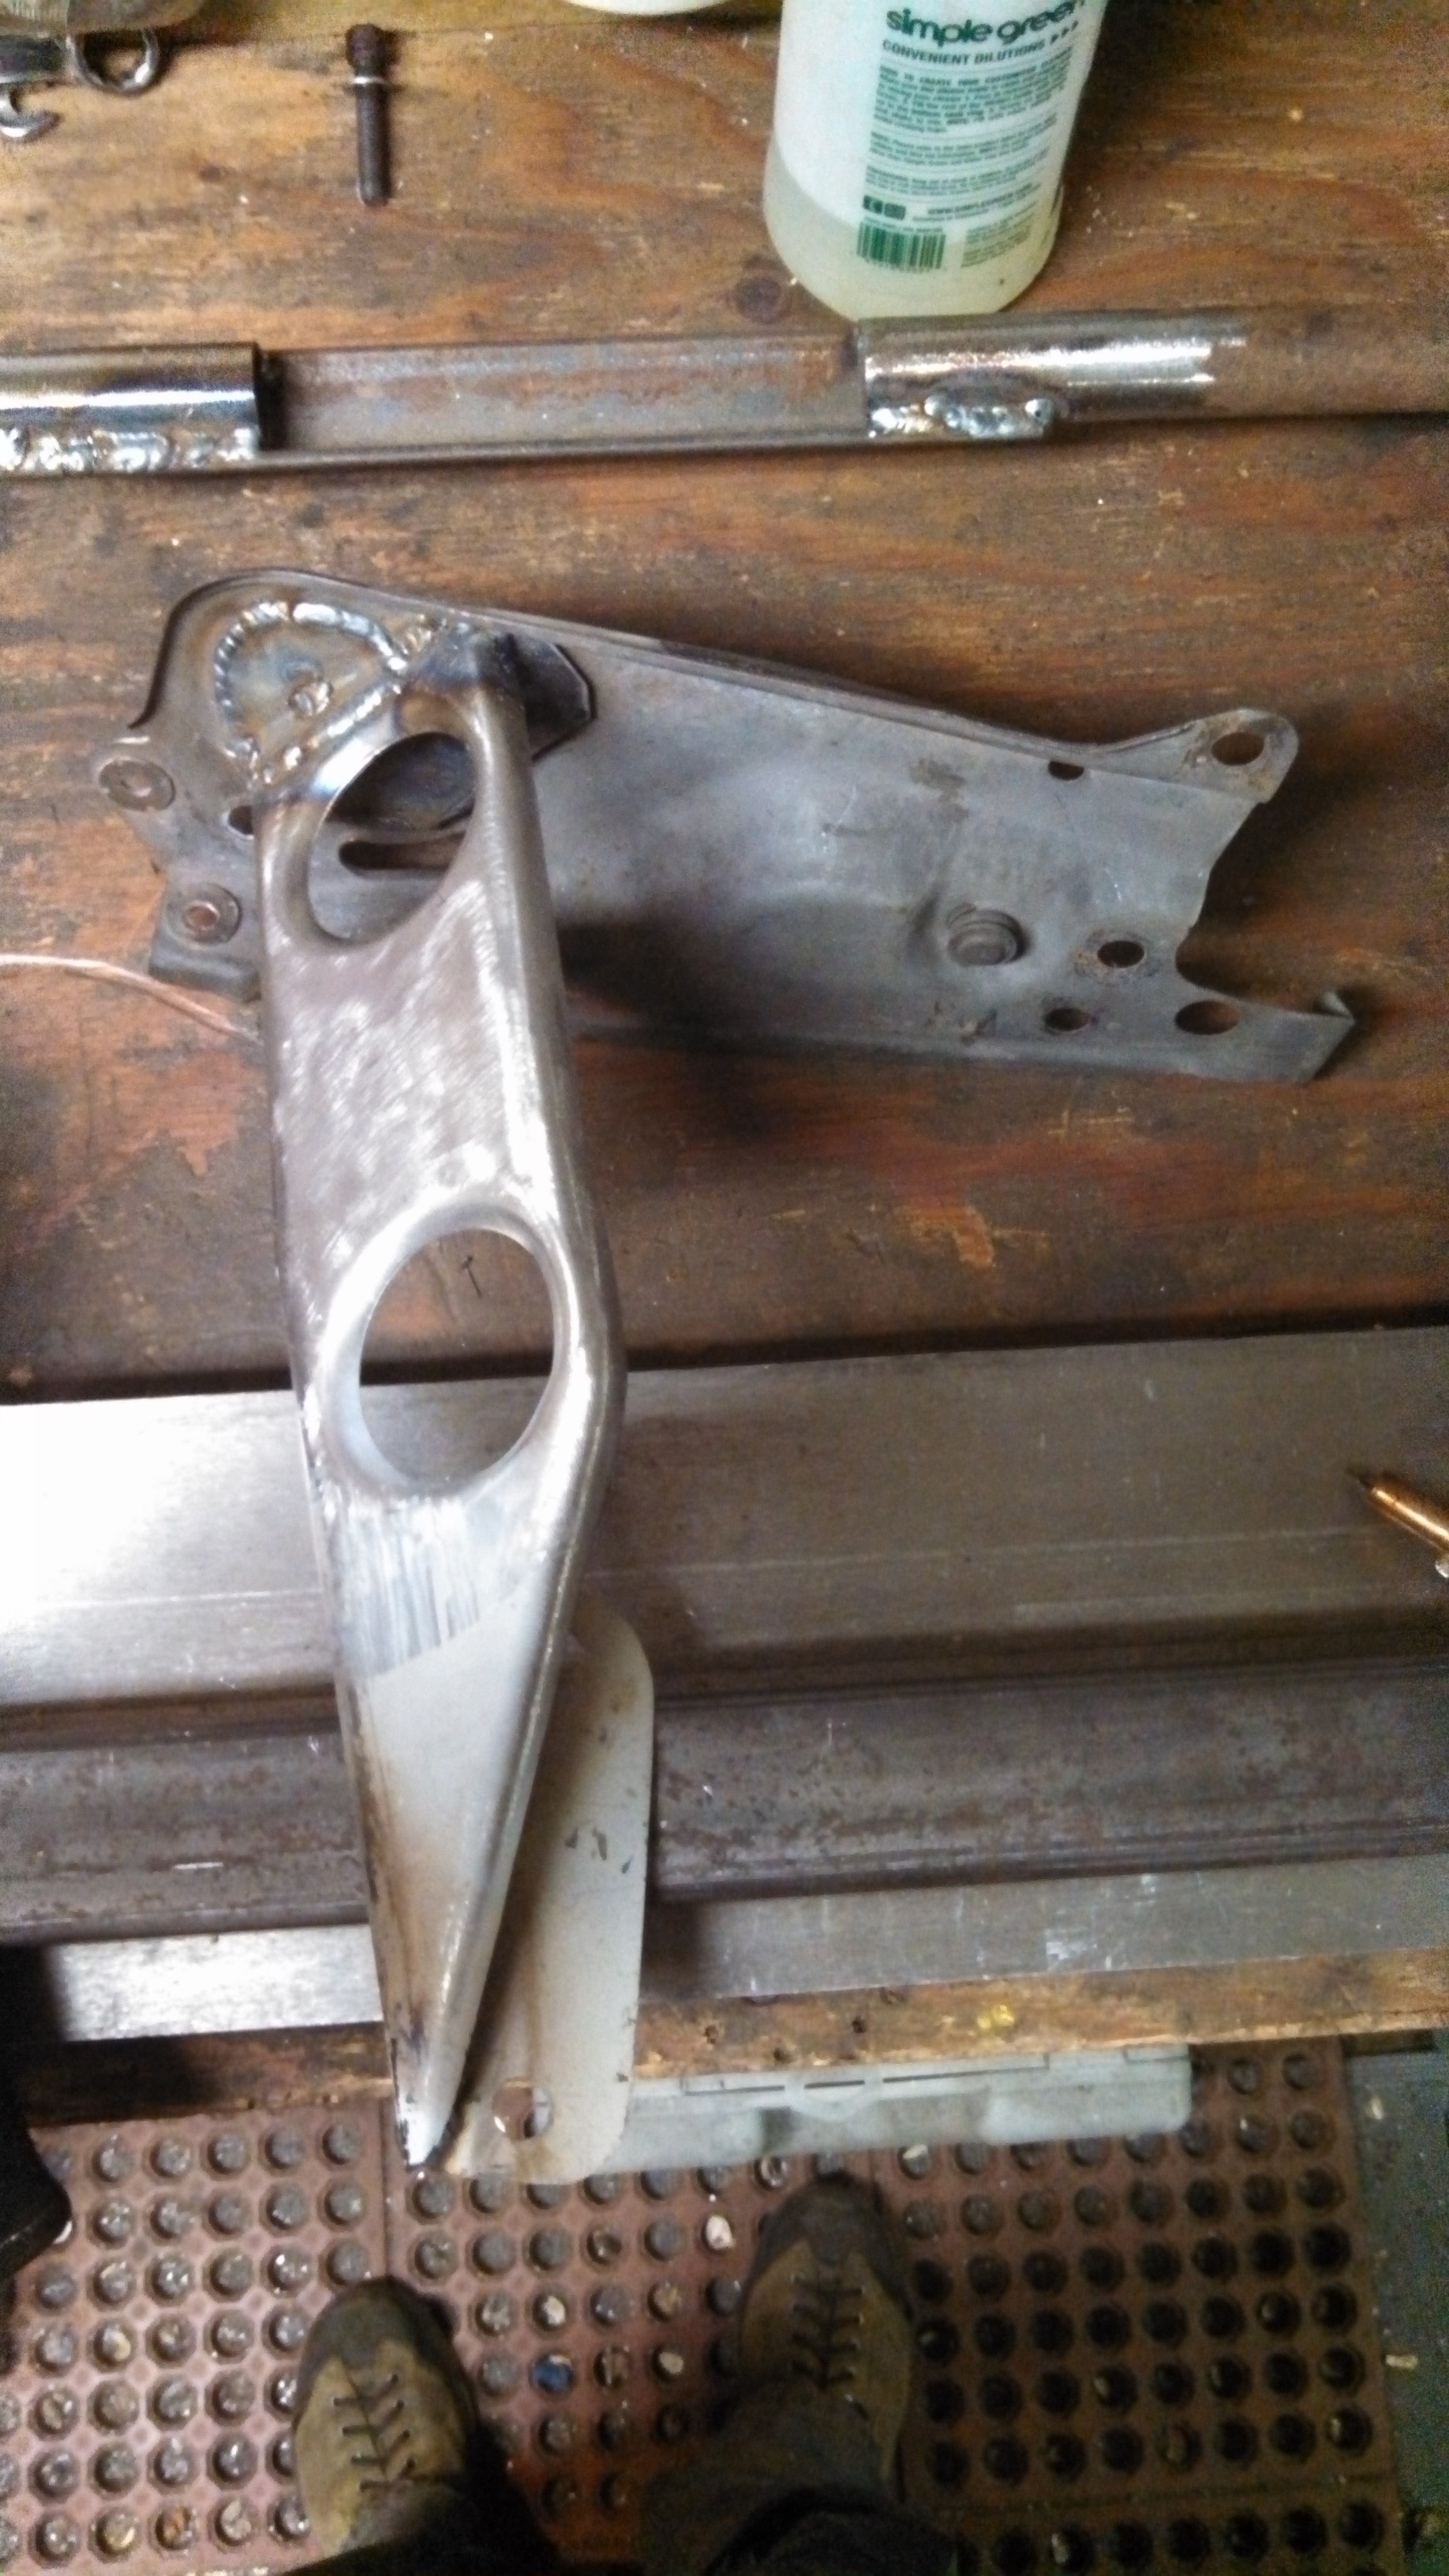
- headlight buket new passenger side.jpg (1.04 MiB) Viewed 51988 times
Re: 24vVR6T CQ Project: EATSGTR, chassis FAB
Posted: Tue May 06, 2014 2:30 am
by my2000apb
MORE!!!
I got the turbo drain line in place, I’m going to be changing it a bit to use a straight hose end for better clearance to the frame rail.
- turbo drain line.jpg (1.33 MiB) Viewed 51988 times
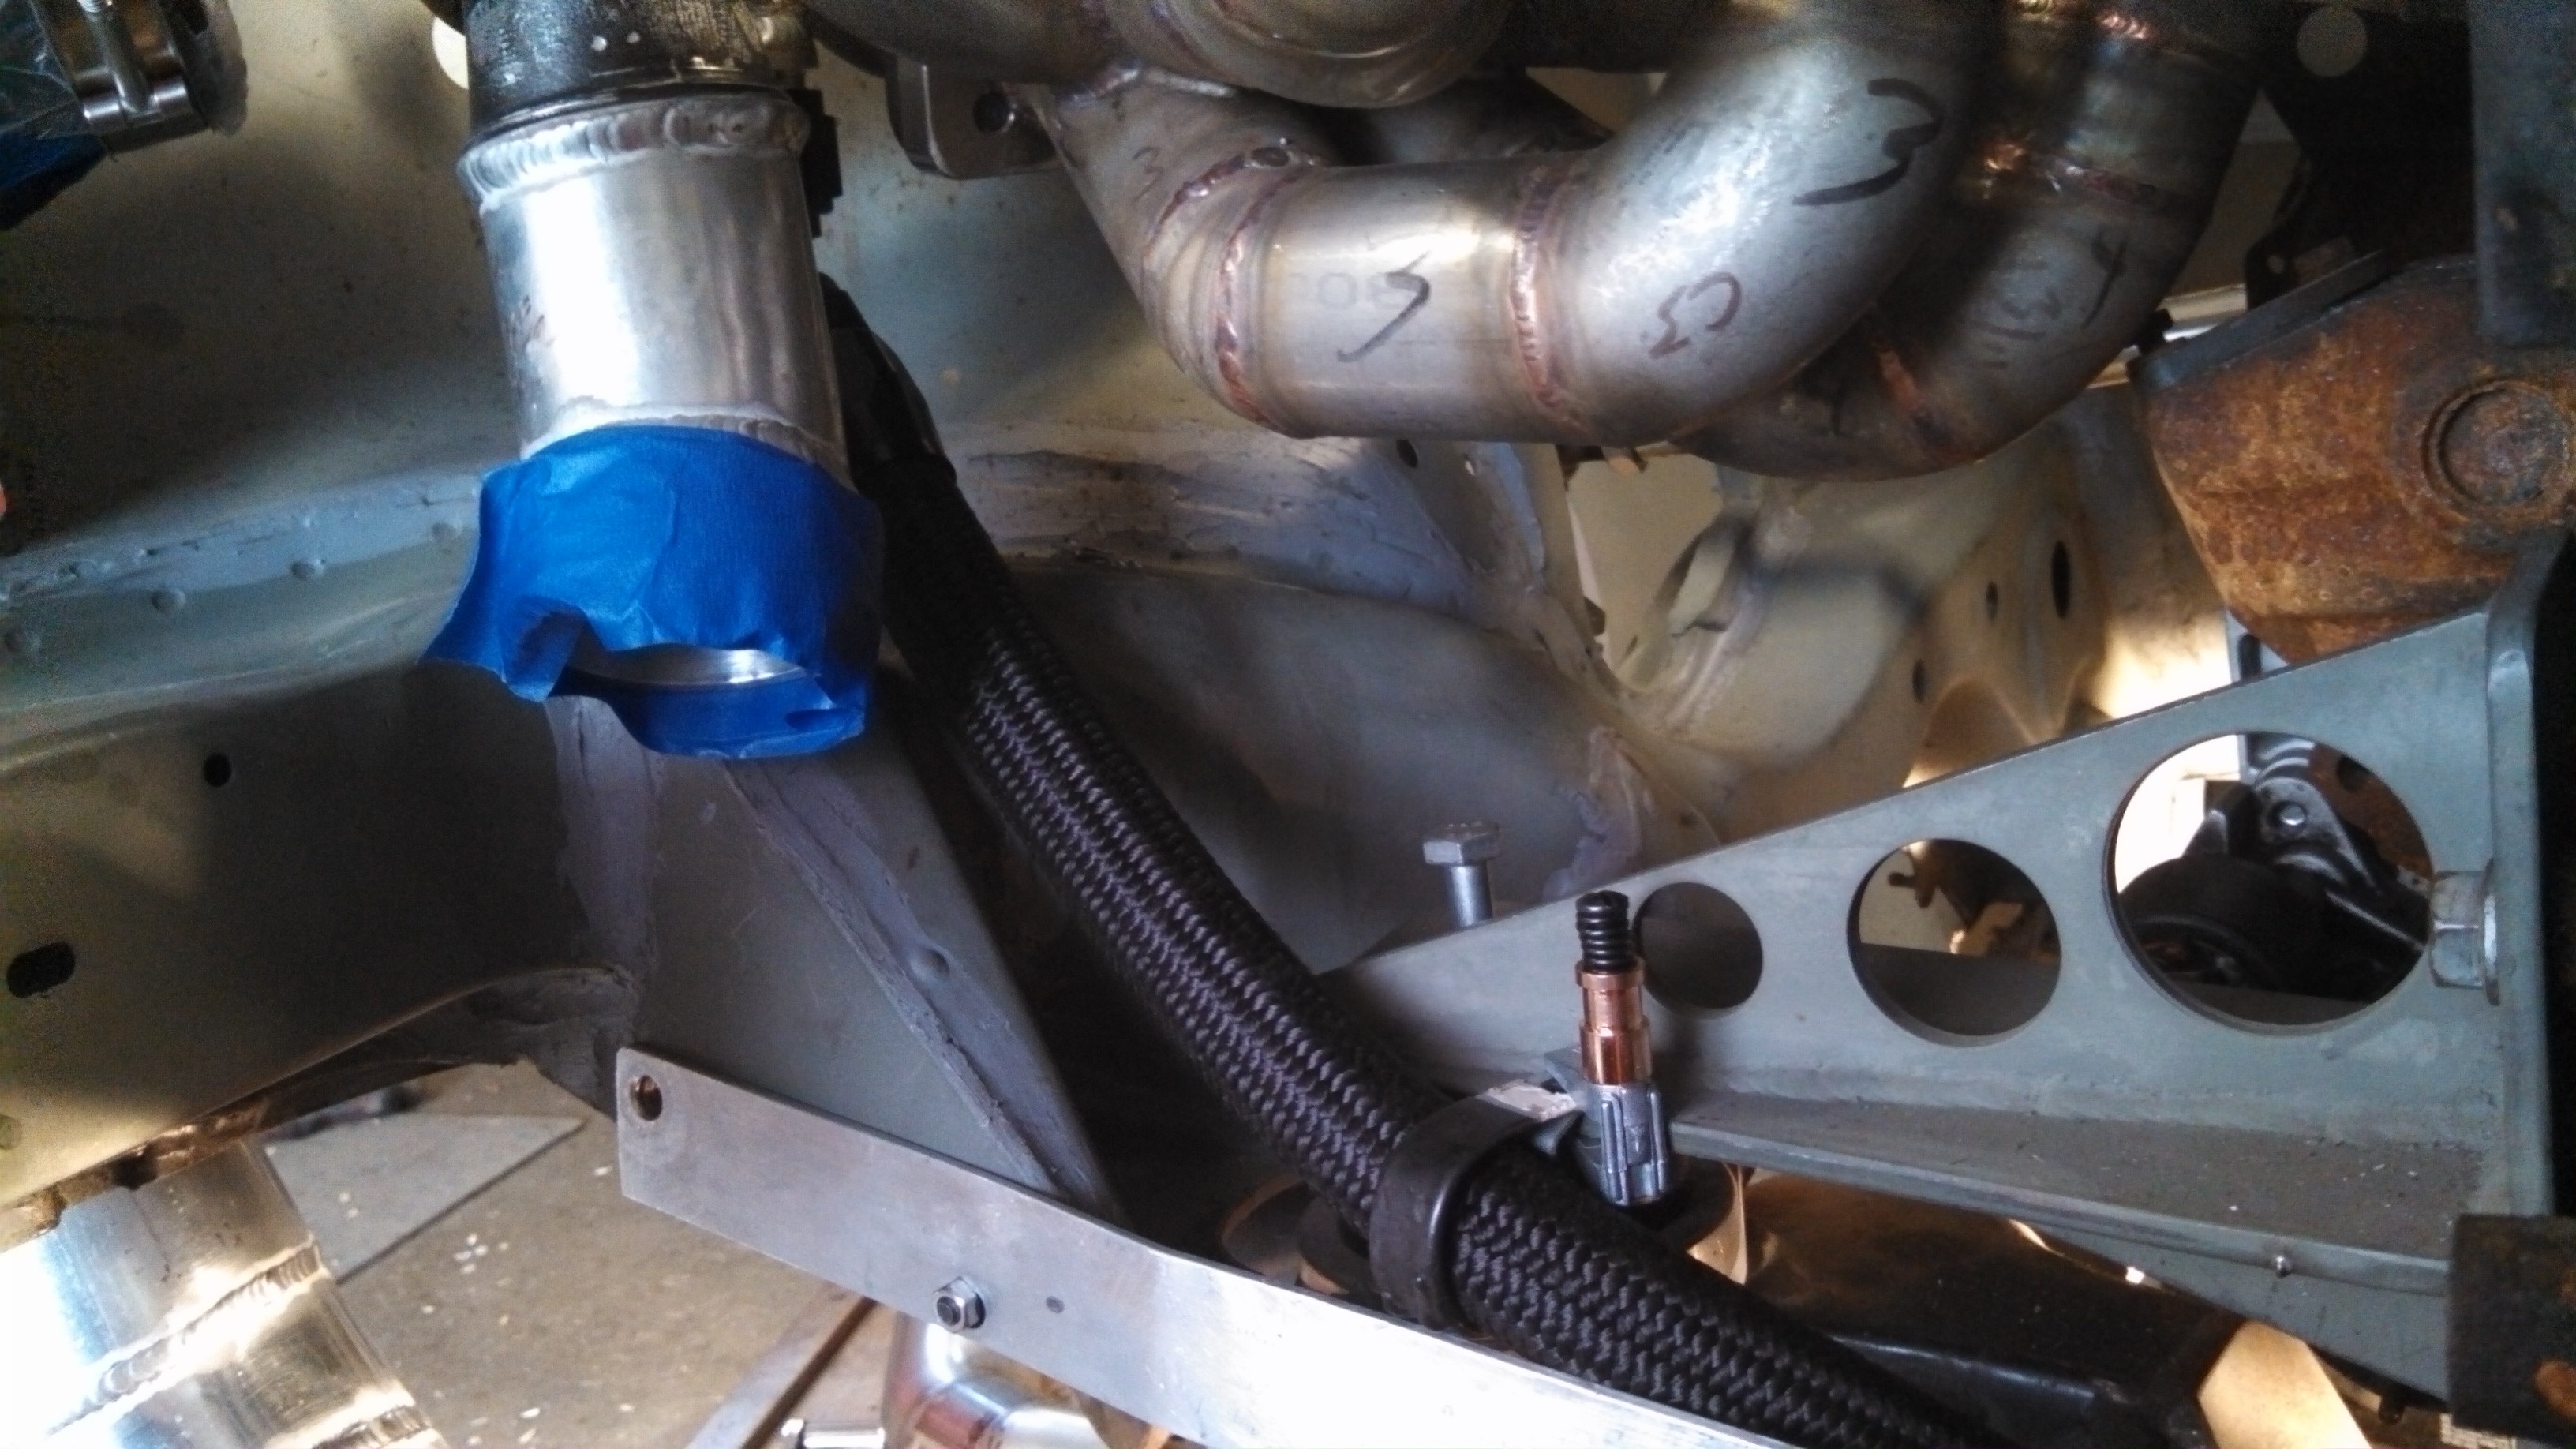
- turbo drain line 2.jpg (1.41 MiB) Viewed 51988 times
And the start of some breather cans
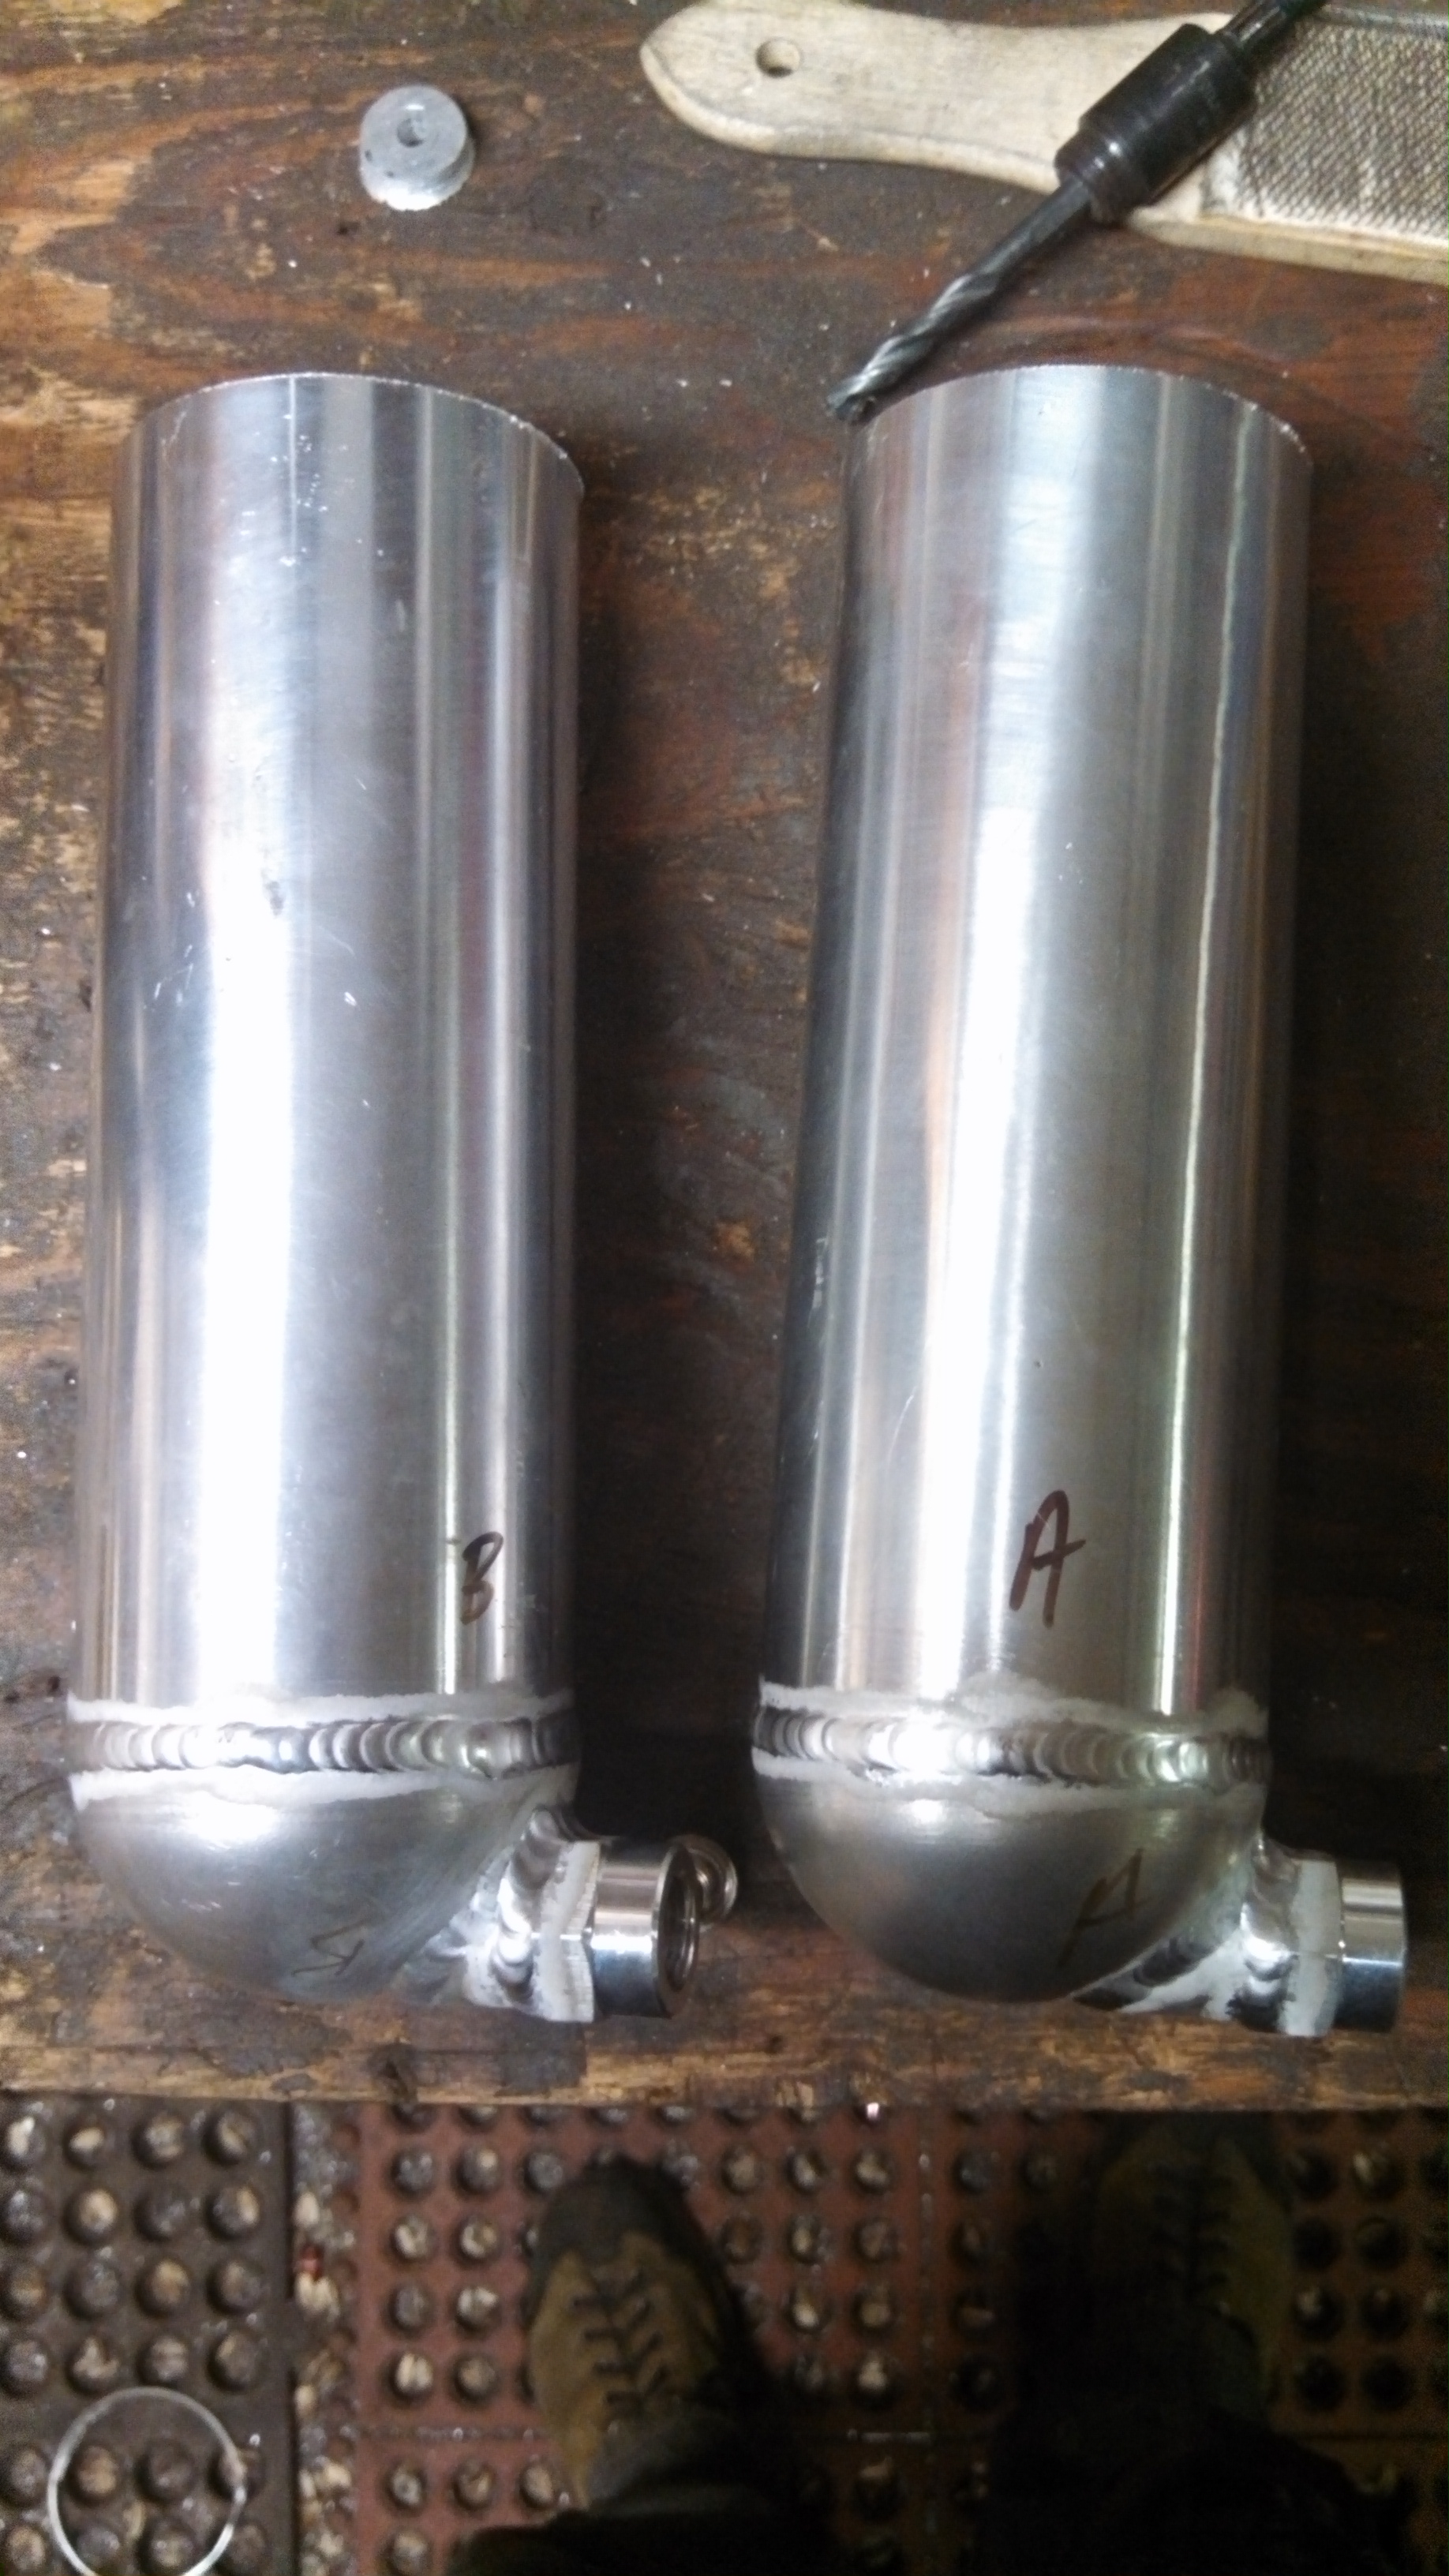
- breather cans.jpg (1.4 MiB) Viewed 51988 times
And the breather cans 3/8” NPT drain bungs
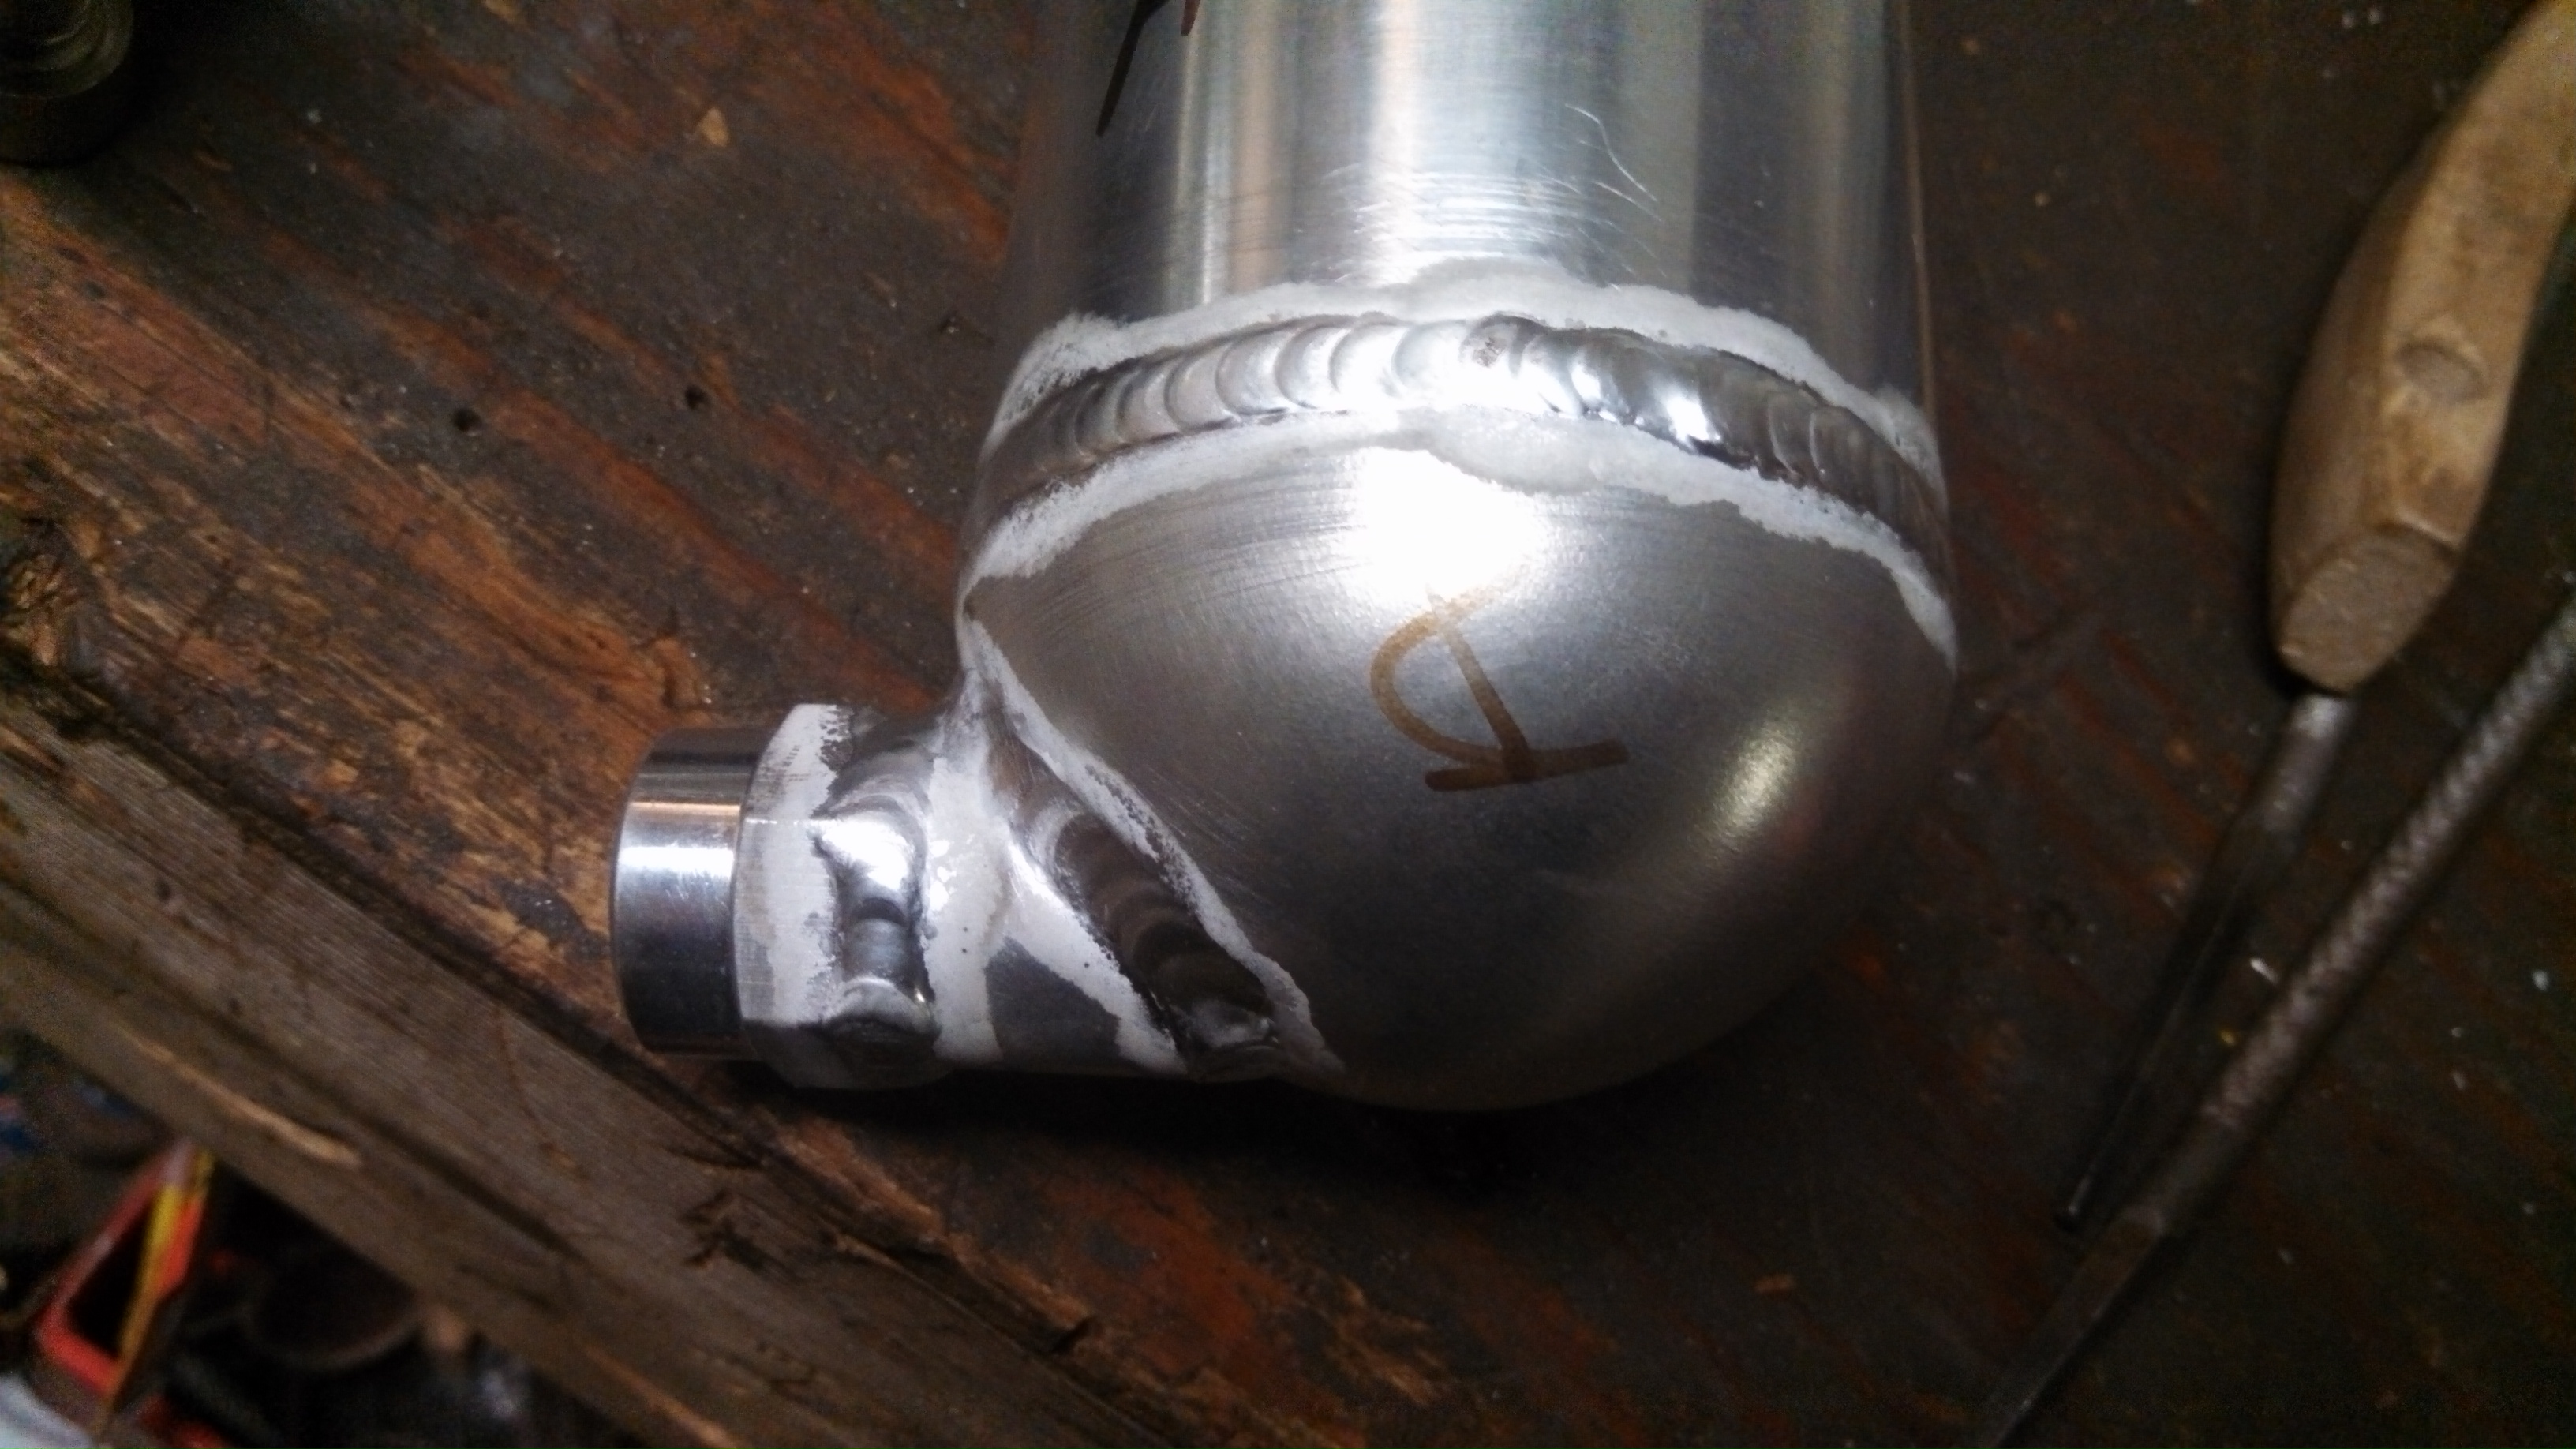
- breather can drain detail.jpg (1.31 MiB) Viewed 51988 times
Re: 24vVR6T CQ Project: EATSGTR, chassis FAB
Posted: Tue May 06, 2014 2:42 am
by my2000apb
UPDATE!!!
My material finally came in for my radiator shroud, so it was time to get braking.
The shroud is 0.090” 5000 series alu, its soooo much nicer bender the 4-5000 grades of alu vs the 6061
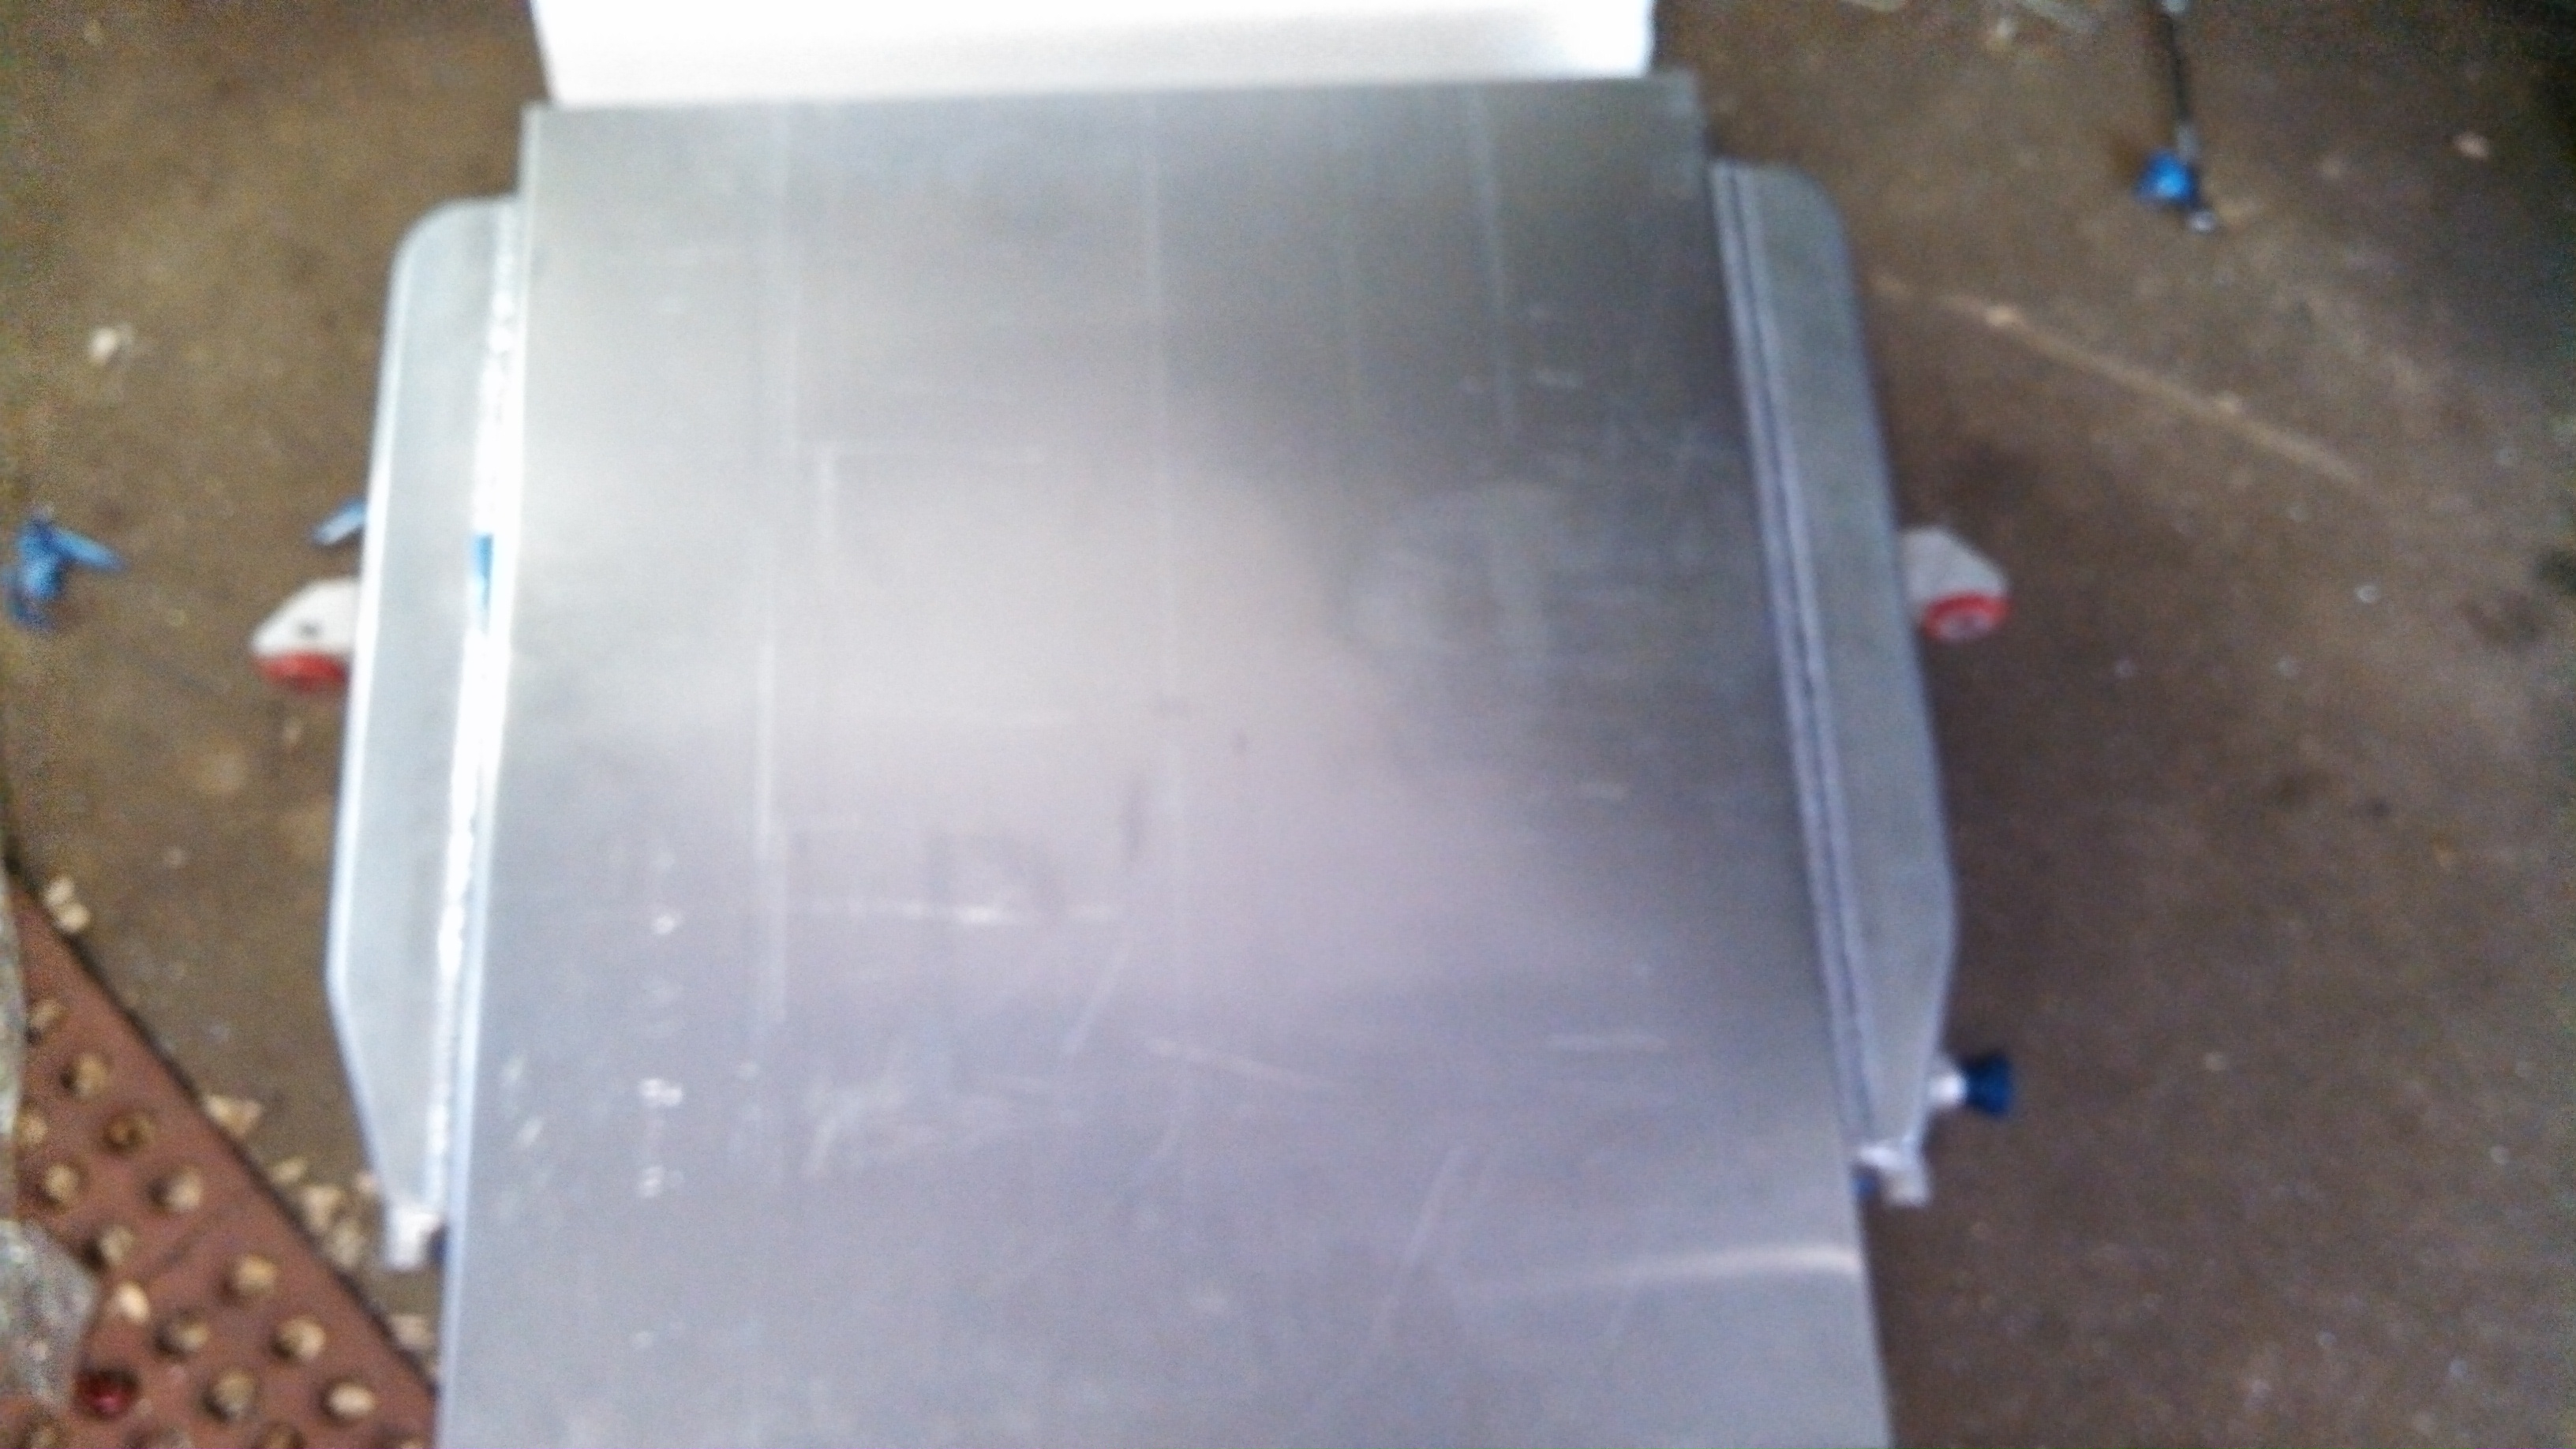
- braking rad shroud.jpg (1.36 MiB) Viewed 51988 times
It took a bit of time but I got the sides to fit very close to the sides of the end tanks.
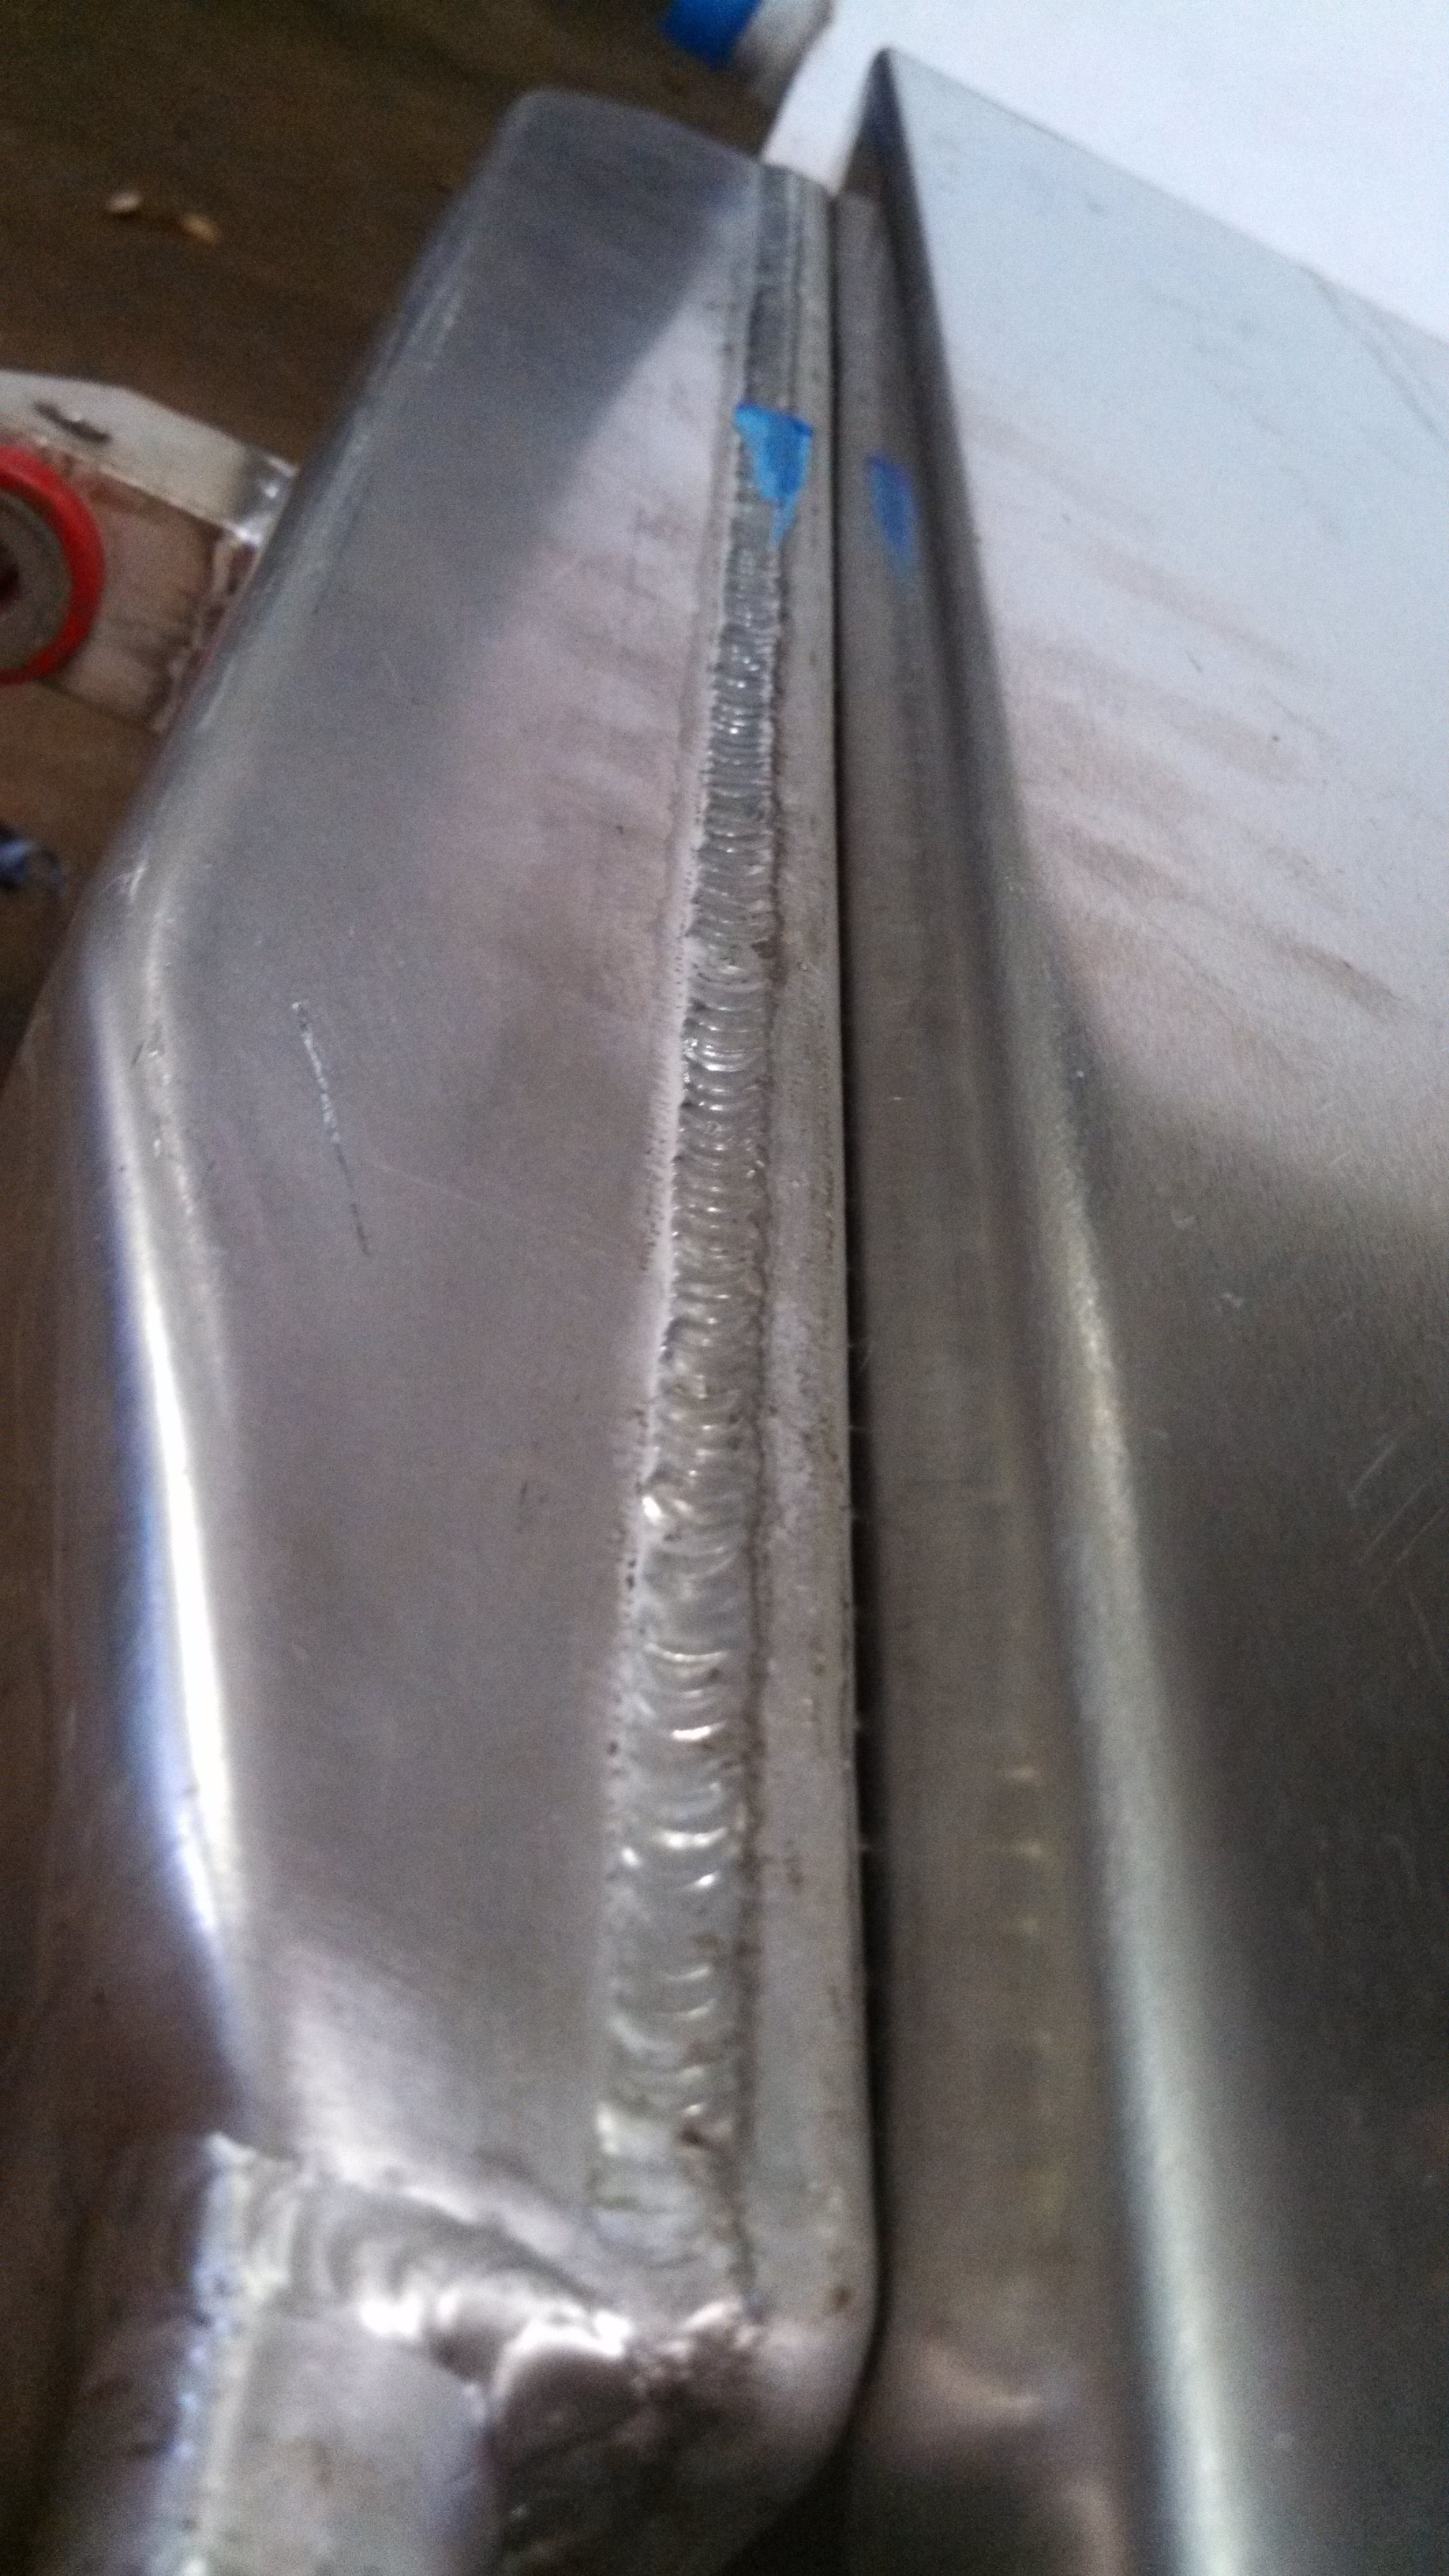
- rad shroud tight around the edges.jpg (1.92 MiB) Viewed 51988 times
I also had to relieve the shroud for the upper rad hose. And got a small plate welded in there.
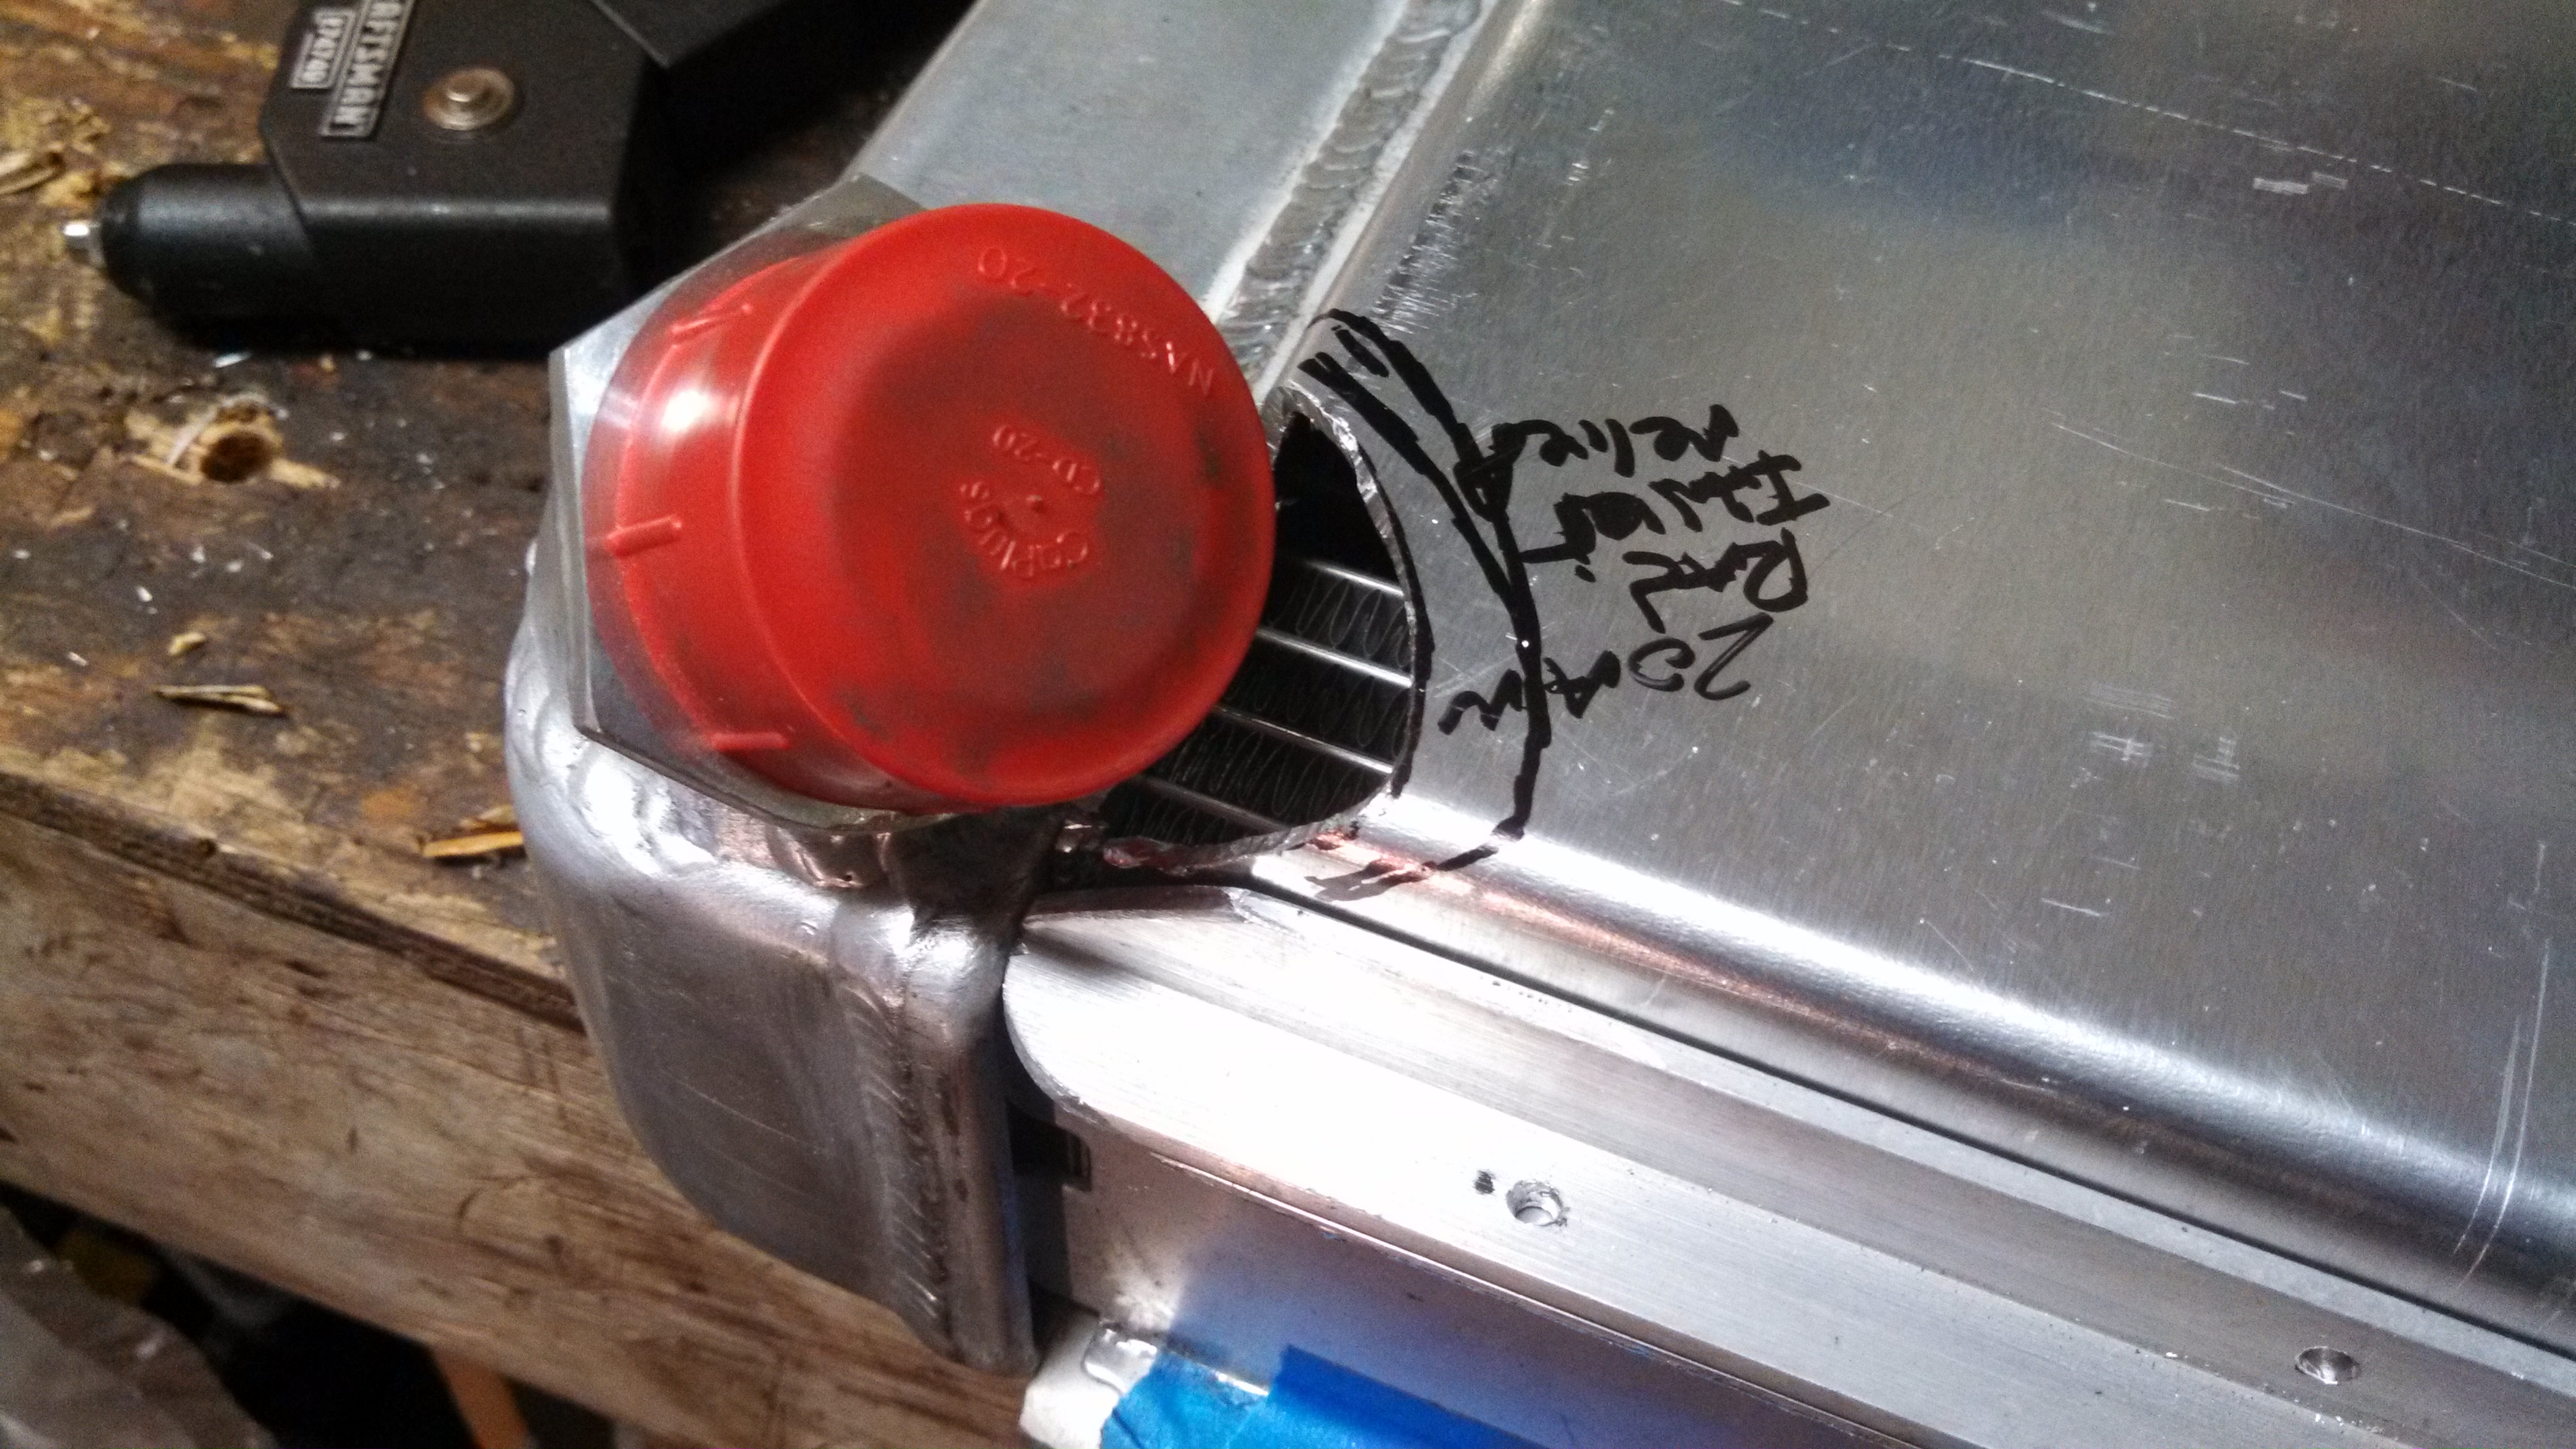
- rad shroud relief for upper rad hose.jpg (1.99 MiB) Viewed 51988 times
The shroud still needs a bit of weld cleanup and some clip nuts for mounting but its nearly done.
And the 13” fan riveted on for temp fitment, now just waiting on the 8” fan. Then its time to cut out the fan holes and add some clip nuts.
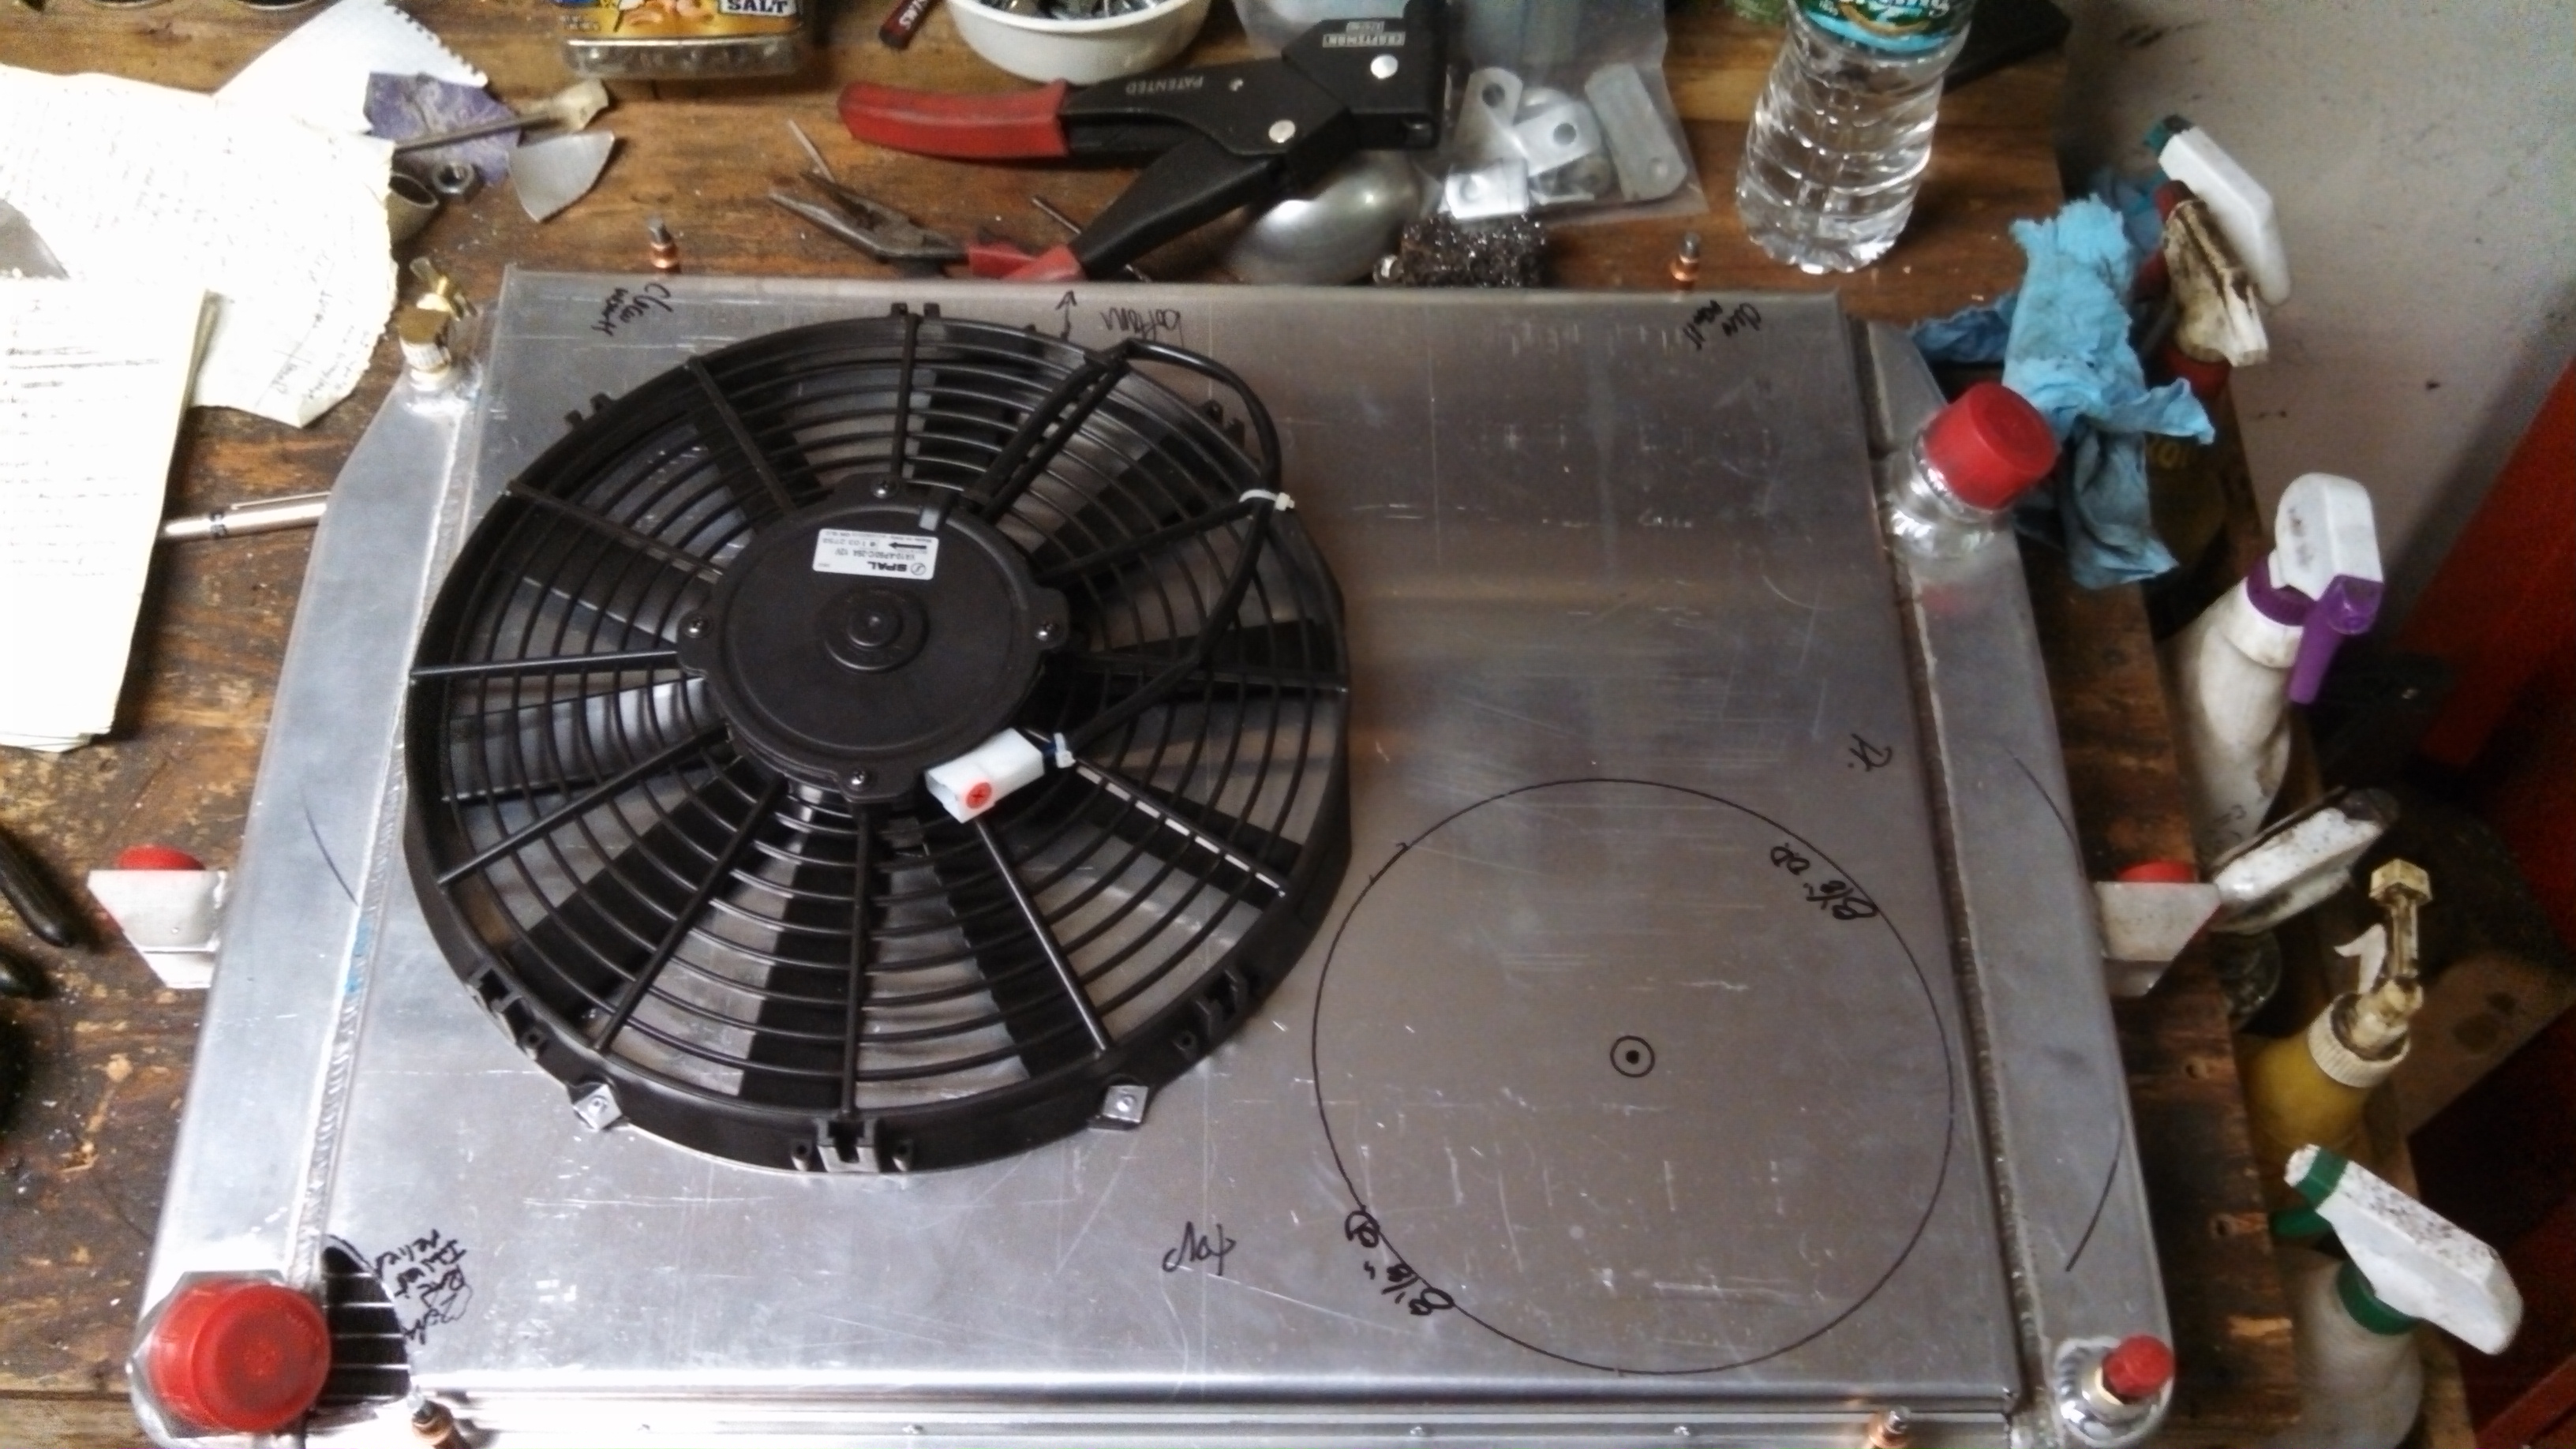
- rad shroud fan riveted on.jpg (1.38 MiB) Viewed 51988 times
Re: 24vVR6T CQ Project: EATSGTR, chassis FAB
Posted: Tue May 06, 2014 2:54 am
by my2000apb
MORE!!!
I also got back into the Wastegate outlet routing. The rear Wastegate will “loop” down and around to meet up with the front Wastegate outlet under the collector.
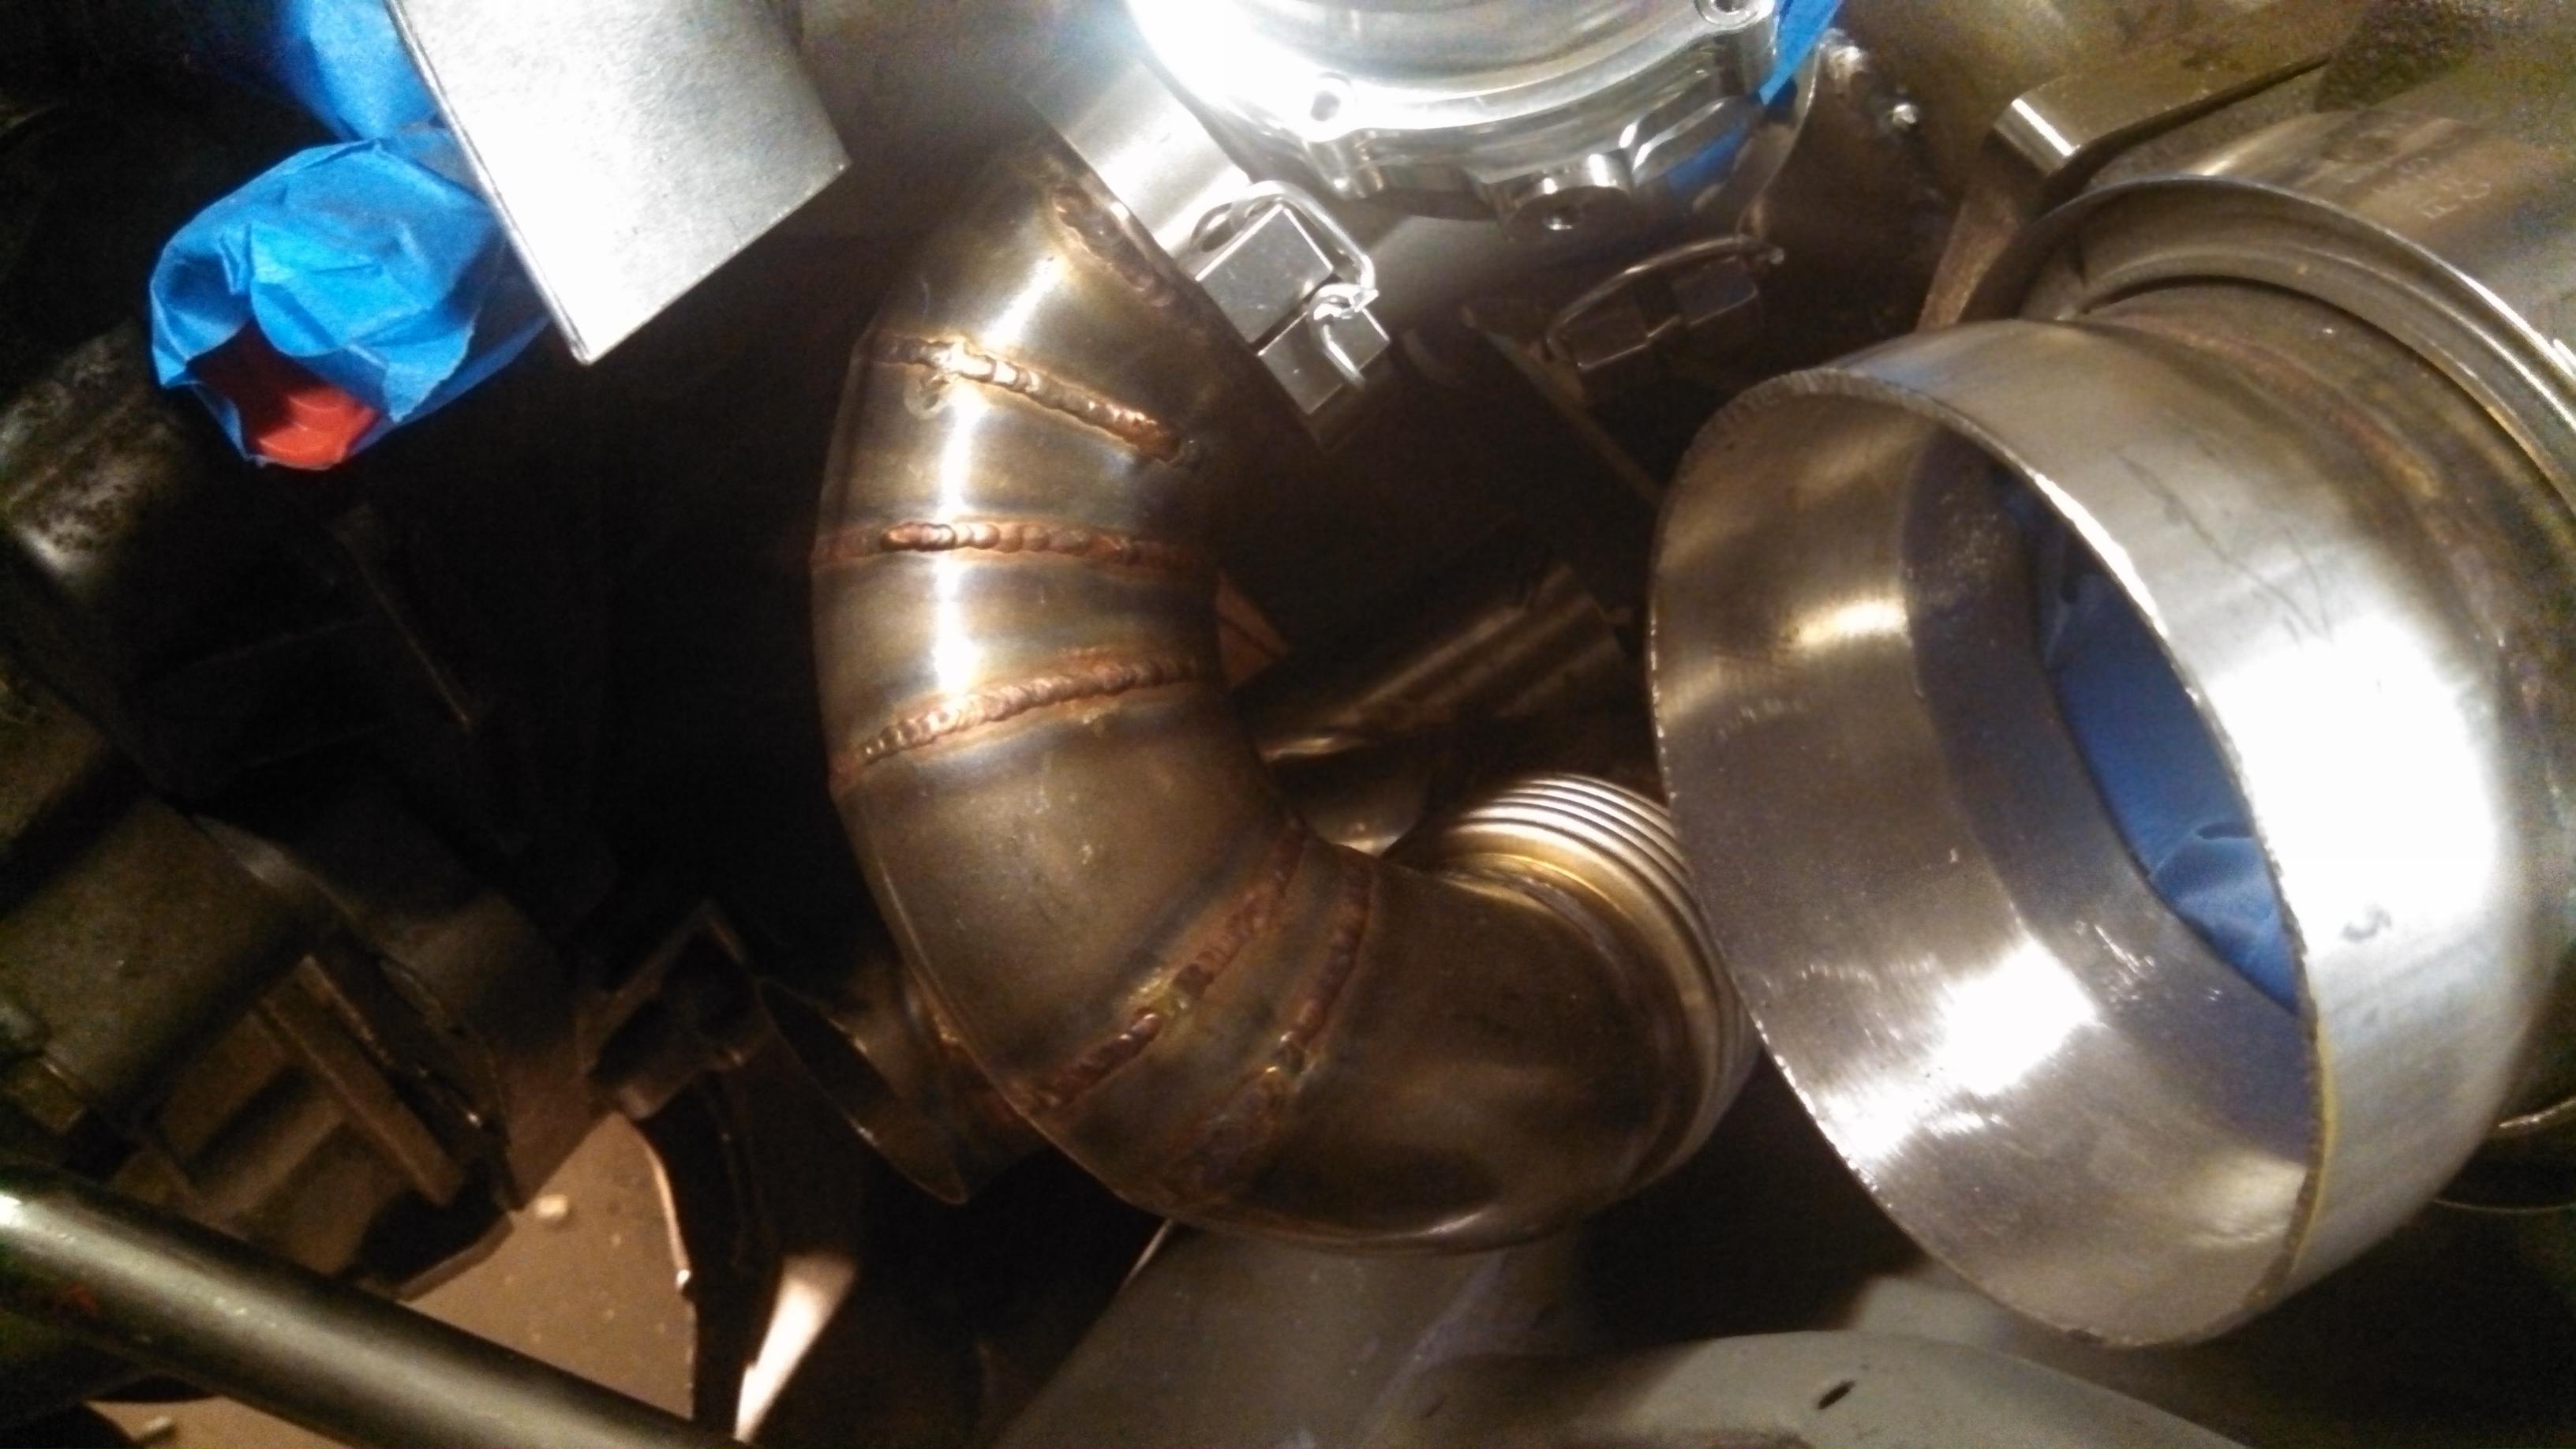
- rear wastegate outlet.jpg (1.21 MiB) Viewed 51988 times
I got the merge for the outlets finished up and seam welded. This will dump back into the downpipe just above the front/pass CV and bellow the steering rods. I’ve run the steering and suspension through its range of motion and it’ll all clear just fine.
Just waiting on some 2.5” 304SS v-band flanges and a shorty 2.5” ID flex joint.
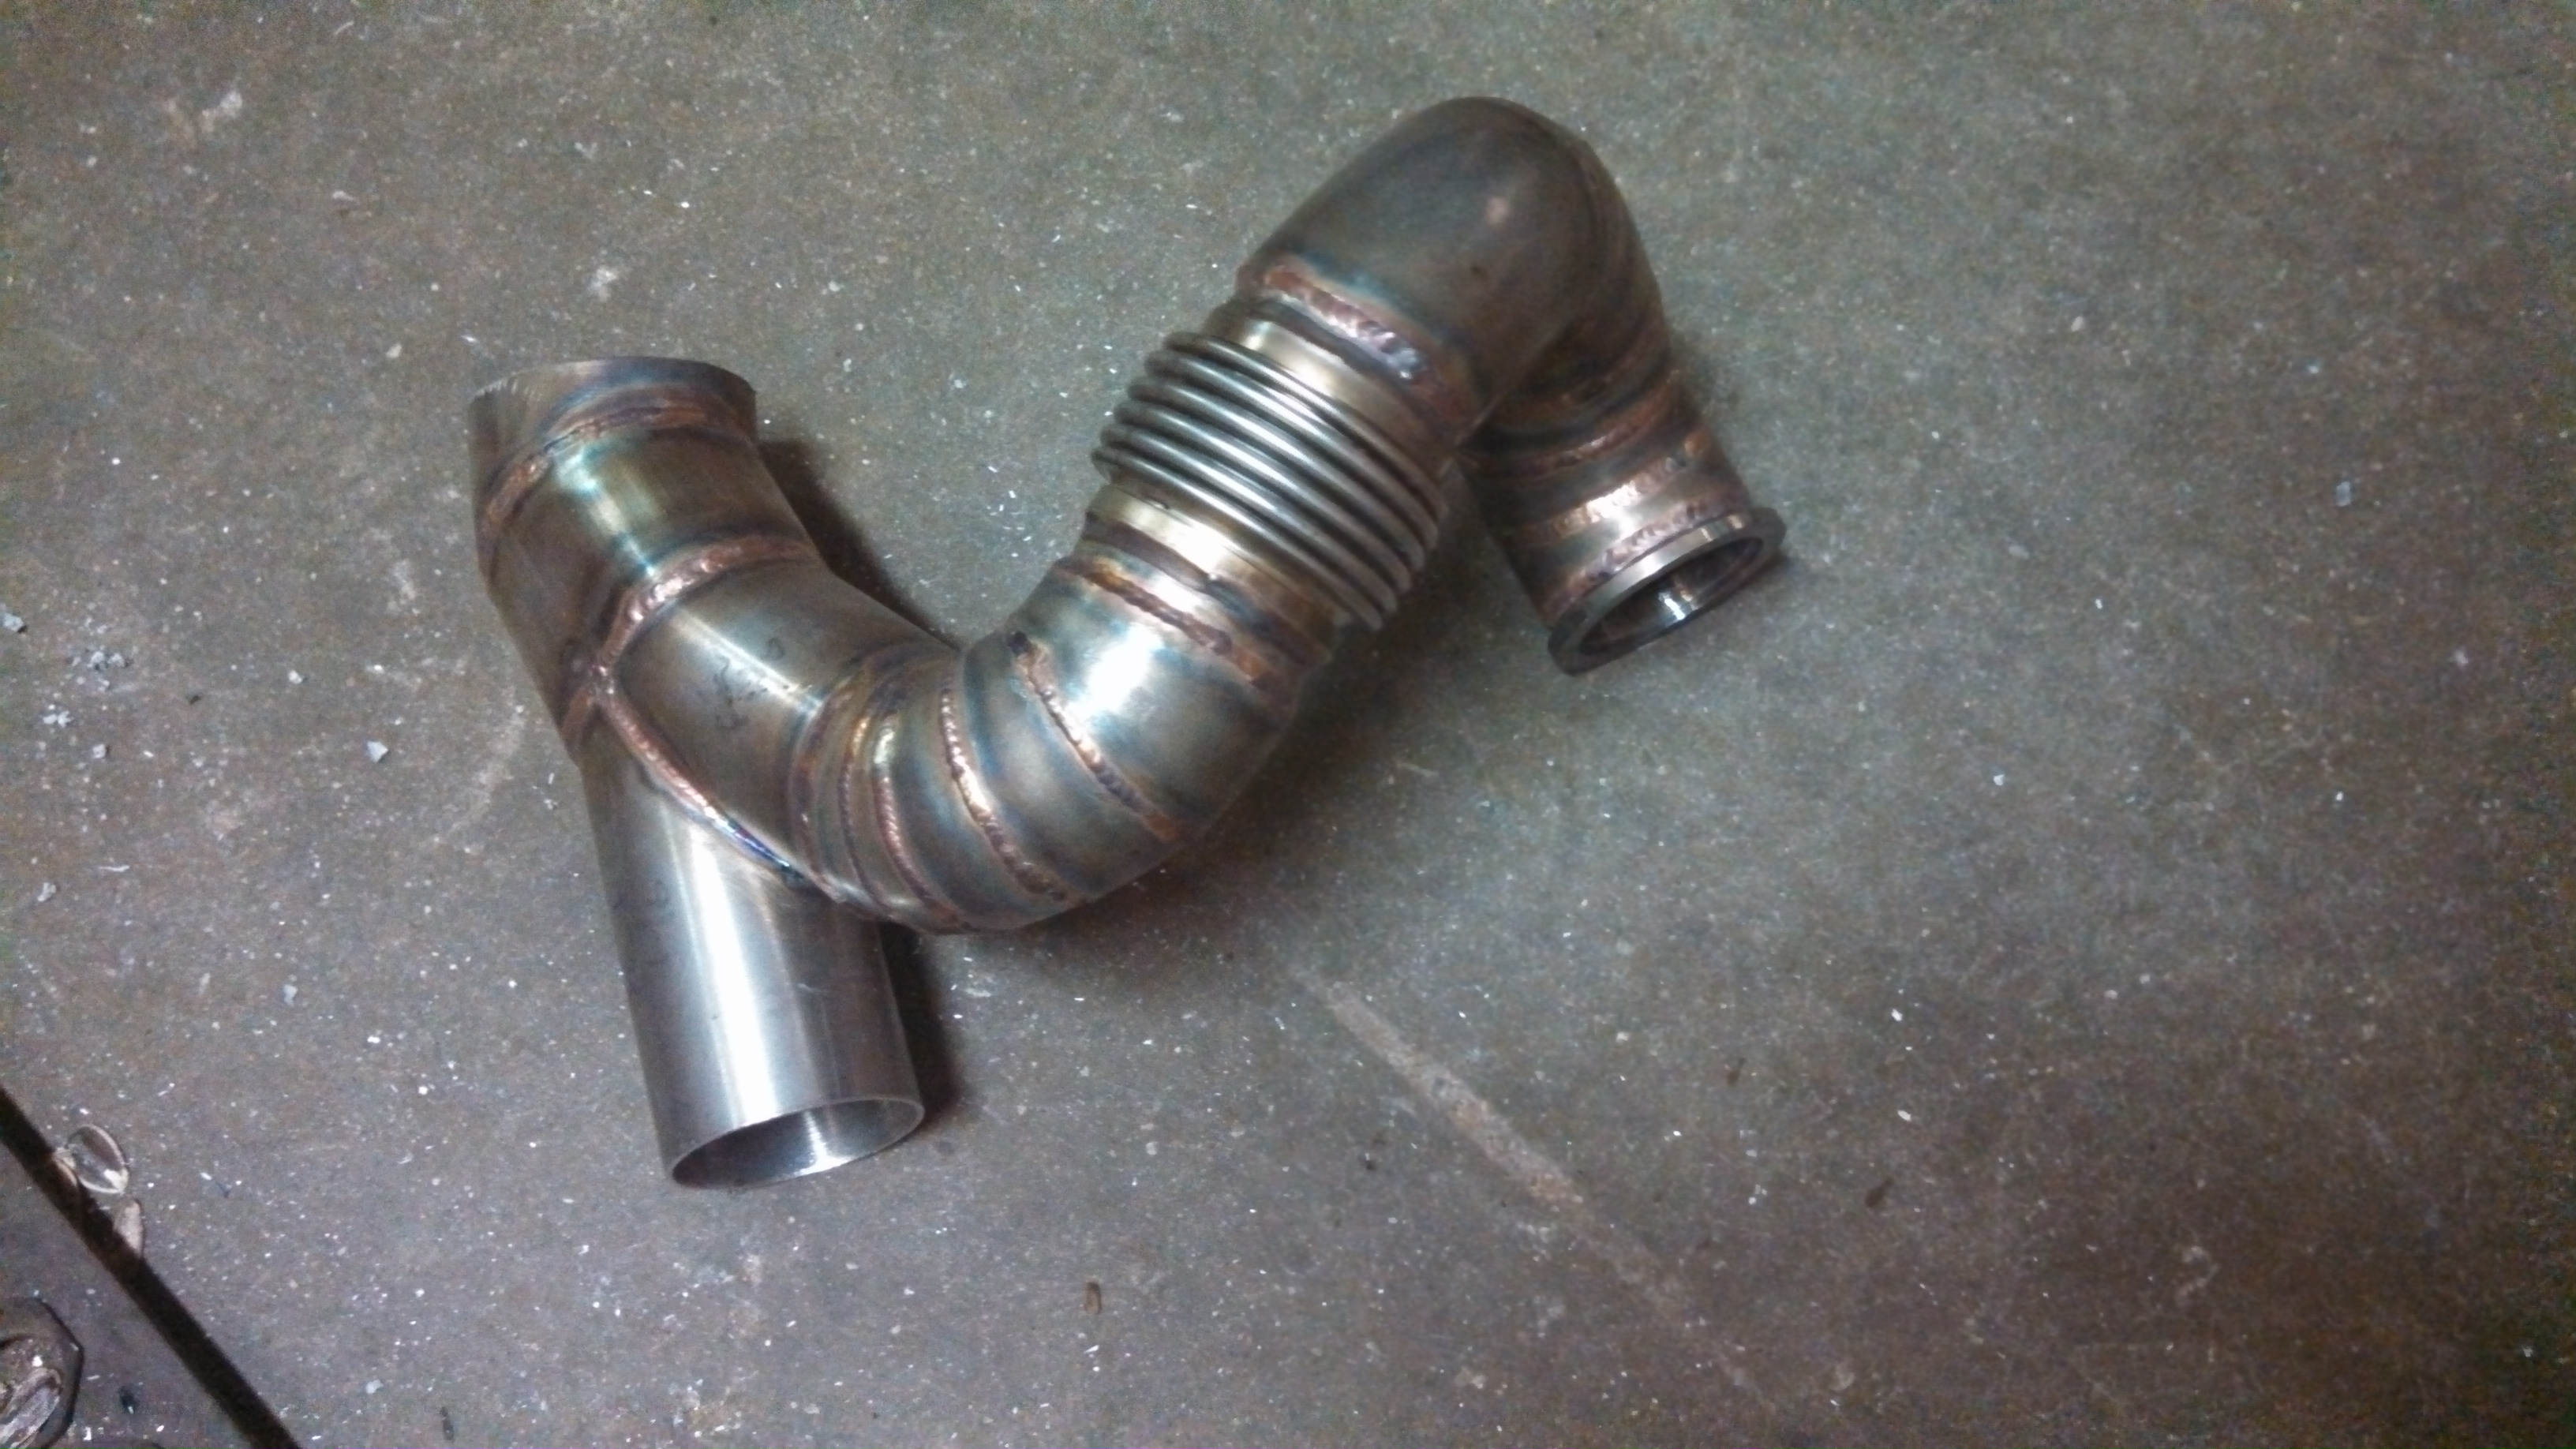
- rear wastegate outlet and merge.jpg (1.49 MiB) Viewed 51988 times
I need to change the front Wastegate outlet just a bit, I wanted better turbo drain line clearance.
And here you can see where the front outlet will meet up with the merge. The front Wastegate will have a second flex bellow and compact Tial clamp right before the merger.
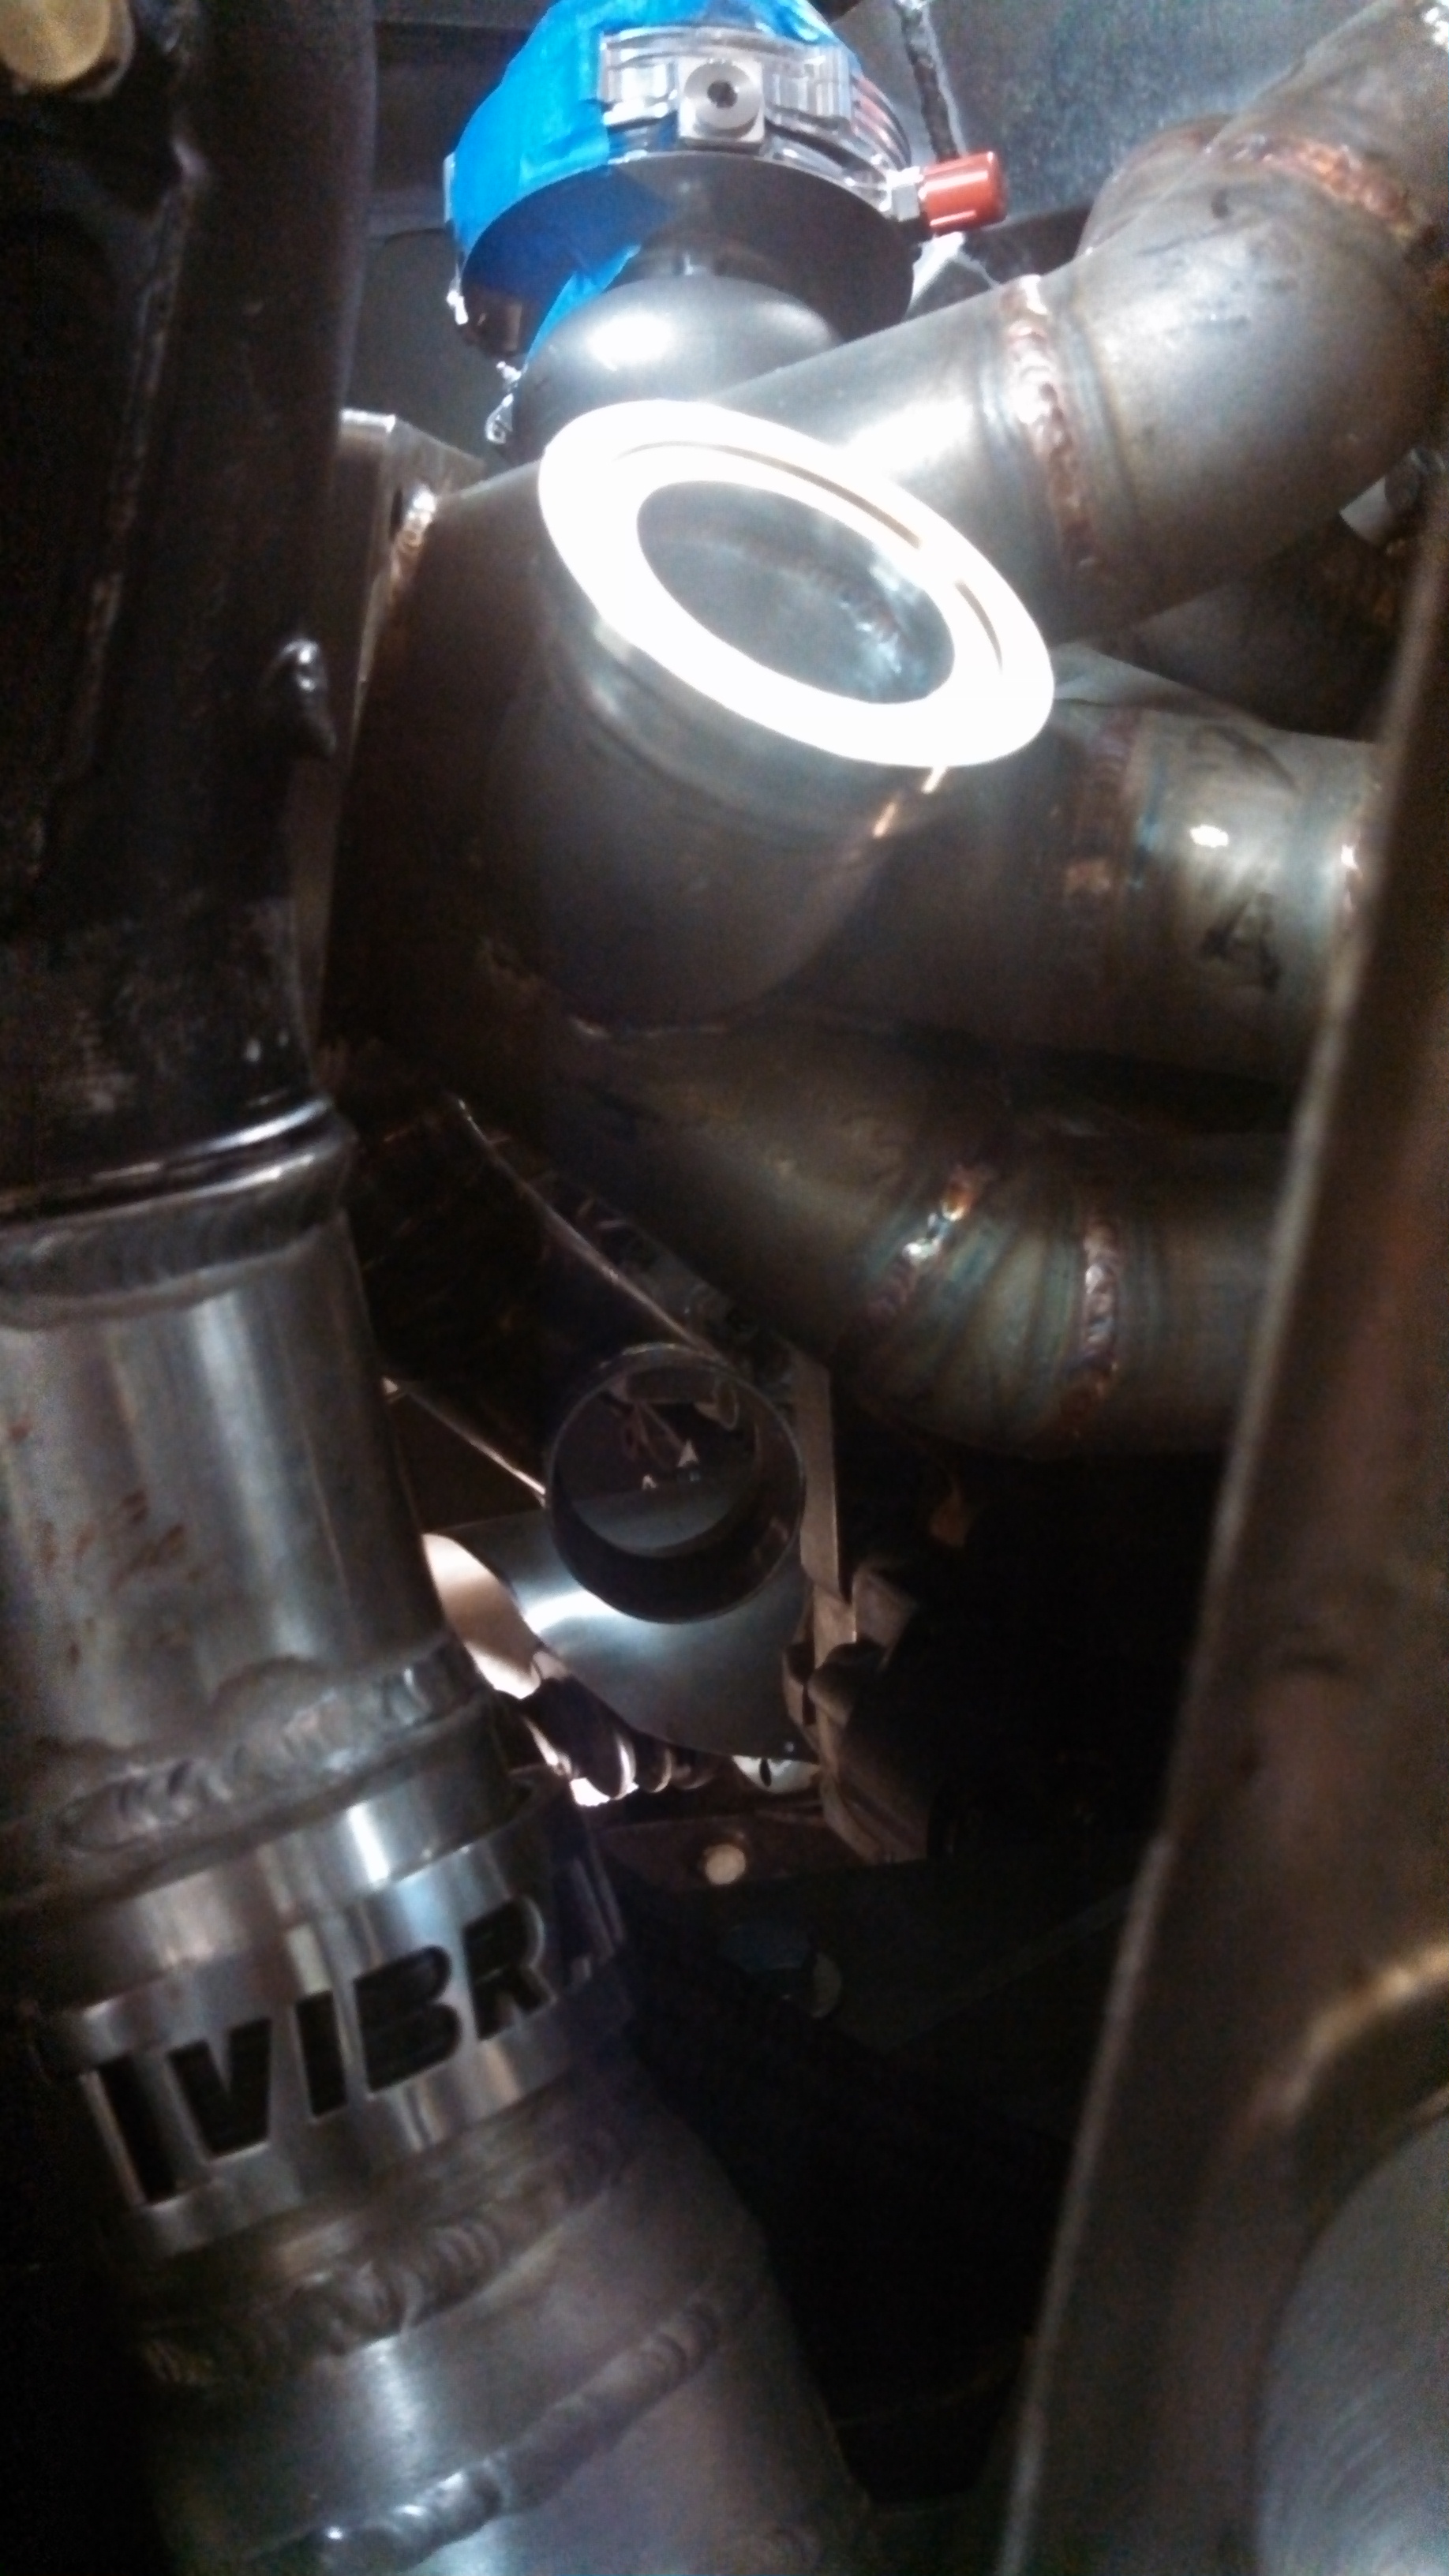
- wastegate merger looking forward.jpg (1.07 MiB) Viewed 51988 times
And this pile of stainless will be a completed downpipe later this week! Woohoo
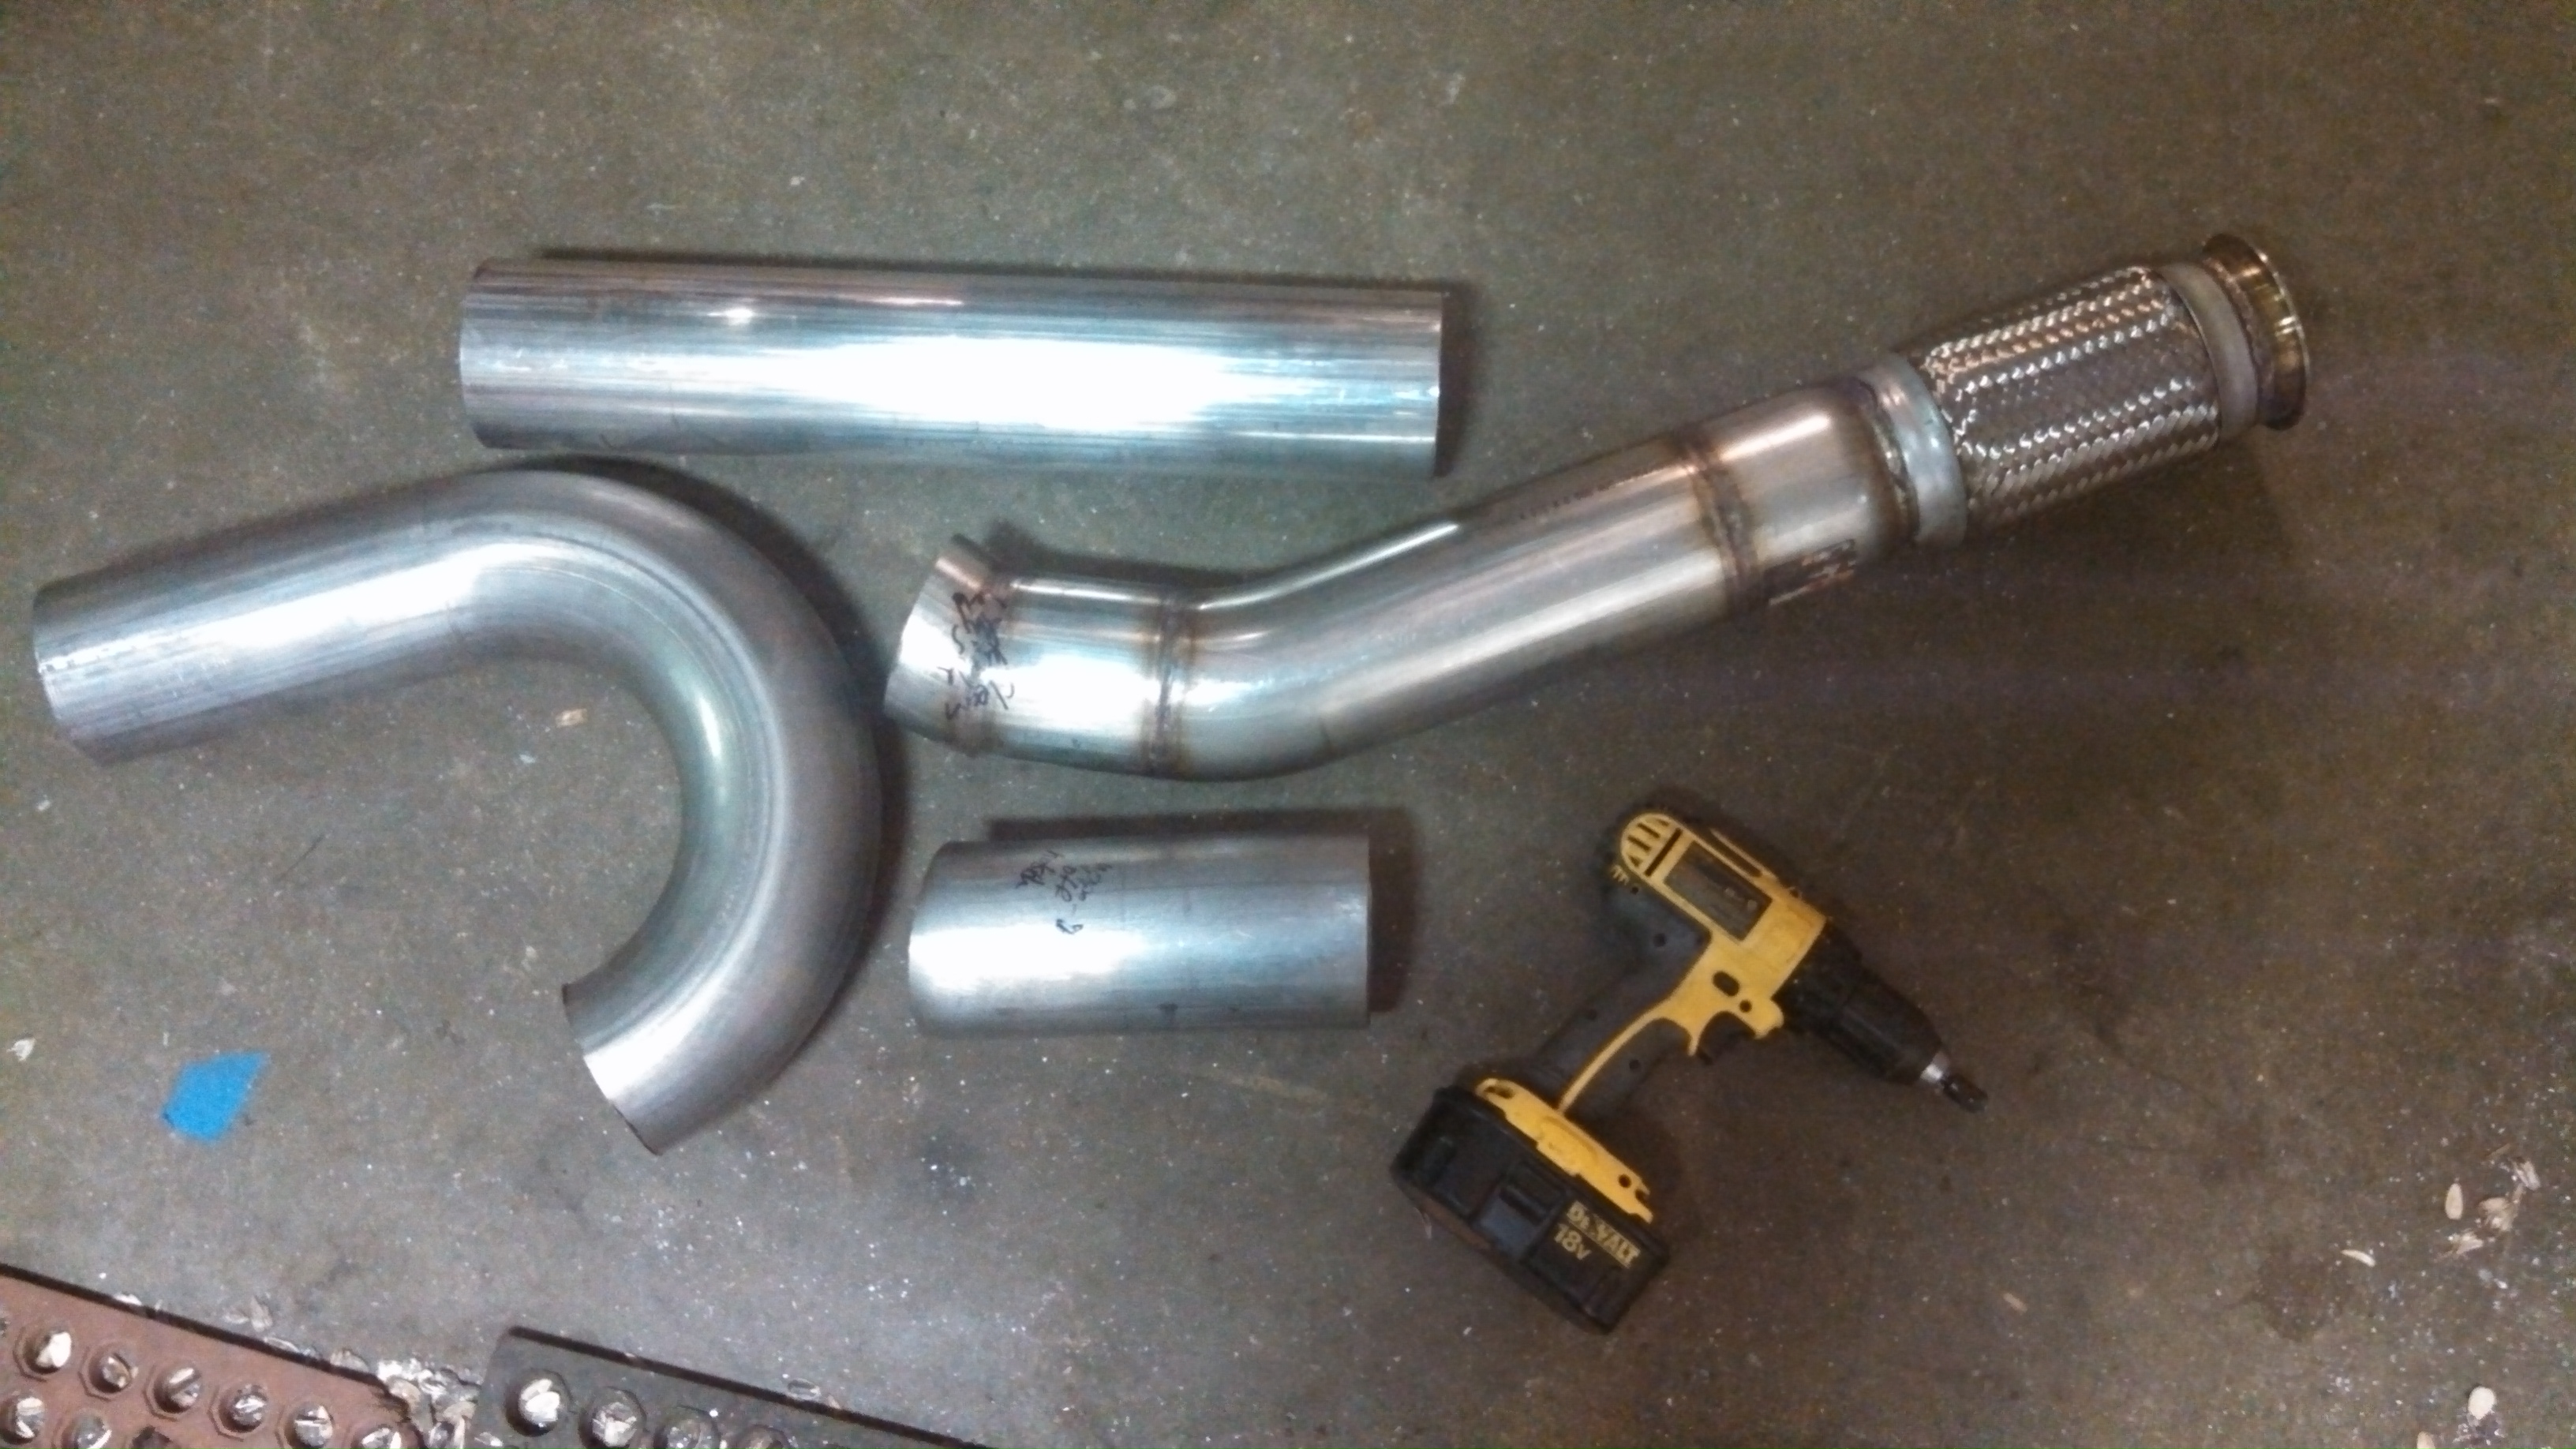
- will be a finished DP soon.jpg (1.35 MiB) Viewed 51988 times