Page 12 of 17
Re: 24vVR6T CQ Project: EATSGTR, chassis FAB
Posted: Sat Nov 23, 2013 8:20 am
by vt10vt
Zerb wrote:Maybe I missed it on an earlier page here in regards to the intake mani fabrication. But why didn't you put extended velocity stacks in the plenum on the 3 runners that match the 3 ports on the "front" of the head. So they are all equal length.
Sent from my iPad using
Tapatalk
I'm pretty sure the 24v's deal with the offset via cam timing instead of different runner lengths.
Also this thread needs more updates.
Re: 24vVR6T CQ Project: EATSGTR, chassis FAB
Posted: Sat Nov 23, 2013 9:07 pm
by loxxrider
Nice work Tim.
I'm interested in the way you are doing these patches... with all of the rust replacement work I've been doing on my 635csi, I am cutting out a section and cutting a piece of metal to fit in precisely and then weld it all in. It looks like you are overlapping the metal around the edges. Are you concerned with the two layers rusting between one-another?
Re: 24vVR6T CQ Project: EATSGTR, chassis FAB
Posted: Sun Nov 24, 2013 10:22 am
by my2000apb
chris, panels are painted with weld through primer on the very edges where they overlap, tacked in place the wire-wheeled clean and seam welded. then ground smooth-ish (leaving some protruding bead for strength but not much), they are then self etching primered and seam sealed all the way around.
and all painted over, inside and out before its on the road/track.
get yourself a small set of cleco fasteners and a pair of the cleco pliers, theyre awesome!!
and a pair of flanging pliers, pneumatic or manual
http://search.eastwood.com/ppc/flanger? ... OgodEHYASA
Re: 24vVR6T CQ Project: EATSGTR, chassis FAB
Posted: Sun Nov 24, 2013 11:14 am
by DE80q
I was pretty sure you were using weld through primer. That stuff works quite well. Will really help to keep rust from forming in between the 2 pieces.
Re: 24vVR6T CQ Project: EATSGTR, chassis FAB
Posted: Wed Nov 27, 2013 9:25 pm
by loxxrider
Thanks Tim, I'll definitely be using some of that. Might be time to invest in a tig soon too

Re: 24vVR6T CQ Project: EATSGTR, chassis FAB
Posted: Thu Nov 28, 2013 9:51 am
by my2000apb
its all done with mig, id prefer to mig body work anyway.
lots of tacks-inline then switching to a different part of panel, back and forth
practice, practice
Re: 24vVR6T CQ Project: EATSGTR, chassis FAB
Posted: Thu Nov 28, 2013 10:04 am
by DE80q
As I found out last night, sheet metal is a PITA to weld. Especially when im used to welding much thicker material.
Re: 24vVR6T CQ Project: EATSGTR, chassis FAB
Posted: Thu Nov 28, 2013 11:22 am
by my2000apb
vt10vt wrote:Zerb wrote:Maybe I missed it on an earlier page here in regards to the intake mani fabrication. But why didn't you put extended velocity stacks in the plenum on the 3 runners that match the 3 ports on the "front" of the head. So they are all equal length.
Sent from my iPad using
Tapatalk
I'm pretty sure the 24v's deal with the offset via cam timing instead of different runner lengths.
Also this thread needs more updates.
yes, compensation in the camshafts
and the update is being worked on right now, incoming shortly
Re: 24vVR6T CQ Project: EATSGTR, chassis FAB
Posted: Thu Nov 28, 2013 11:45 am
by my2000apb
UPDATE!!!
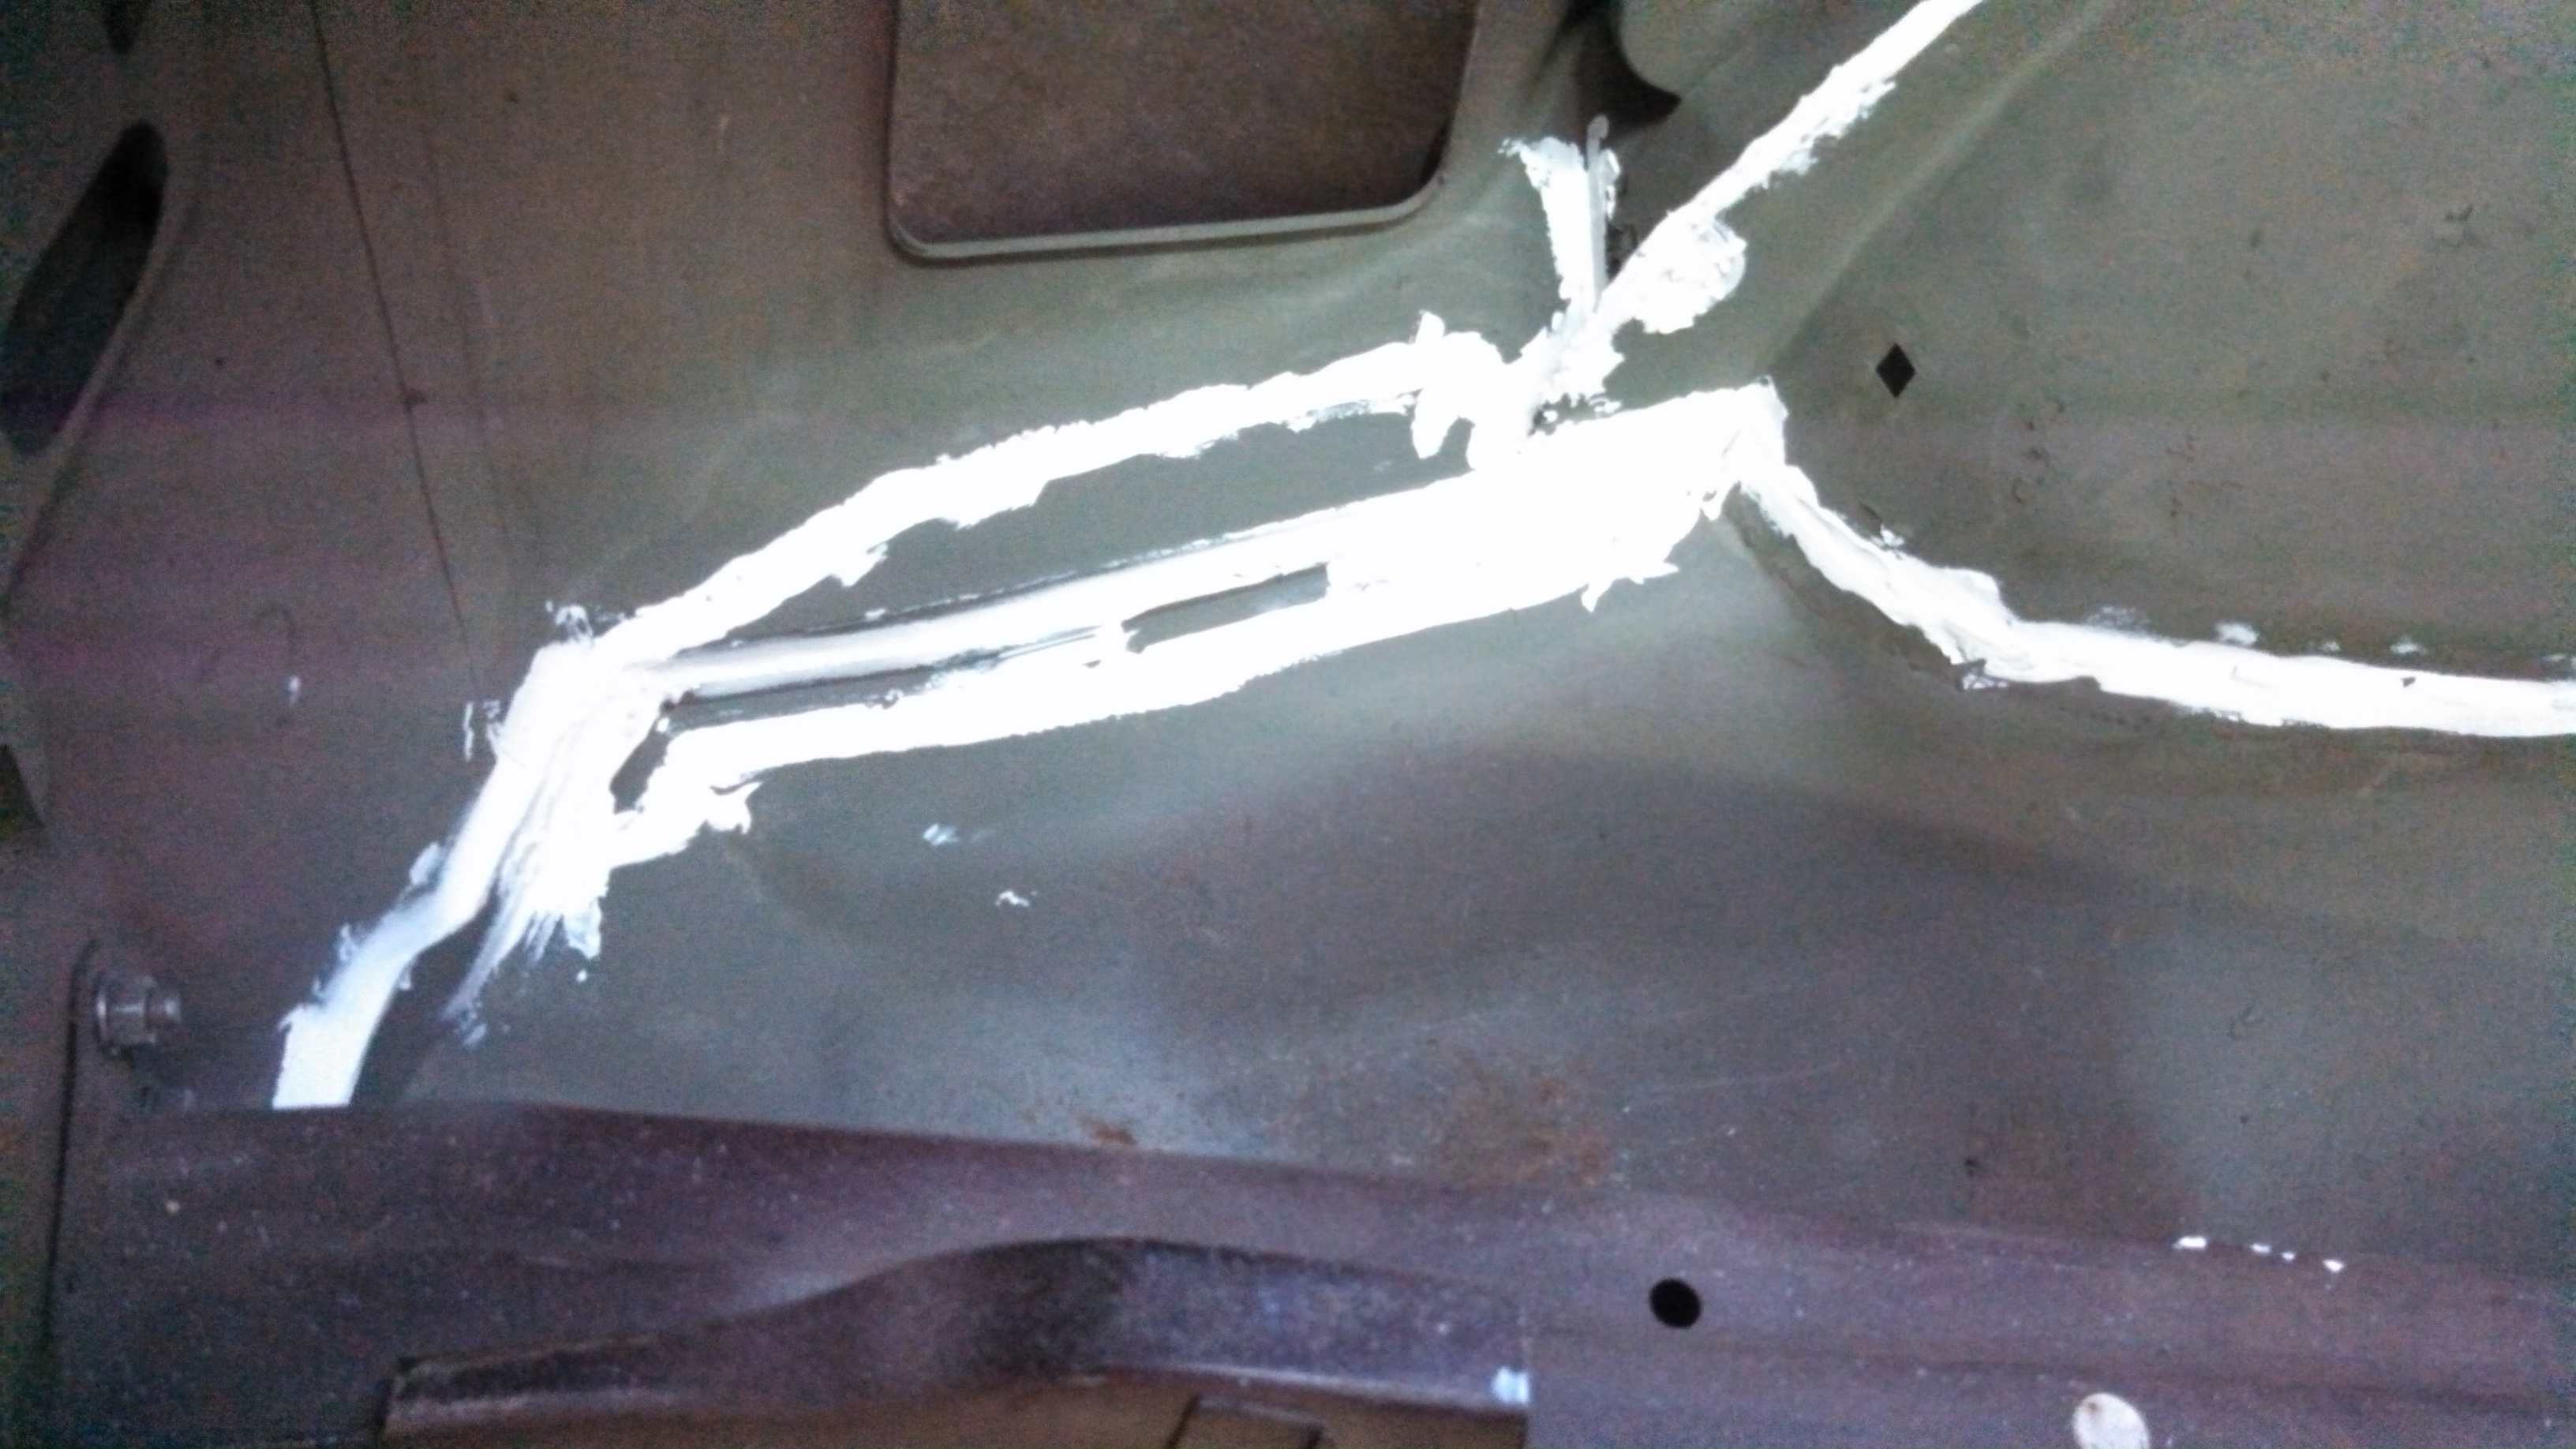
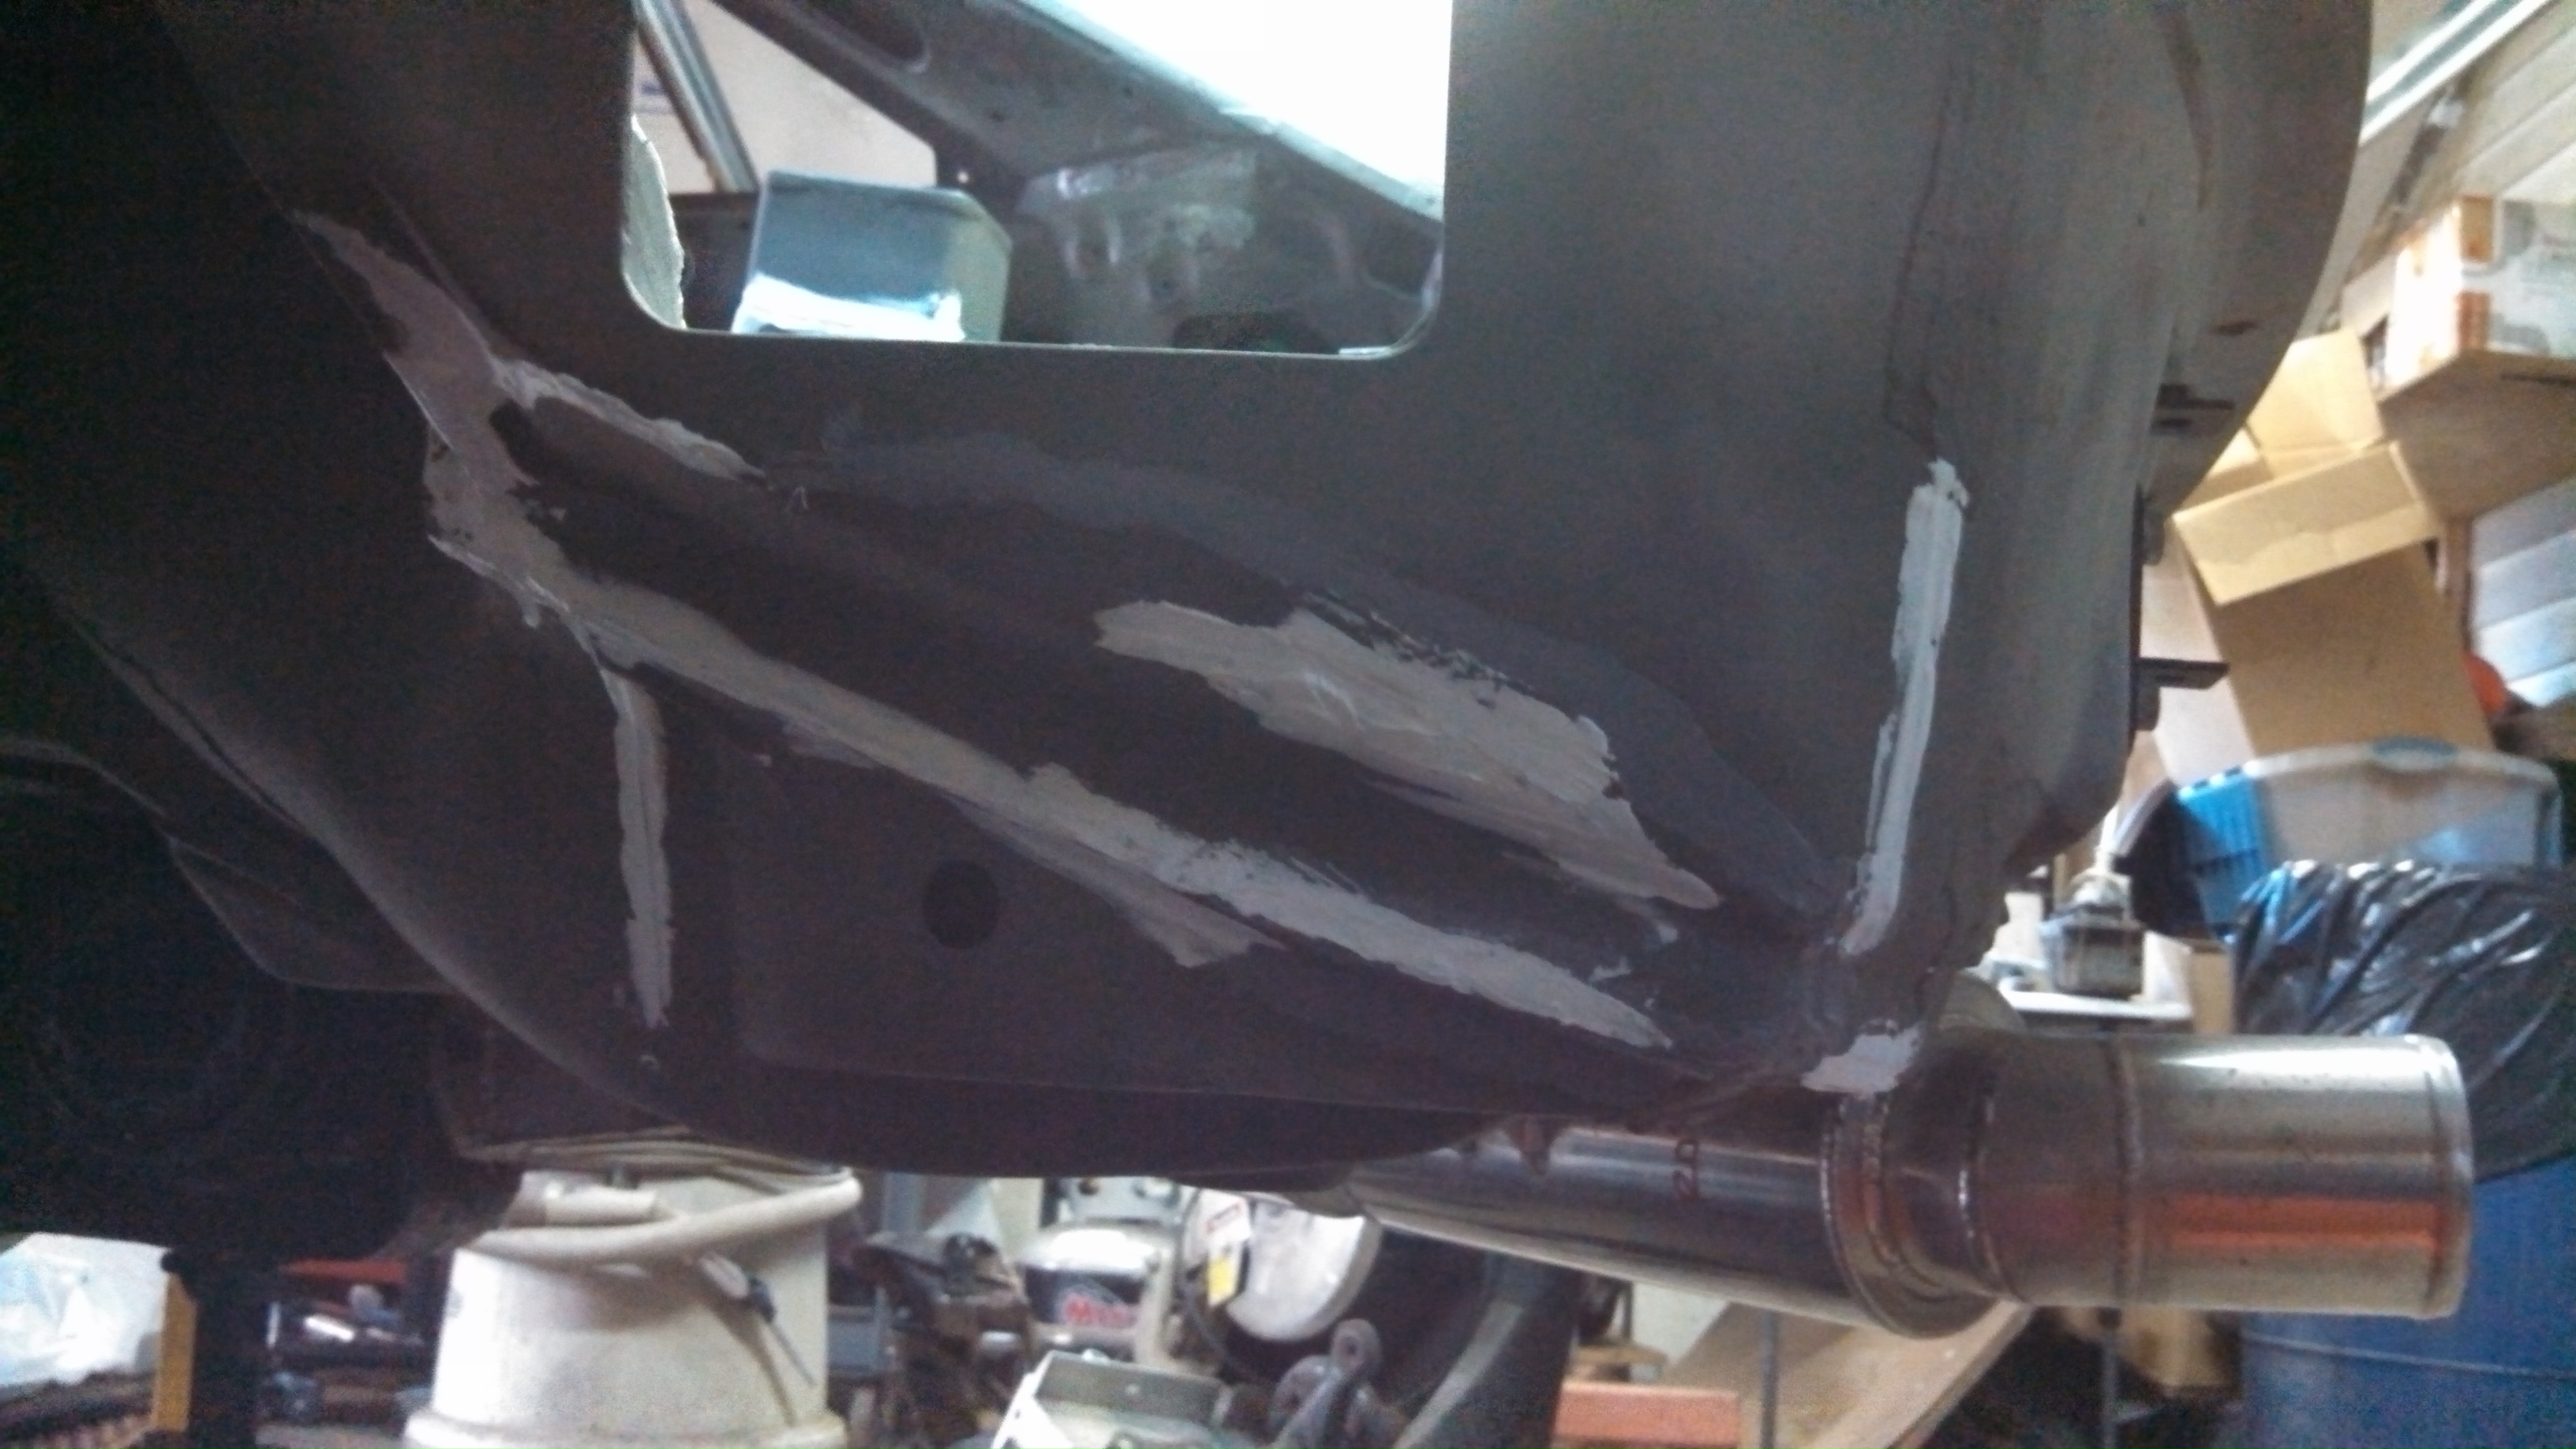
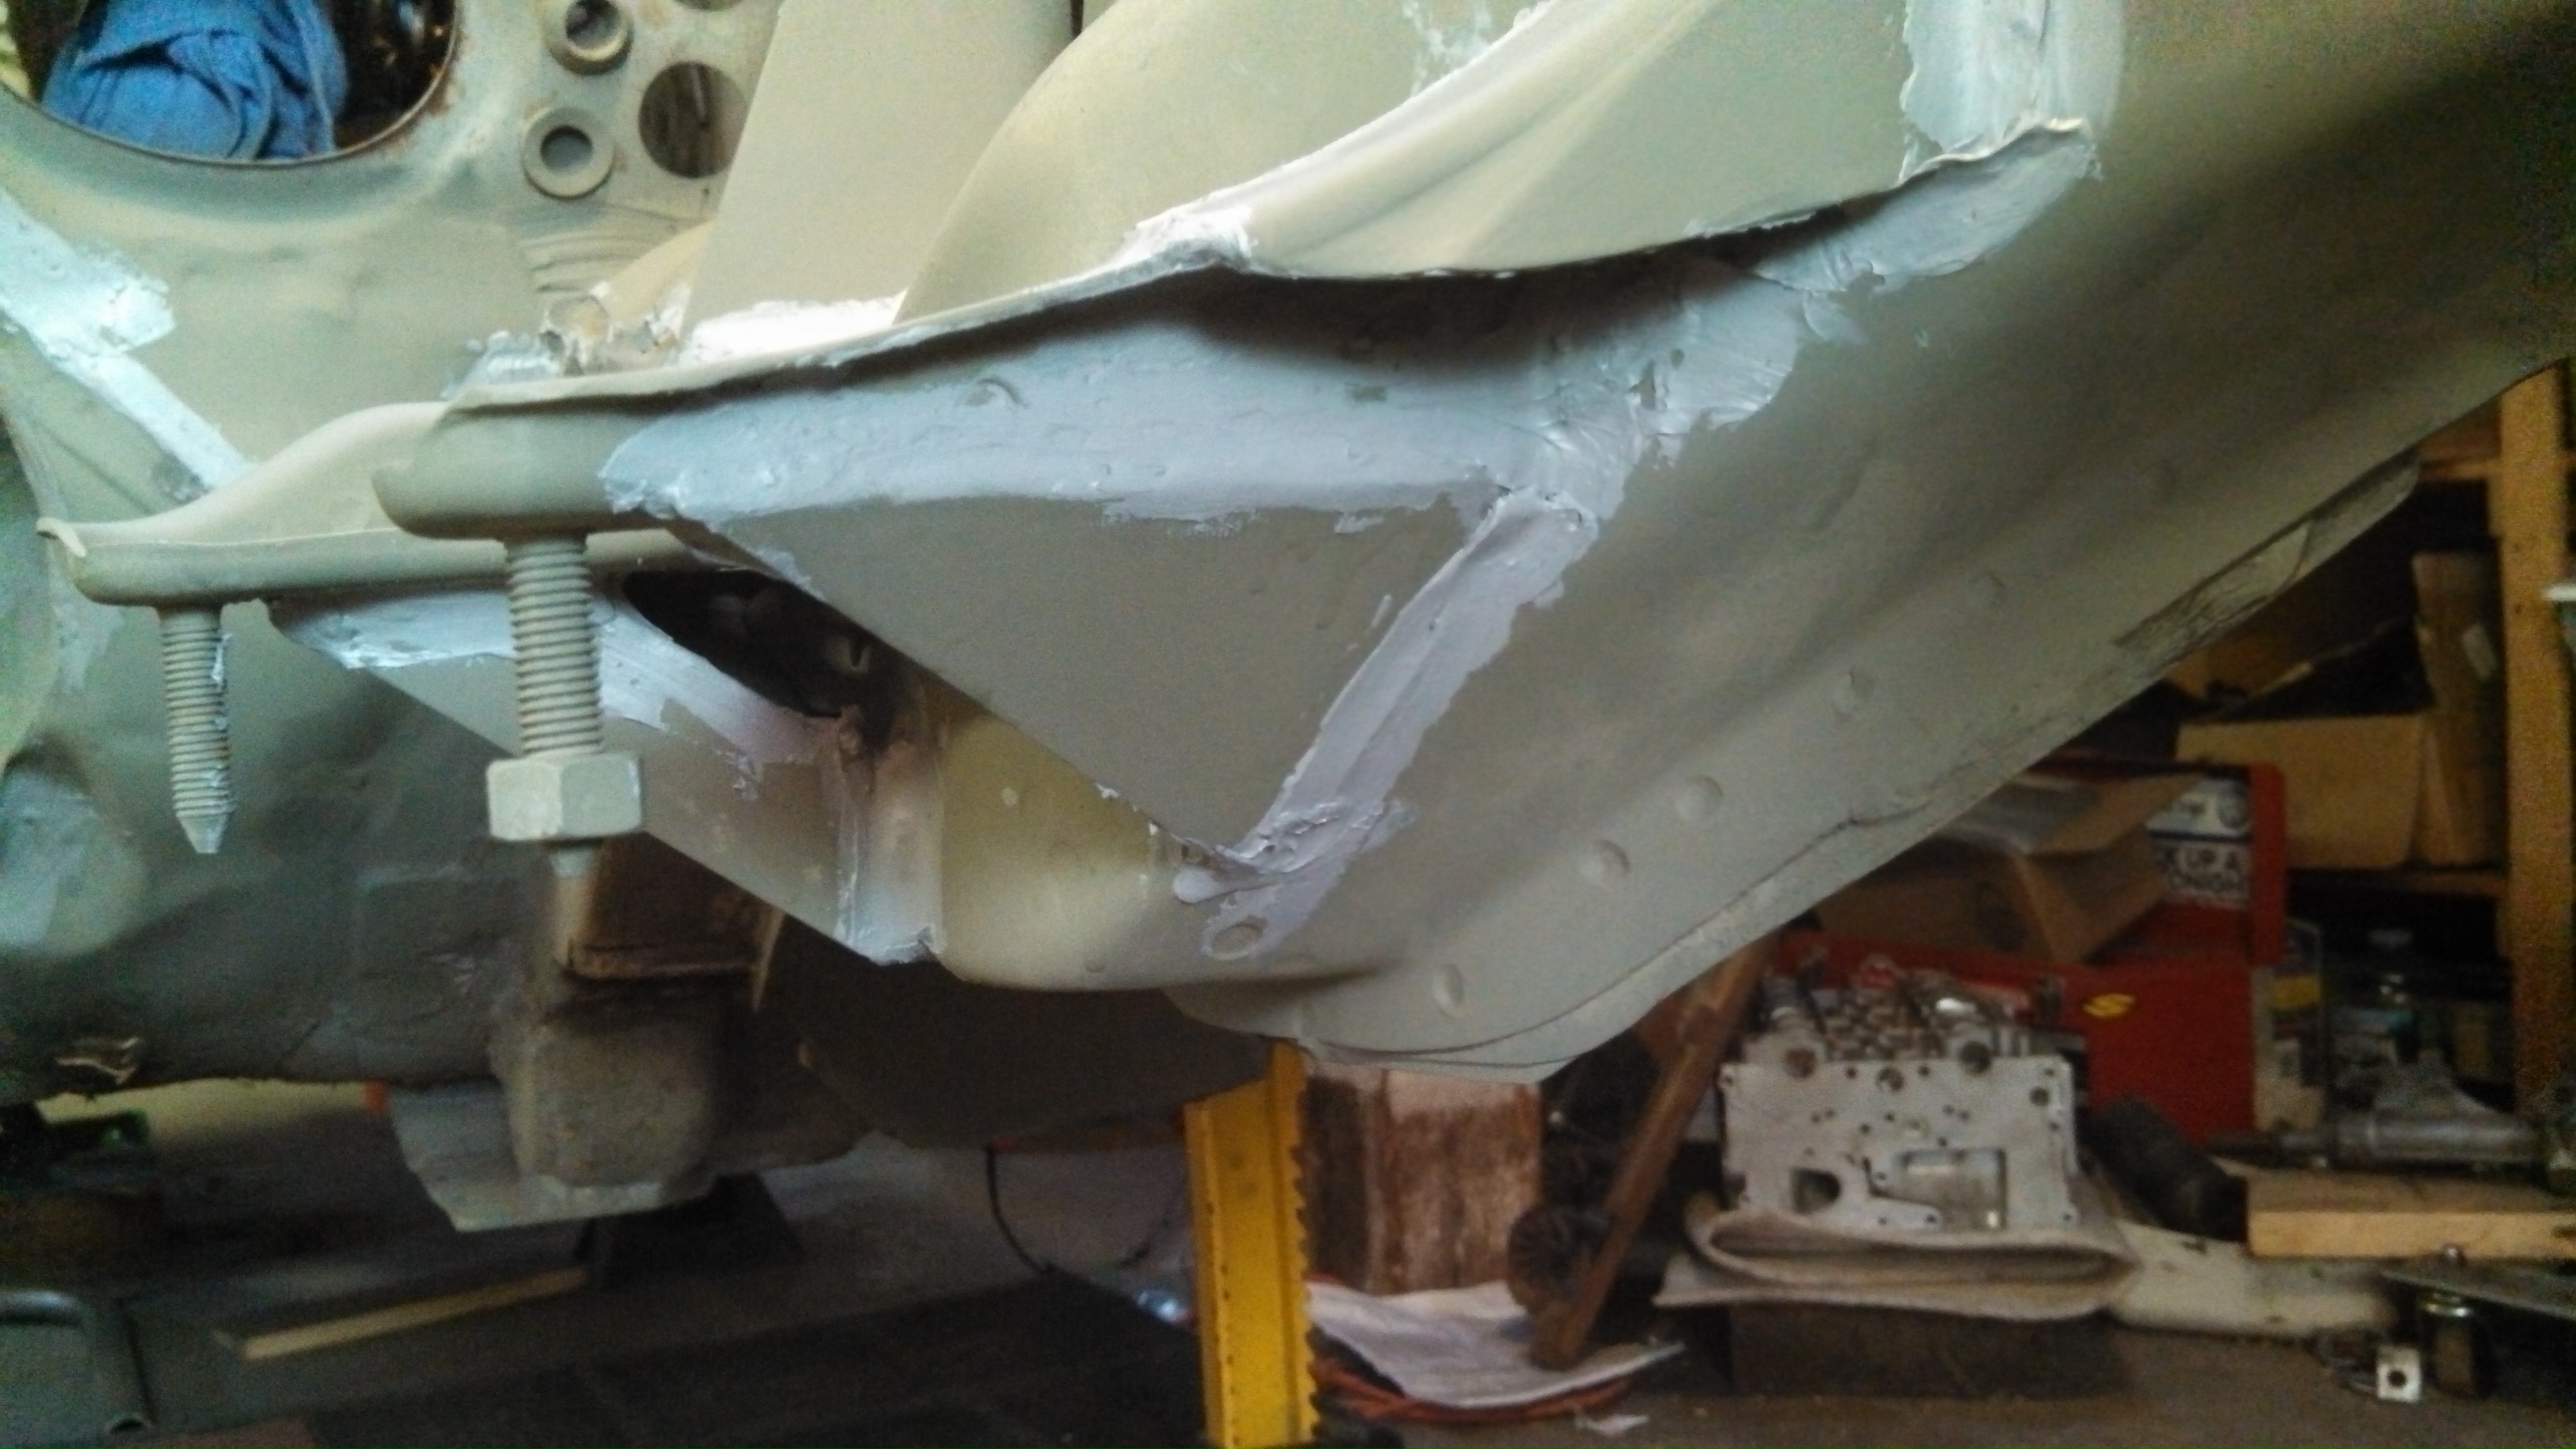
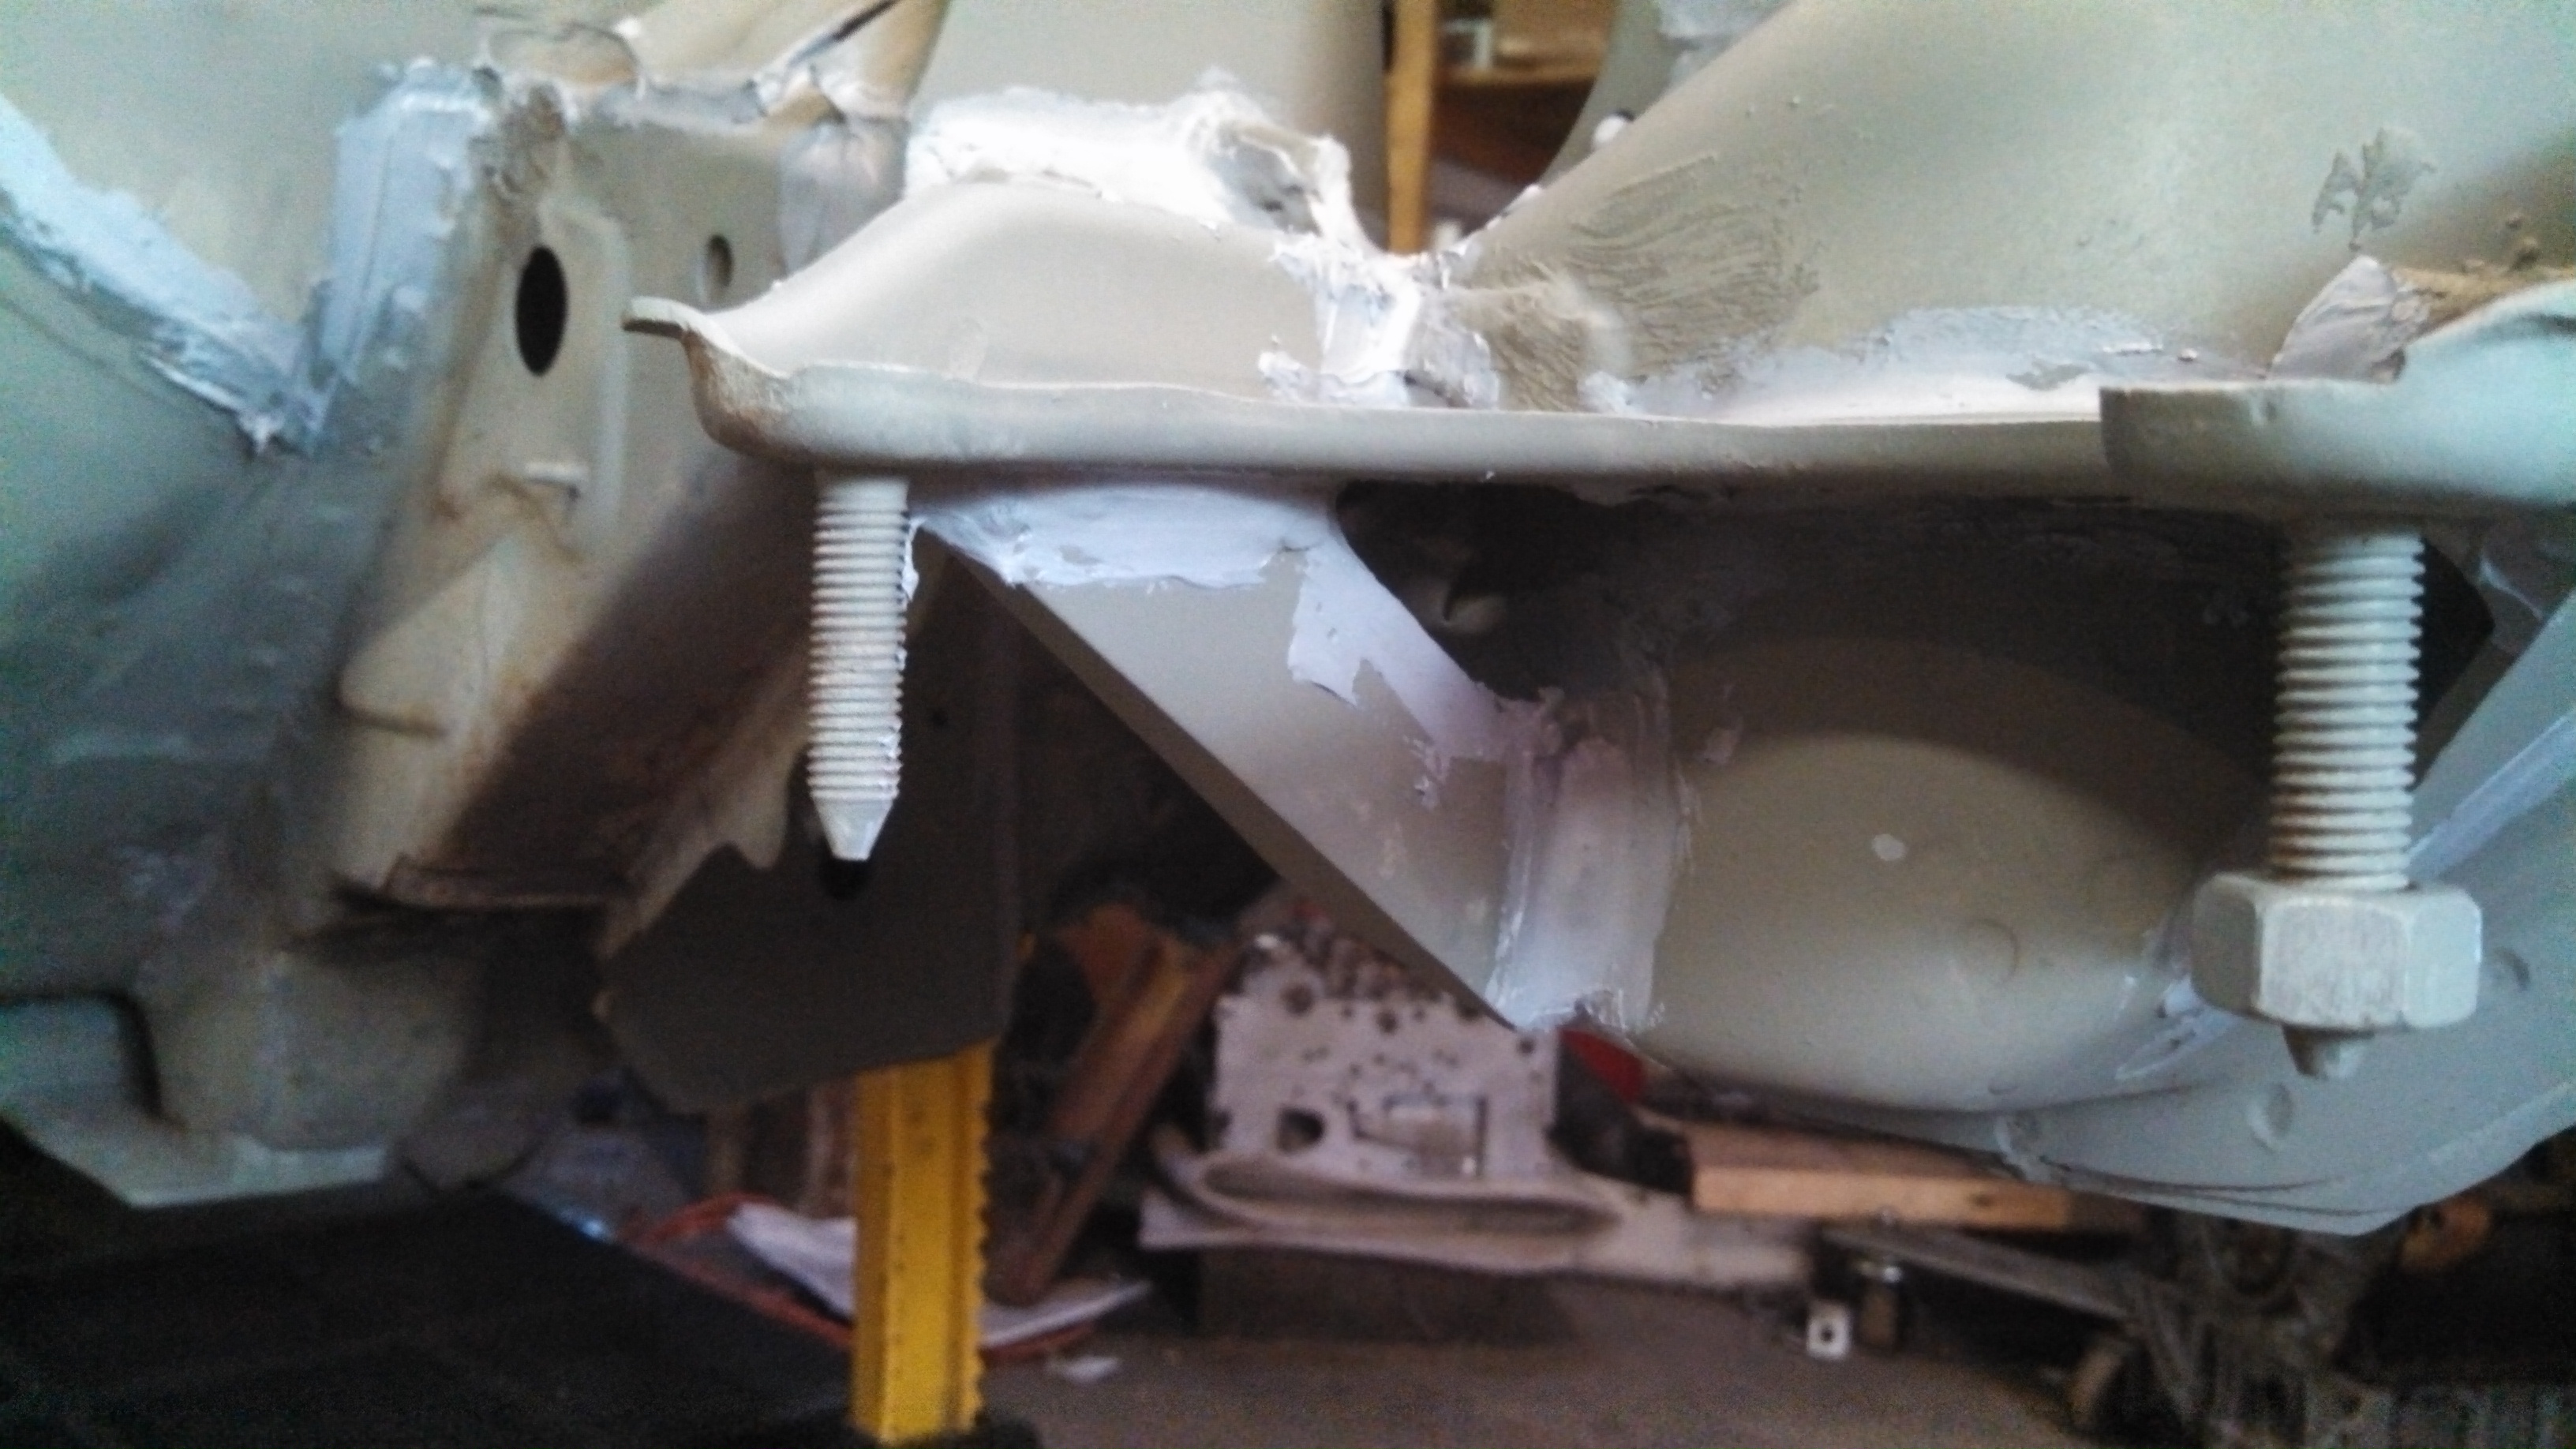
So I had a little bit of rust repair to deal with. Nothing major by any means and it was in an area that was pretty easy to access. The rear lower corners of the shell, where the seam comes together and wraps/goes around the lower corner of the uni-body behind the bumper, that’s where the problem was. The seam had started to rust and separate itself. The repair itself was pretty easy, it just took a bit of time.
The repairs are made with 1/8” thick, ½” x ½” angle and 20 ga. Sheet
Getting started
- rear dr rust patch reinforcement outside.jpg (1.46 MiB) Viewed 45906 times
- rear dr rust patch reinforcement inside above.jpg (1.6 MiB) Viewed 45906 times
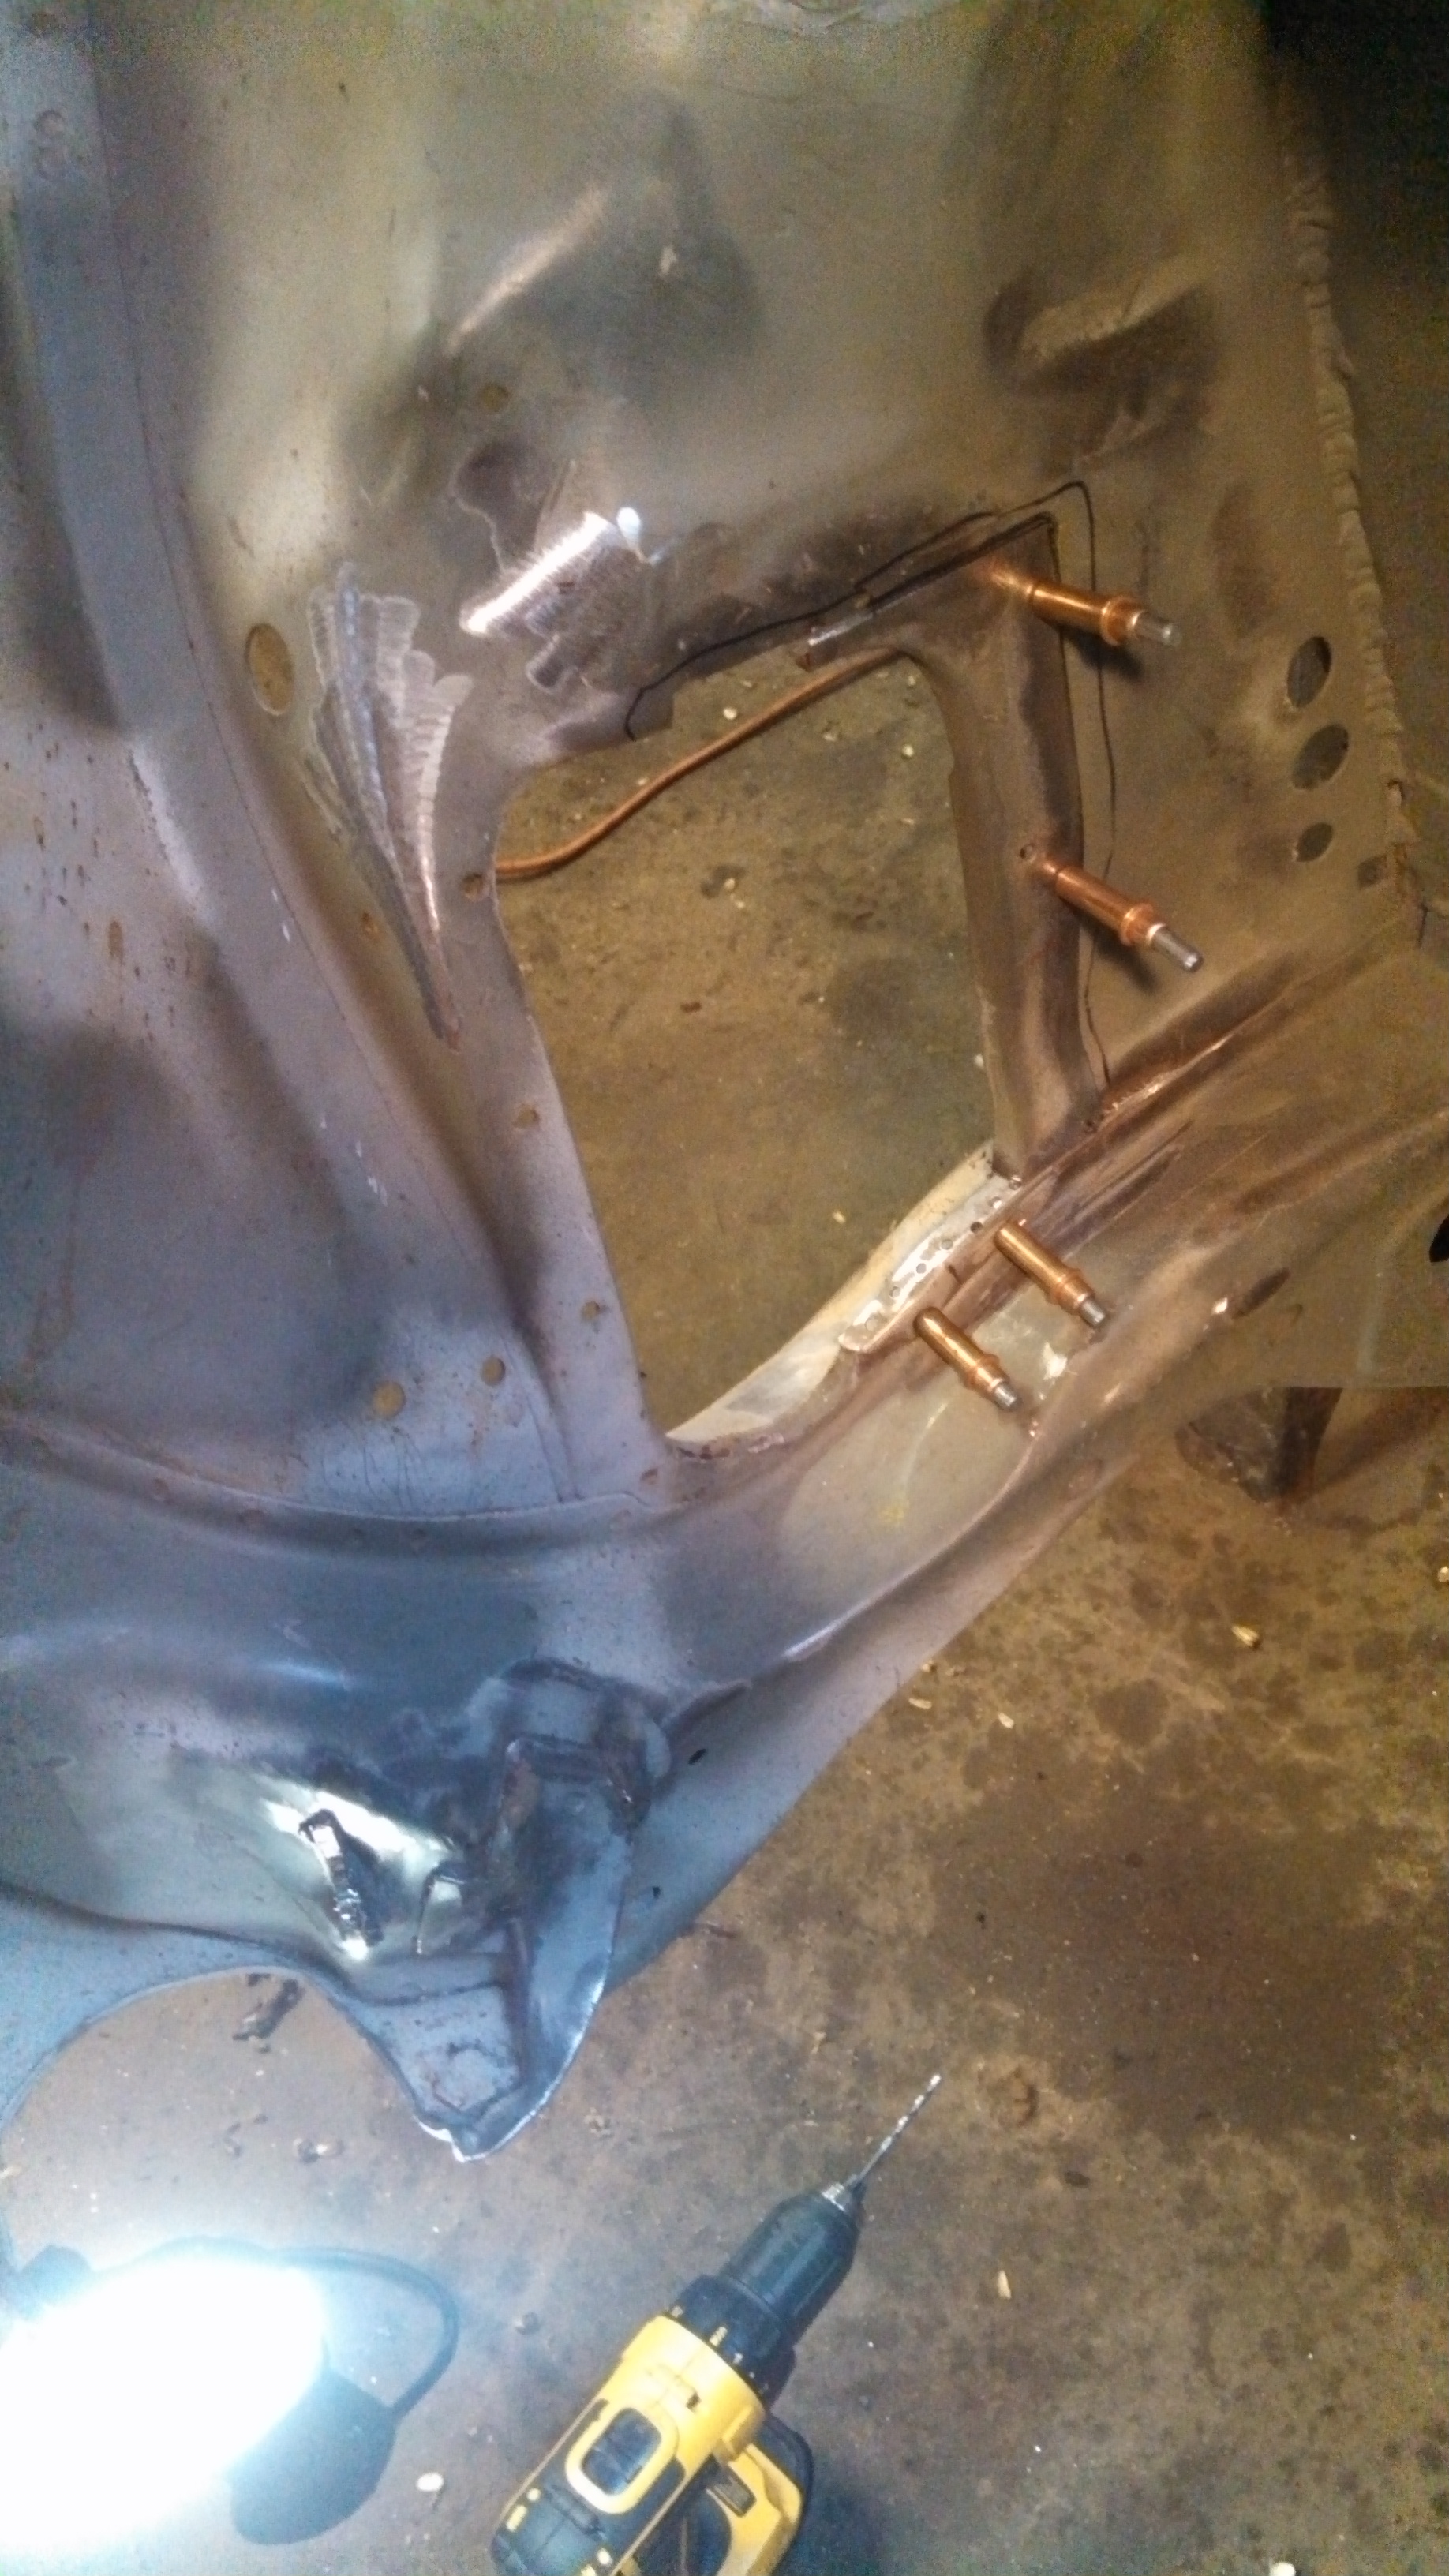
- rear dr rust repair patch inside.jpg (1.65 MiB) Viewed 45906 times
Cleco’s are the best !!!

- rear dr rust patch being made to fit.jpg (1.51 MiB) Viewed 45906 times
- rear dr rust patch ready to weld.jpg (1.54 MiB) Viewed 45906 times
Re: 24vVR6T CQ Project: EATSGTR, chassis FAB
Posted: Thu Nov 28, 2013 11:48 am
by my2000apb
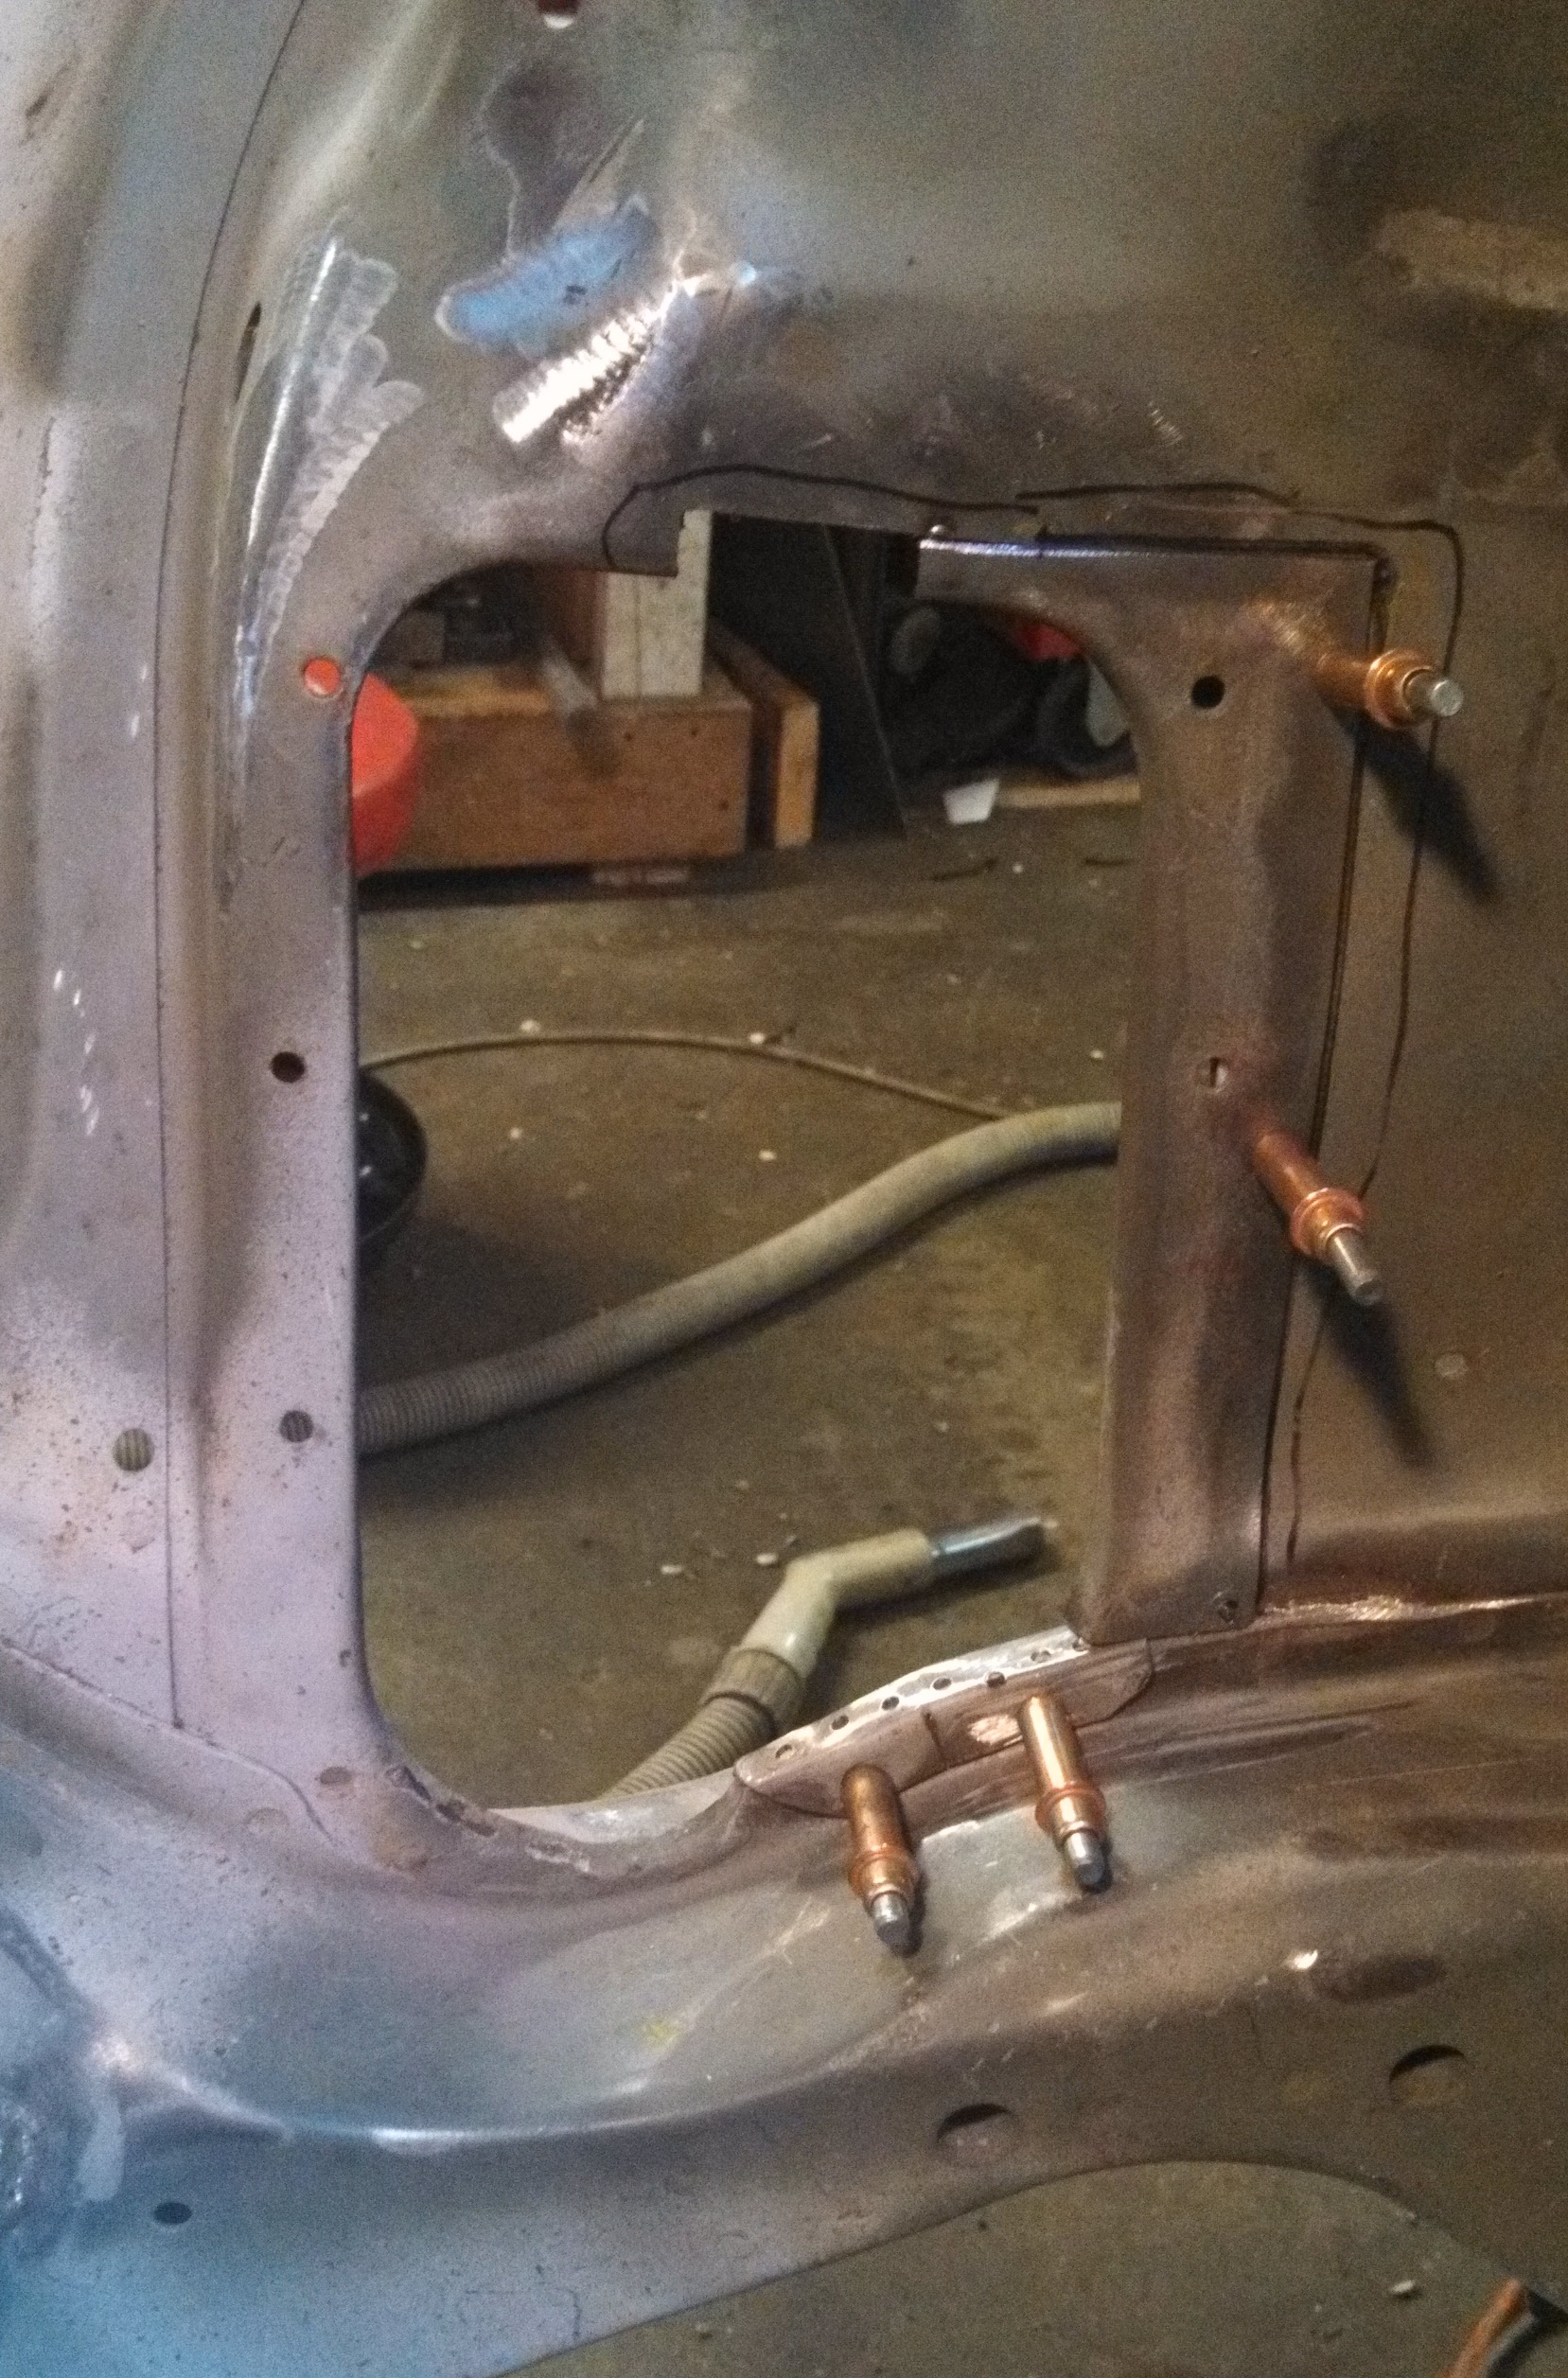
And finally seam welded, primed, and seam-sealed!
- rear corner rust repair welded and sealed.jpg (1.44 MiB) Viewed 45906 times
- rear corner rust repair welded and sealed2.jpg (1.2 MiB) Viewed 45906 times
Re: 24vVR6T CQ Project: EATSGTR, chassis FAB
Posted: Thu Nov 28, 2013 11:57 am
by my2000apb
MORE!!!
I’m running the HTMS steering arms, and with their adjustability I needed to open up the steering arms holes for proper clearances. I cut them out carefully so I could reuse the rounded corners for a nice, clean install.
Here they are cut out
- steering arm holes enlarged.jpg (1.47 MiB) Viewed 45906 times
- steering arm holes enlarged 2.jpg (1.48 MiB) Viewed 45906 times
- steering arm holes weld detail.jpg (1.18 MiB) Viewed 45906 times
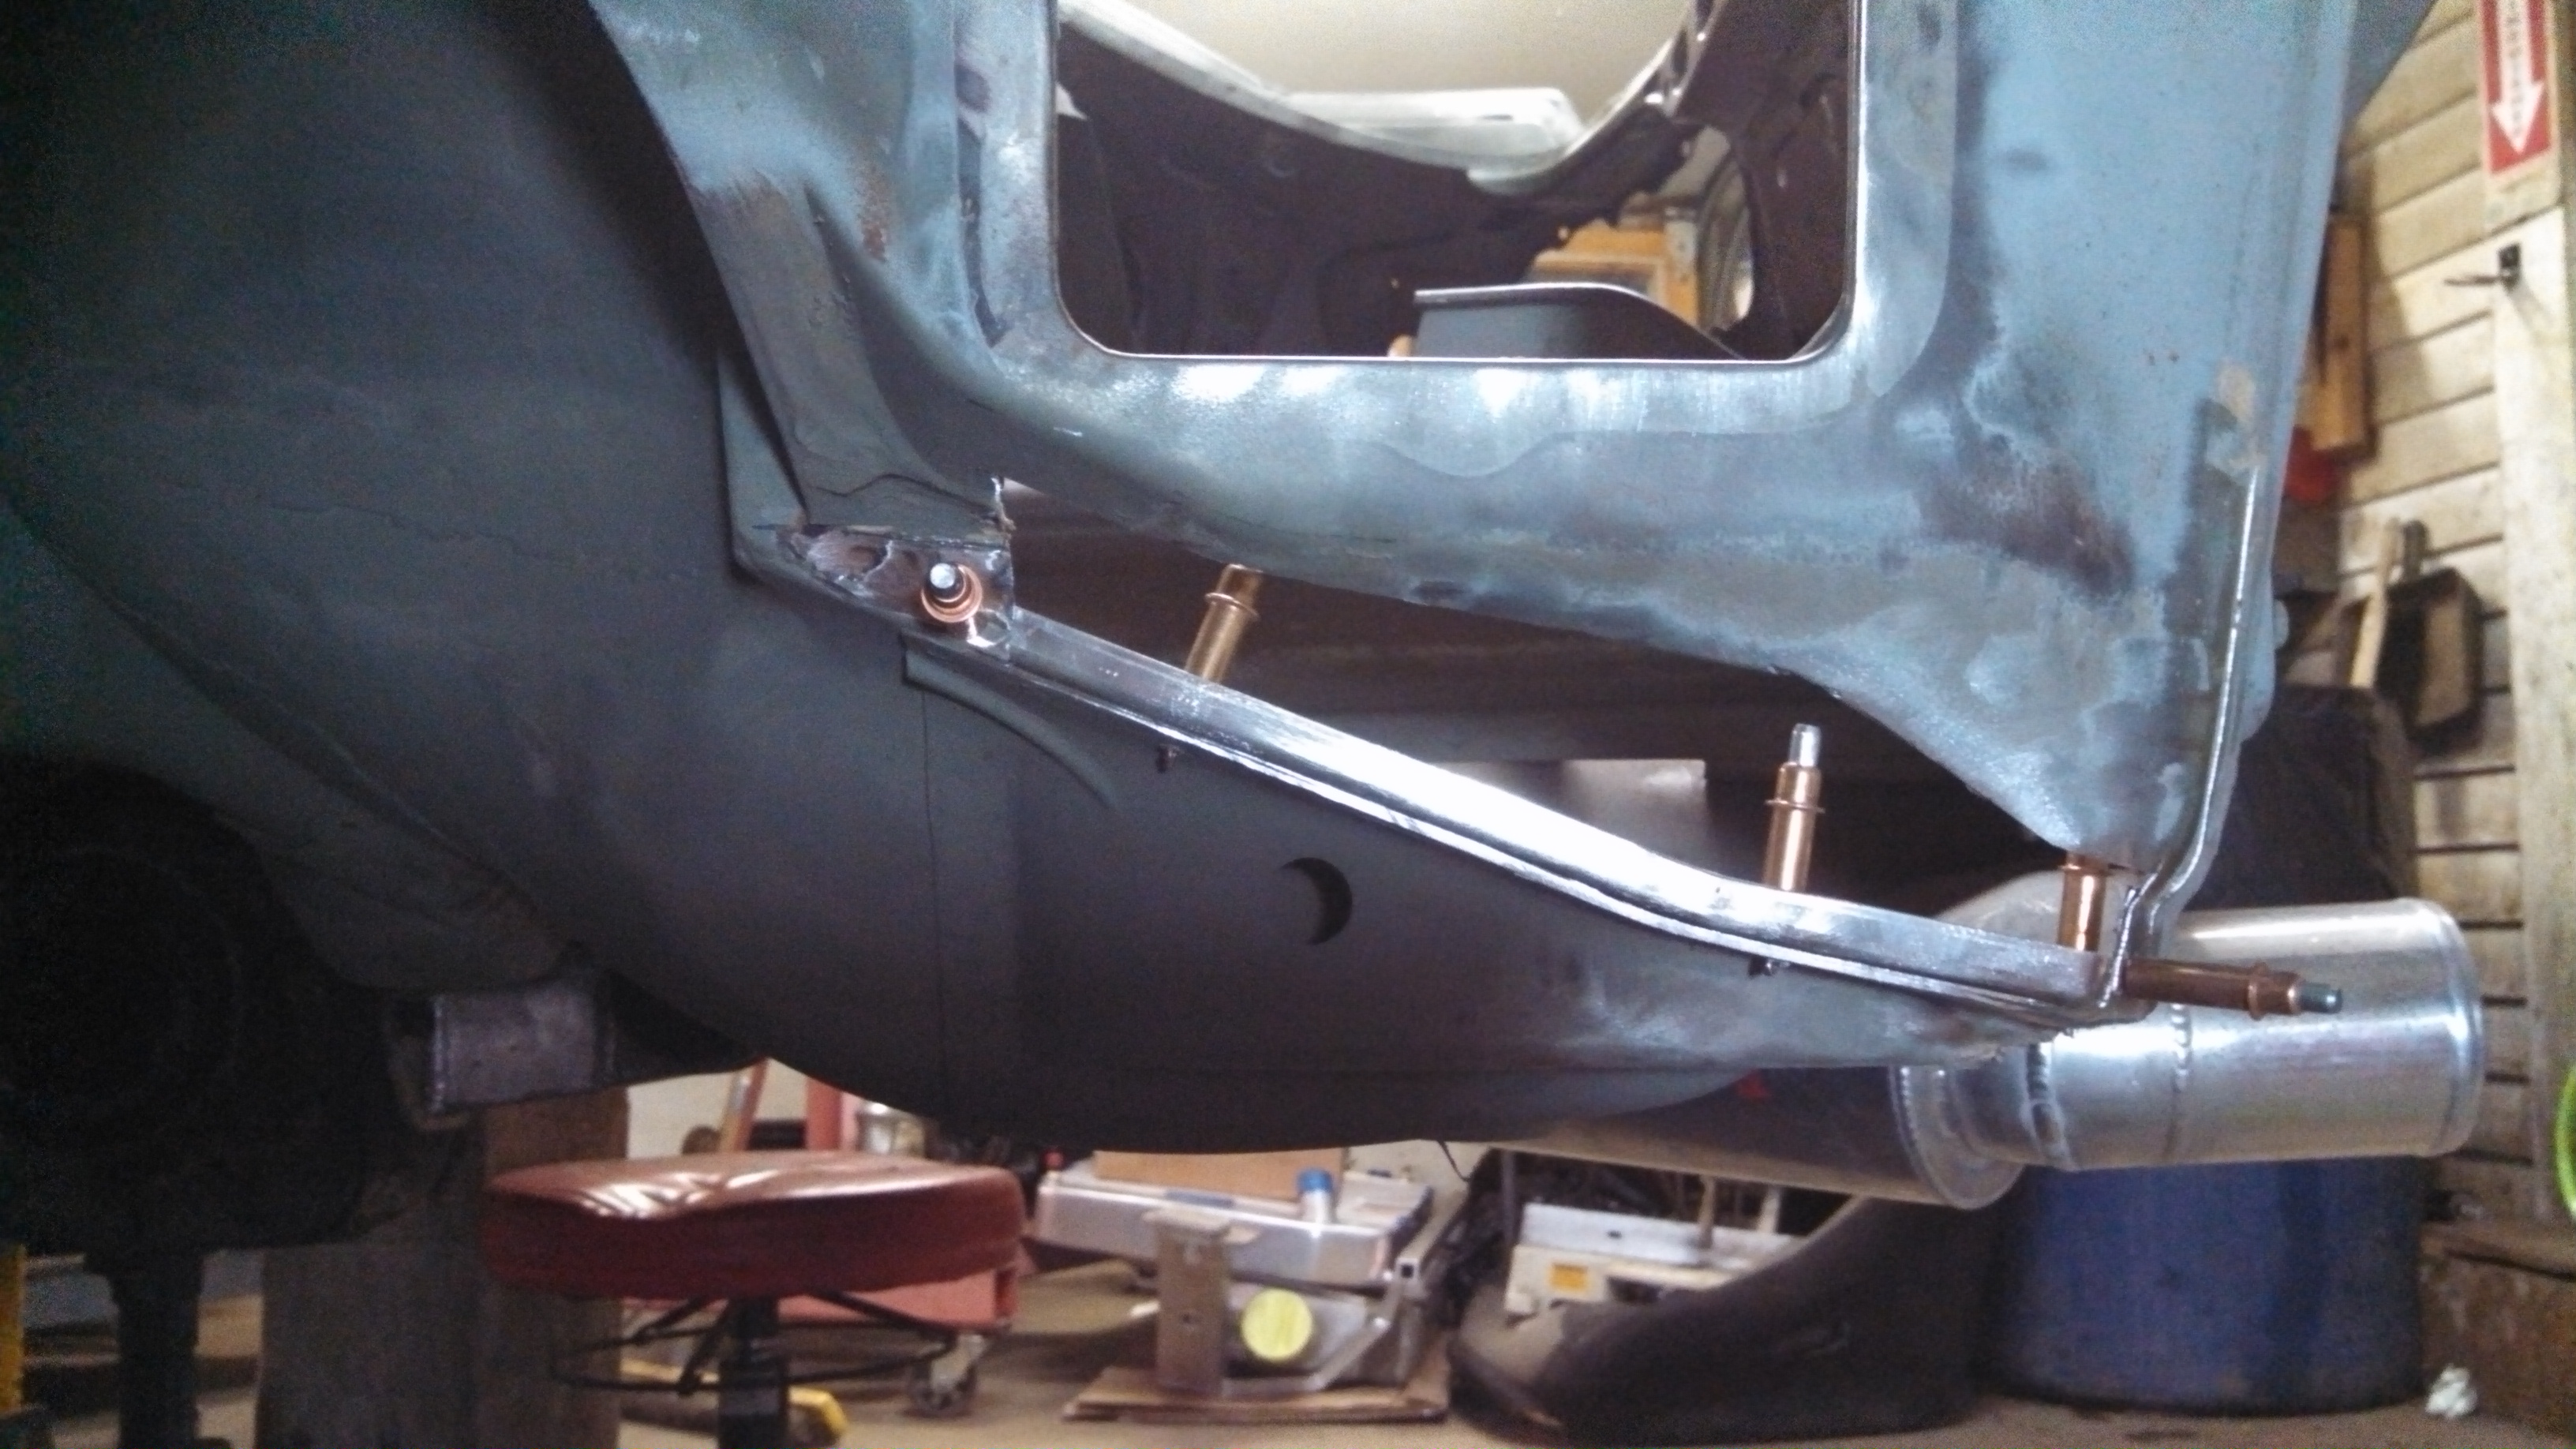
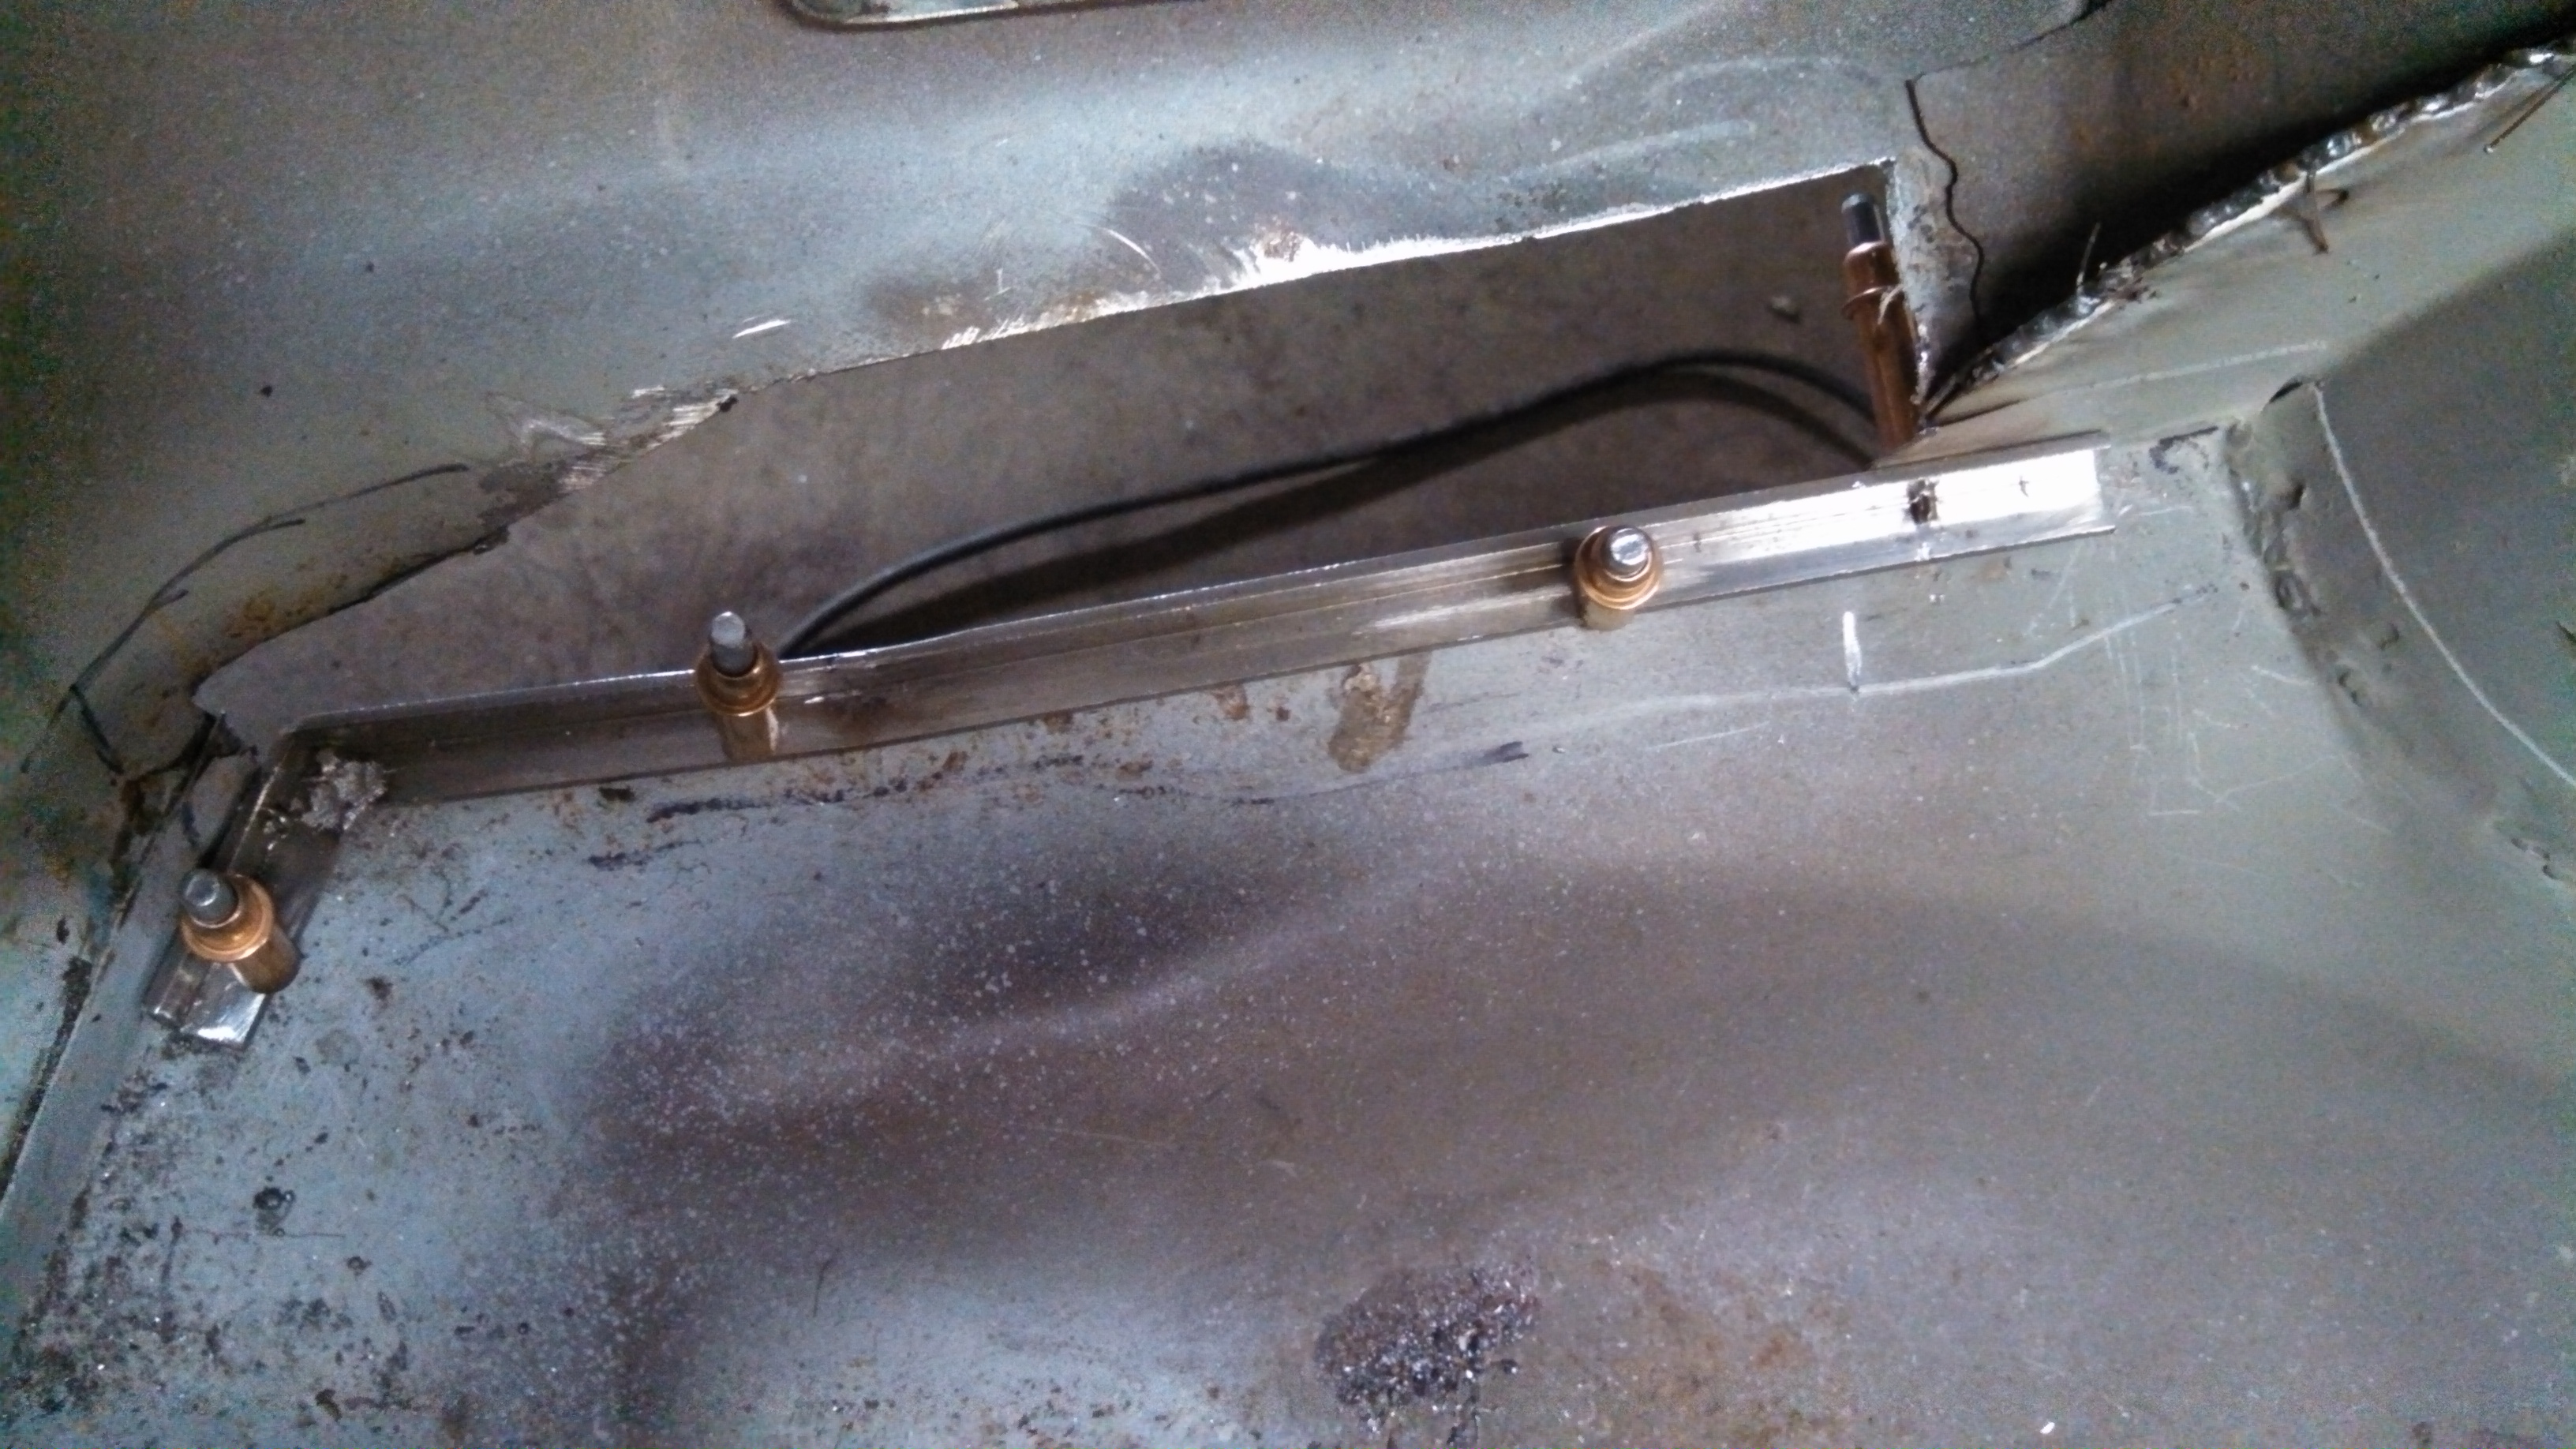
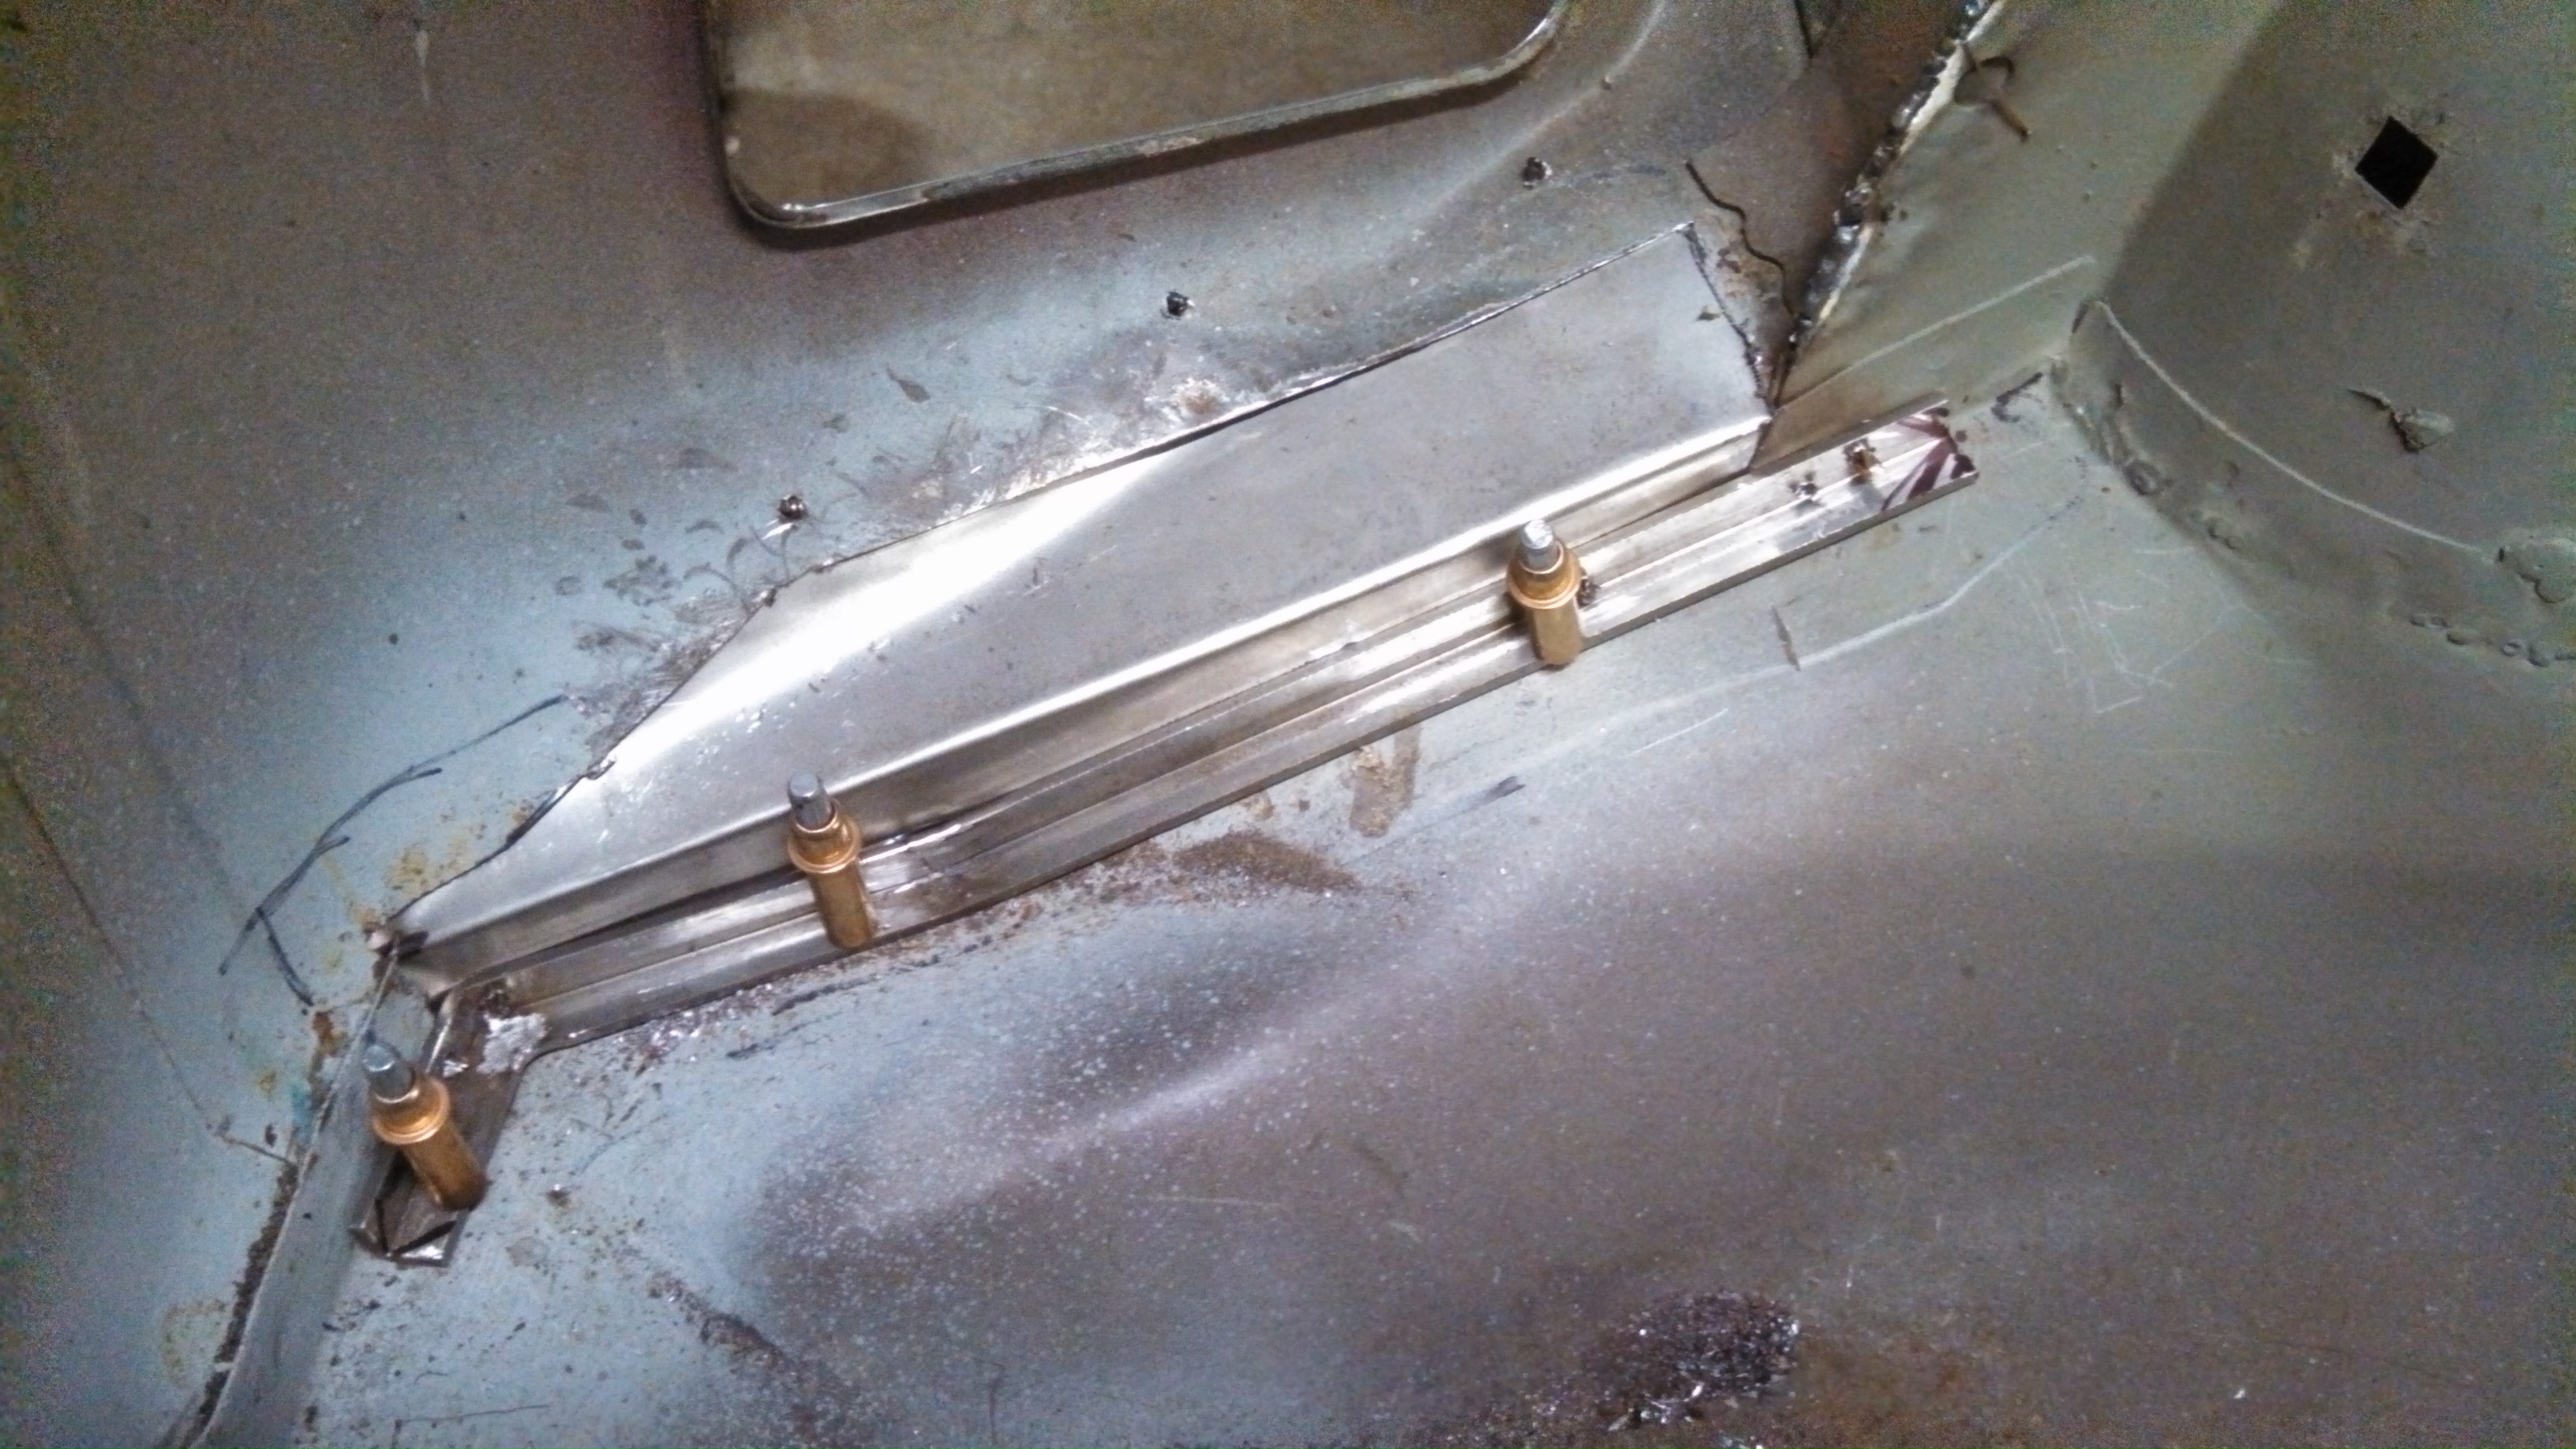
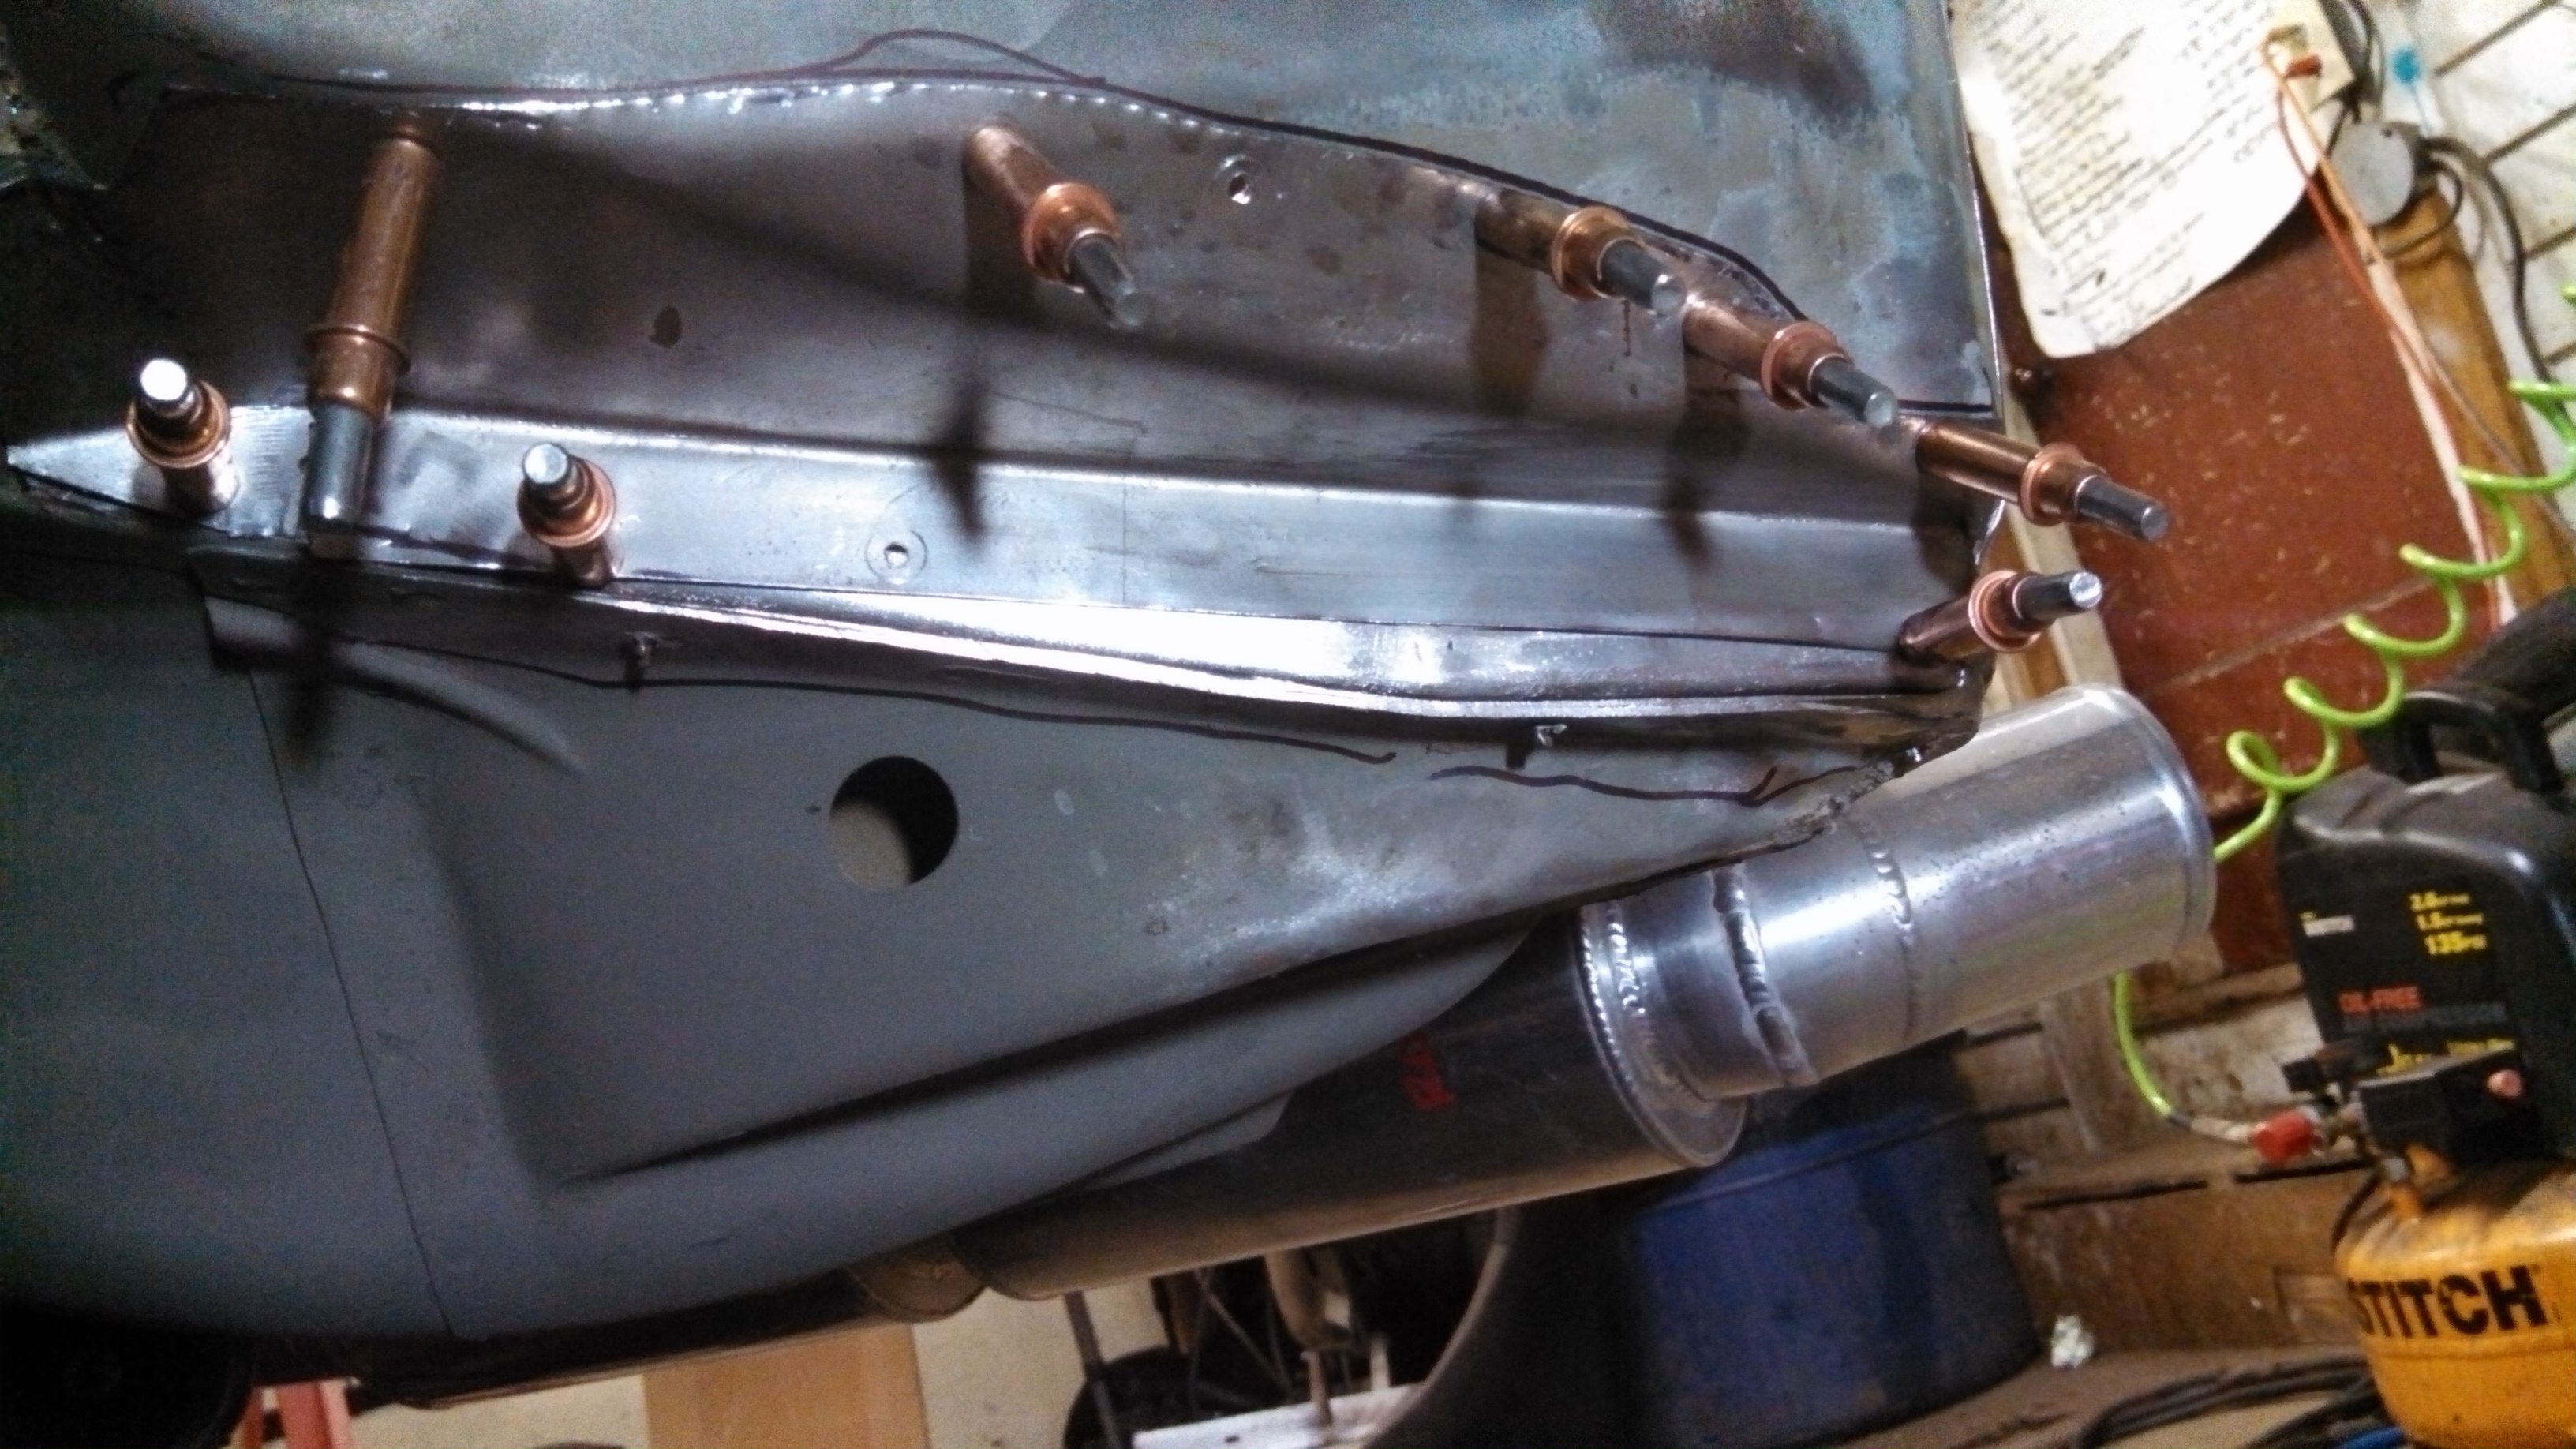
I also added a large steering rack to strut tower brace. These cars are pretty flexible and with the large steering forces that will be generated, I thought it would be a good idea to reinforce it. The brace is wide enough that it was fully welded to either side of the upper portion of the frame rail, and then welded in/out all the way to the top. Getting the rack in/out is a bit tight, but its well worth it for the stiffness and strength.
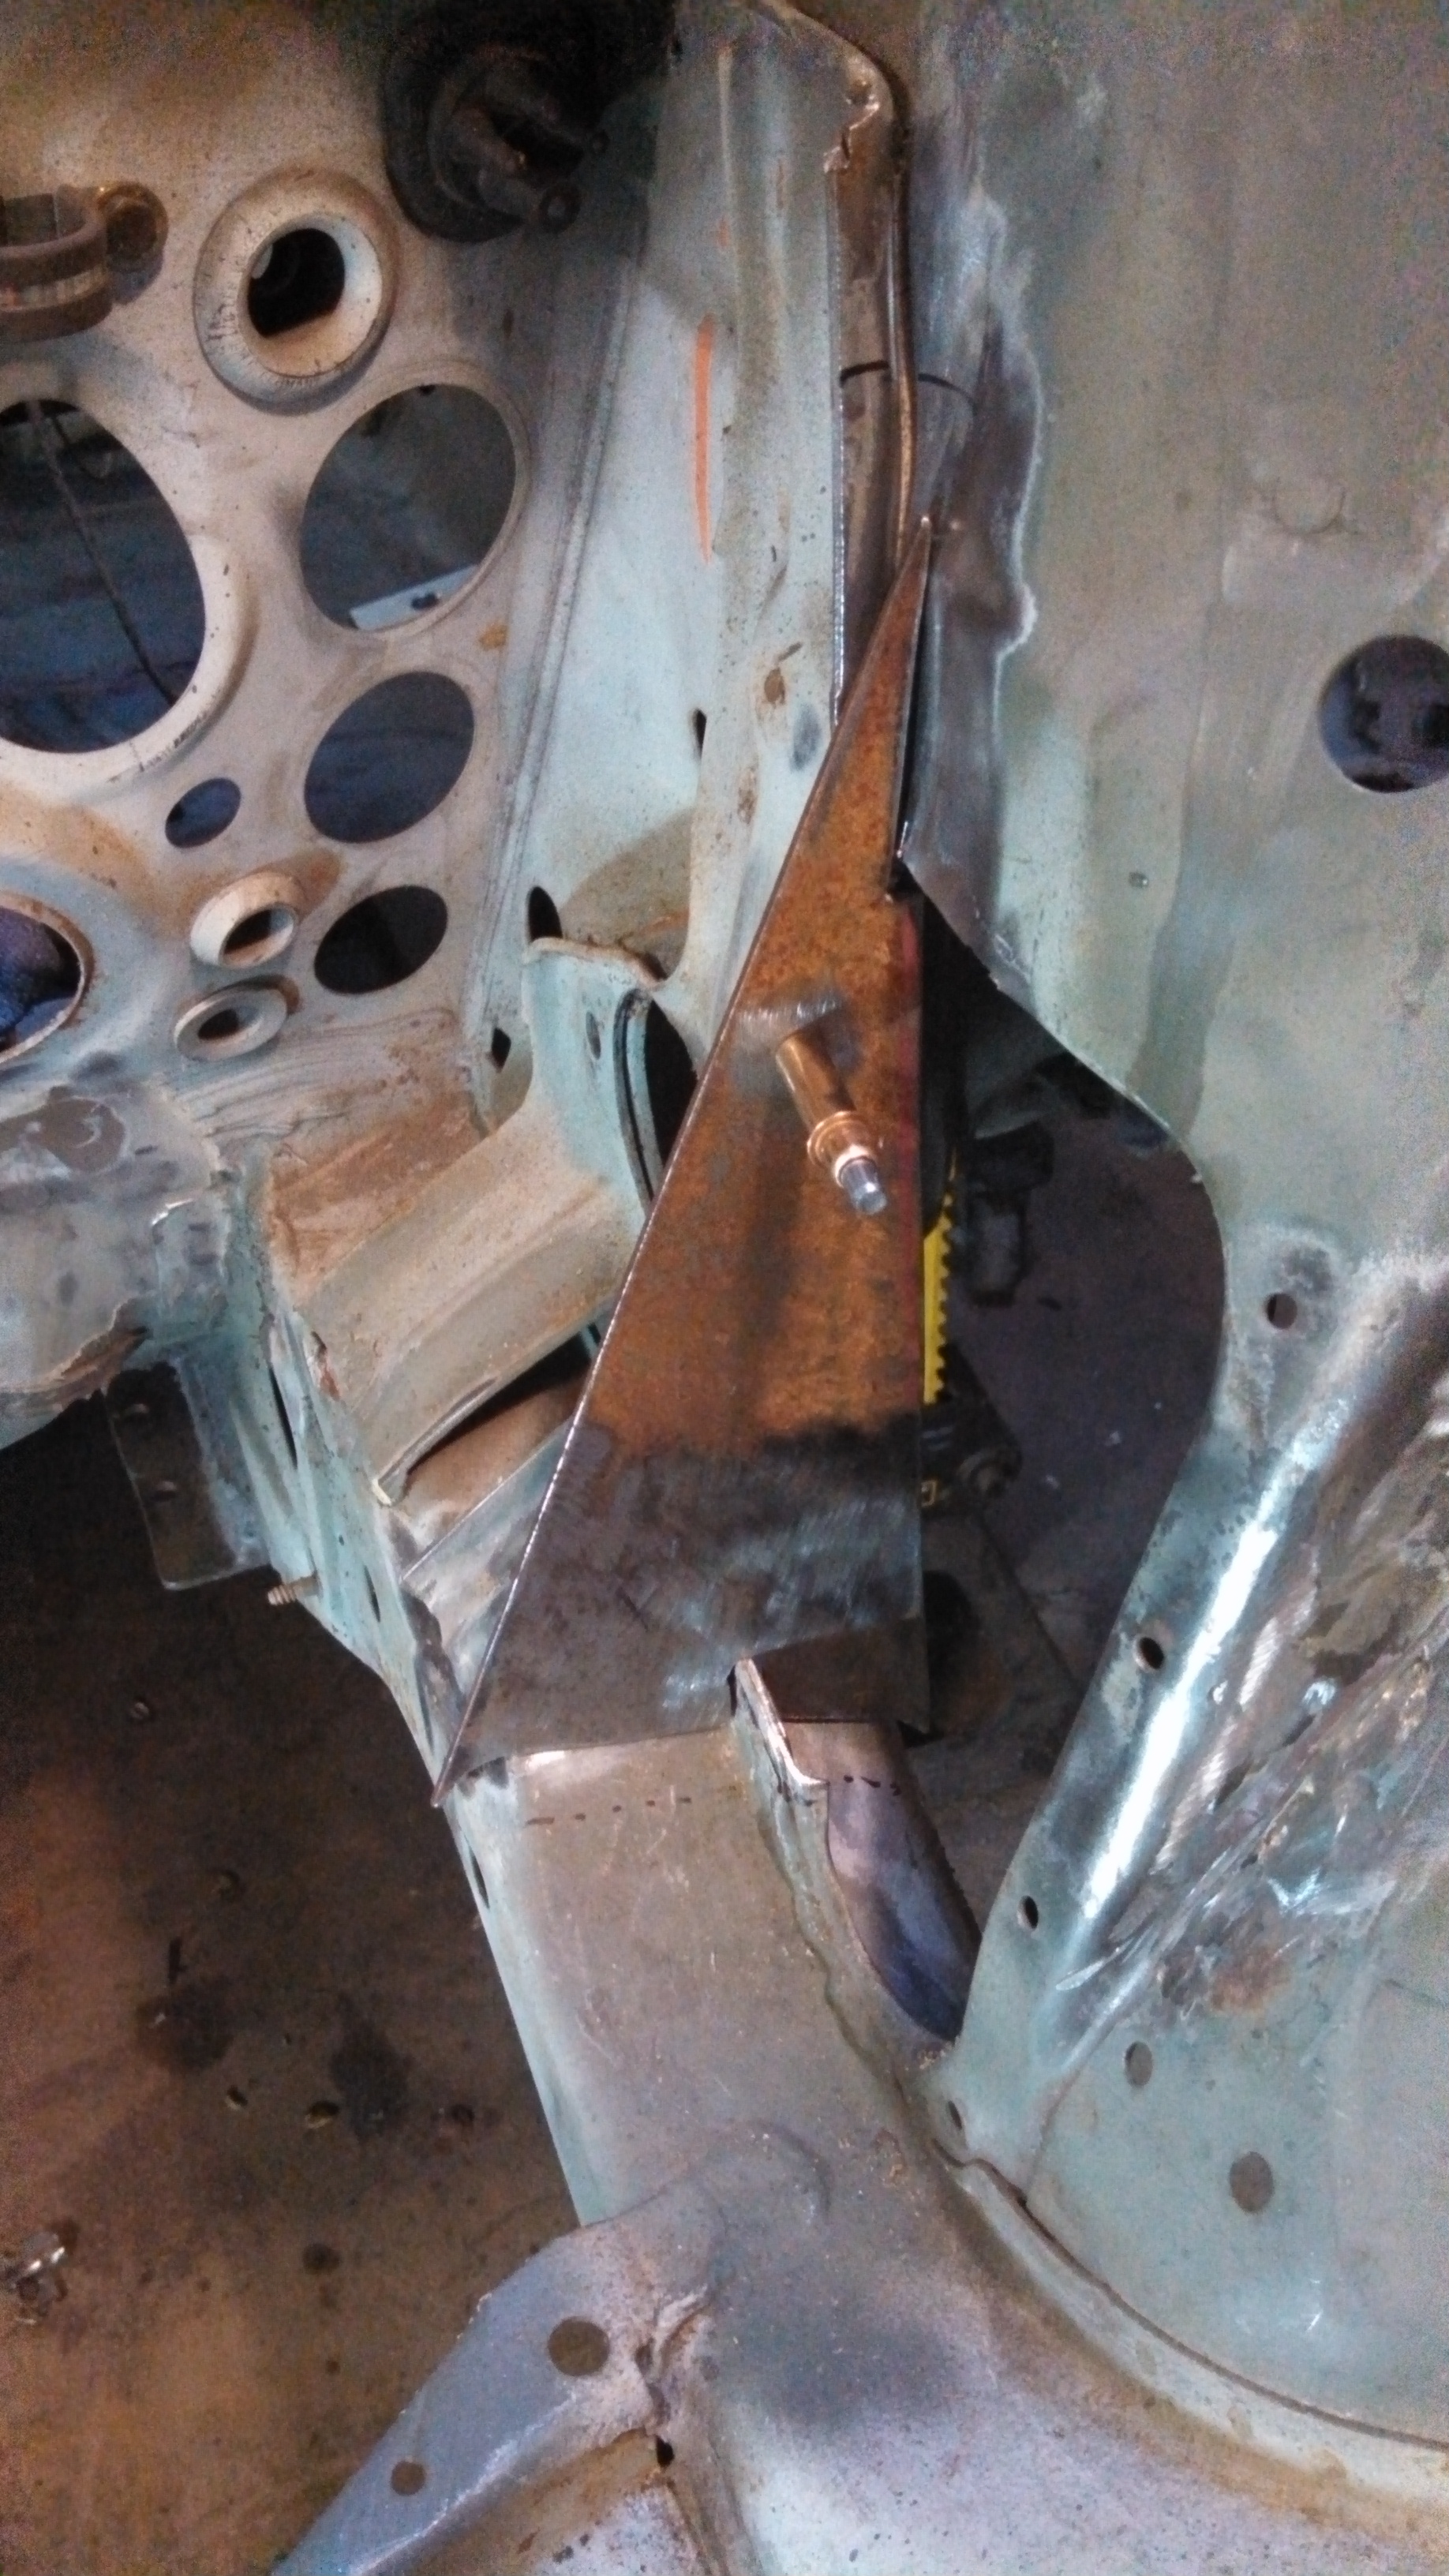
- steering rack strut tower brace.jpg (1.6 MiB) Viewed 45906 times
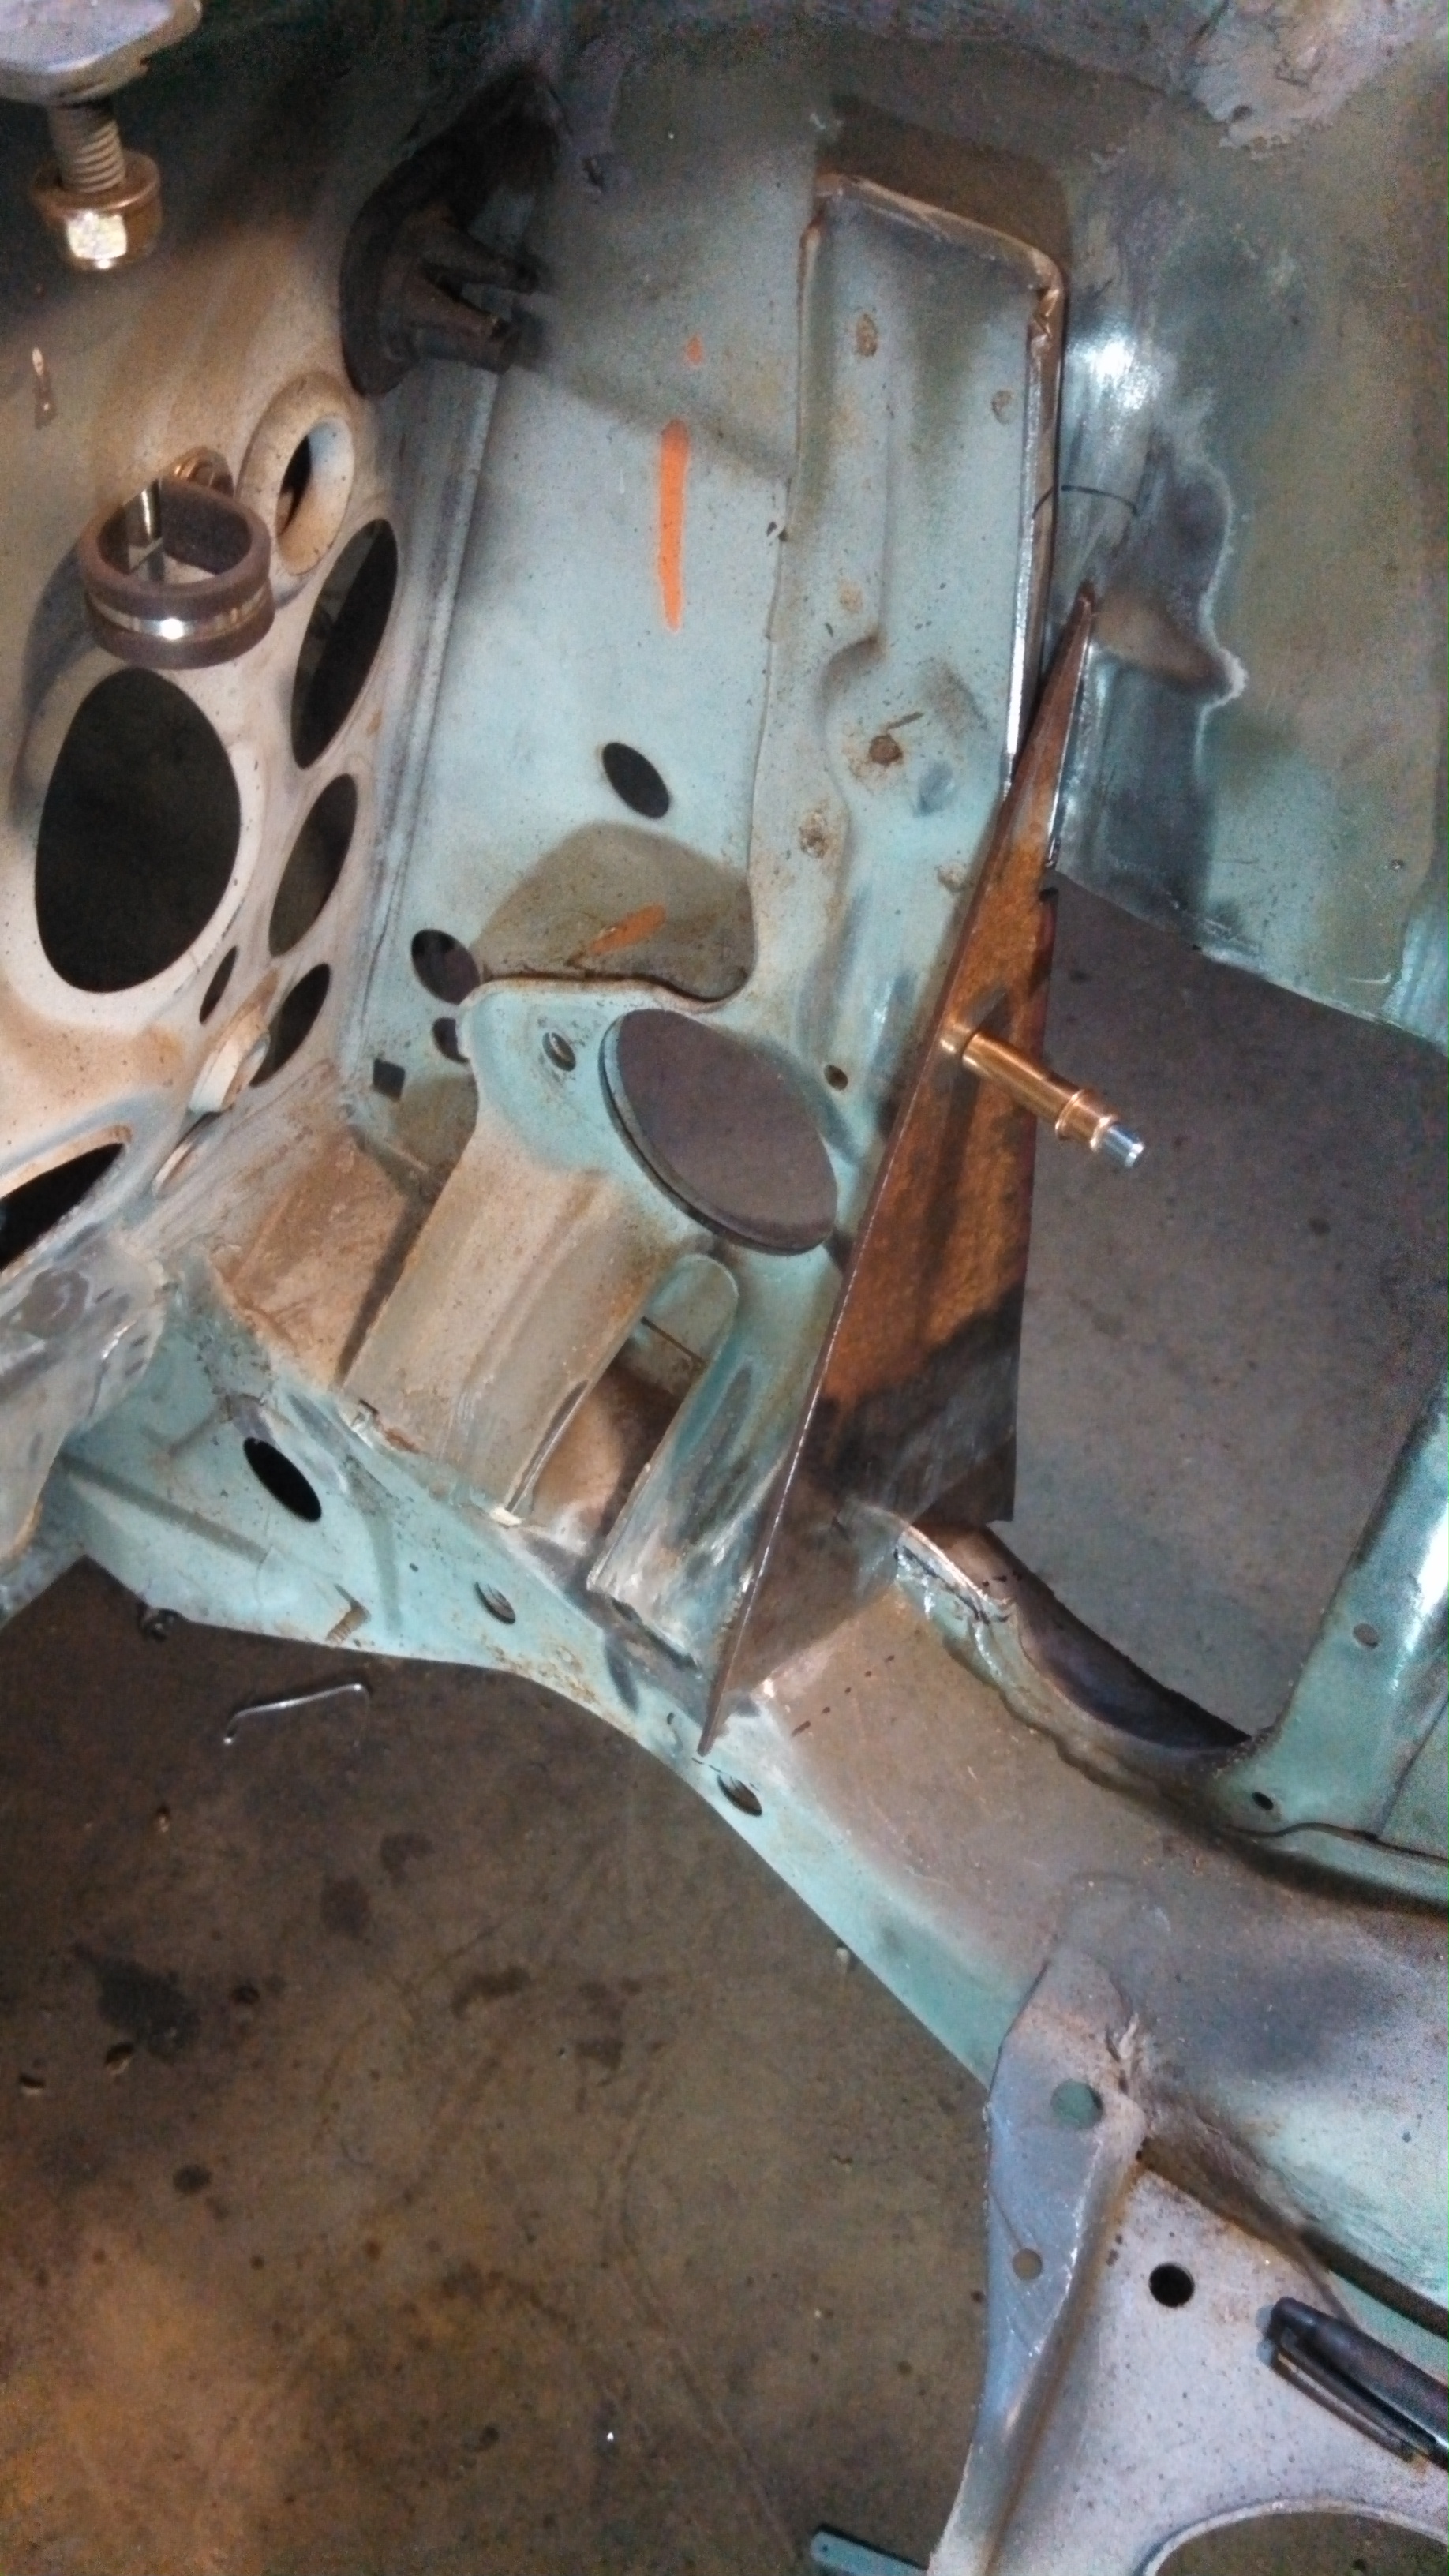
- steering rack strut tower brace2.jpg (1.51 MiB) Viewed 45906 times
Re: 24vVR6T CQ Project: EATSGTR, chassis FAB
Posted: Thu Nov 28, 2013 12:06 pm
by my2000apb
Re: 24vVR6T CQ Project: EATSGTR, chassis FAB
Posted: Thu Nov 28, 2013 12:13 pm
by my2000apb
MORE!!!
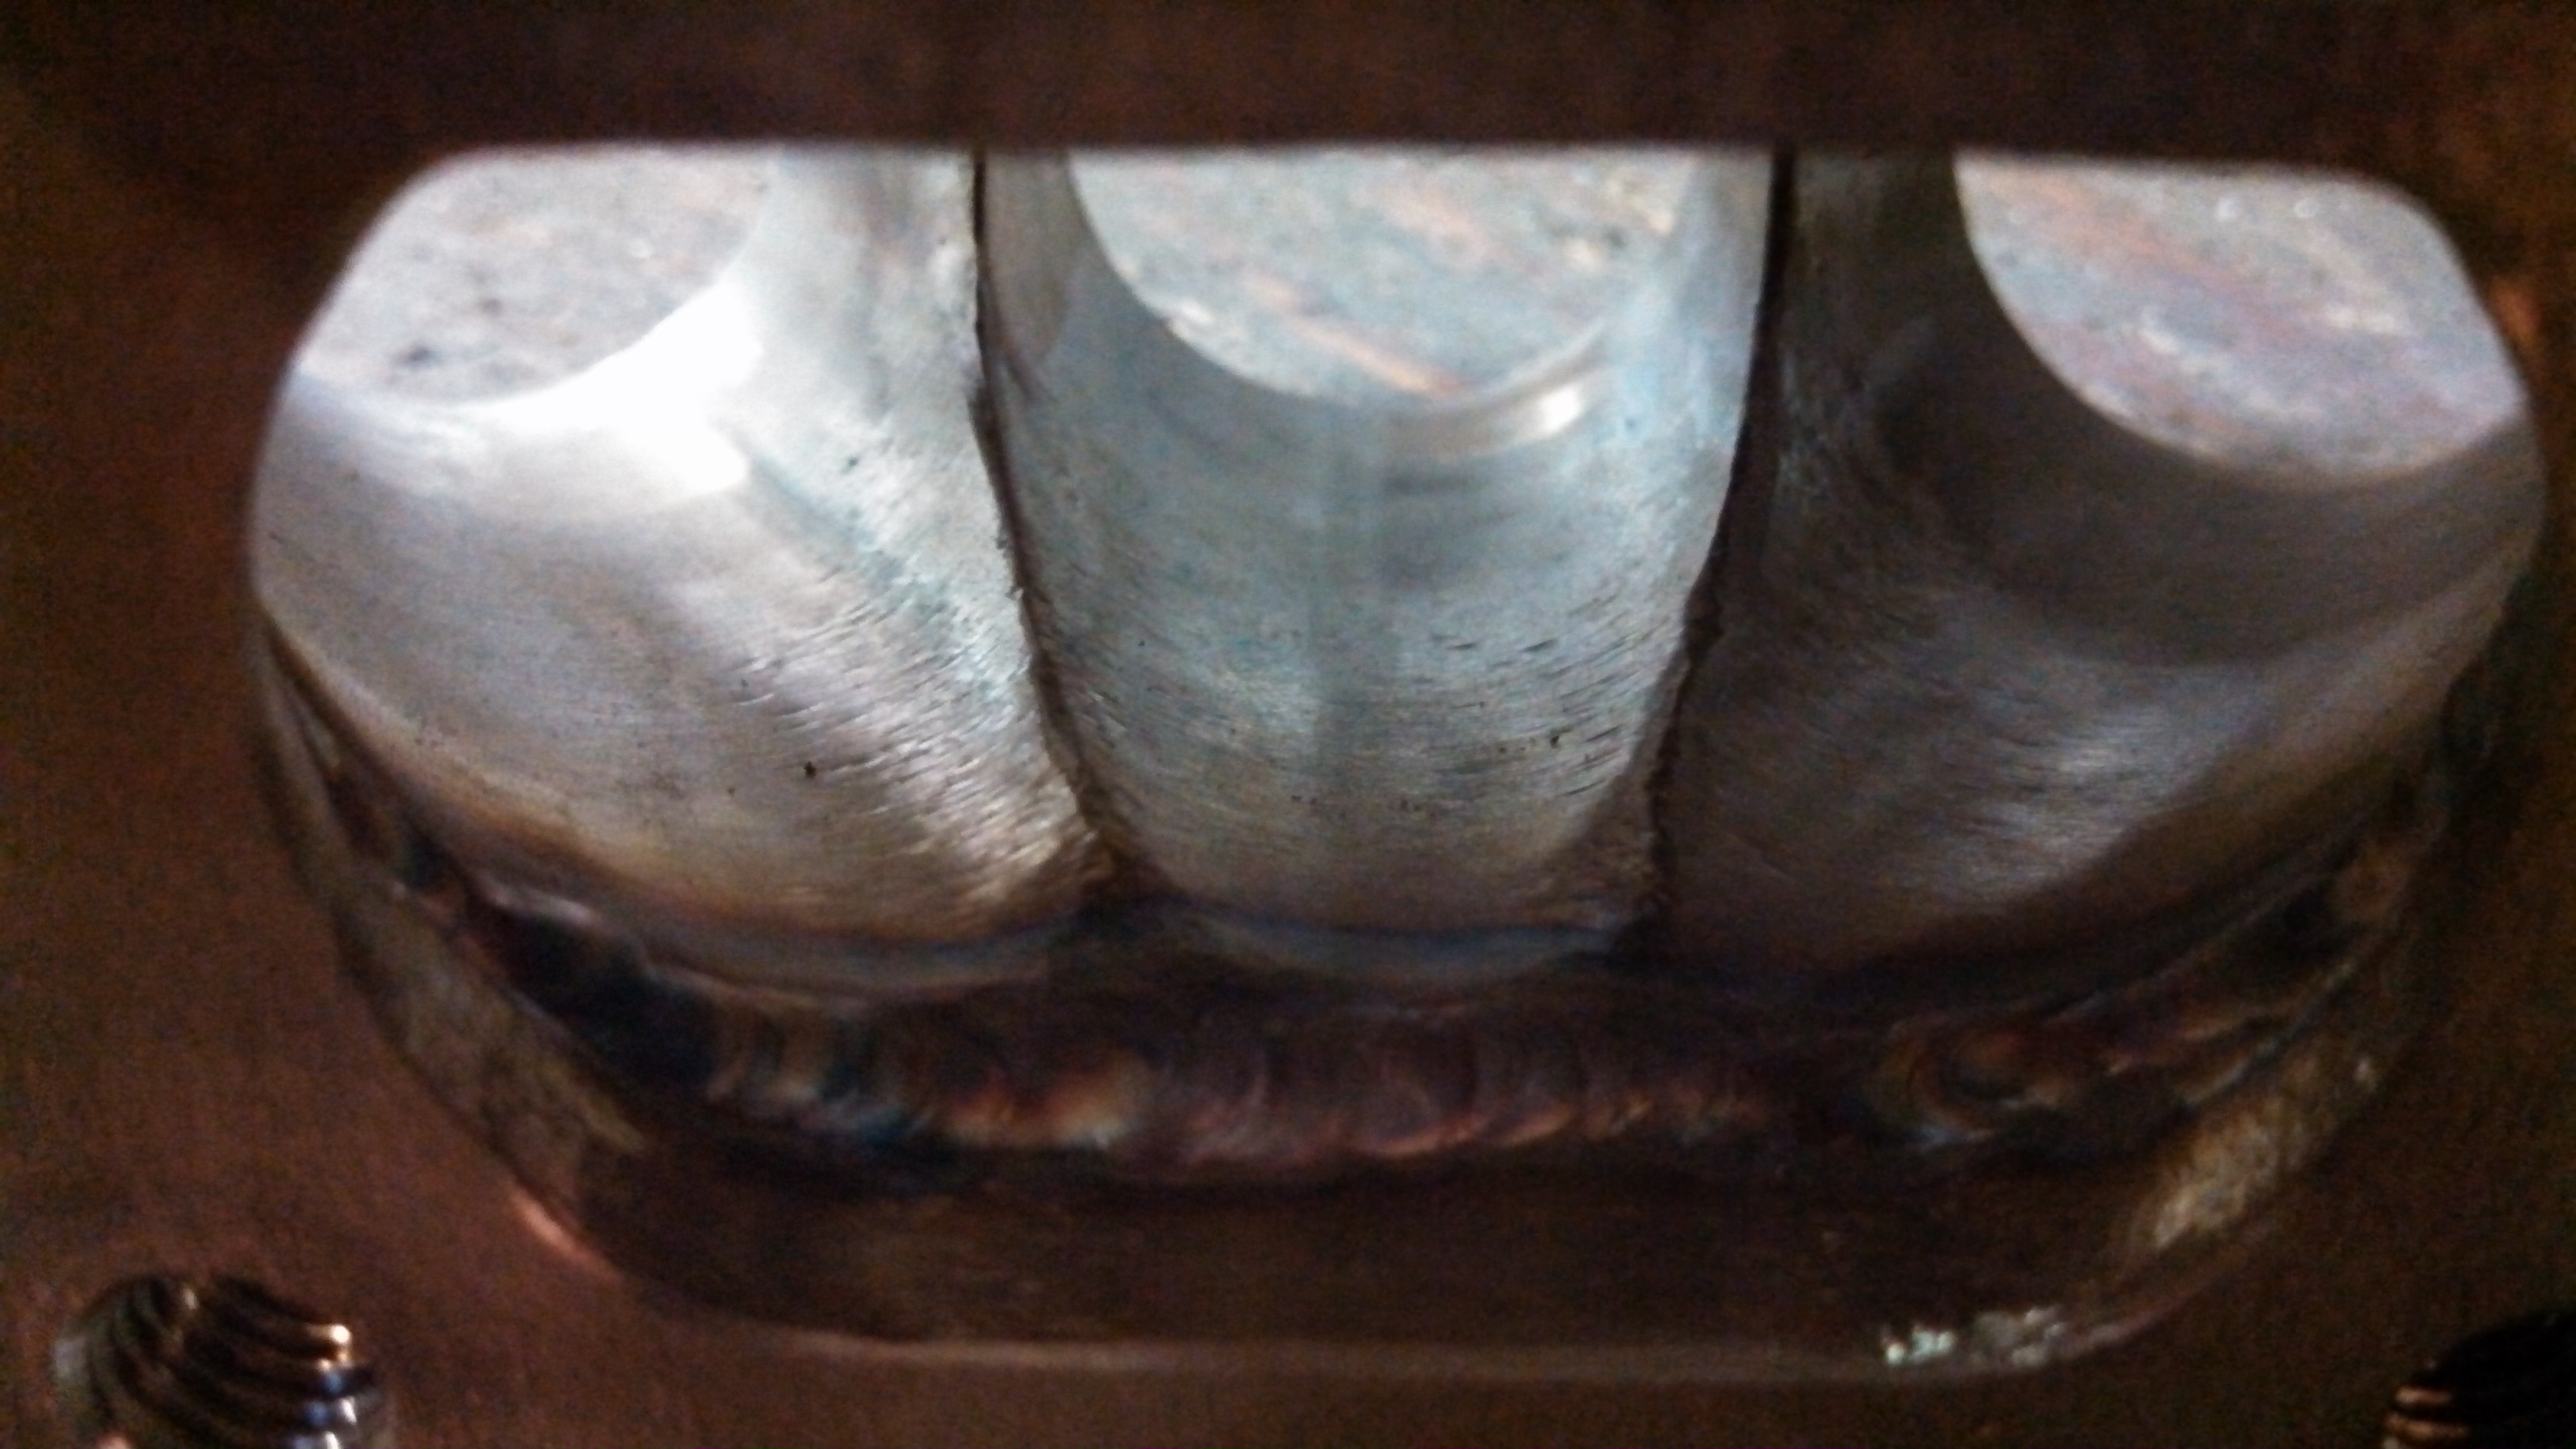
I had Ryan seam weld the exhaust manifold collector. The collector to flange to hotside transition will be beautifully formed. It will all get ground and polished.

- t4 flange to collector welded.jpg (1.49 MiB) Viewed 45905 times
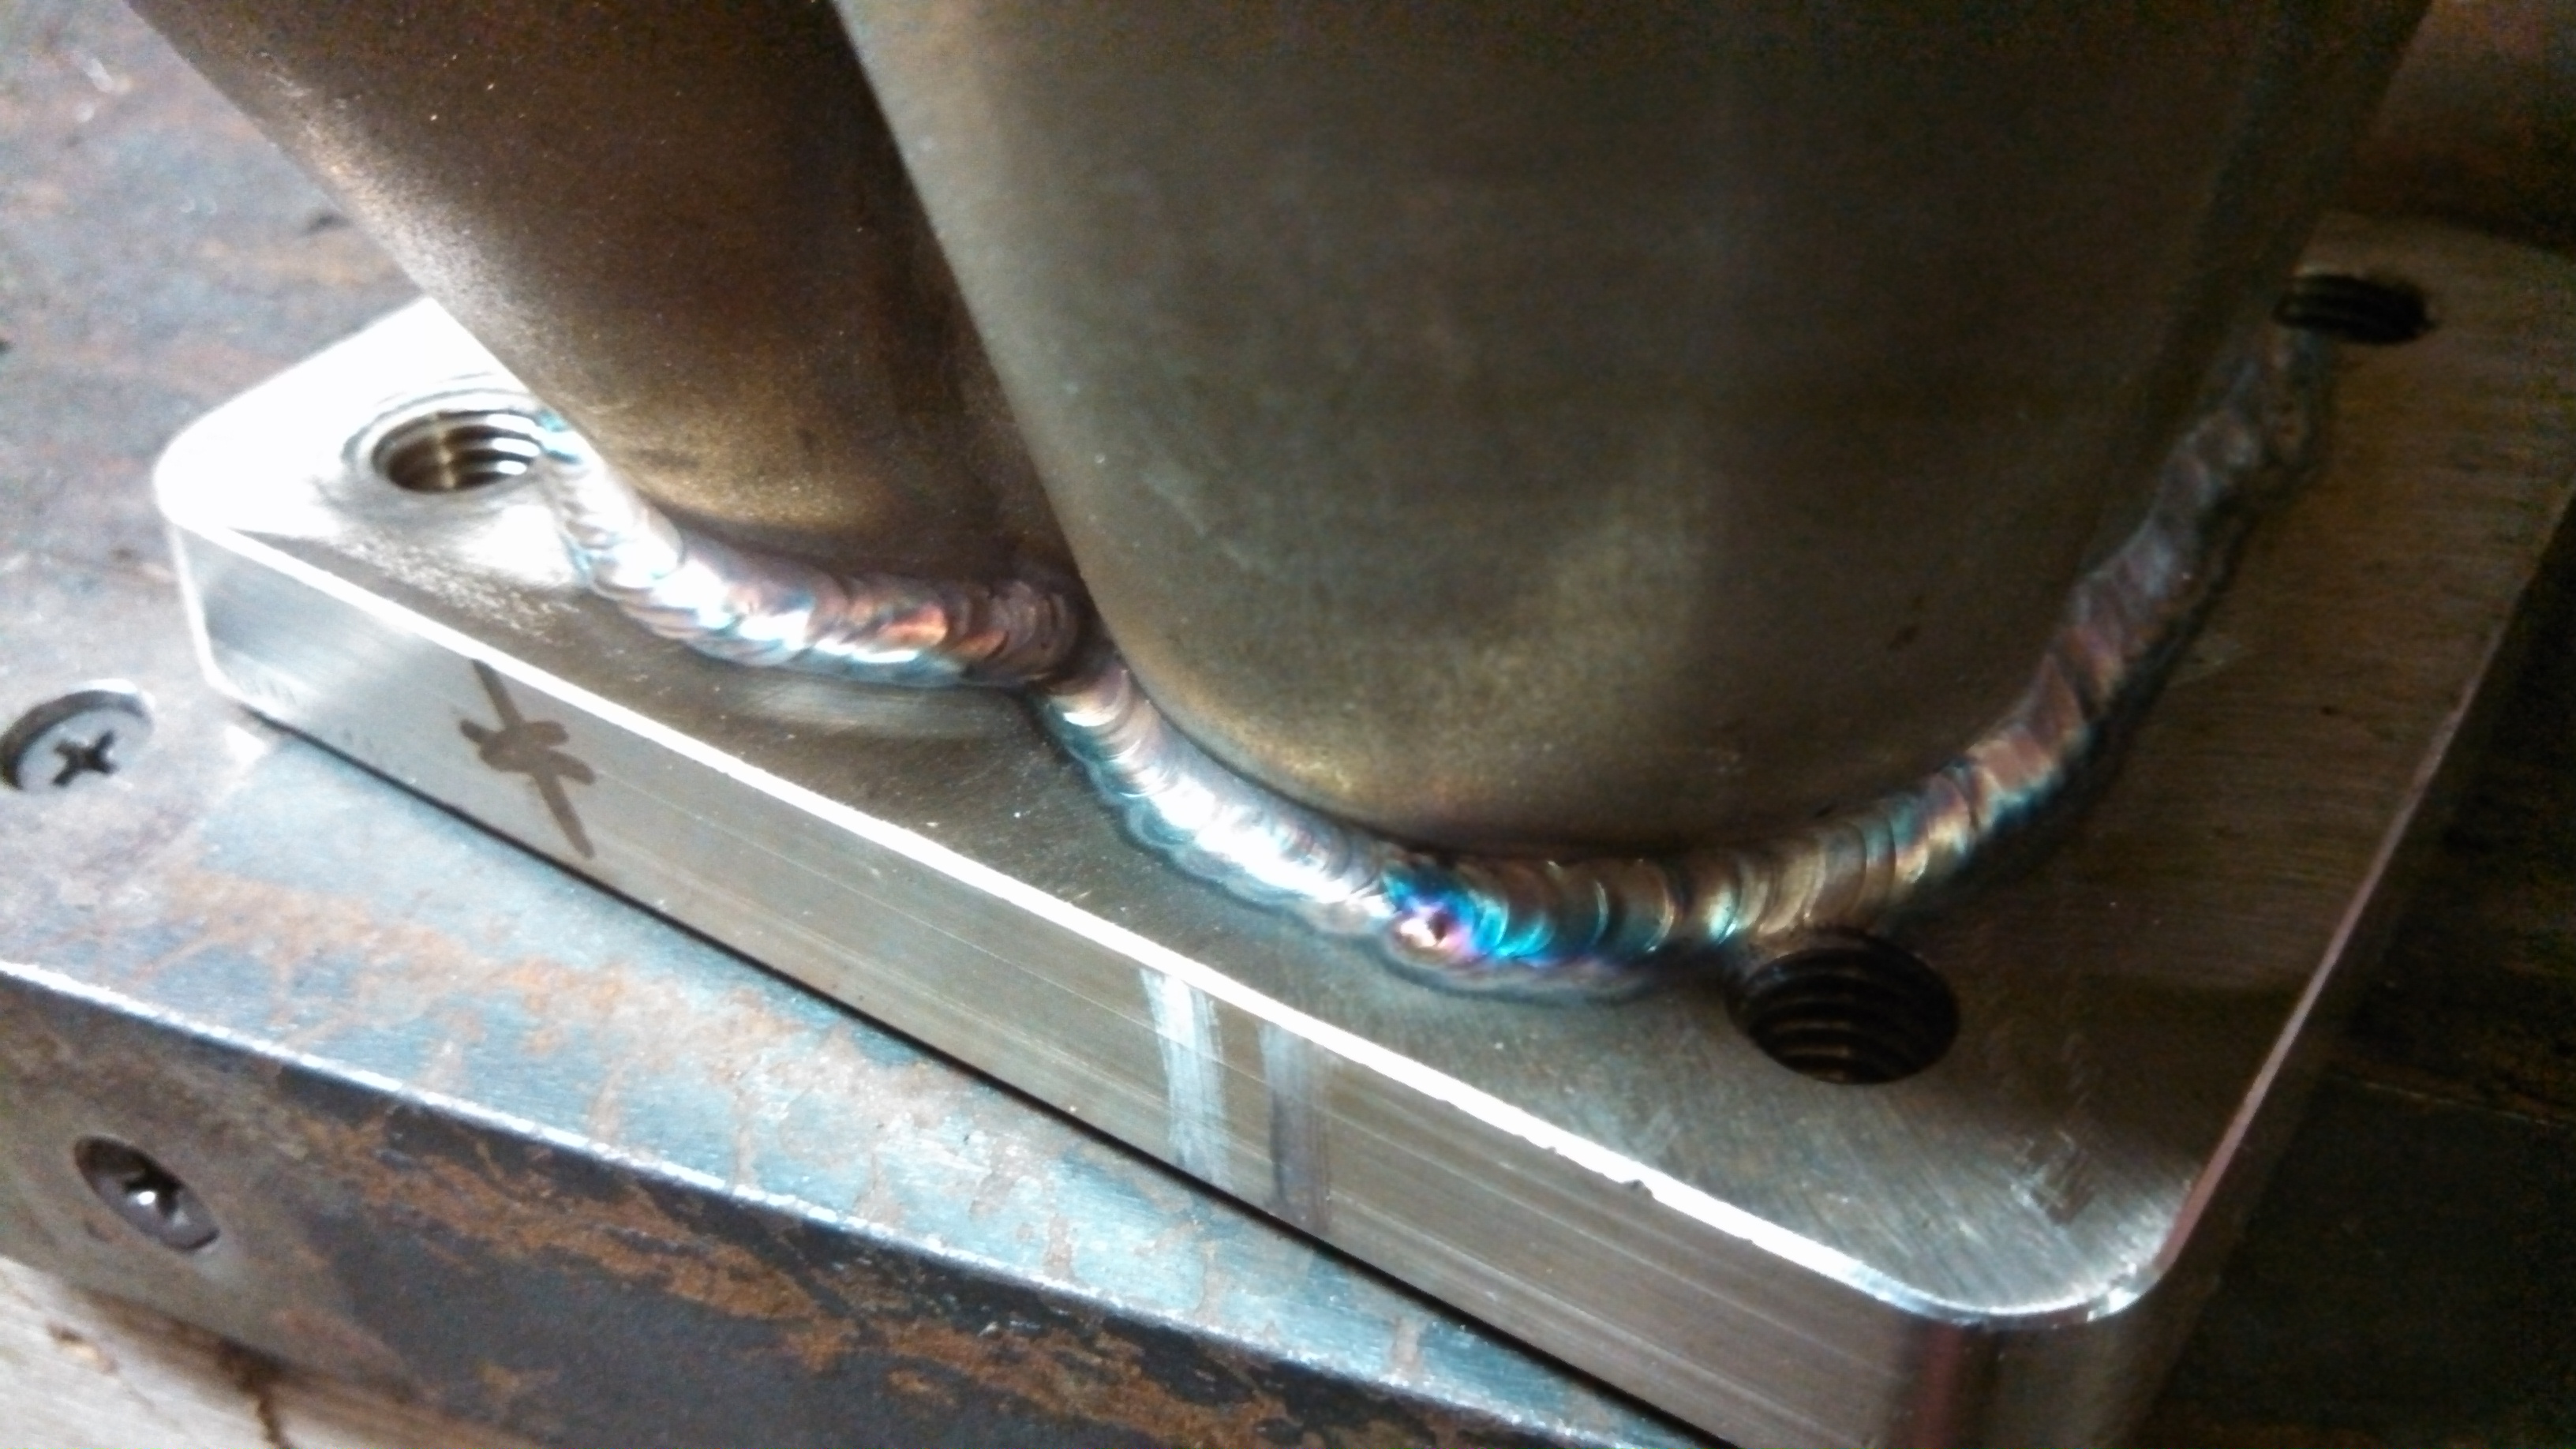
- t4 flange to collector welded2.jpg (1.2 MiB) Viewed 45905 times
I got a lot of it done where the runners come together, now just to work on the collector to flange seam.
I will get this damn thing nice and shiny smooth!!!
- t4 flange to inner collector welded.jpg (1.15 MiB) Viewed 45905 times
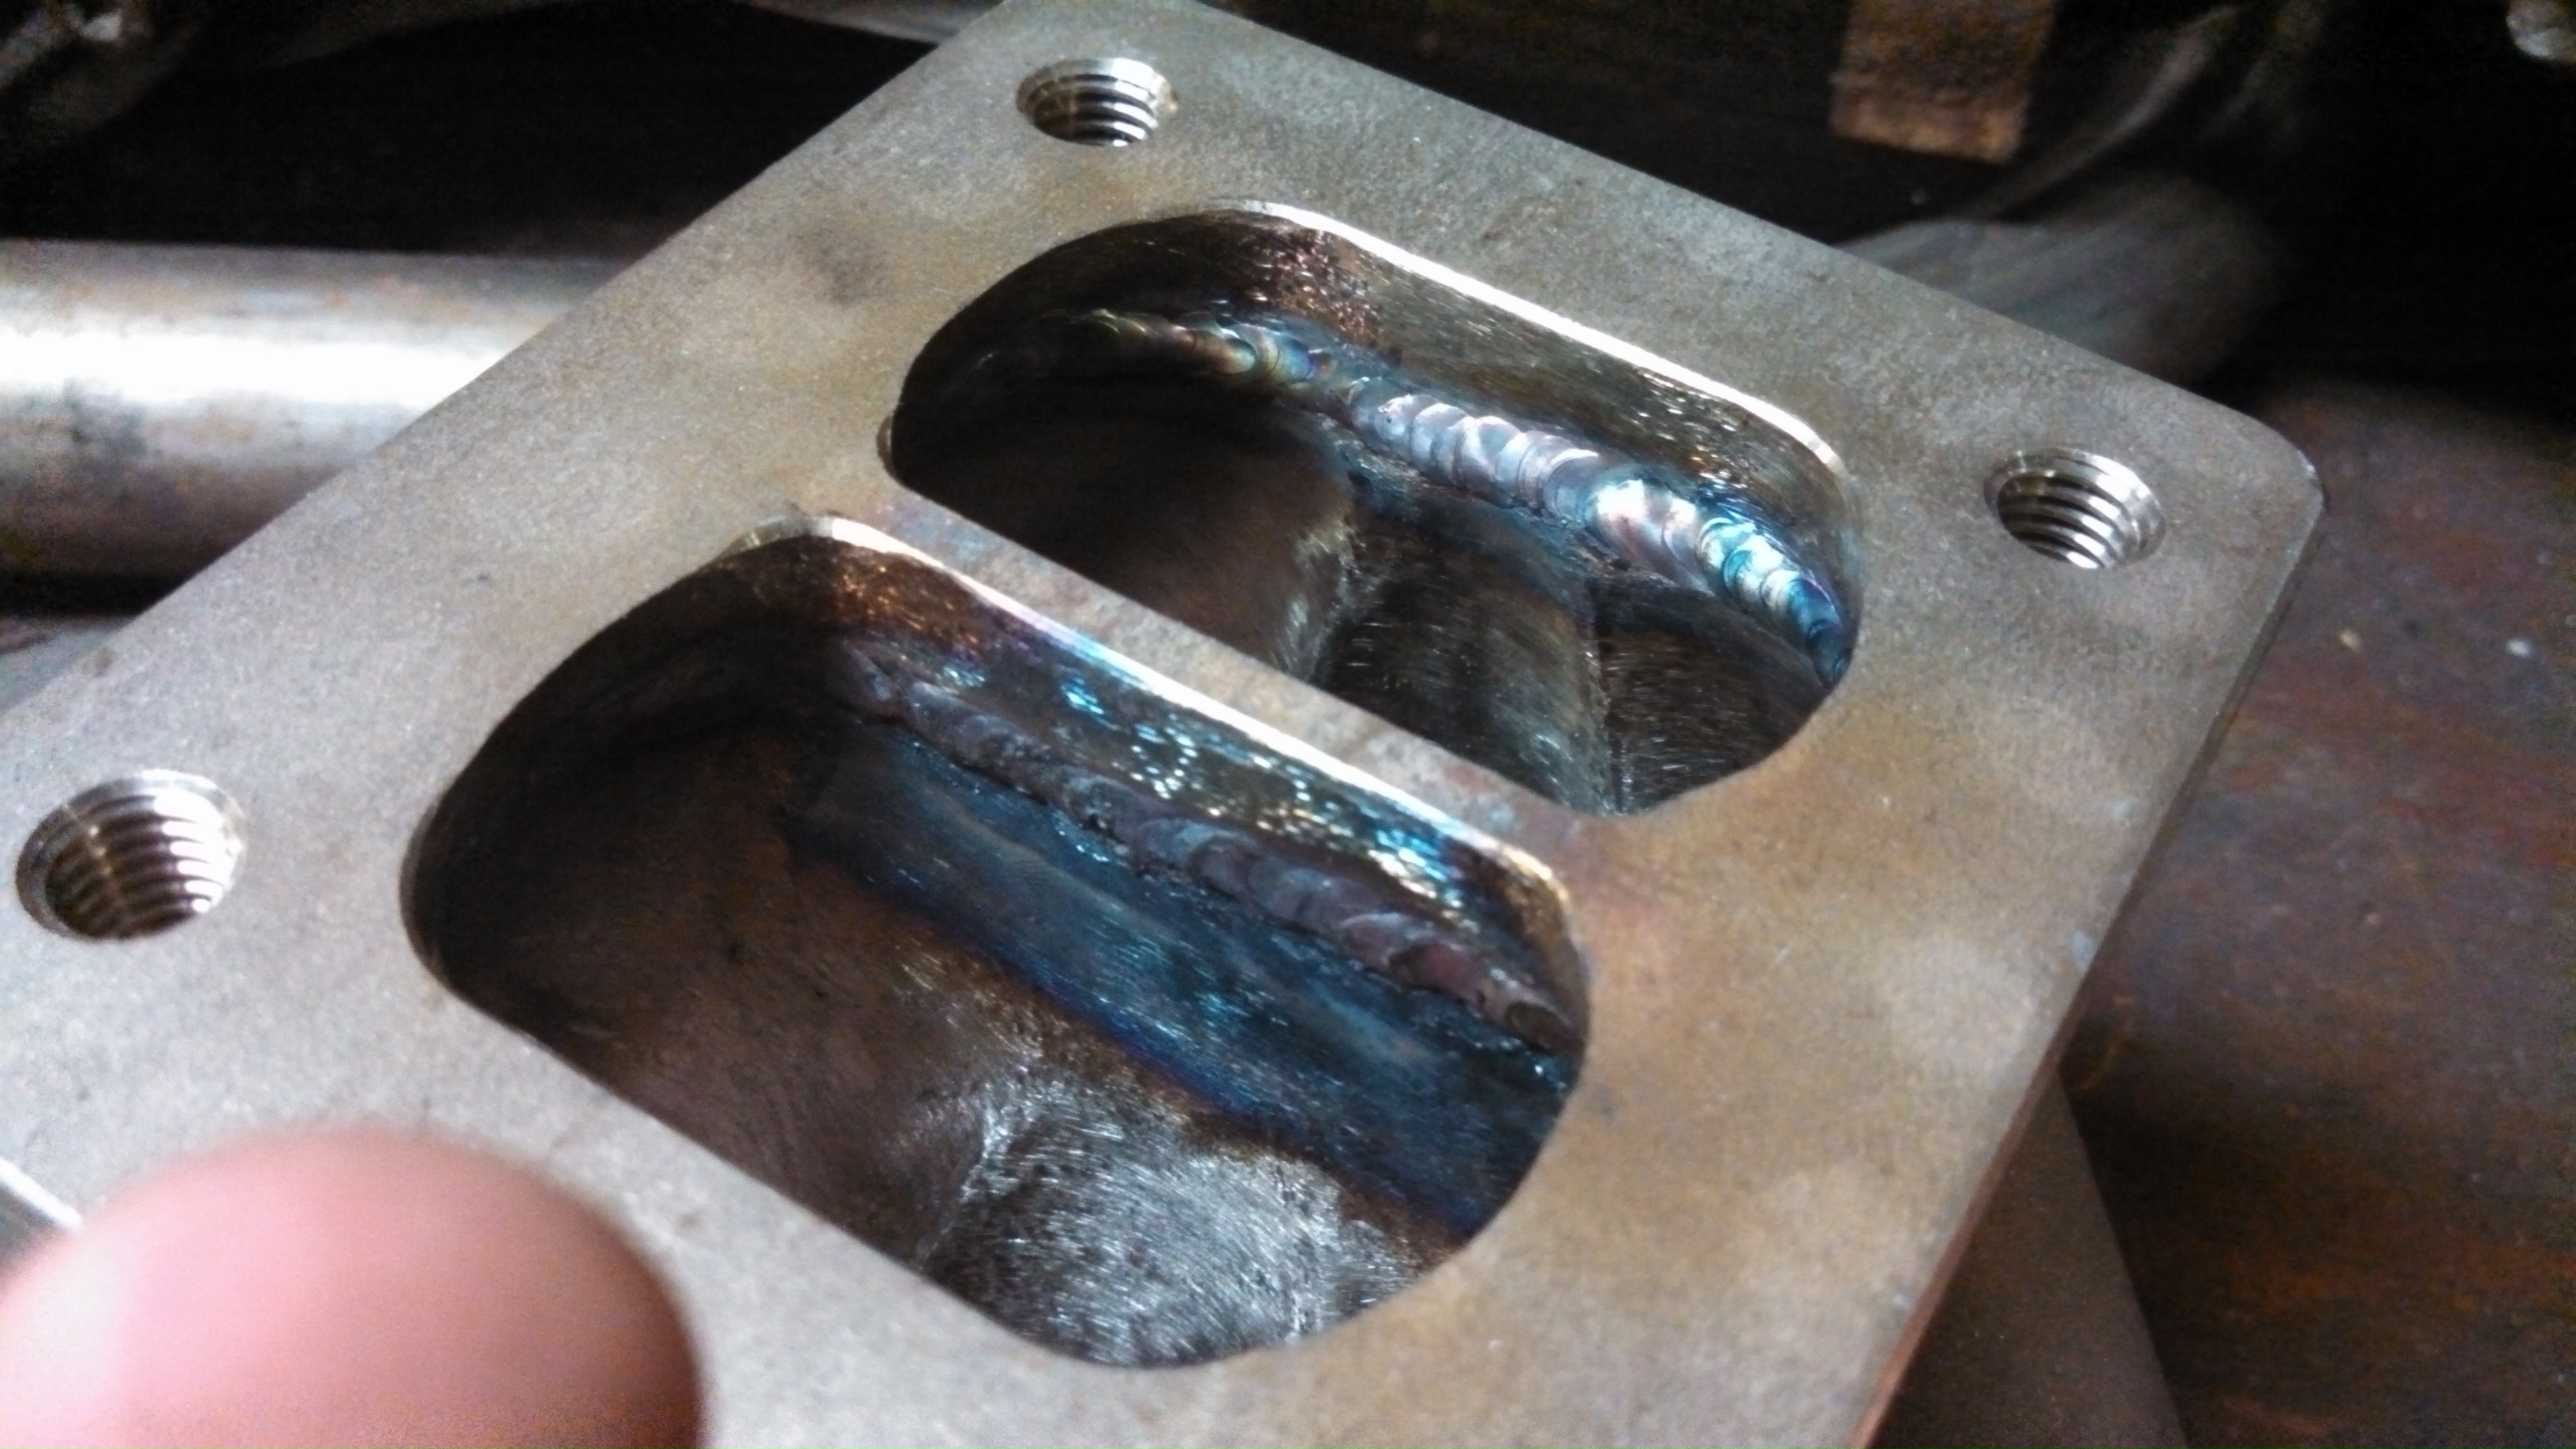
- t4 flange to inner collector welded2.jpg (1.37 MiB) Viewed 45905 times
Re: 24vVR6T CQ Project: EATSGTR, chassis FAB
Posted: Thu Nov 28, 2013 1:00 pm
by my2000apb
UPDATE!!!
My Delrin trans. bar spacer/bushing is back from machining. It sits between the trans. bar and the transmission mounting surface. Its ½” Delrin plate, with a 1/8” radius on the edges, with 1 1/8” reliefs for extra thick 304ss washers on which the trans. will sit.
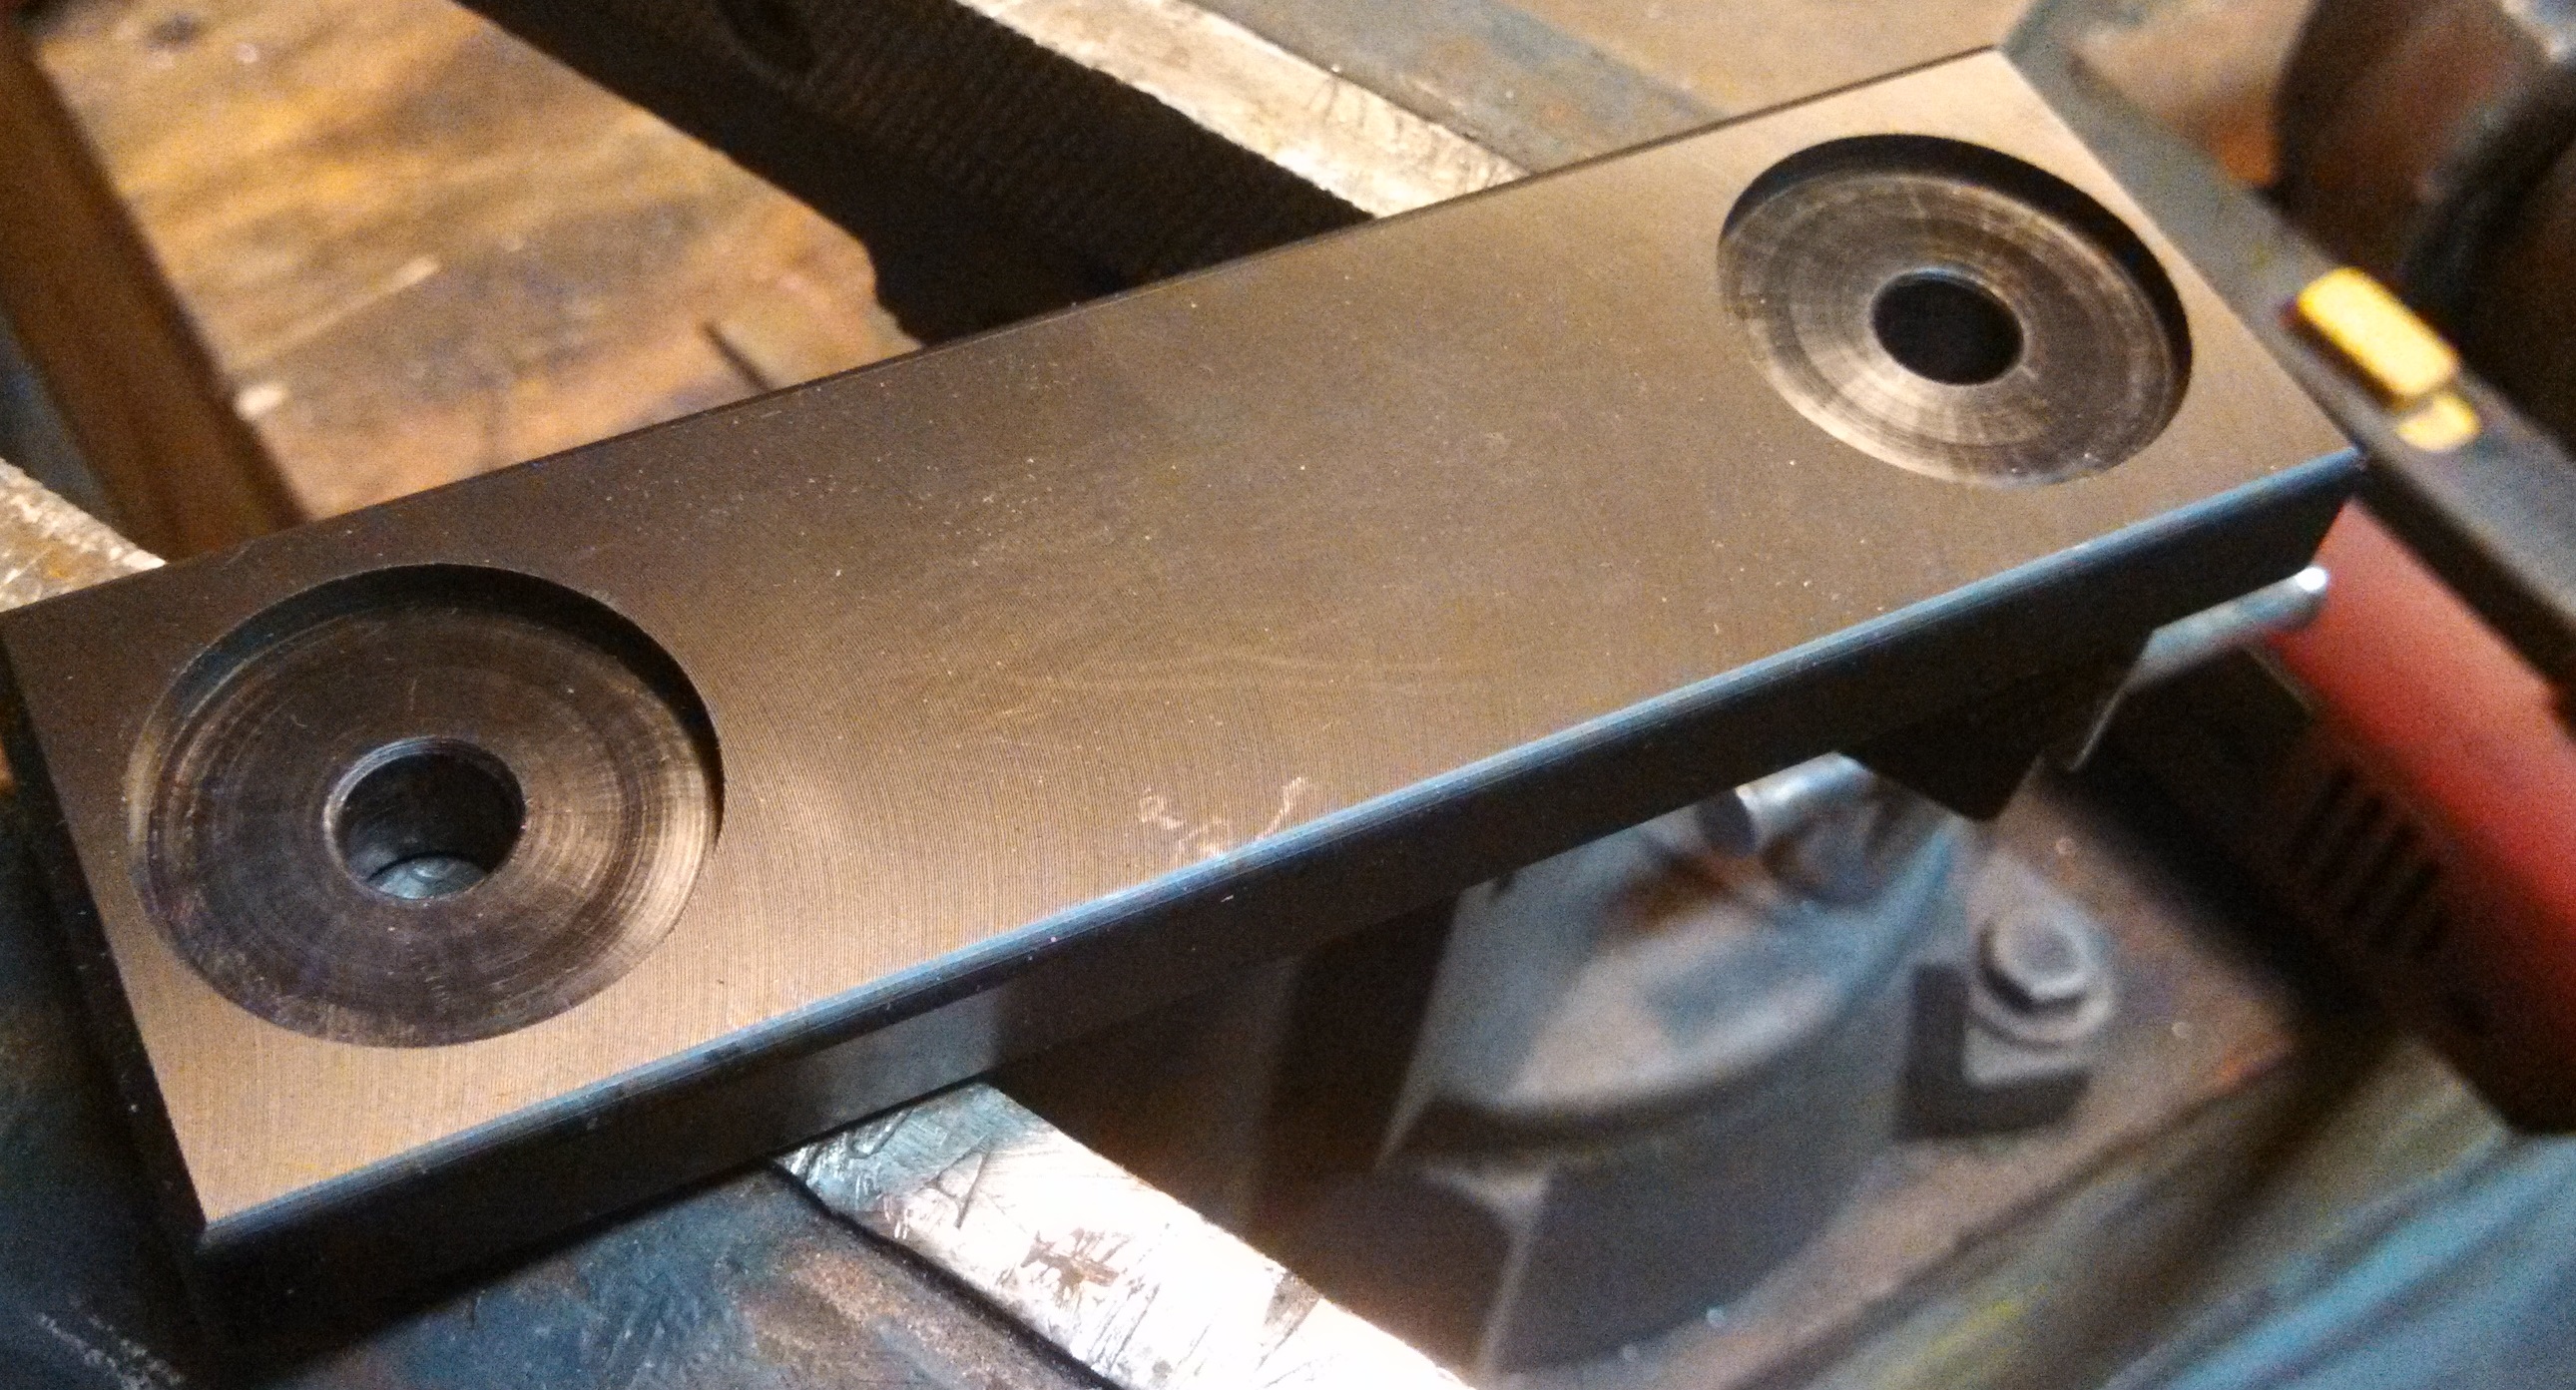
- delrin transbar bushing machined.jpg (1.3 MiB) Viewed 45904 times
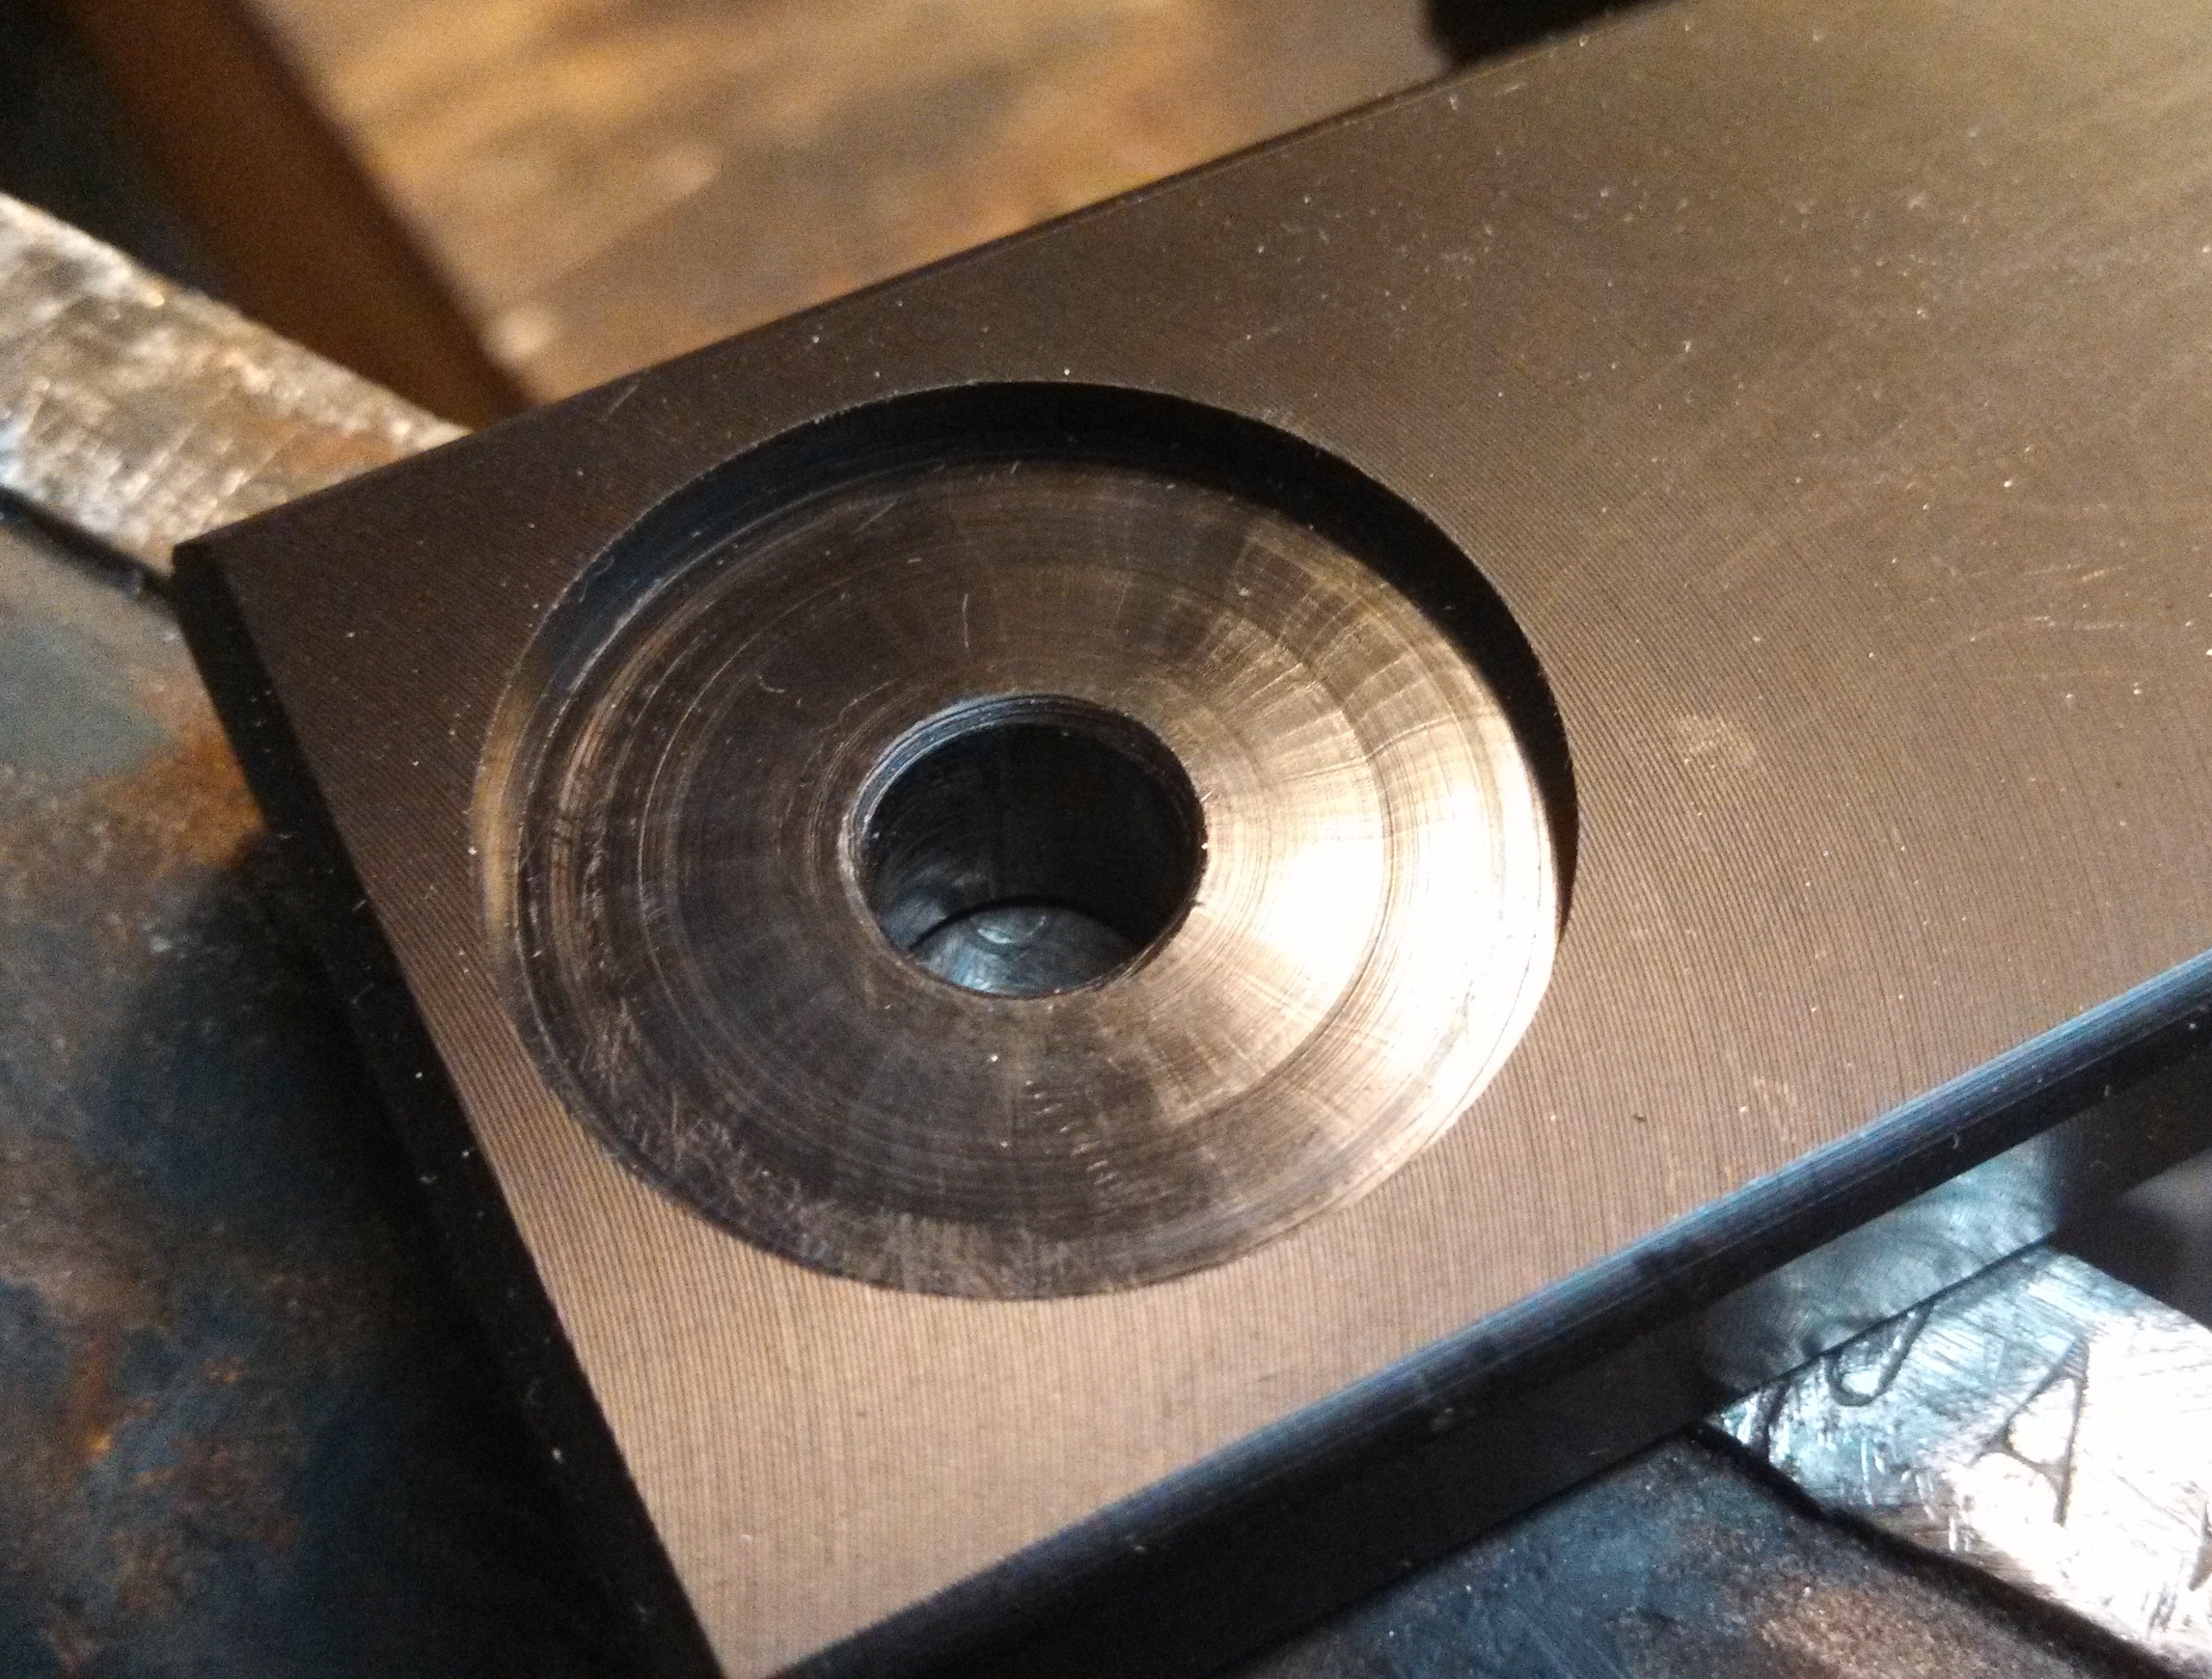
- delrin transbar bushing thick SS washer relief.jpg (1.38 MiB) Viewed 45904 times
I also got my intake manifold plenum flange re-machined. The recess for the plenum was brought in on either end ~3/4-7/8”. It was tough for Ryan to get it all jigged up in the Bridgeport, but he got it figured out and cut nice and clean. Intake manifold progress has restarted and be finished up soon.
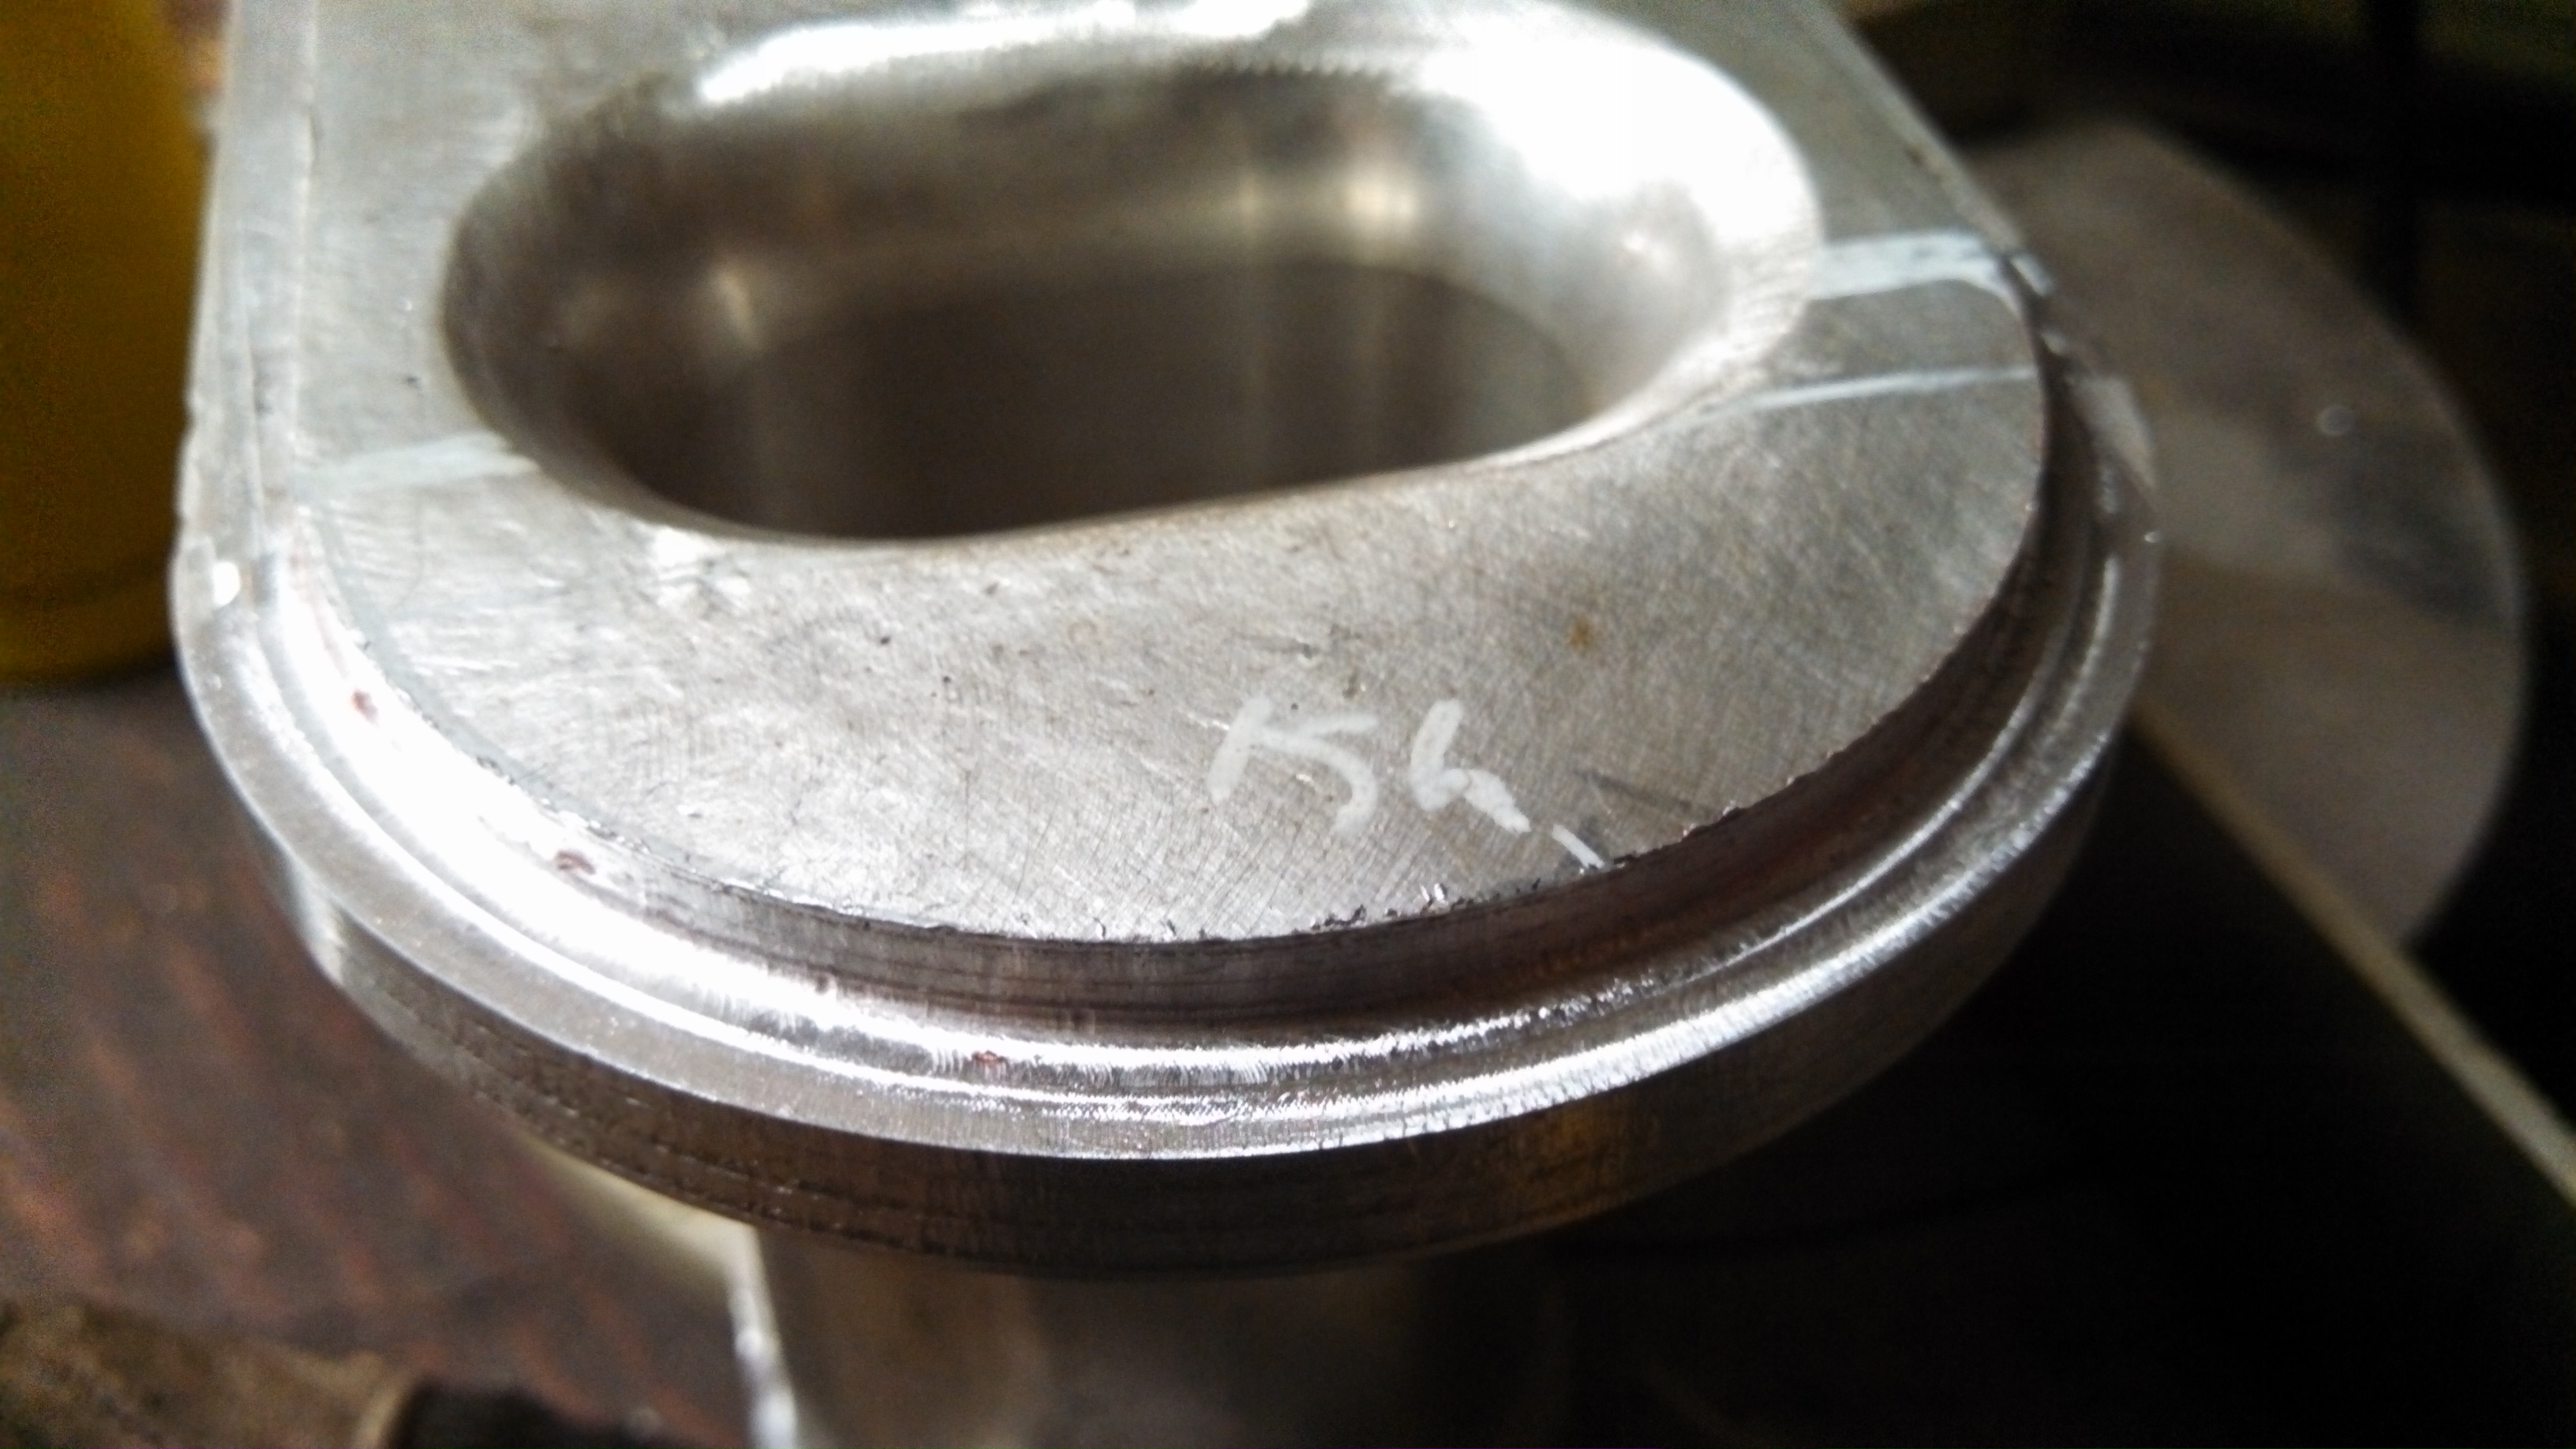
- intake mani plenum flange re-radiused.jpg (1.27 MiB) Viewed 45904 times
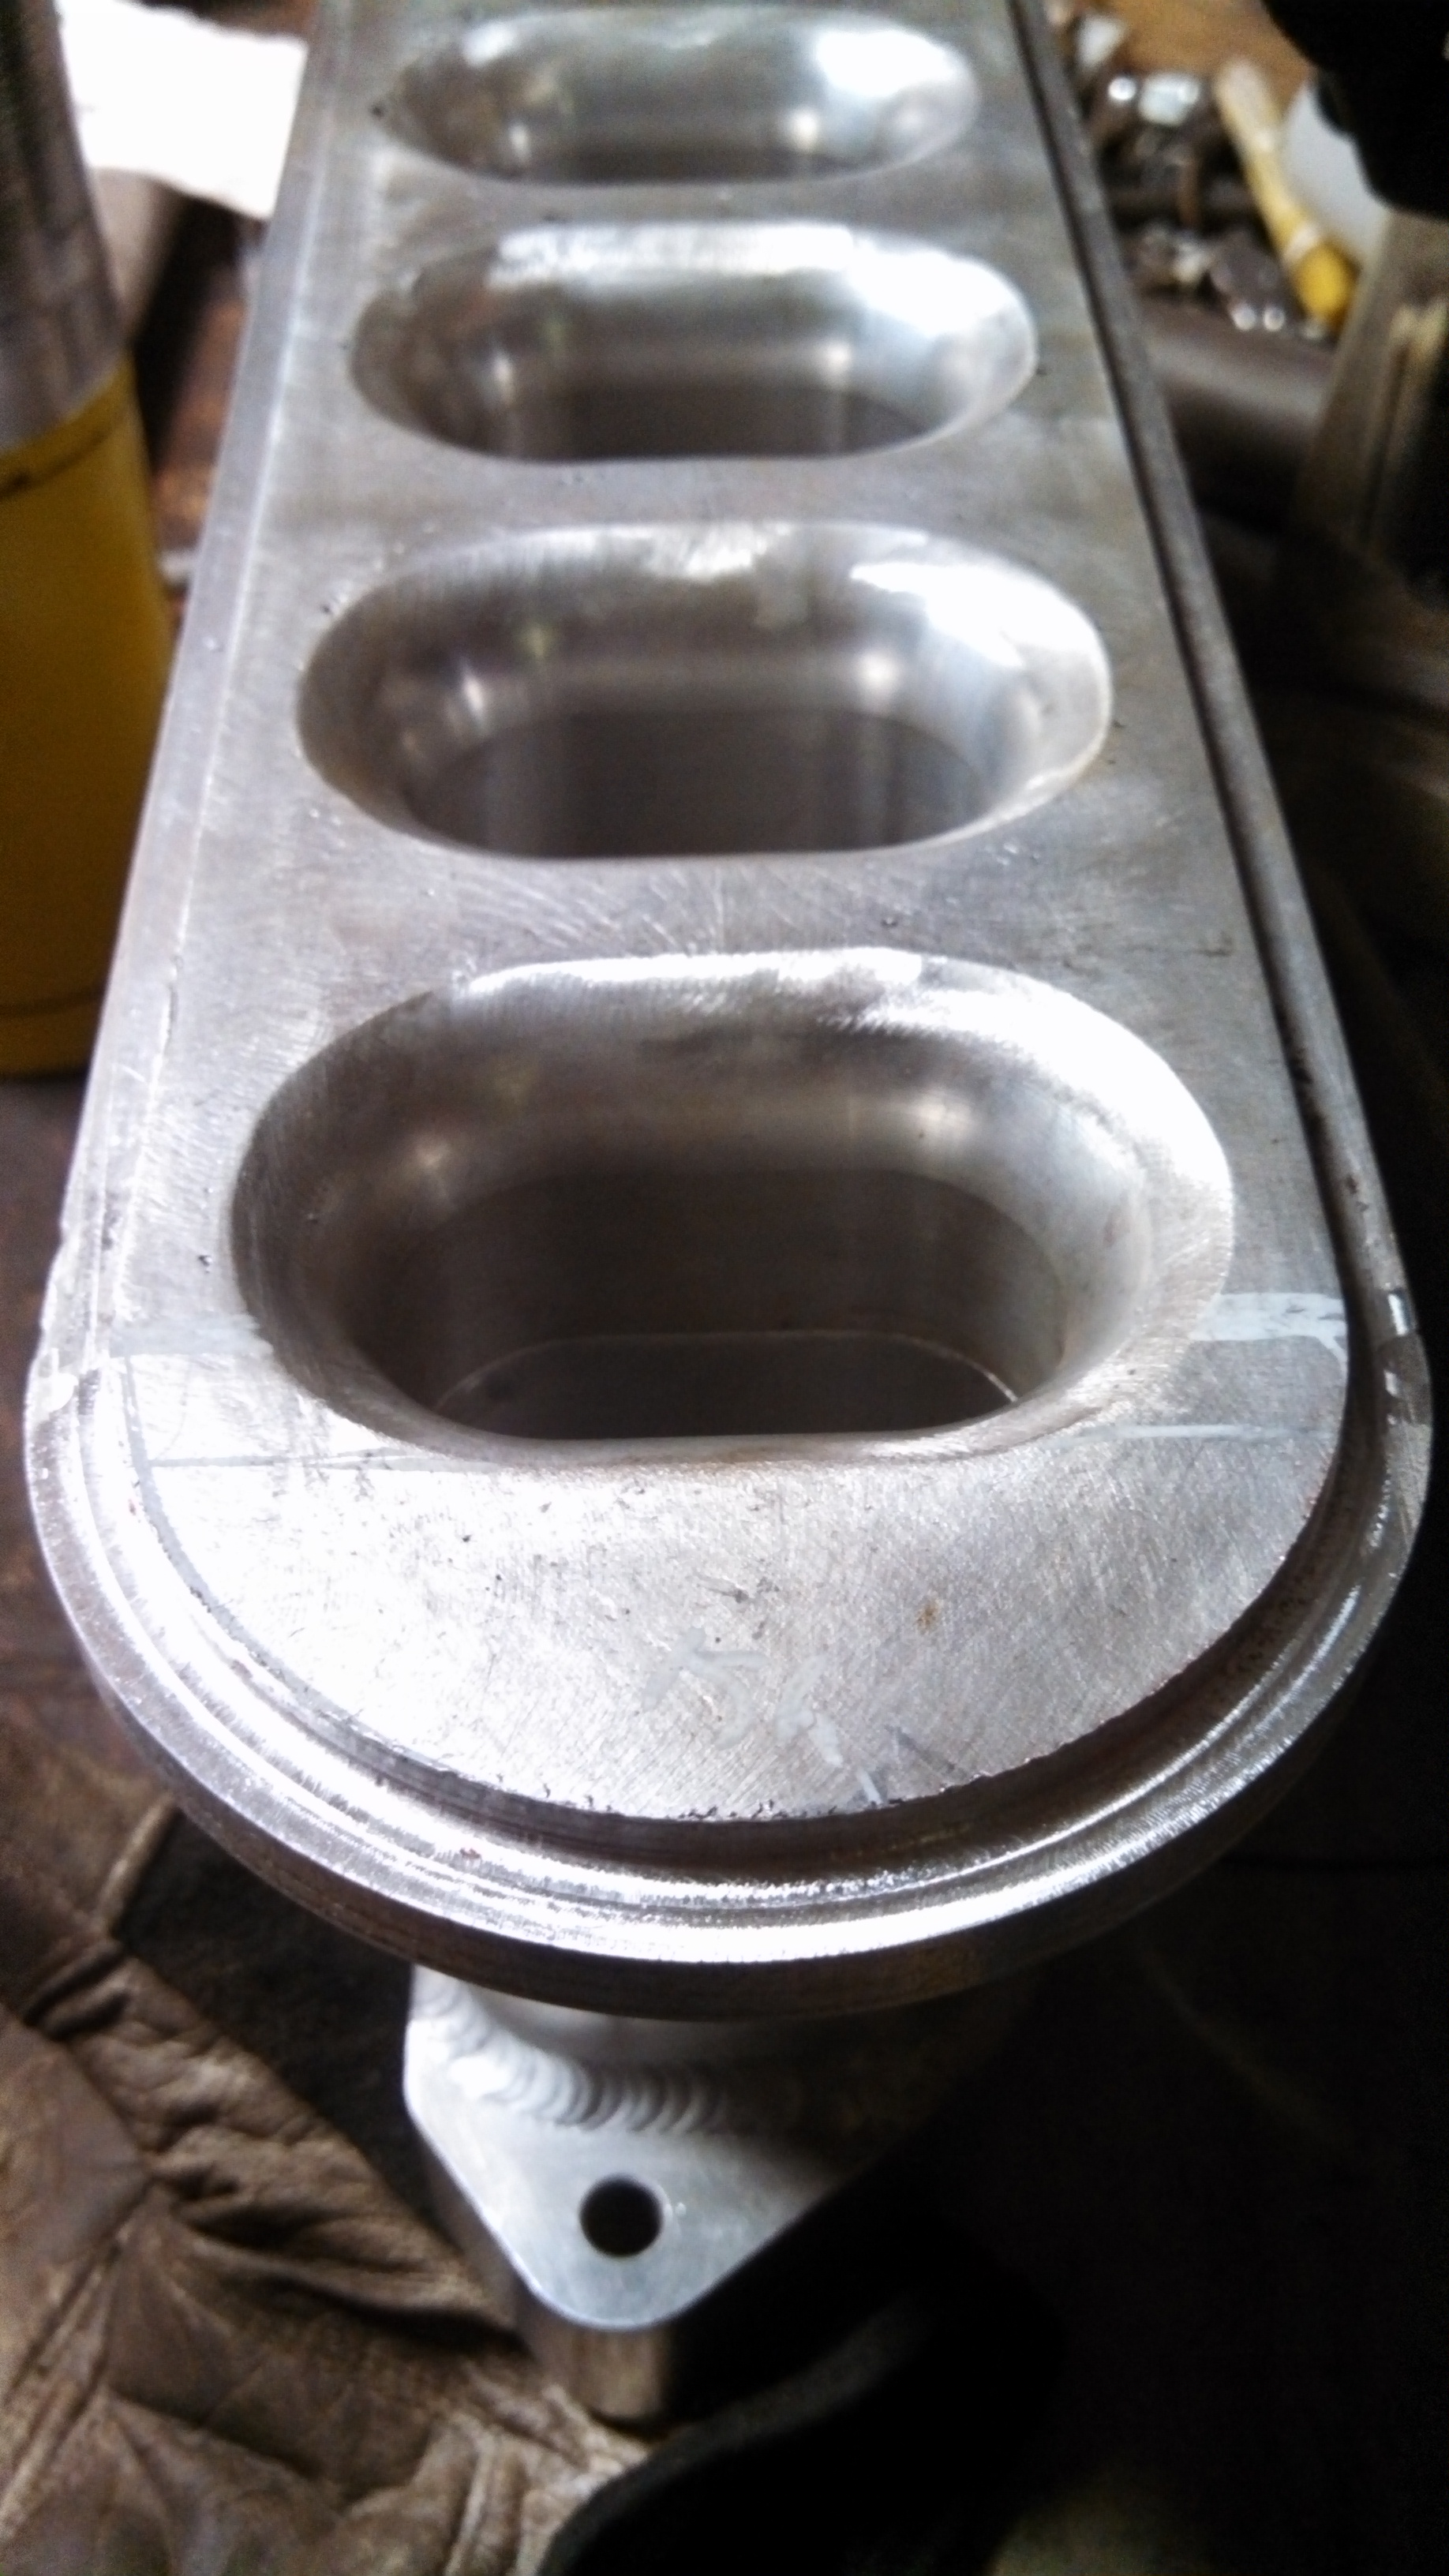
- intake mani plenum flange re-radiused2.jpg (1.28 MiB) Viewed 45904 times
Re: 24vVR6T CQ Project: EATSGTR, chassis FAB
Posted: Thu Nov 28, 2013 1:05 pm
by my2000apb
MORE!!
I added some reinforcement plates and angle to the chassis motor mount ears. No process pics, but here they are seam welded, etch primed, and seam seamled.
- motor mount ear reinforcments welded and sealed.jpg (1.33 MiB) Viewed 45902 times
- motor mount ear reinforcments welded and sealed2.jpg (1.33 MiB) Viewed 45902 times
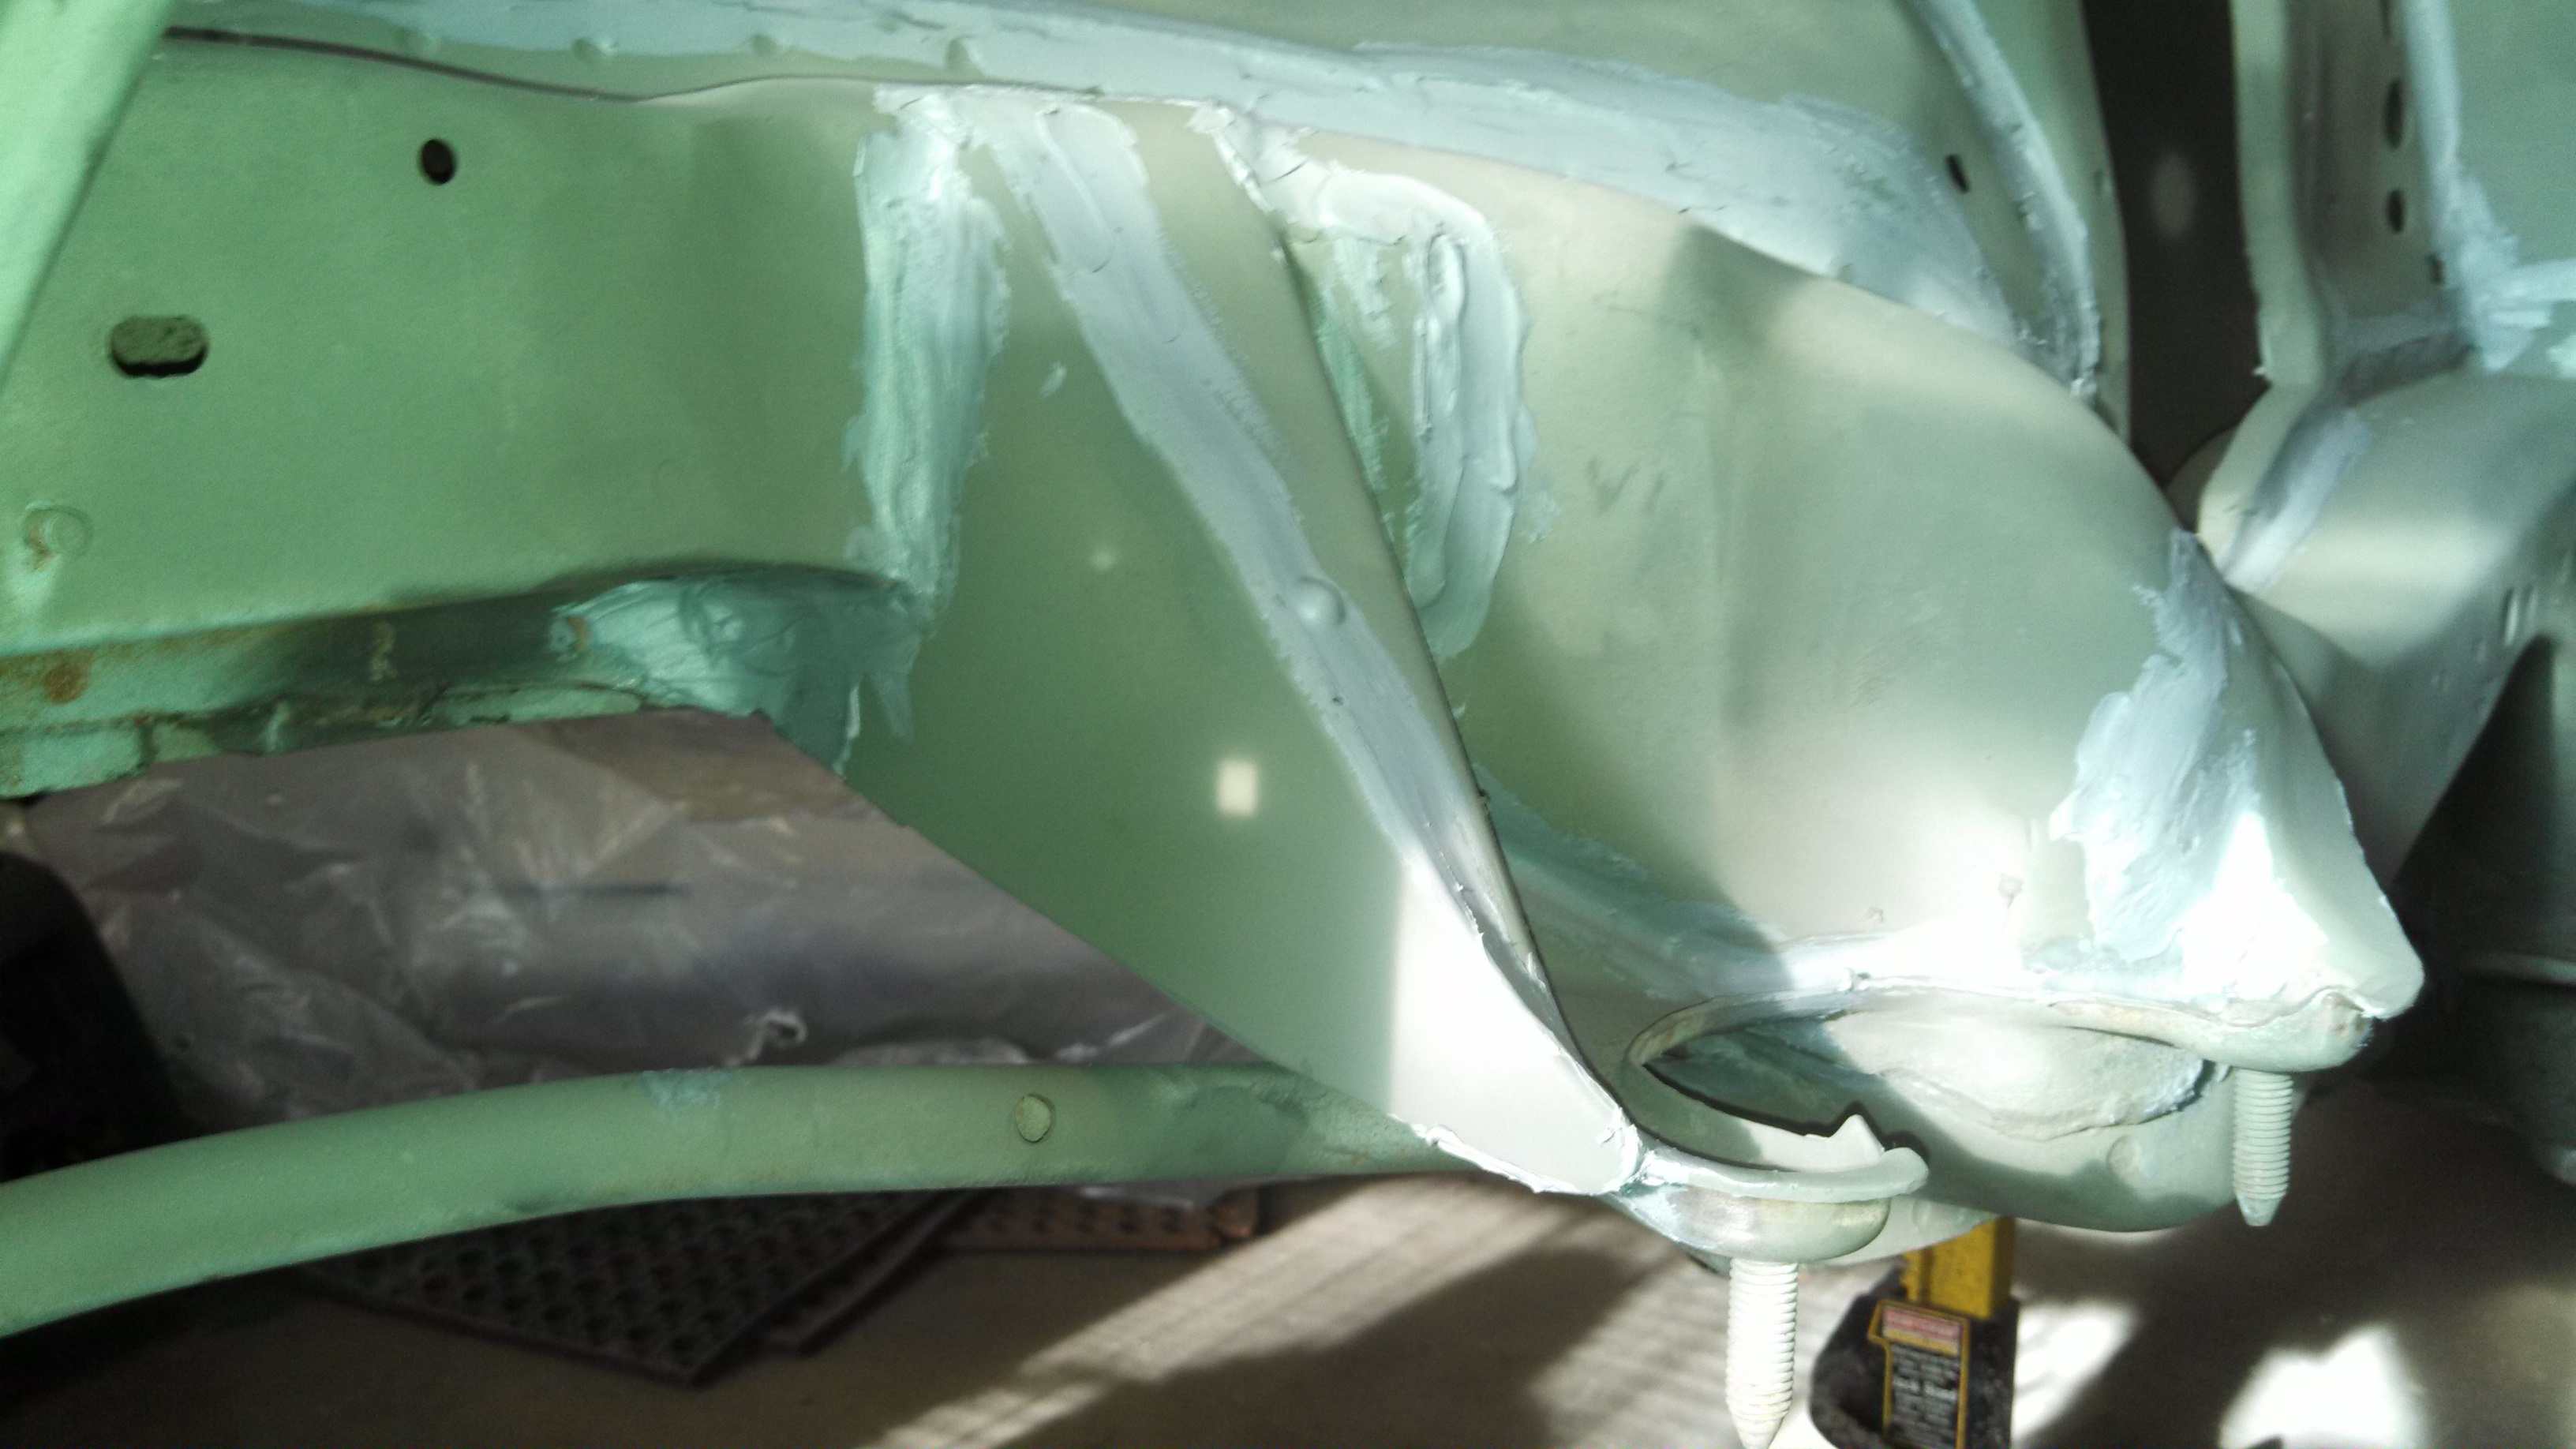
- motor mount ear reinforcments welded and sealed3.jpg (1.34 MiB) Viewed 45902 times
Fully seam sealed engine bay

- seamsealed engine bay.jpg (1.41 MiB) Viewed 45902 times
Re: 24vVR6T CQ Project: EATSGTR, chassis FAB
Posted: Thu Nov 28, 2013 1:12 pm
by my2000apb
MORE!!!
Front X-member
I had finished the front portion of the rad/ic support, but the lower bar still needed its vertical supports. Yes, there is room for the IC to slide in and out.
Here is the passenger side. The one piece of box tubing is relieved, and allowed to slide into the other like a puzzle piece. It is then seam welded around. See pics
- front xmember support jigsaw detail.jpg (1.24 MiB) Viewed 45908 times
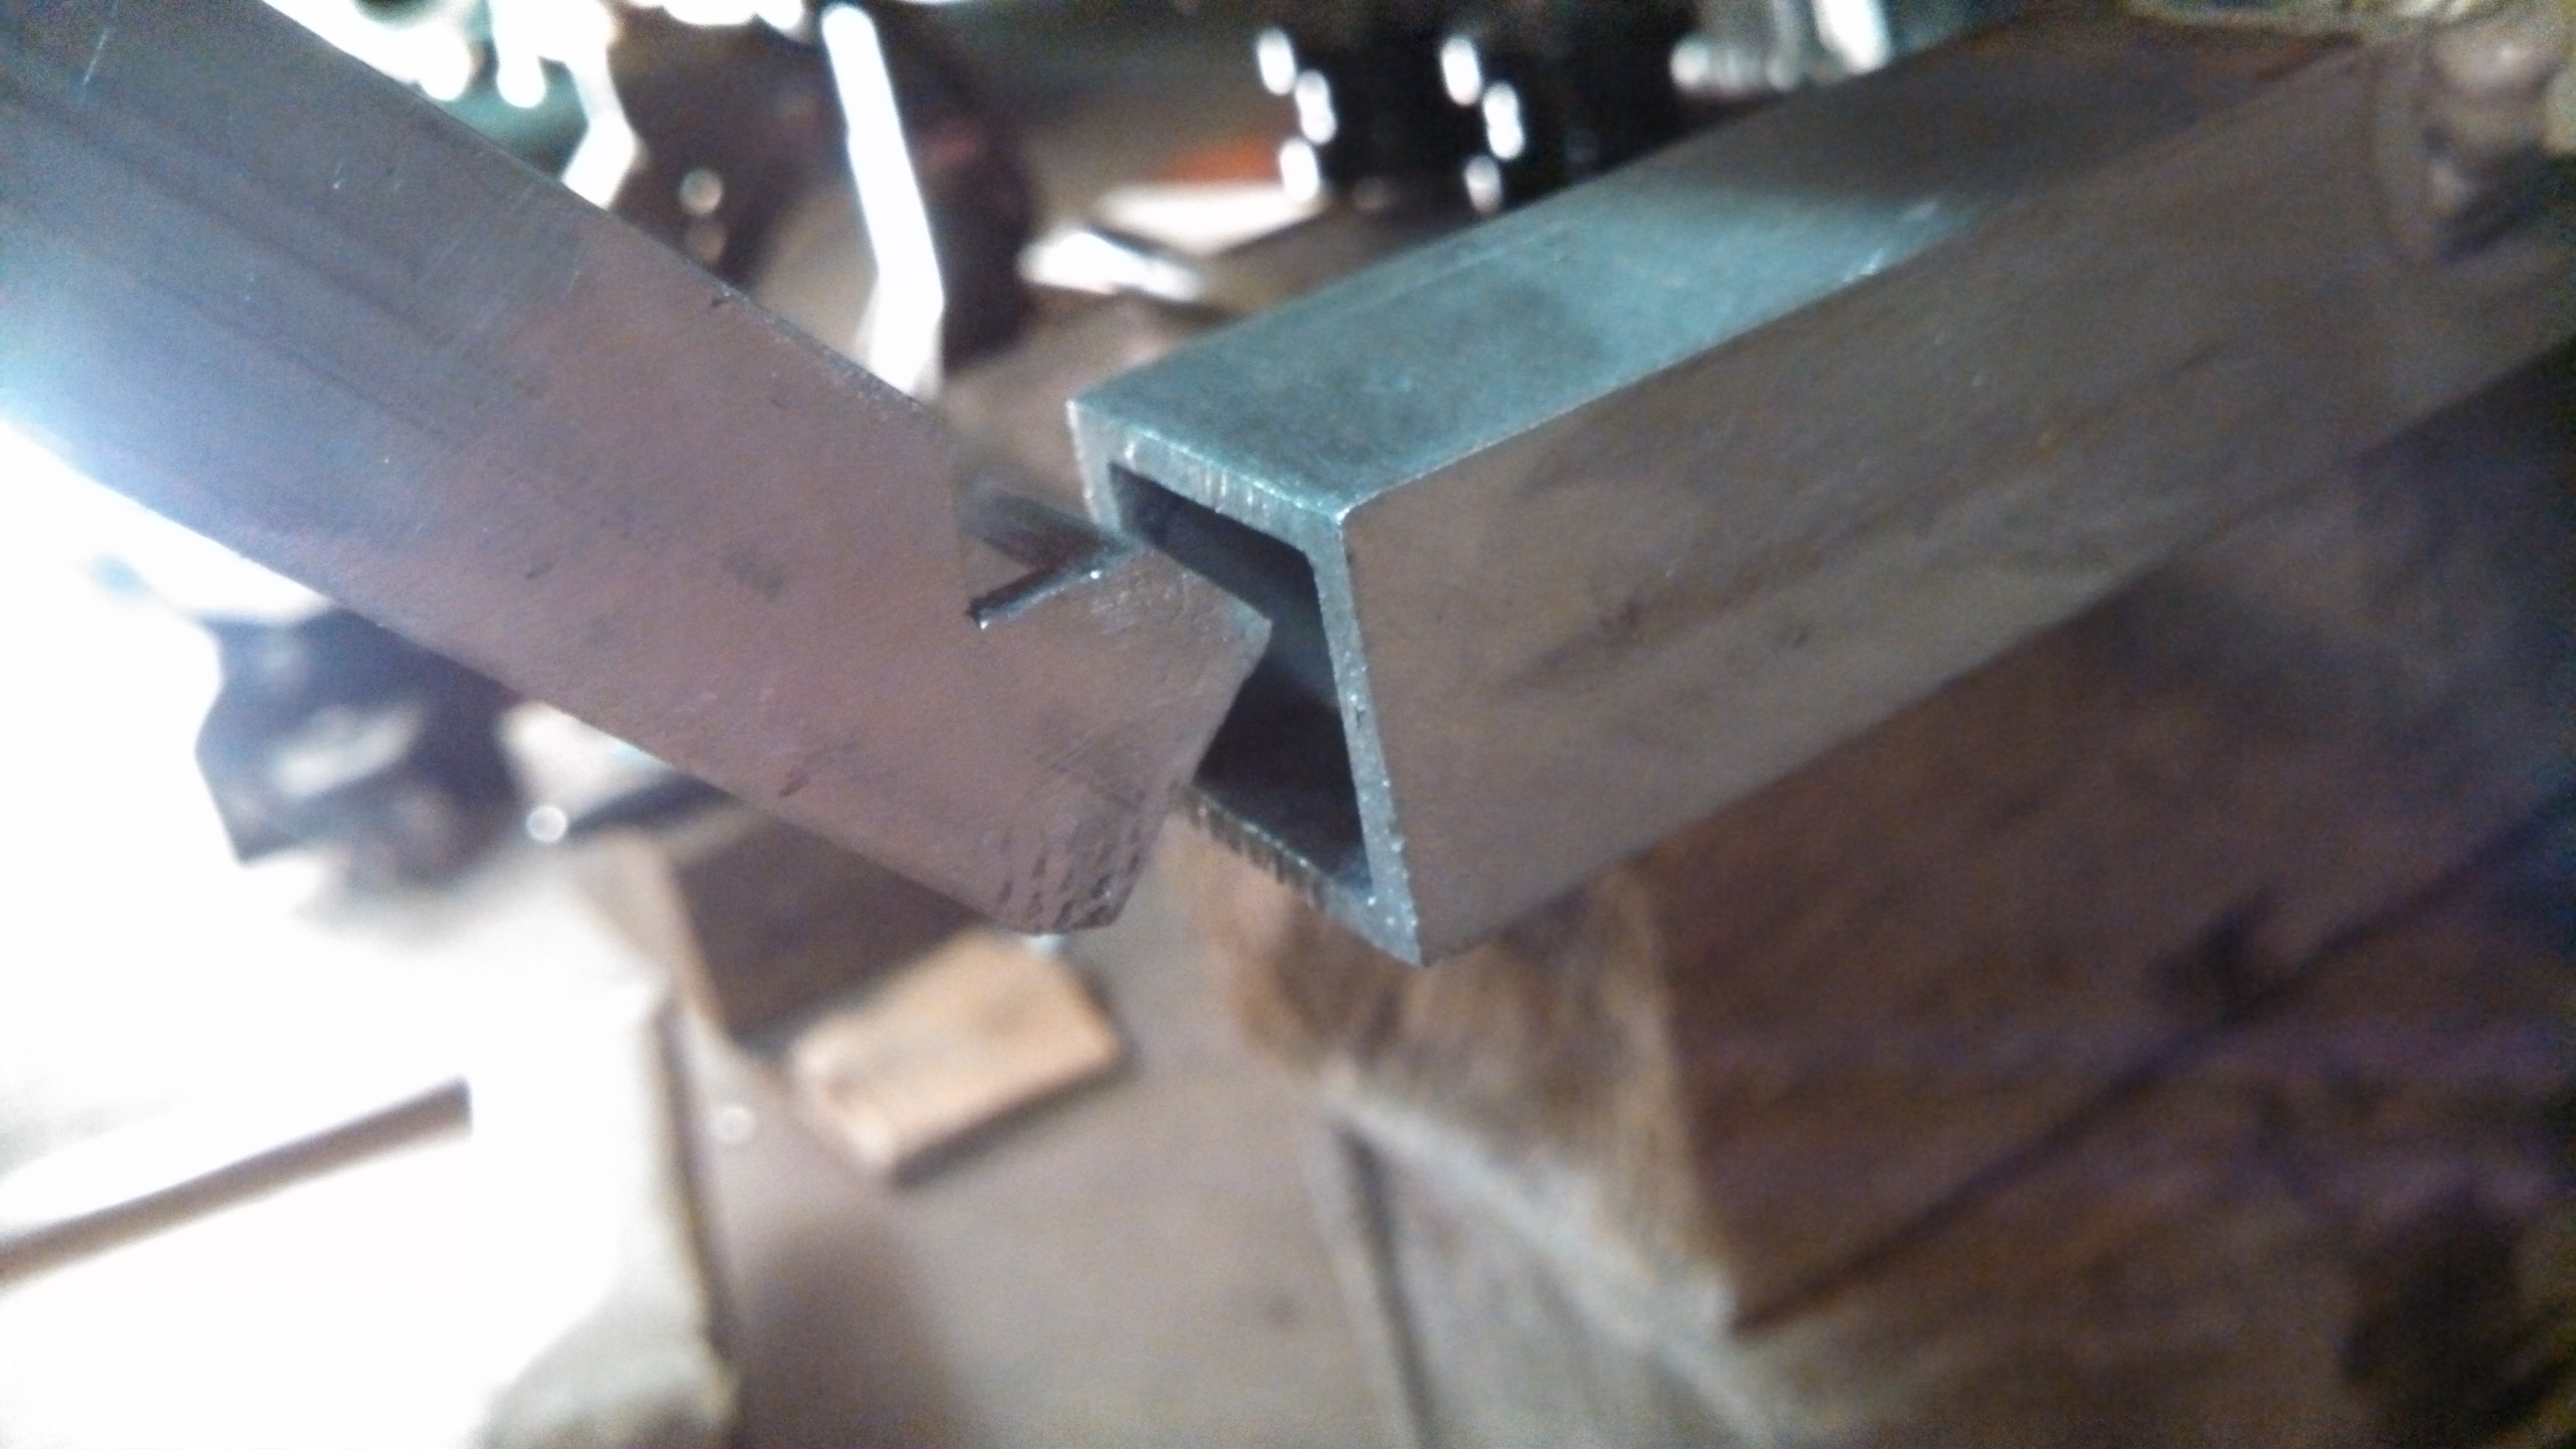
- front xmember support jigsaw detail2.jpg (1.15 MiB) Viewed 45908 times
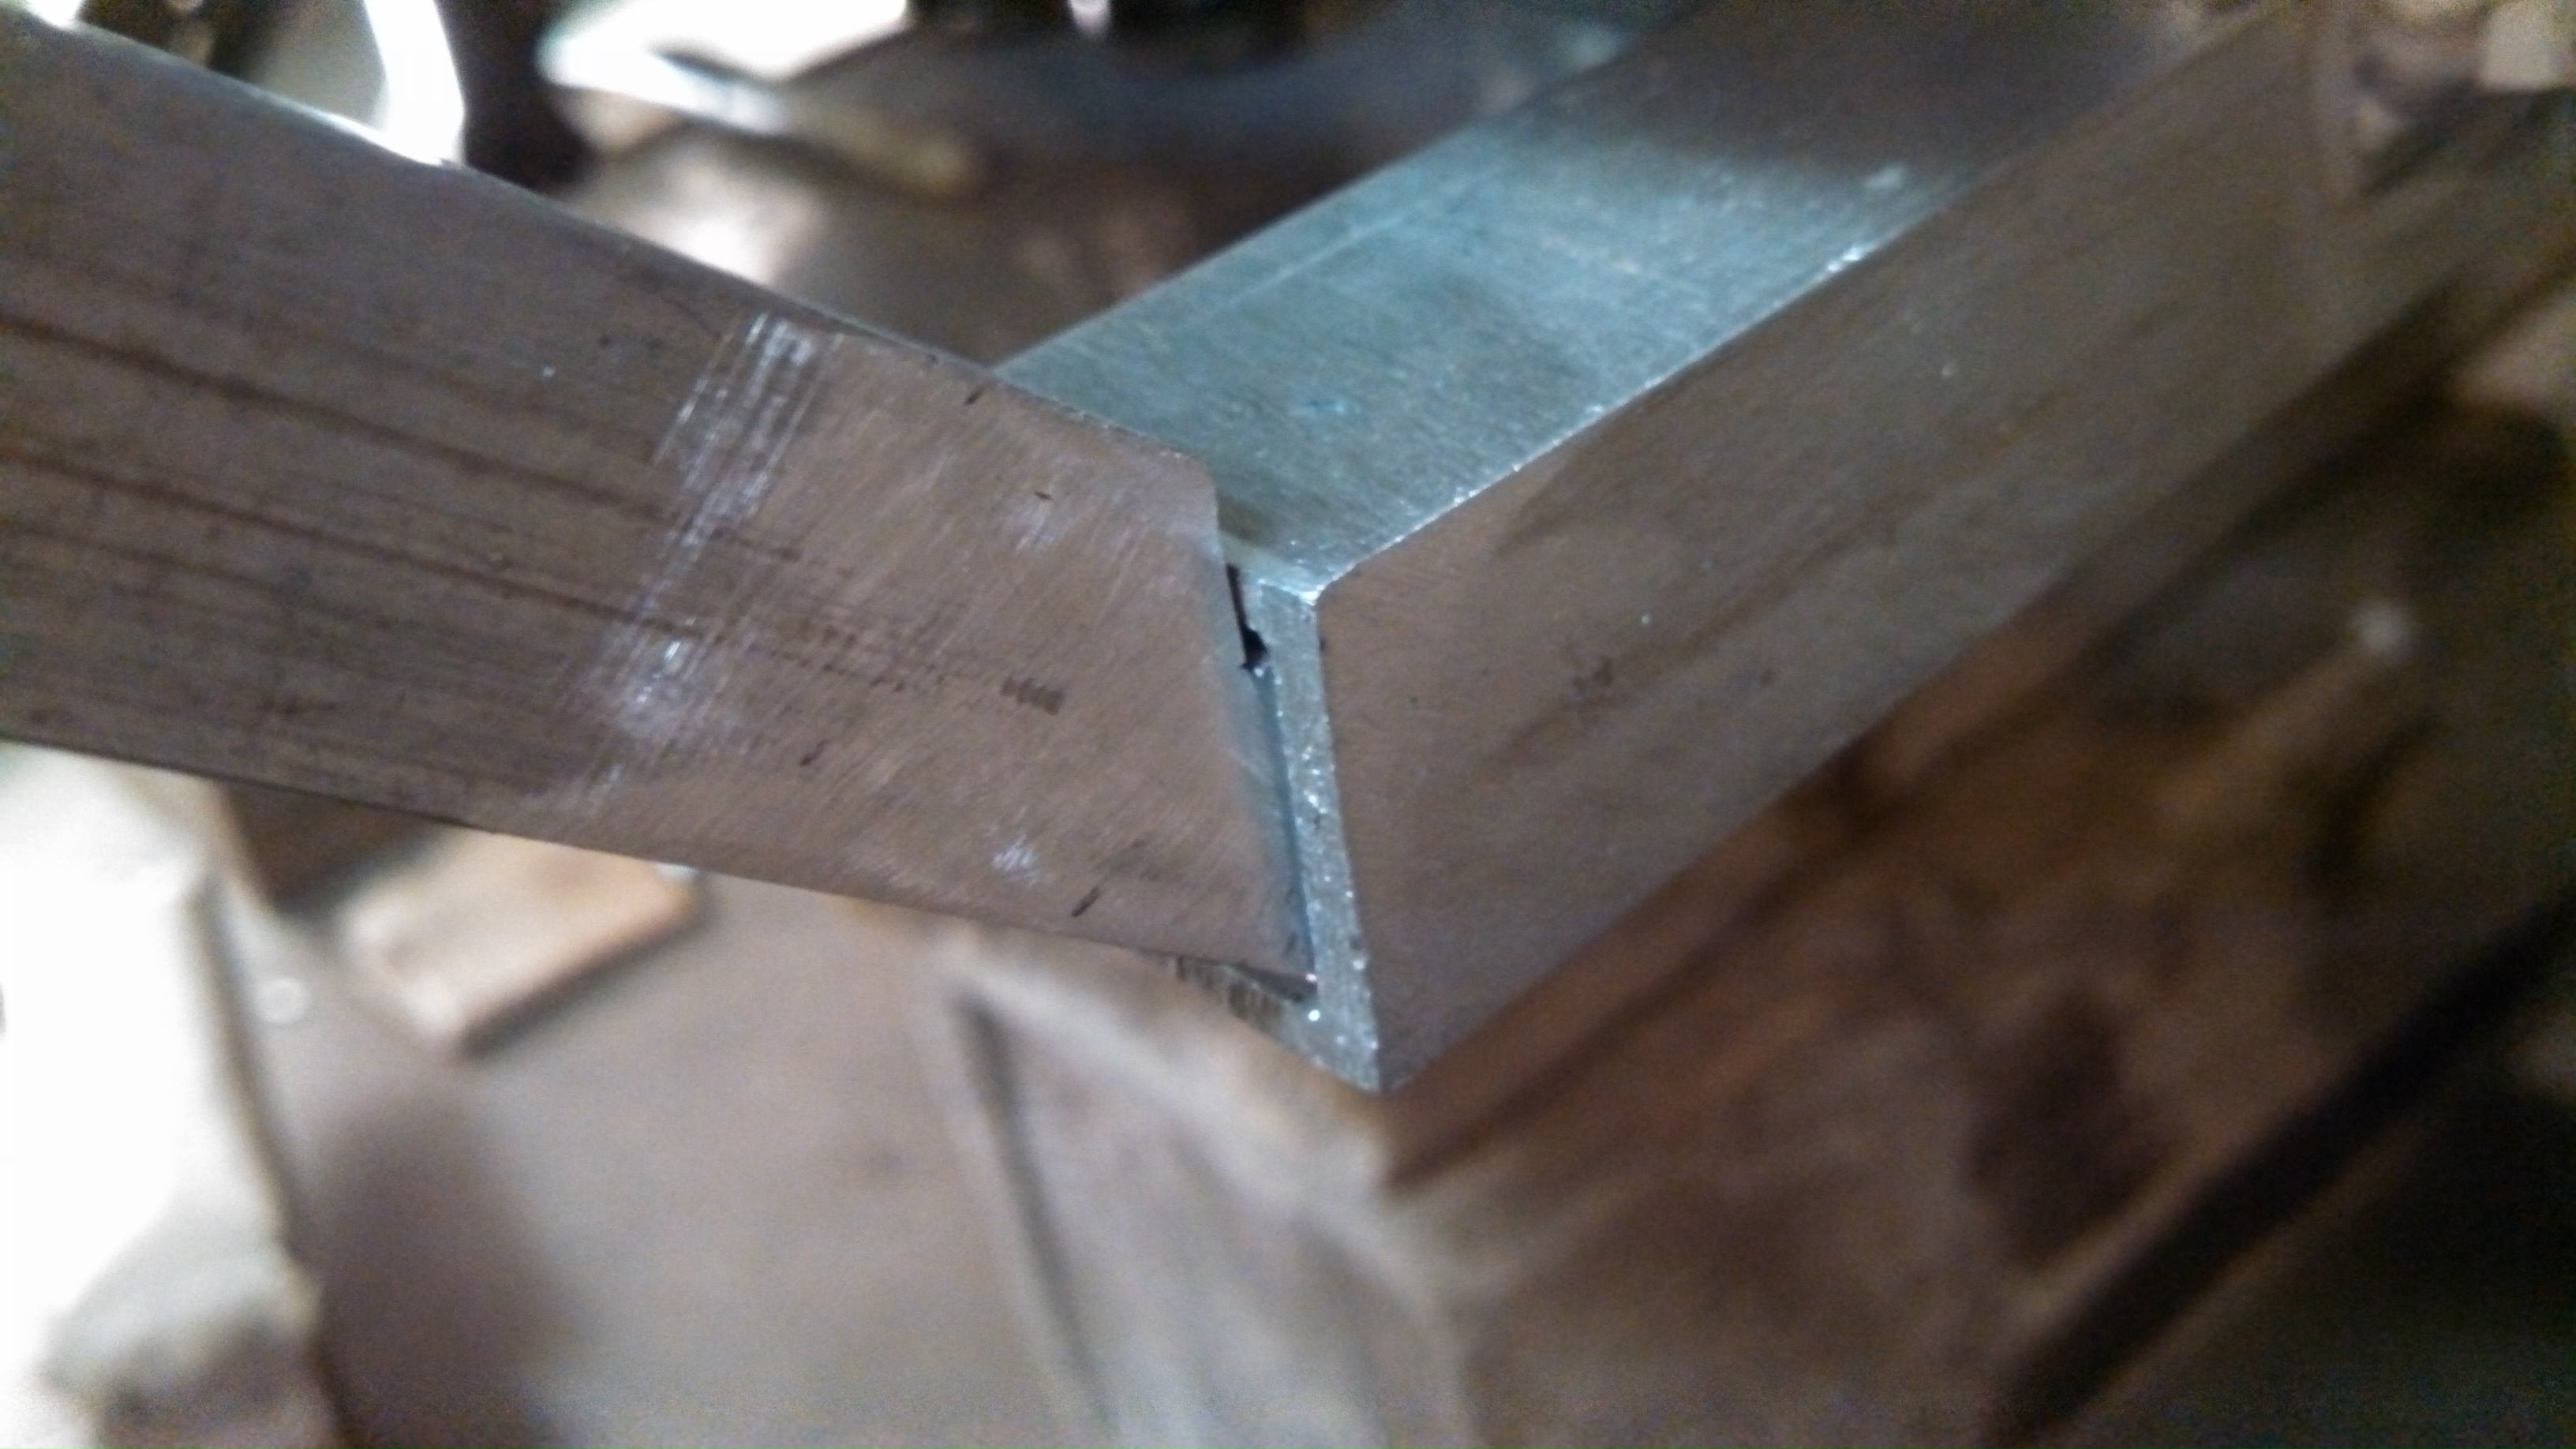
- front xmember support jigsaw detail3.jpg (1.15 MiB) Viewed 45908 times
- front x member support pass.jpg (1.47 MiB) Viewed 45908 times
Re: 24vVR6T CQ Project: EATSGTR, chassis FAB
Posted: Thu Nov 28, 2013 1:18 pm
by my2000apb
Re: 24vVR6T CQ Project: EATSGTR, chassis FAB
Posted: Thu Nov 28, 2013 1:25 pm
by my2000apb
MORE!!!
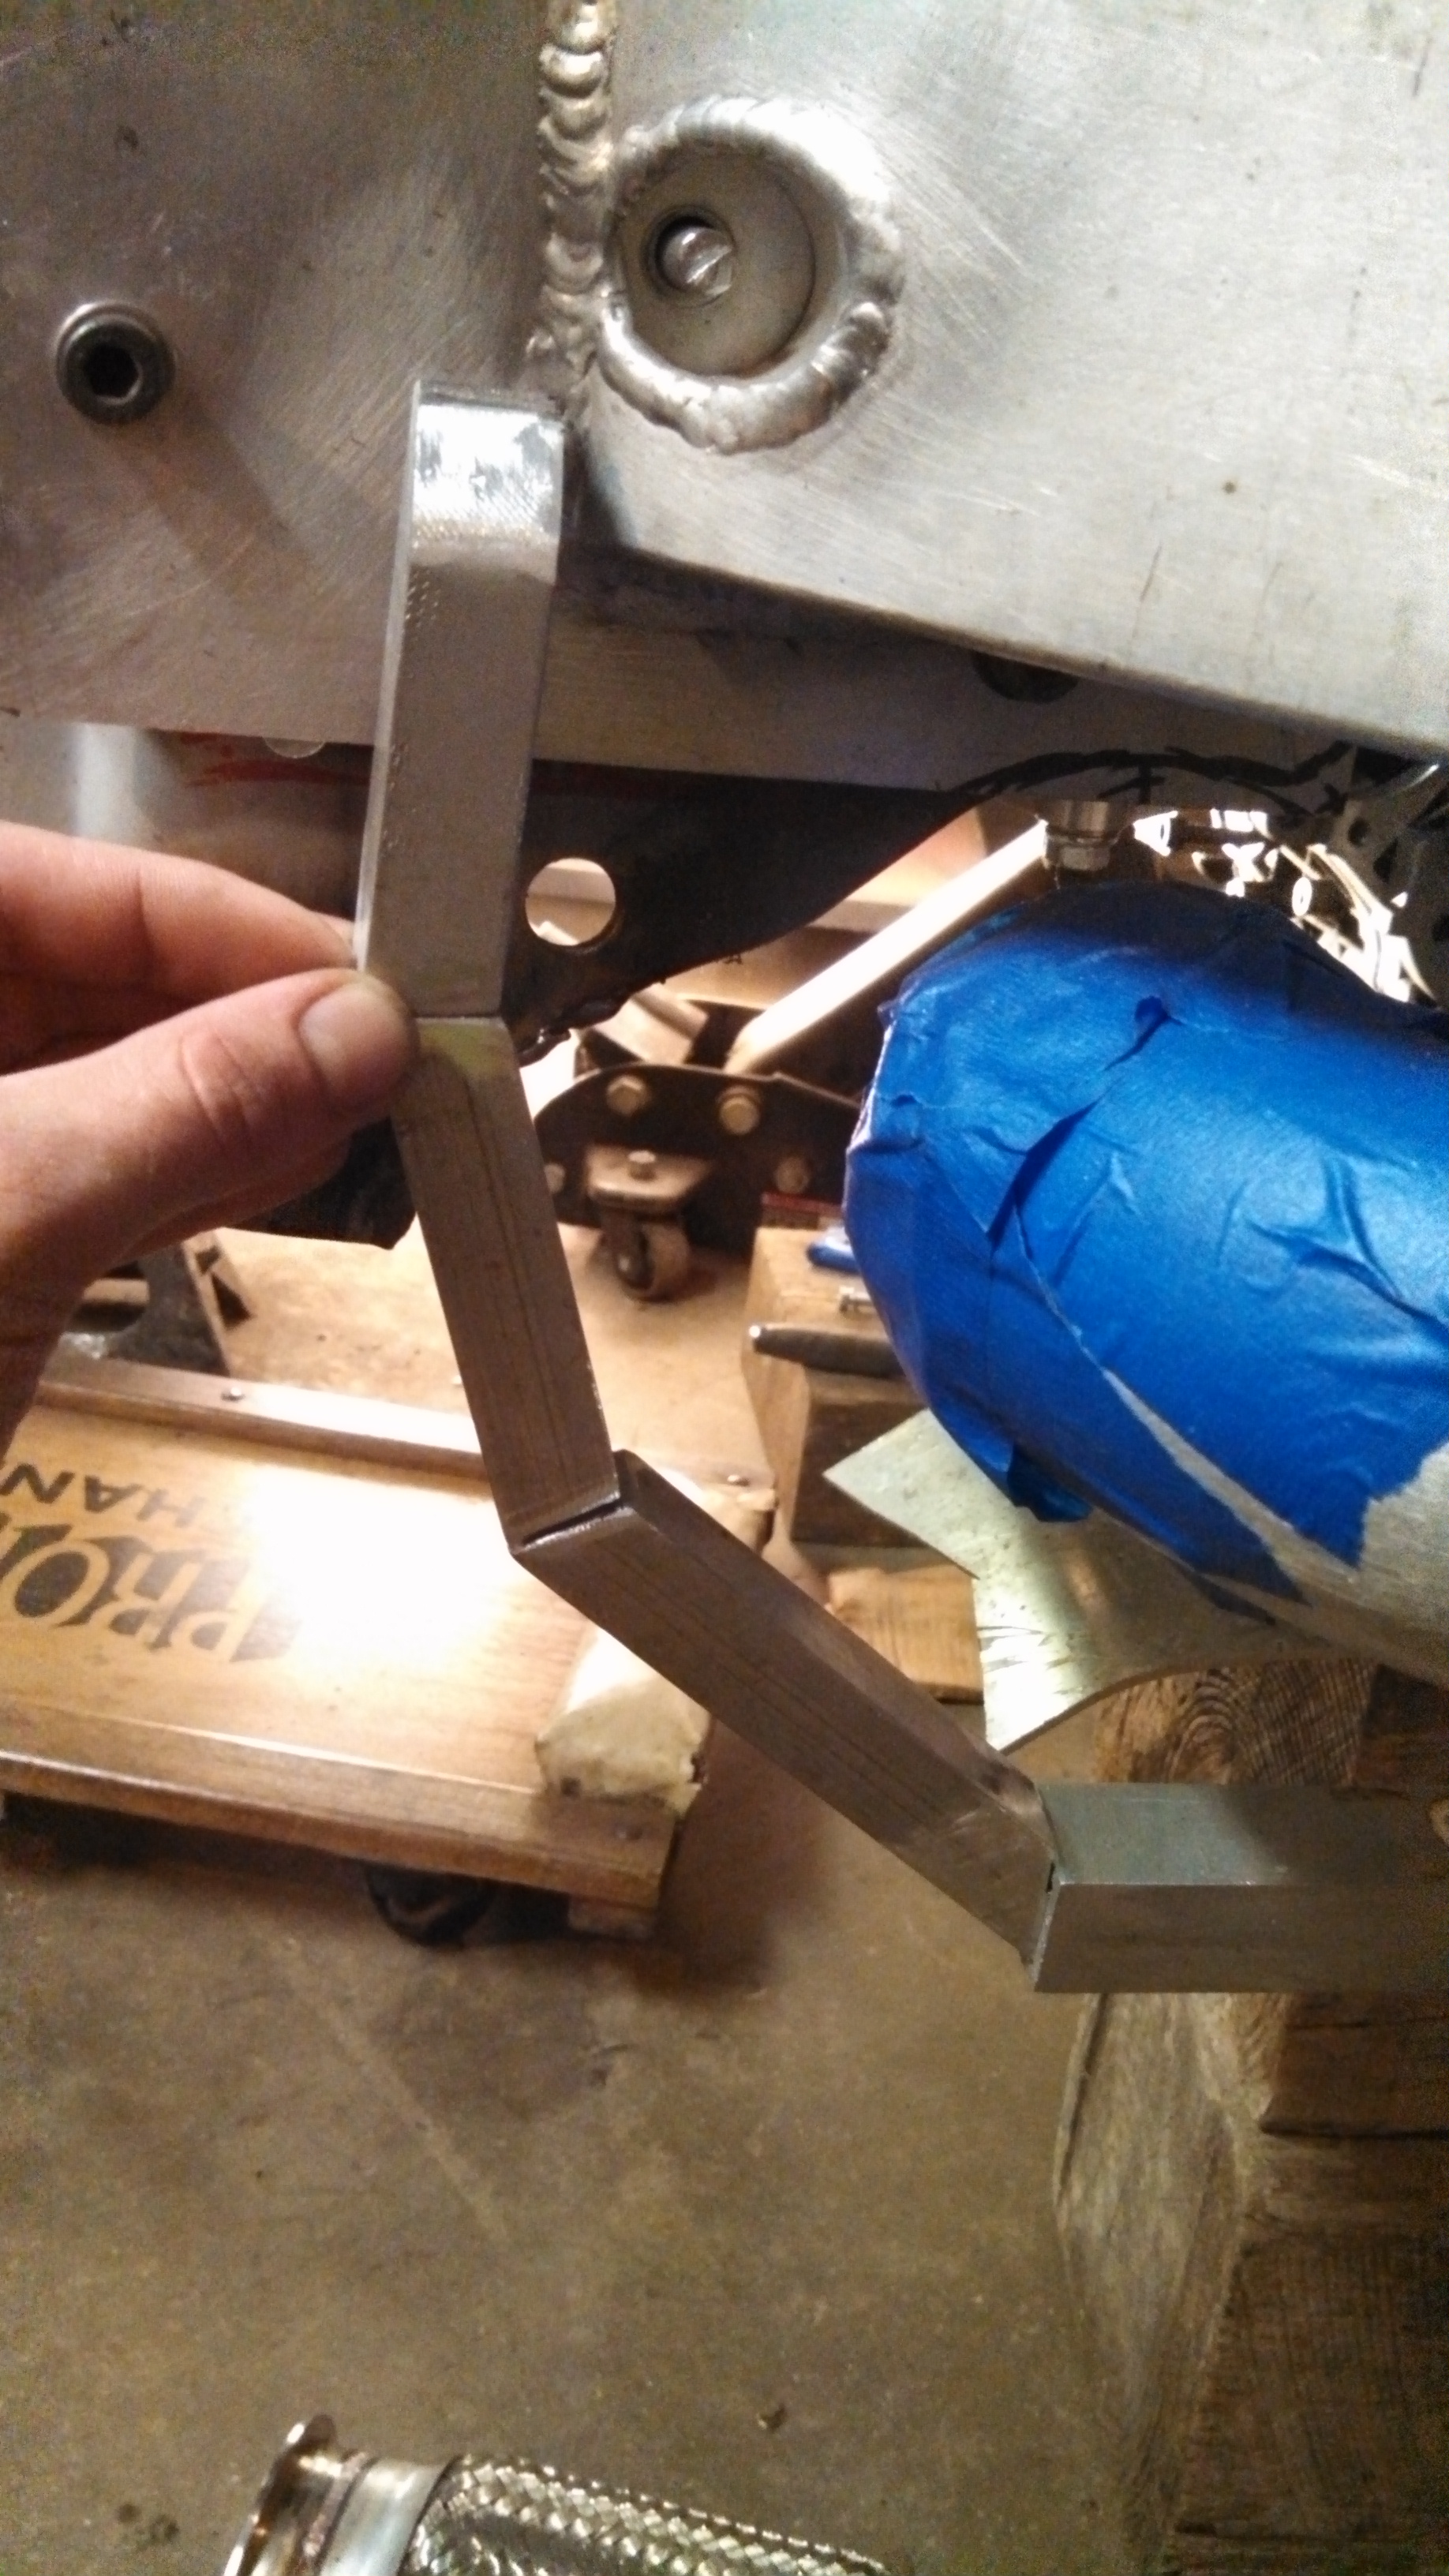
I also got some more time to work on the tubular sub-frames. Here are two more transverse pieces tacked together. The removable rear and the front of the front subframe where it goes under the t-reg oil pan.
- subframe pieces tacked.jpg (1.49 MiB) Viewed 45907 times
The rear subframe will not be open like an oem subframe but have a removable front crossmember. It is removable so I can switch differentials without dropping the subframe and still have a much stiffer stronger setup. Maybe overkill, buts its done now so I’ll run it.
Here they are tacked on
- rear sf removable member ends tacked.jpg (1.26 MiB) Viewed 45907 times

- rear sf removable member ends tacked2.jpg (1.29 MiB) Viewed 45907 times
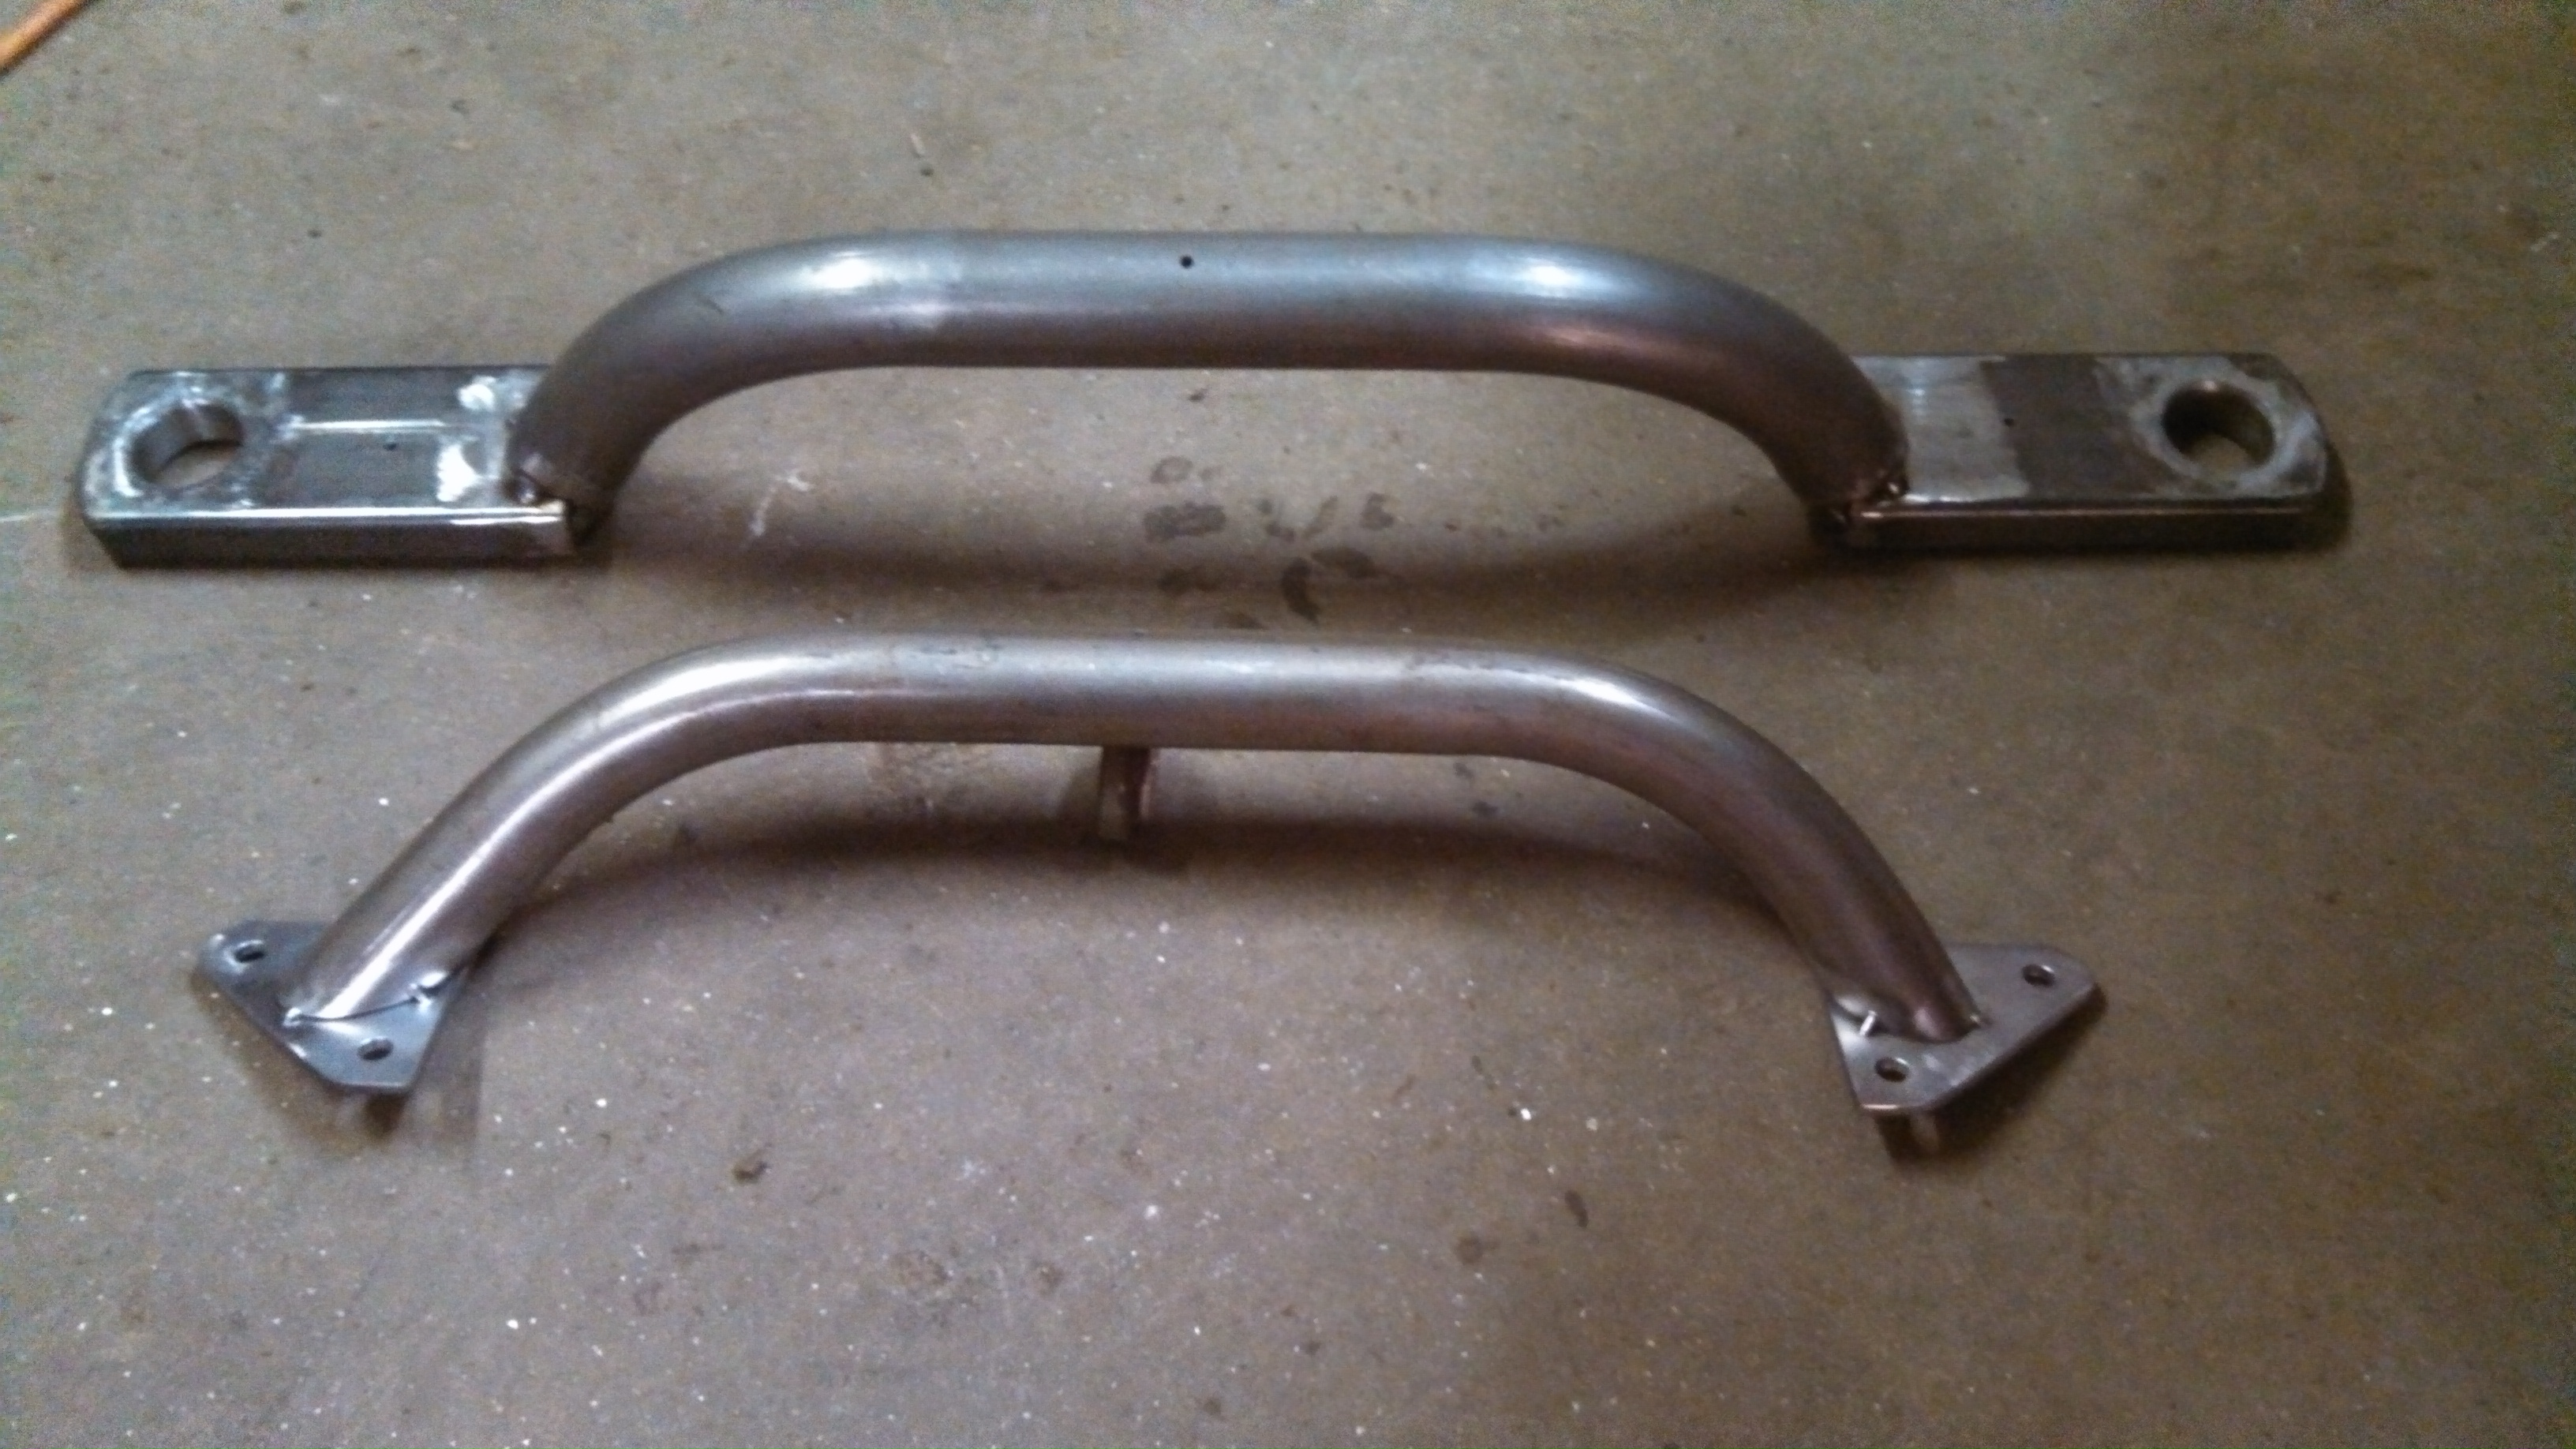
Here they are welded up
- rear sf removable member ends welded.jpg (1.44 MiB) Viewed 45907 times
- rear sf removable member ends welded2.jpg (1.35 MiB) Viewed 45907 times
Re: 24vVR6T CQ Project: EATSGTR, chassis FAB
Posted: Thu Nov 28, 2013 1:27 pm
by my2000apb
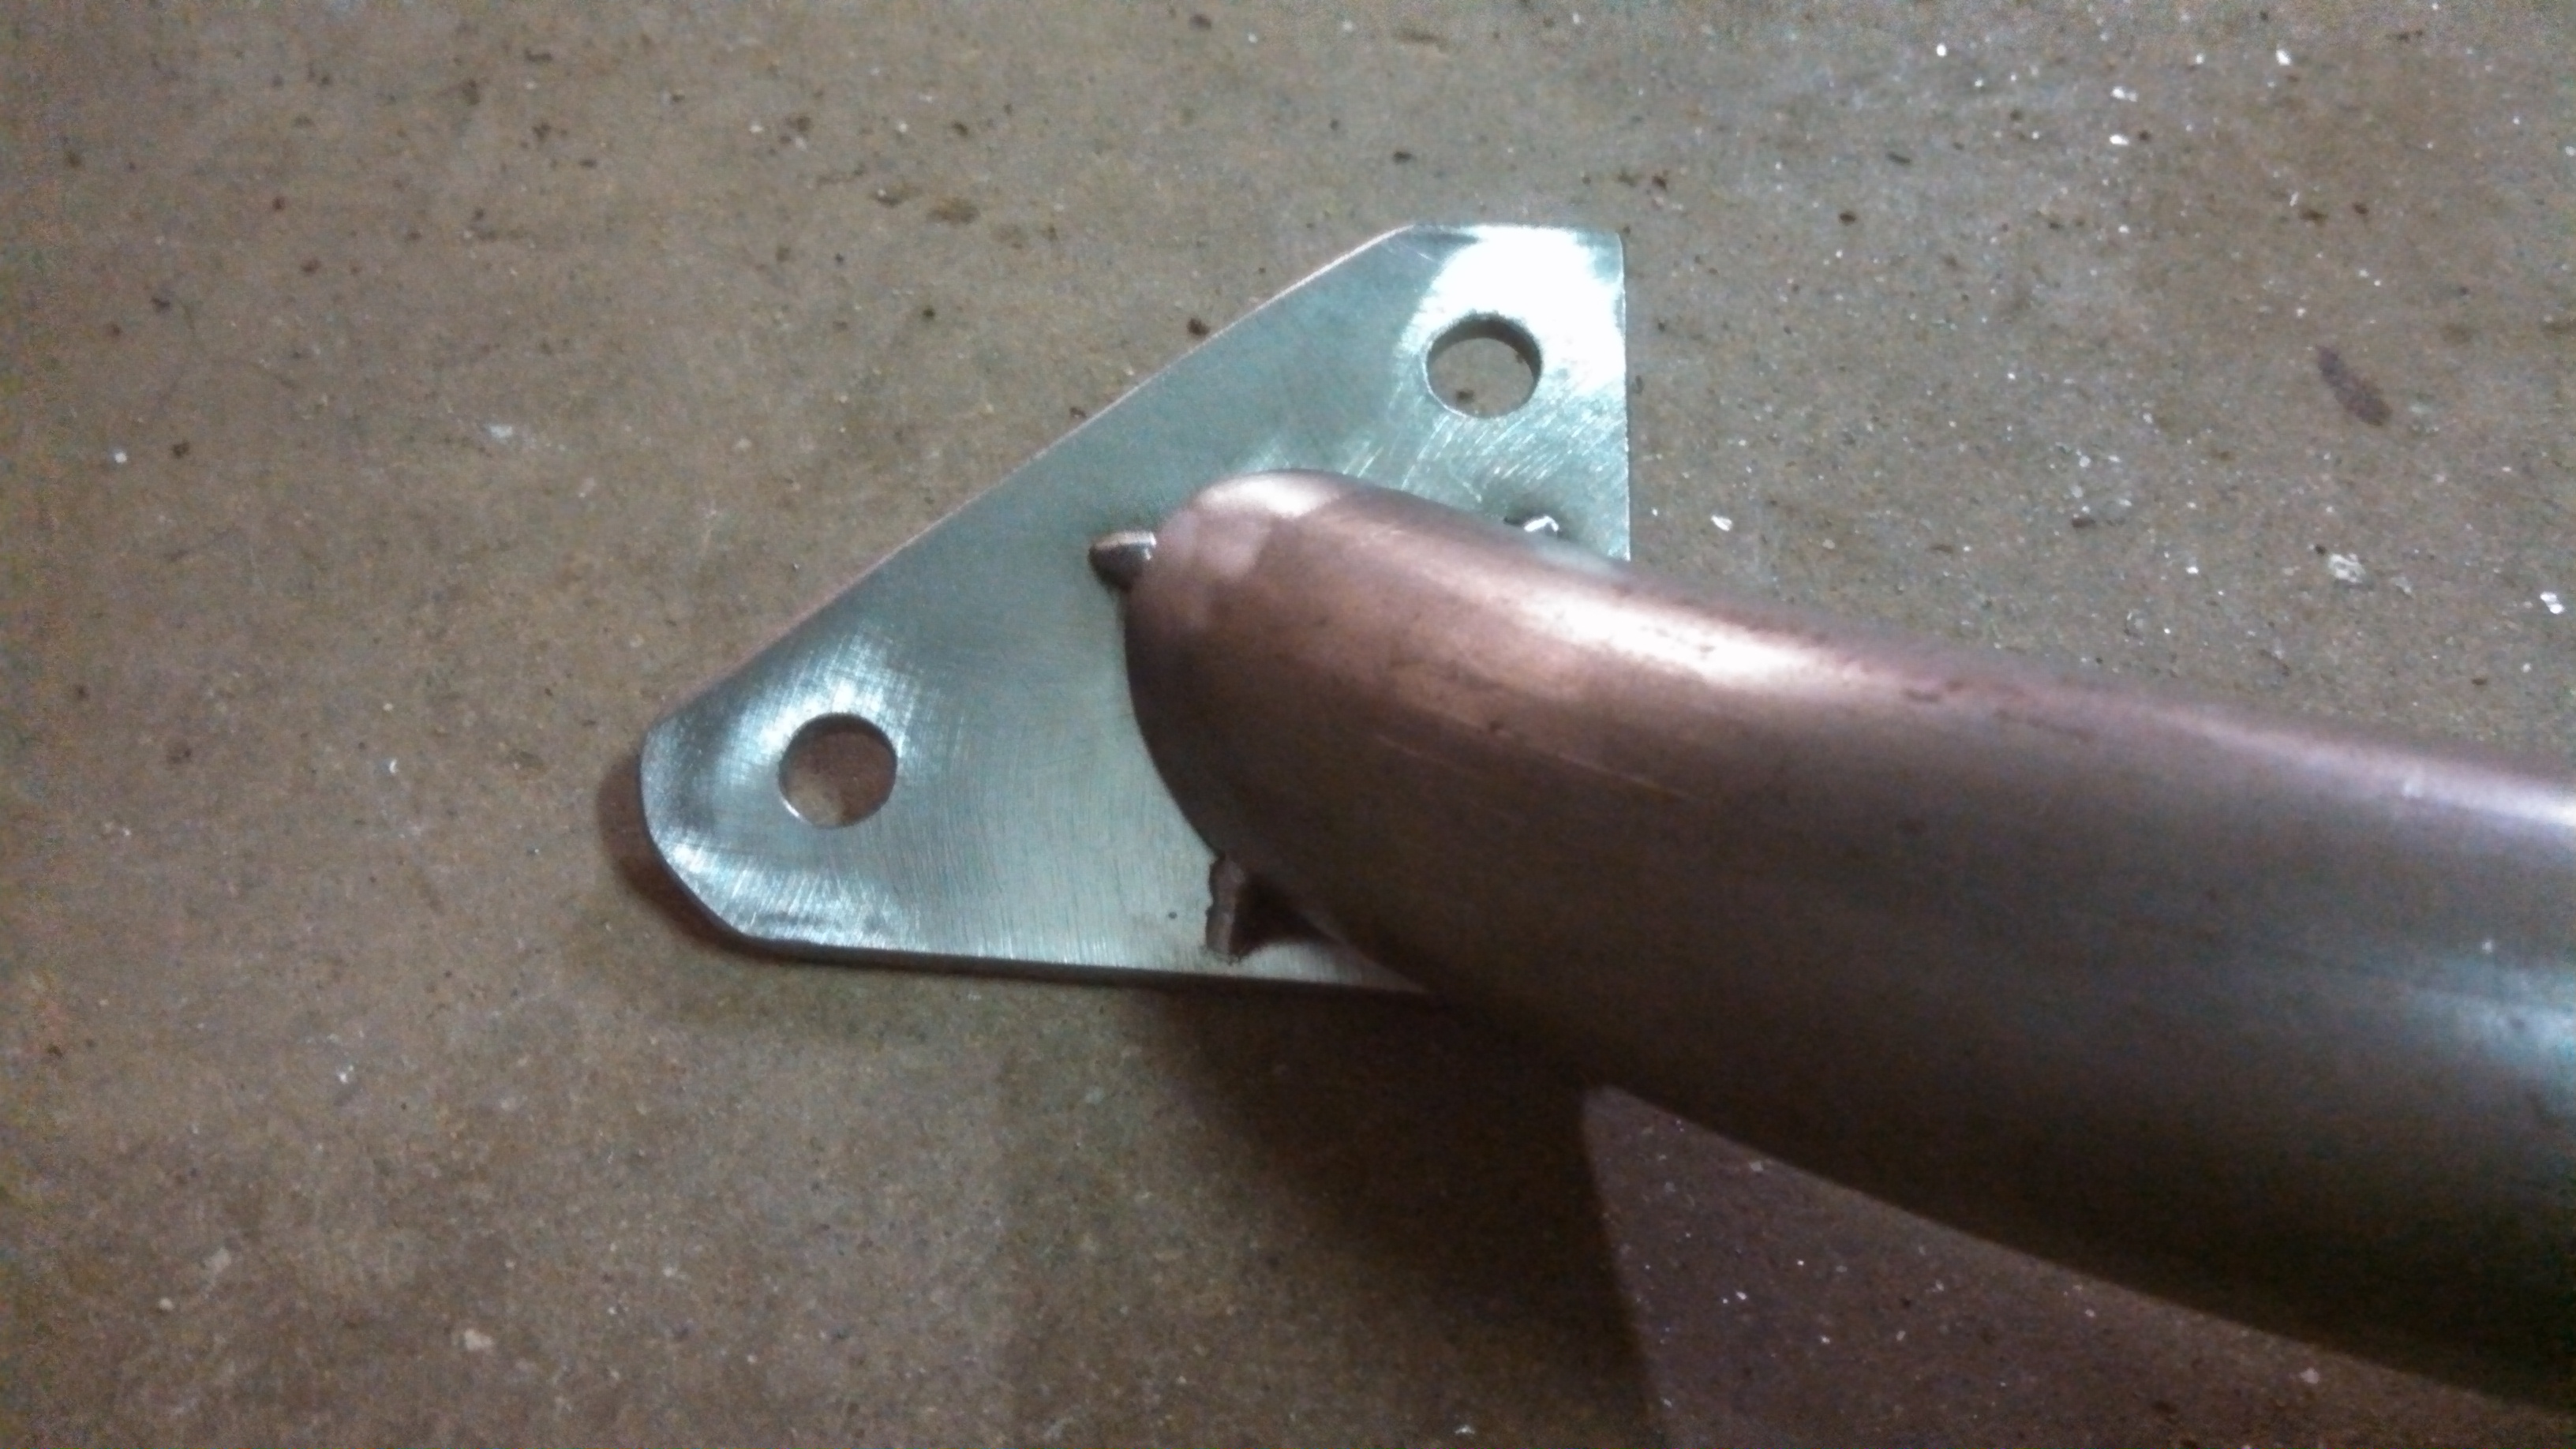
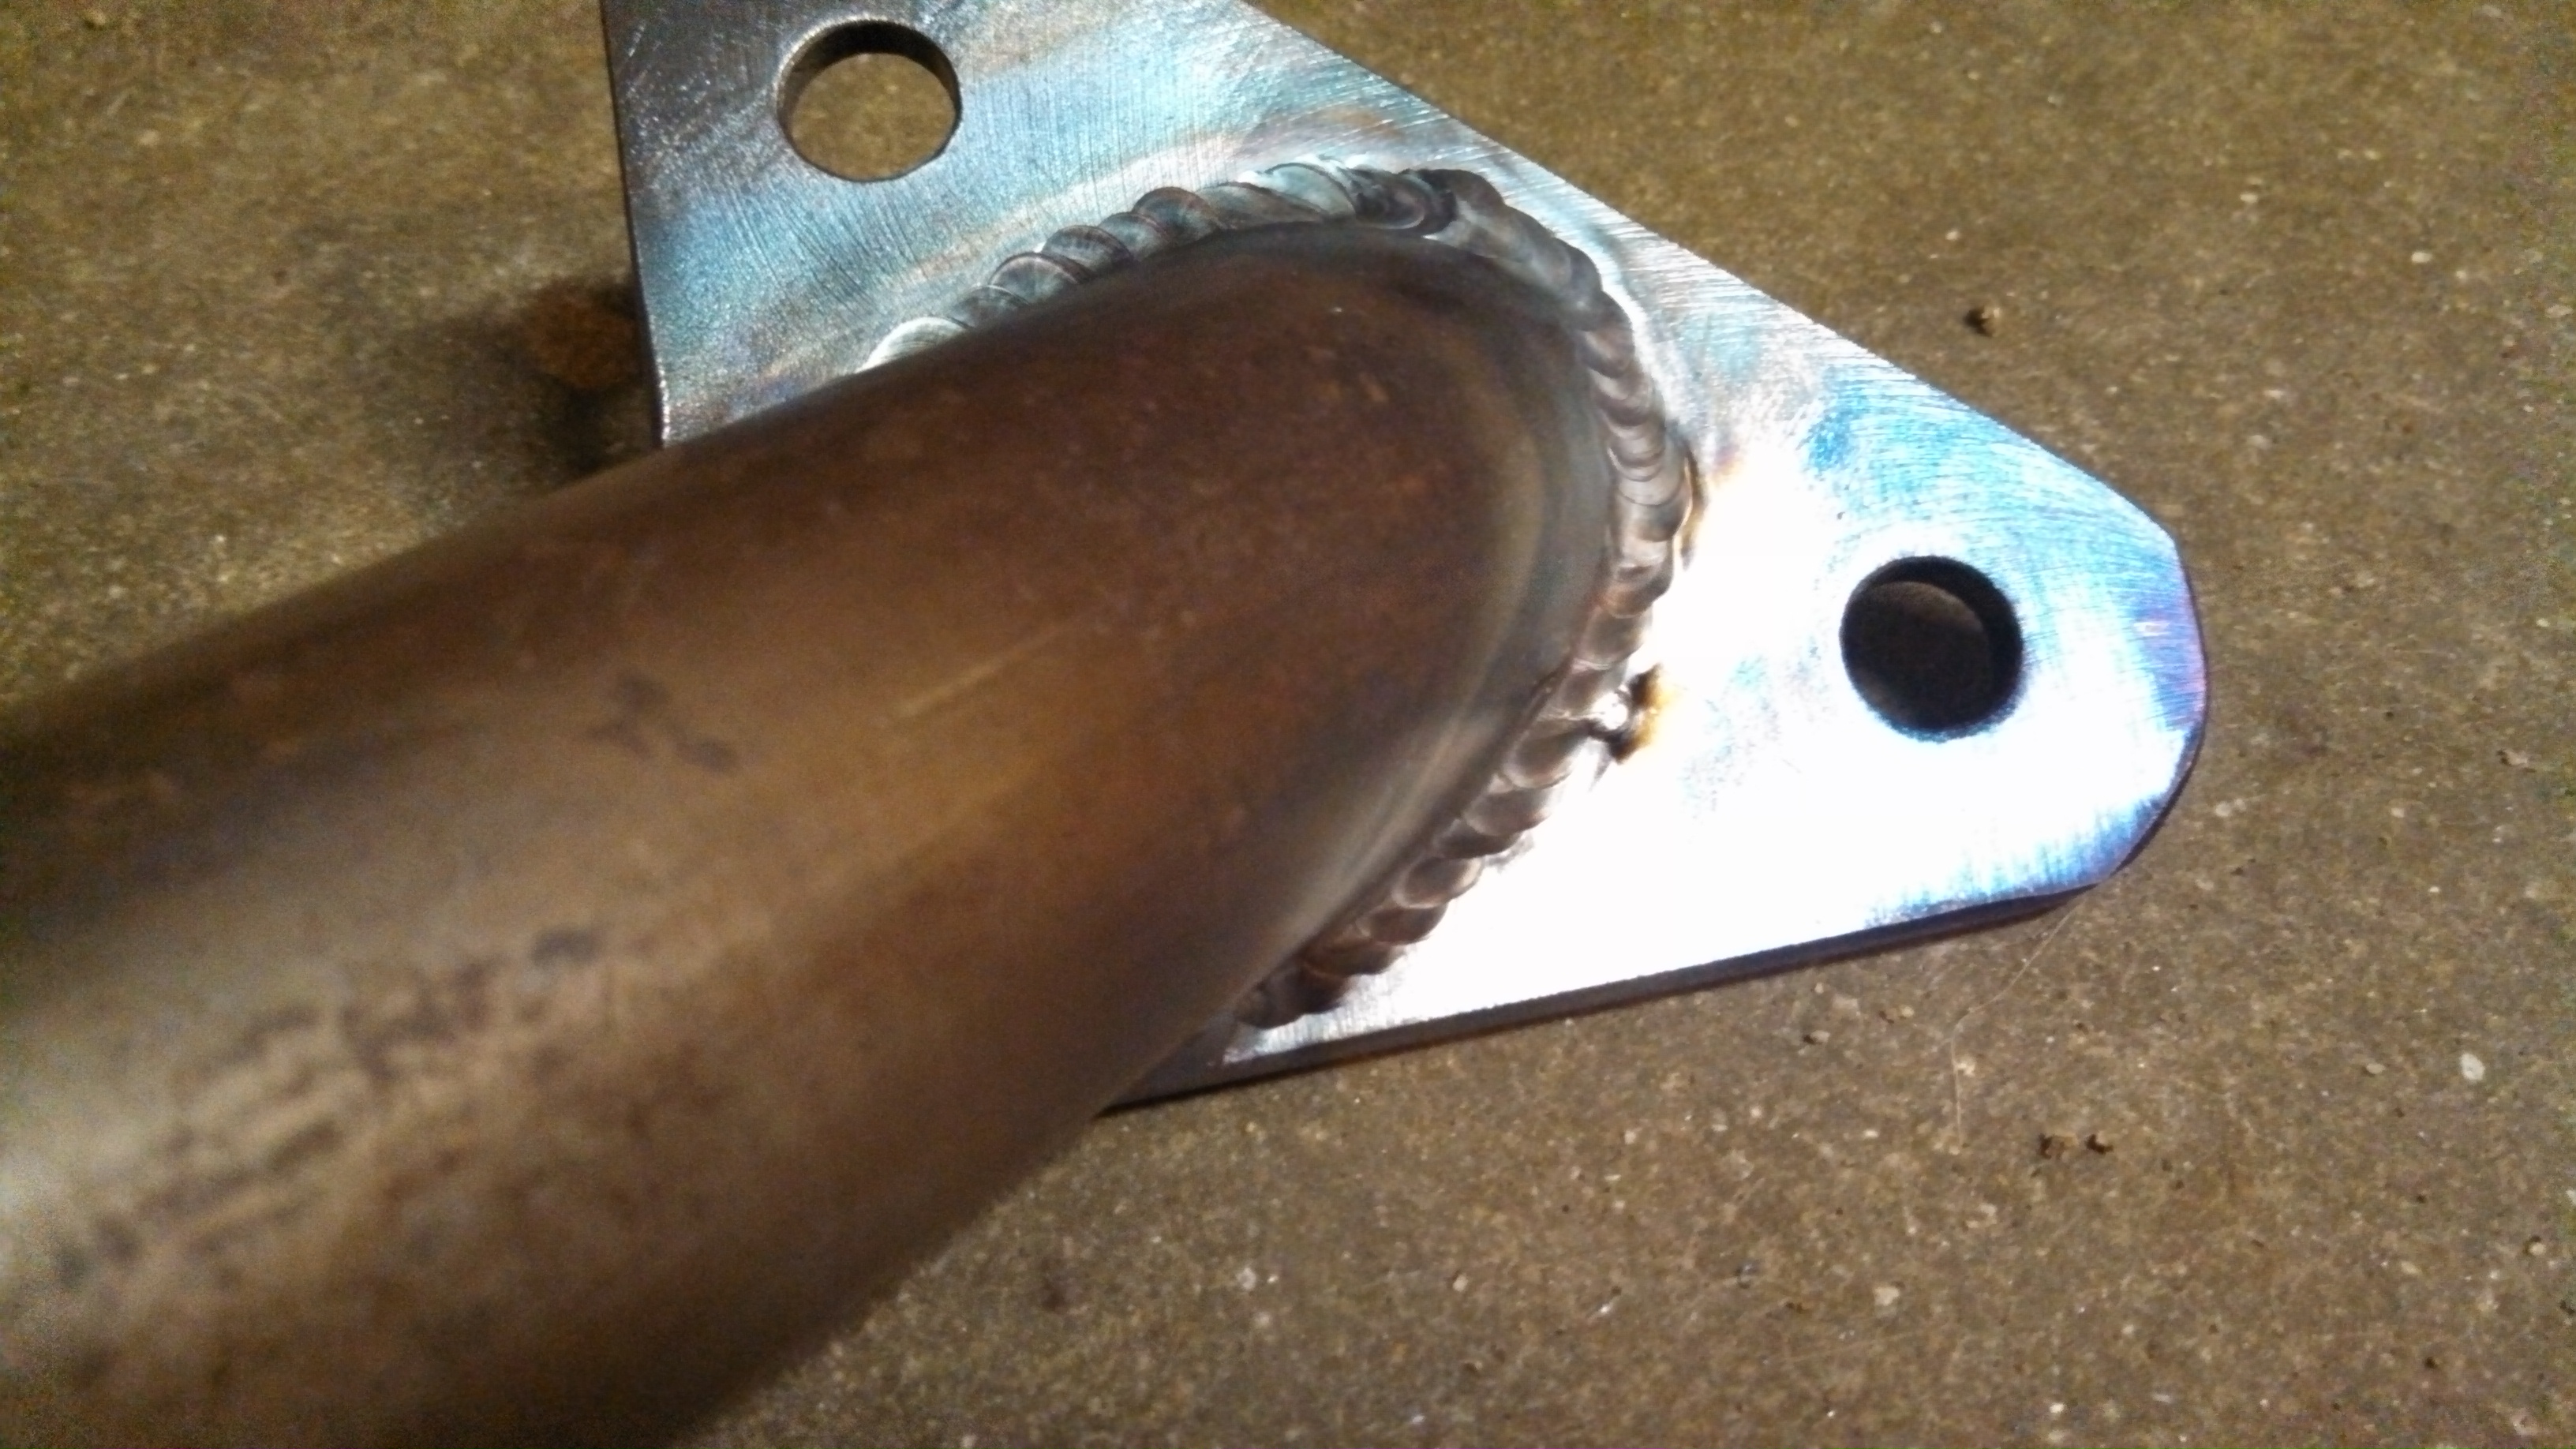
MORE!!
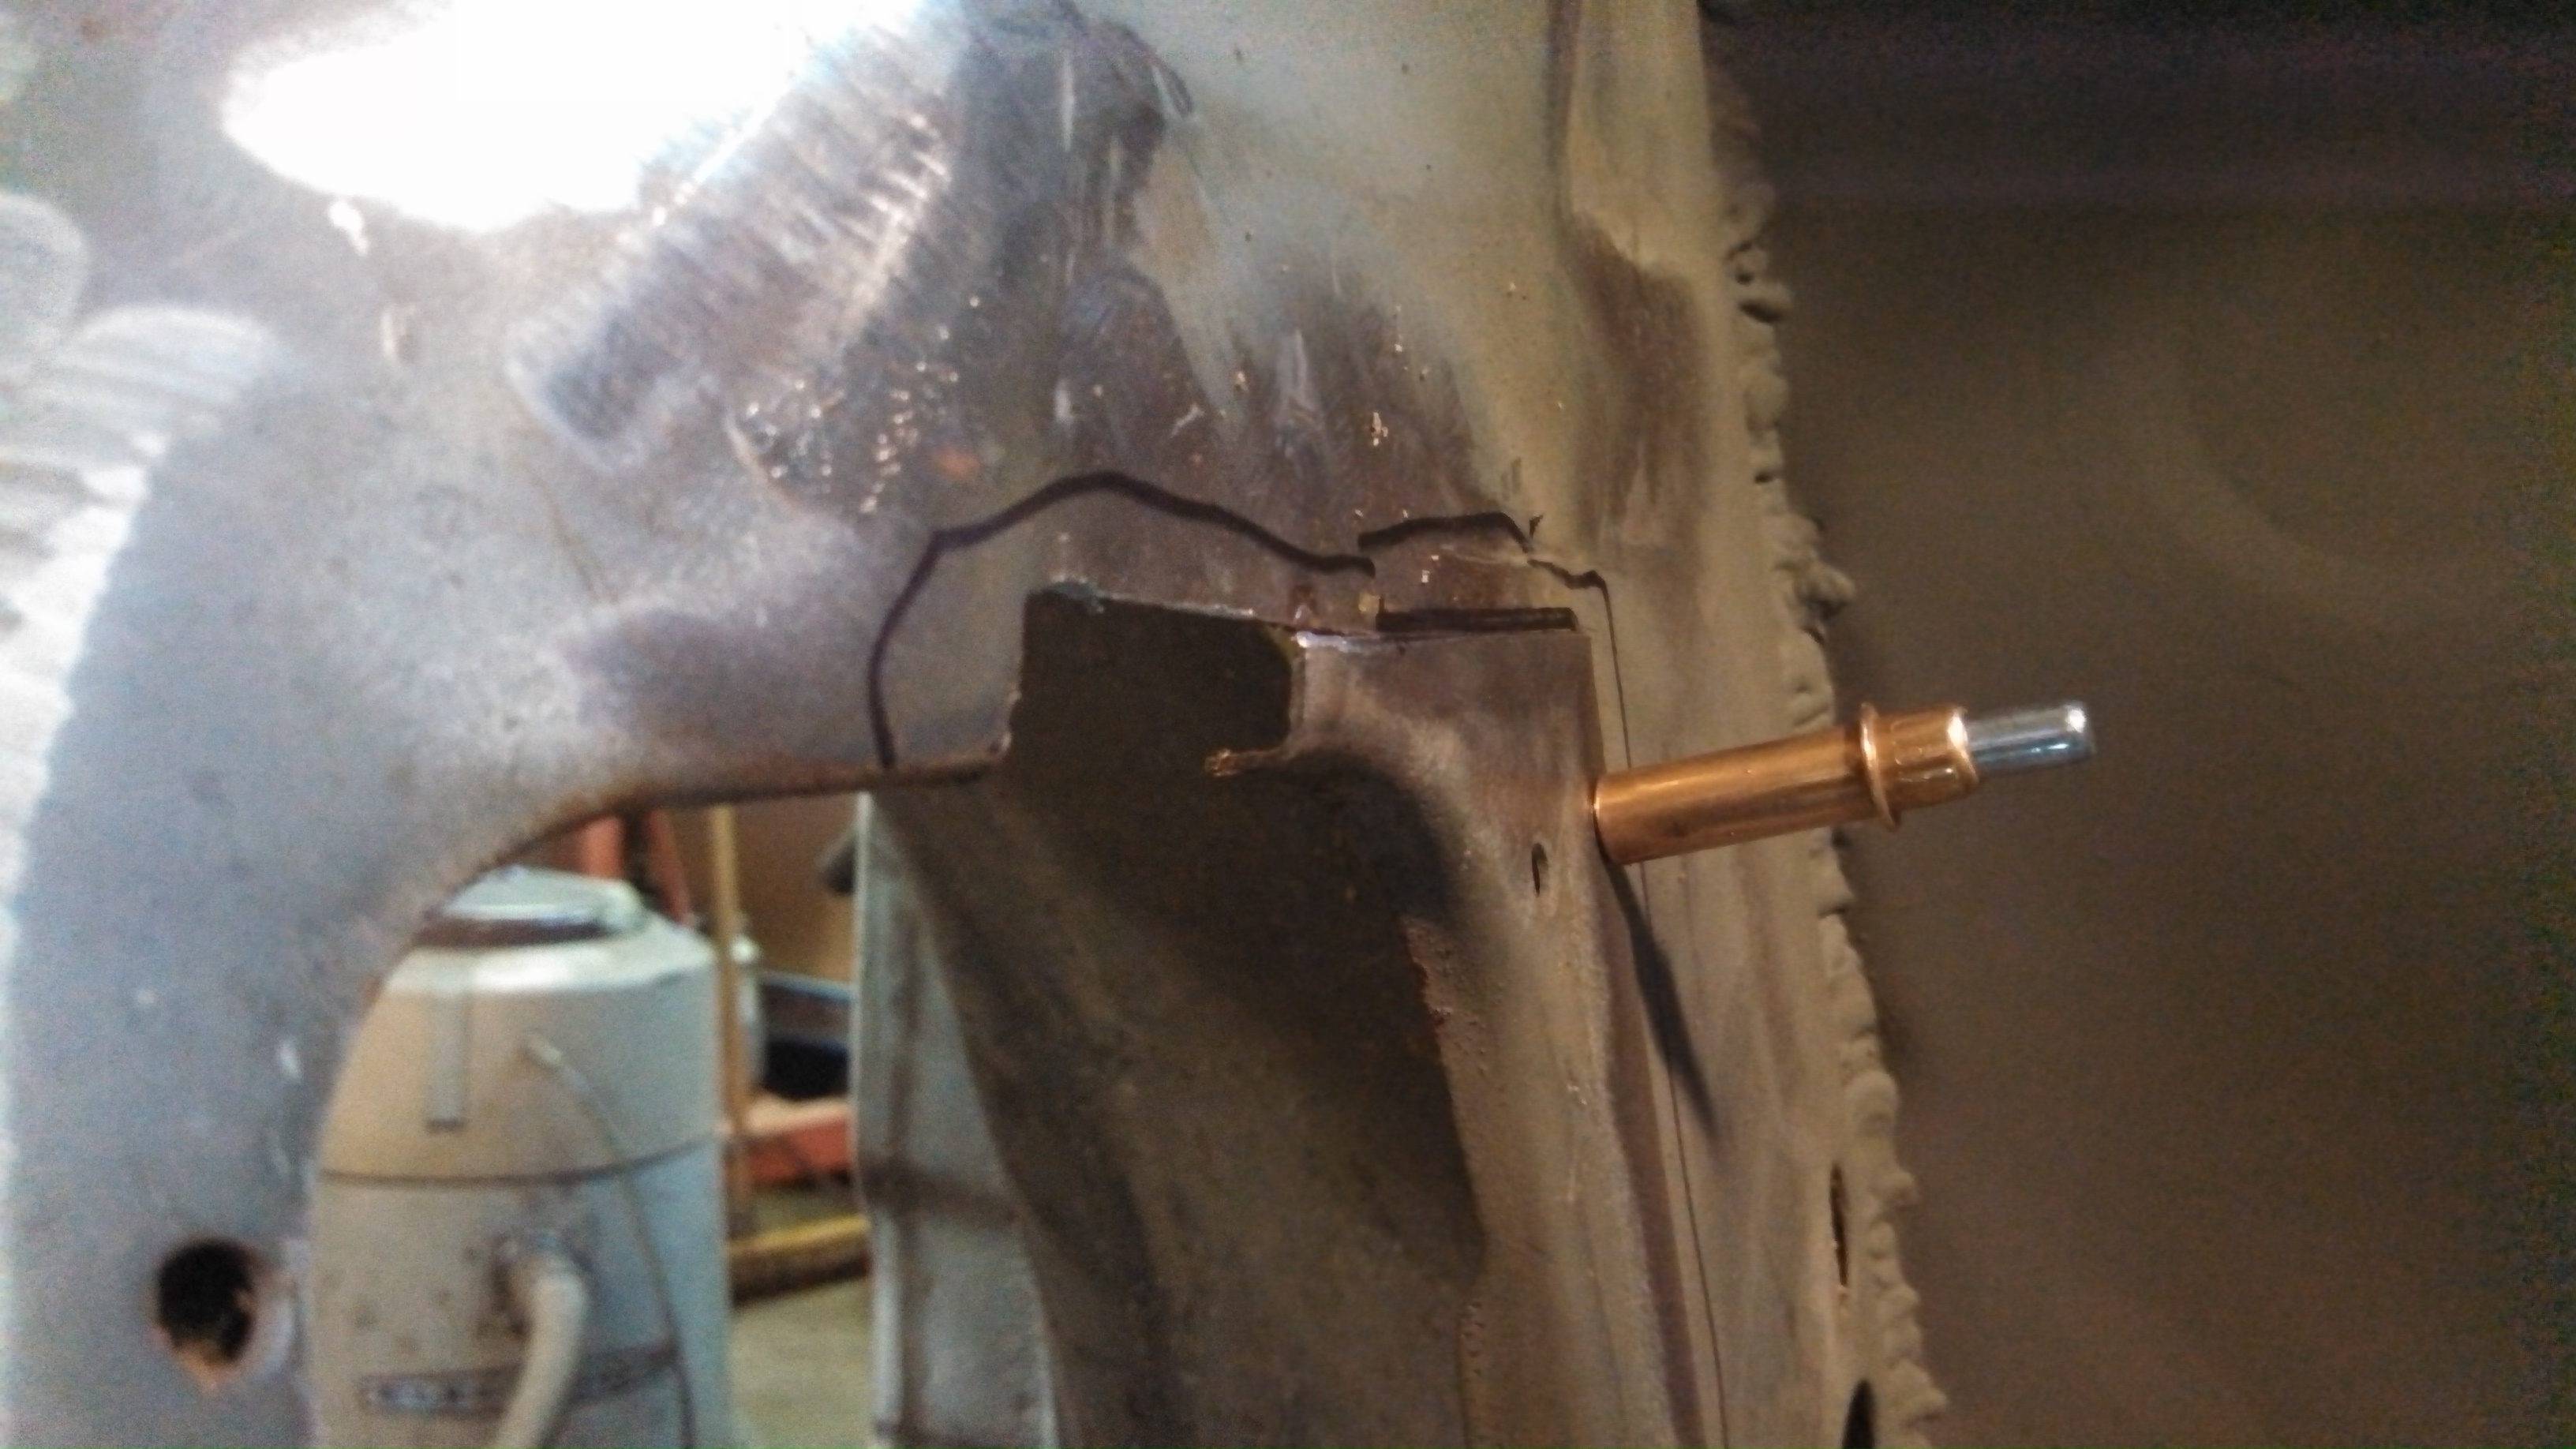
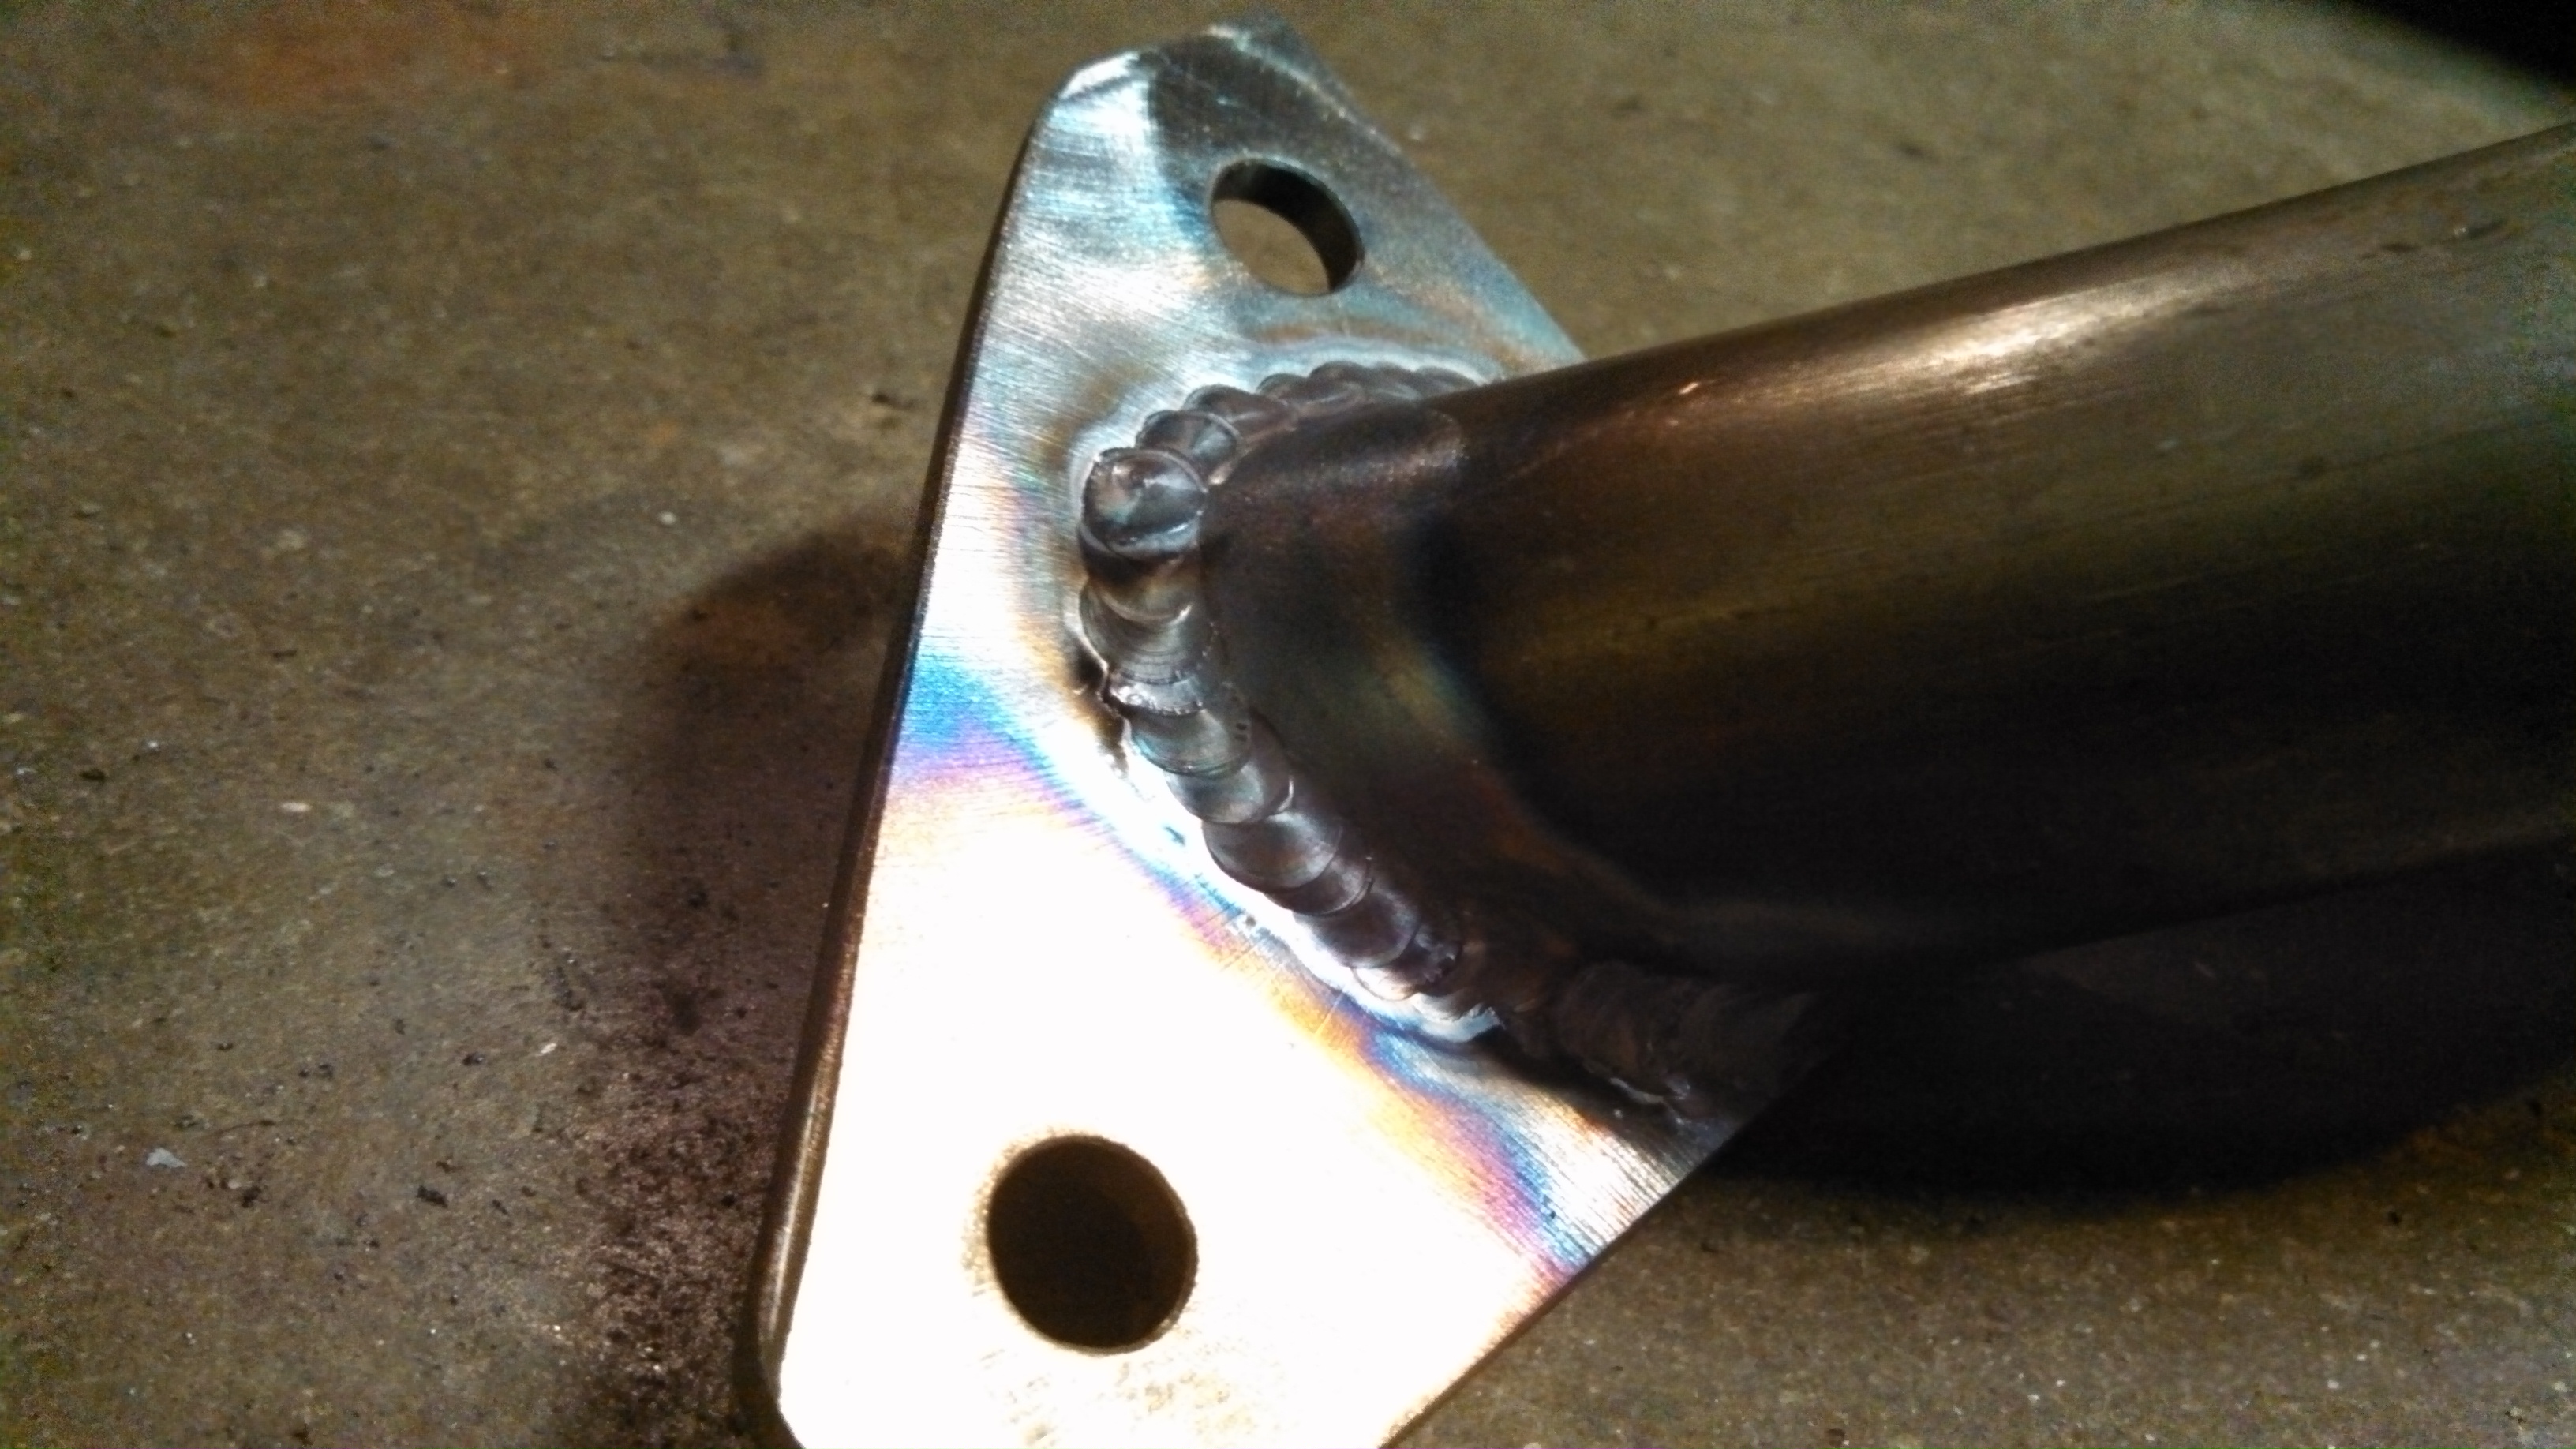
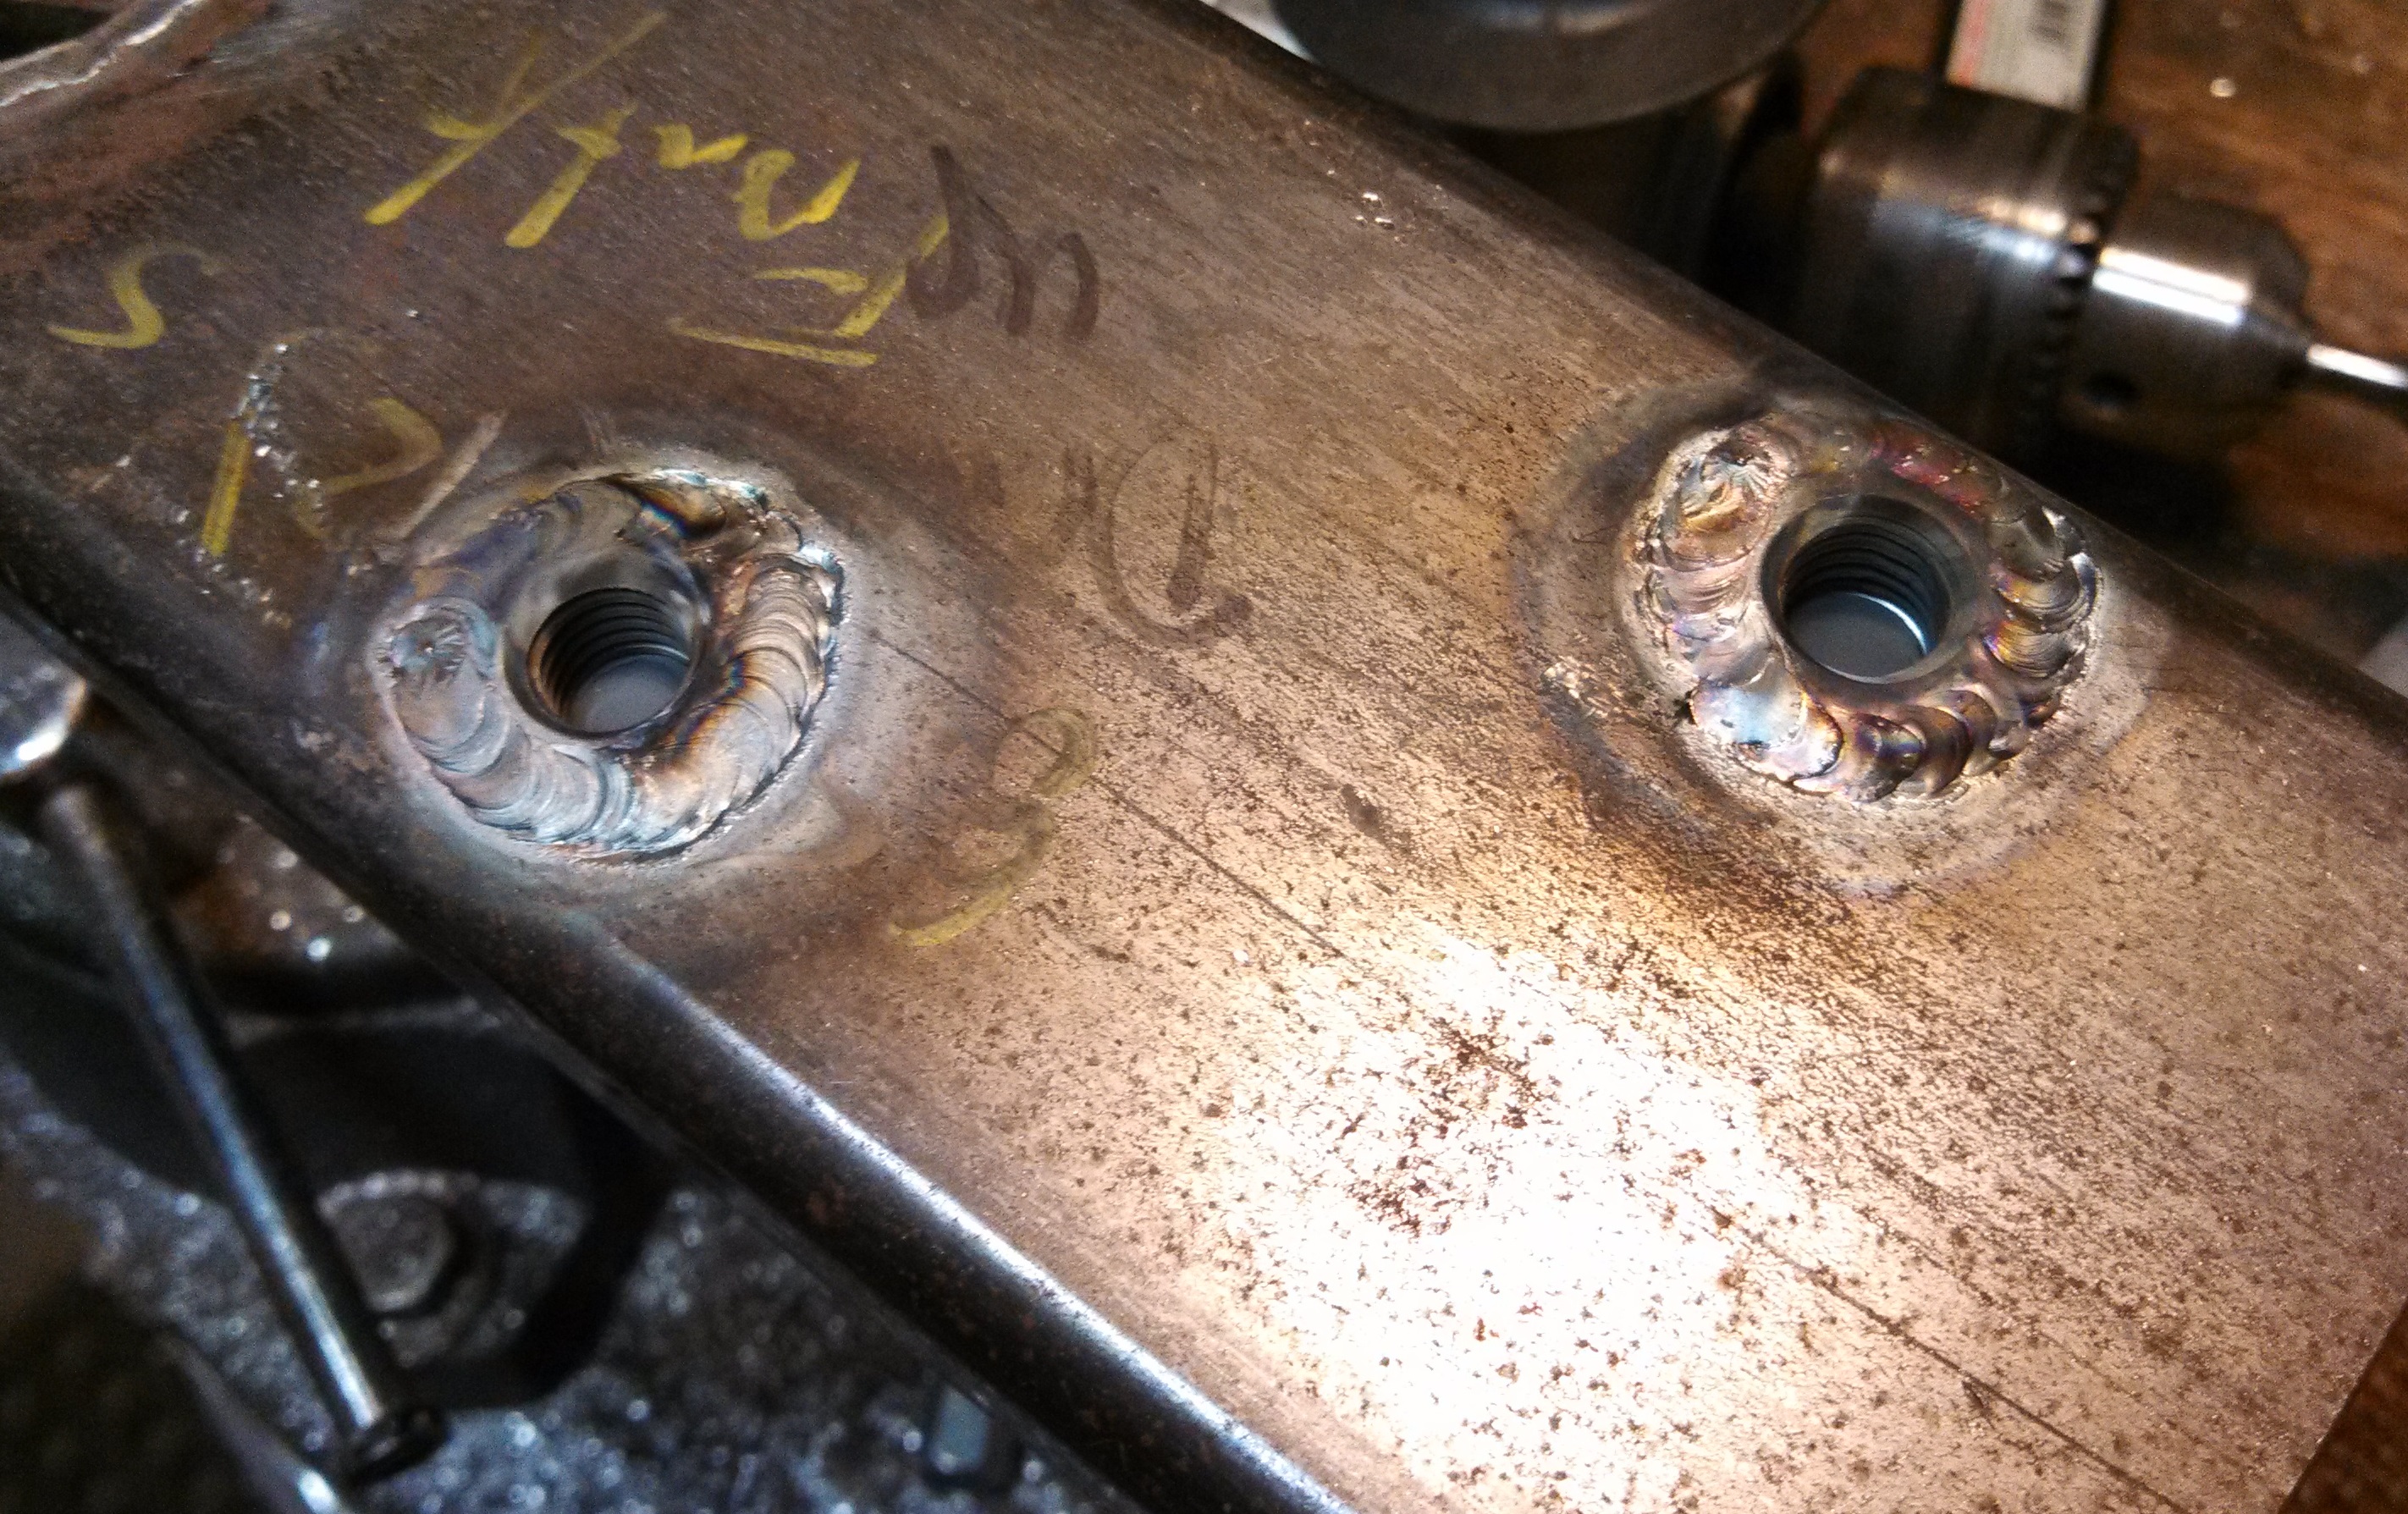
And here is the rear removable member again. Its attached via 2 m10’s. there is a m10 coupler nut welded in the 1x3” tube in compression. The mounting flange side is a 10.2mm hole for the coupler nut to butt up against and the backside is seam welded to the upper part of the 1x3” tube.
Pics!
- rear sf removable member holes done.jpg (1.84 MiB) Viewed 45907 times
- rear sf removable member holes done2.jpg (1.58 MiB) Viewed 45907 times
Re: 24vVR6T CQ Project: EATSGTR, chassis FAB
Posted: Fri Nov 29, 2013 11:30 am
by DE80q
DAMN! this stuff is awesome! Keep the updates coming, I love looking at this thing coming together.
Re: 24vVR6T CQ Project: EATSGTR, chassis FAB
Posted: Fri Nov 29, 2013 12:44 pm
by loxxrider
Indeed, it is awesome.
Tim, why do seam sealer? Just for cosmetics?
Re: 24vVR6T CQ Project: EATSGTR, chassis FAB
Posted: Wed Dec 04, 2013 12:18 am
by my2000apb
loxxrider,
on the parts I seamwelded, its mostly there to fill any small pits etc, prob overkill, but its the only sound deadening ill have ahah
for the rest, its really there to prevent water penetration, but I also use it,(like on the rear strut tops in-cabin) to keep random dust.grit.metal shavings etc out of there, as it seems to accumulate rapidly in the fab shop
Re: 24vVR6T CQ Project: EATSGTR, chassis FAB
Posted: Wed Dec 04, 2013 12:28 am
by highlander69
Looking great !!

Re: 24vVR6T CQ Project: EATSGTR, chassis FAB
Posted: Fri Dec 06, 2013 6:18 pm
by anotherbrick
Sick. Everything is so clean! Cheers indeed.
Re: 24vVR6T CQ Project: EATSGTR, chassis FAB
Posted: Sun Dec 08, 2013 6:38 pm
by my2000apb
thanks for the compliments
UPDATE!!!
Let’s get caught up. I’ve been working on the subframes and they are coming along nicely. The front is definitely more challenging to fabricate than the rear. The rear diff output cups are much more centered between the SF mounting points, so the c-arm mounts will be much easier to make. Then there is the front, with the engine/trans mounted lower and rearward. This puts the front output cups much further rearward and it’ll just be more difficult to make the front c-arm mounting tabs.
Here is the front transverse member of the front subframe, finished welded and reinstalled.

- front sf front transverse member.jpg (1.2 MiB) Viewed 45803 times
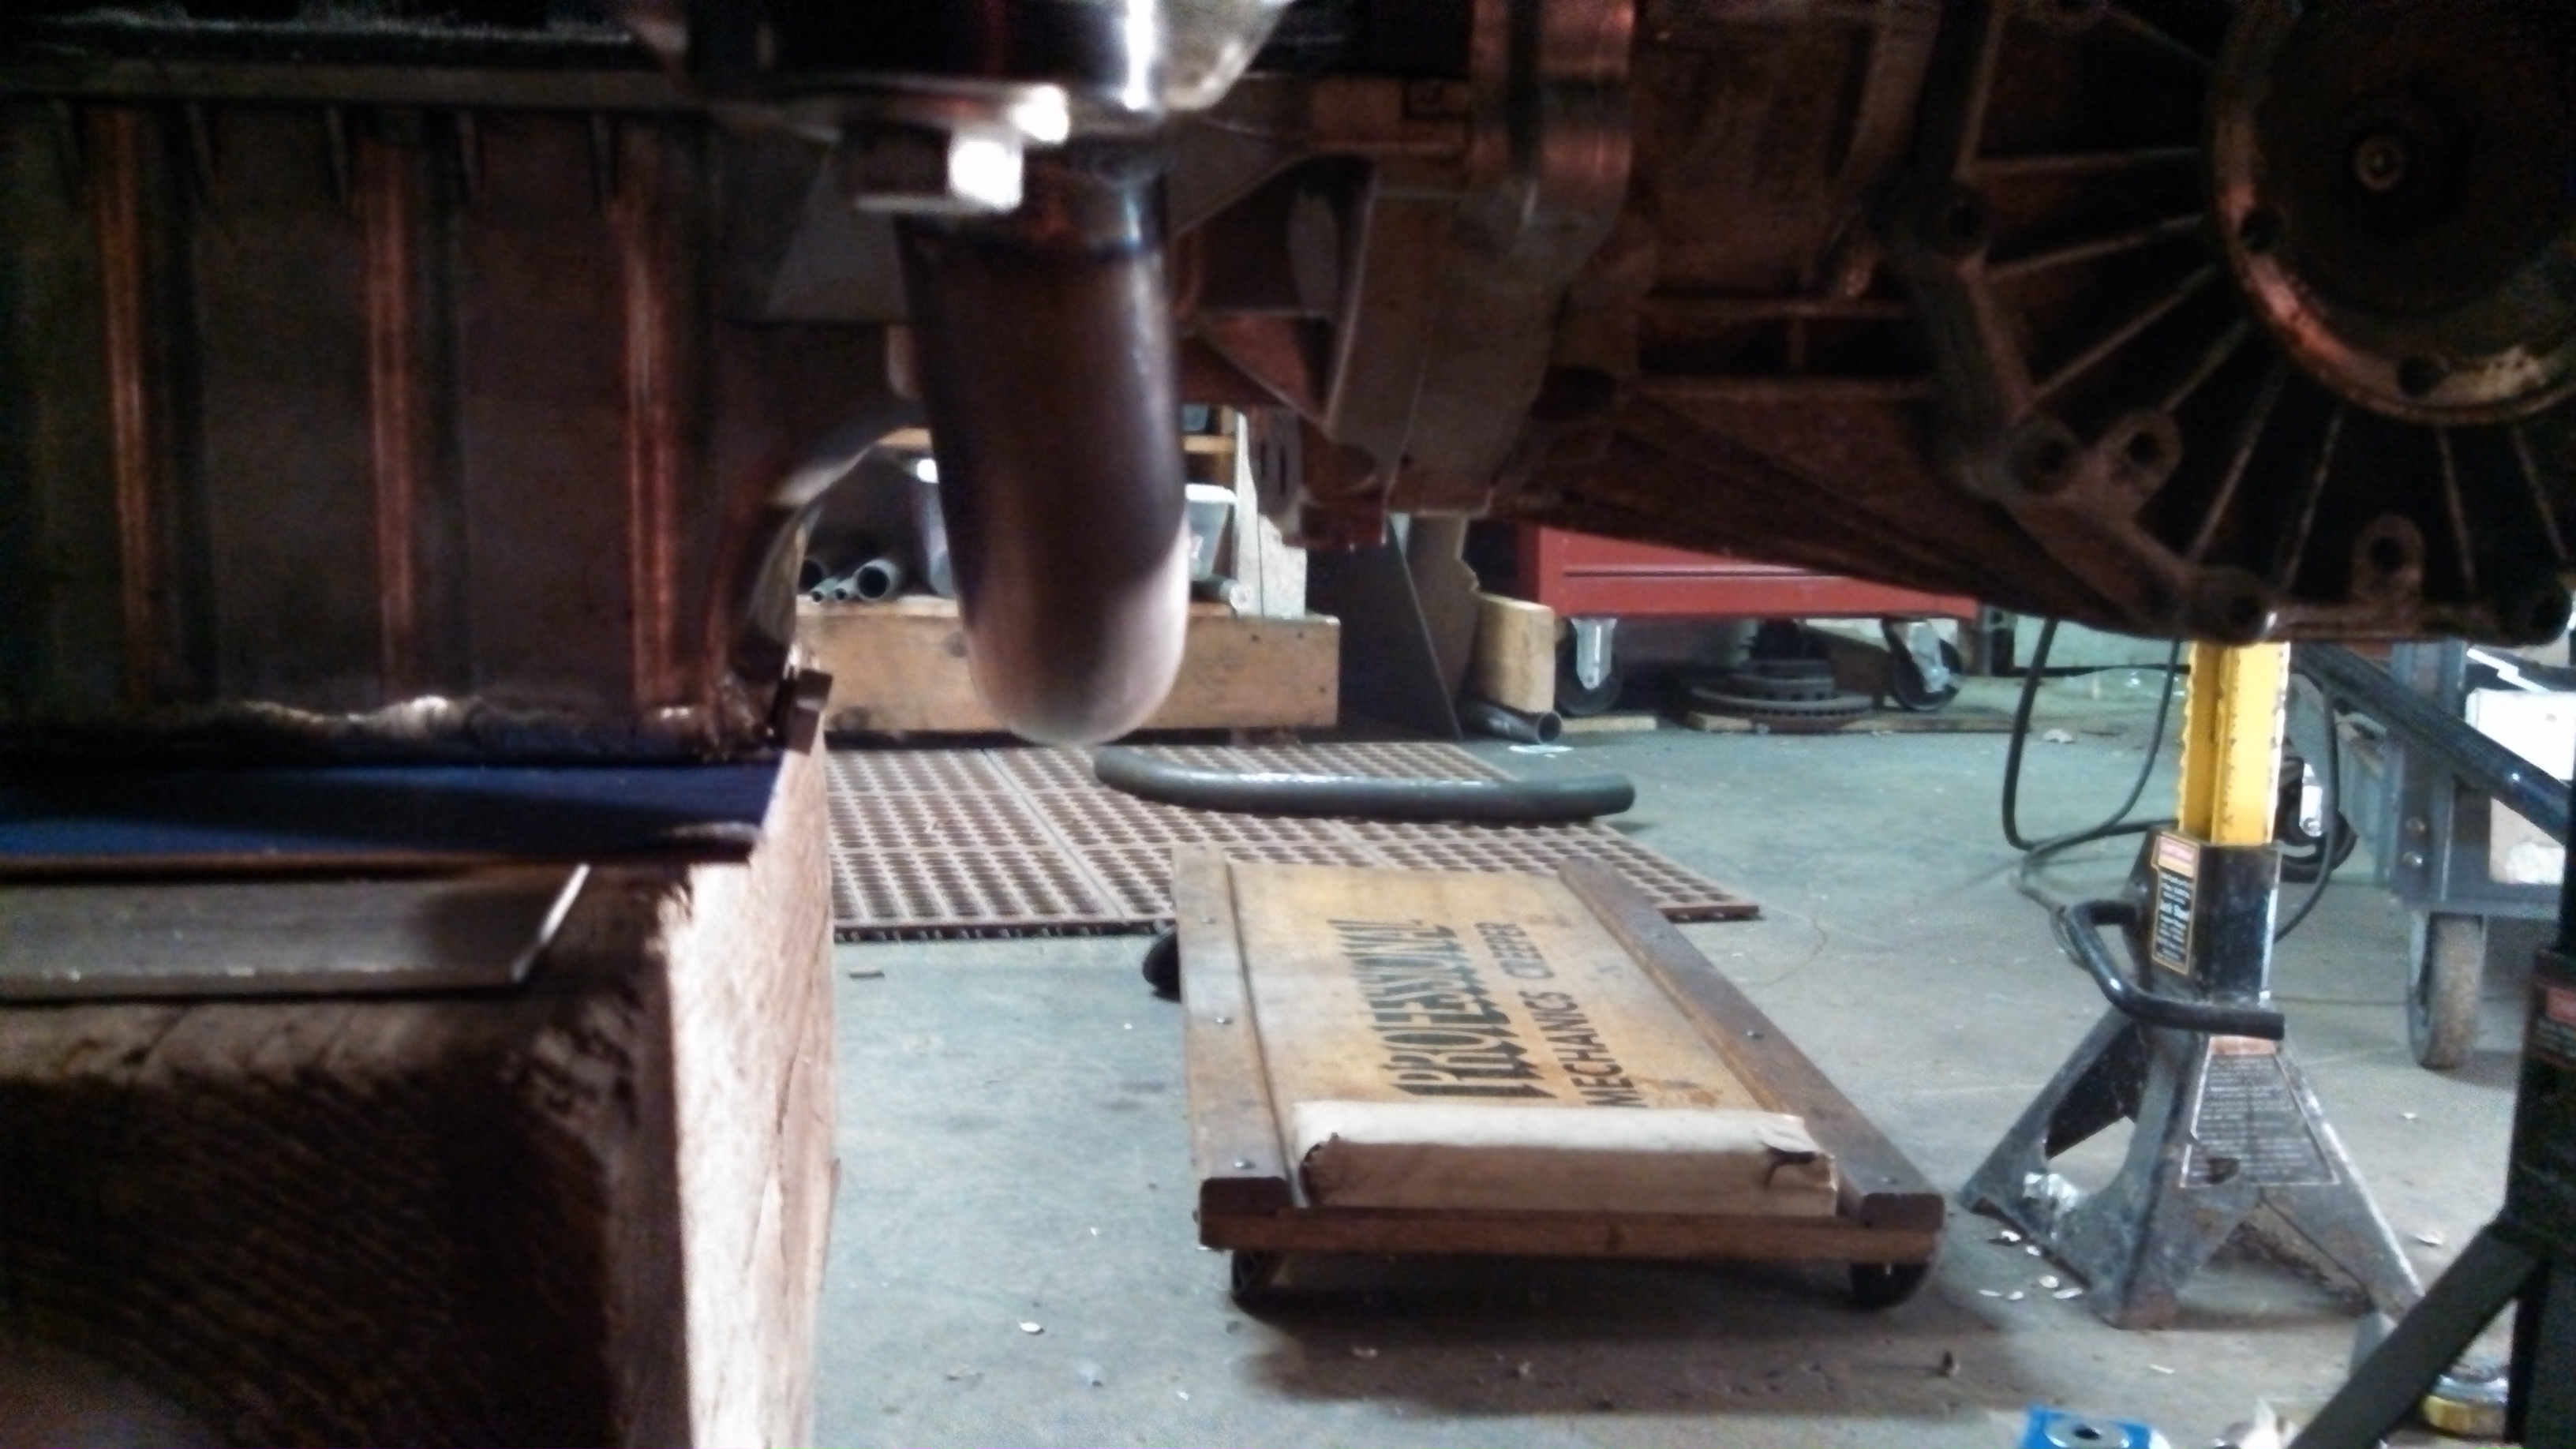
- front sf front transverse member2.jpg (1.19 MiB) Viewed 45803 times
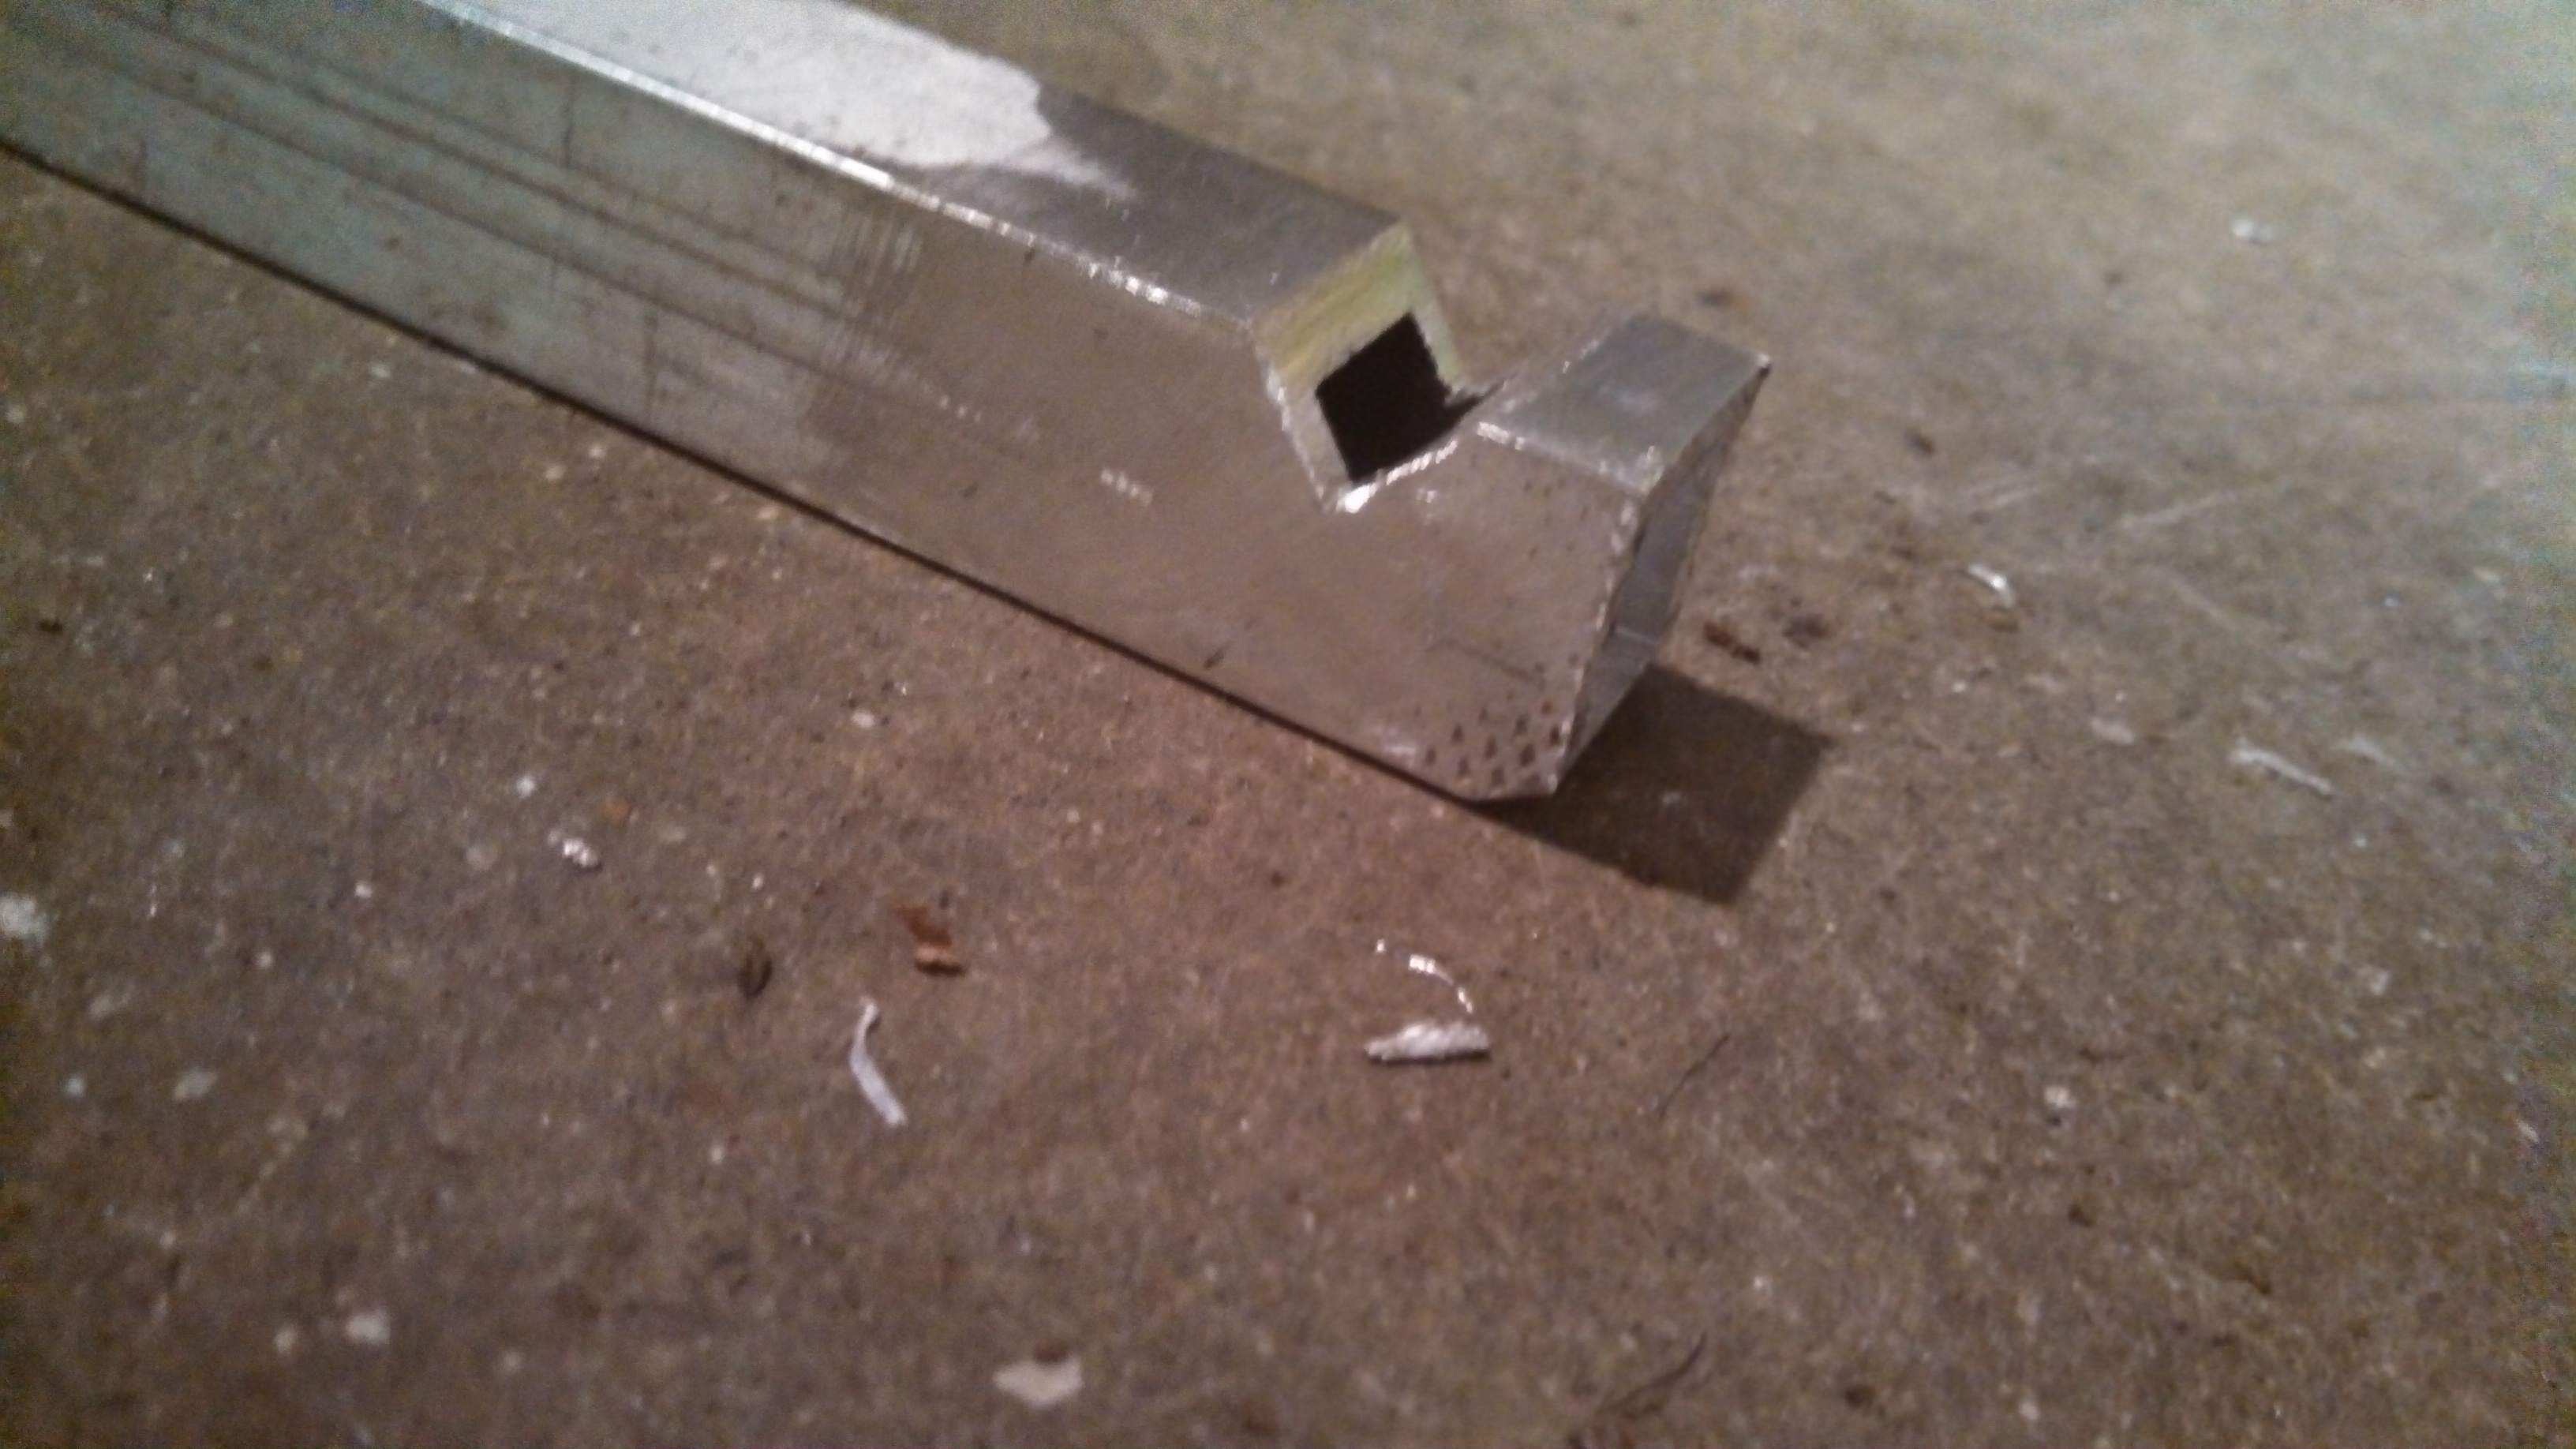
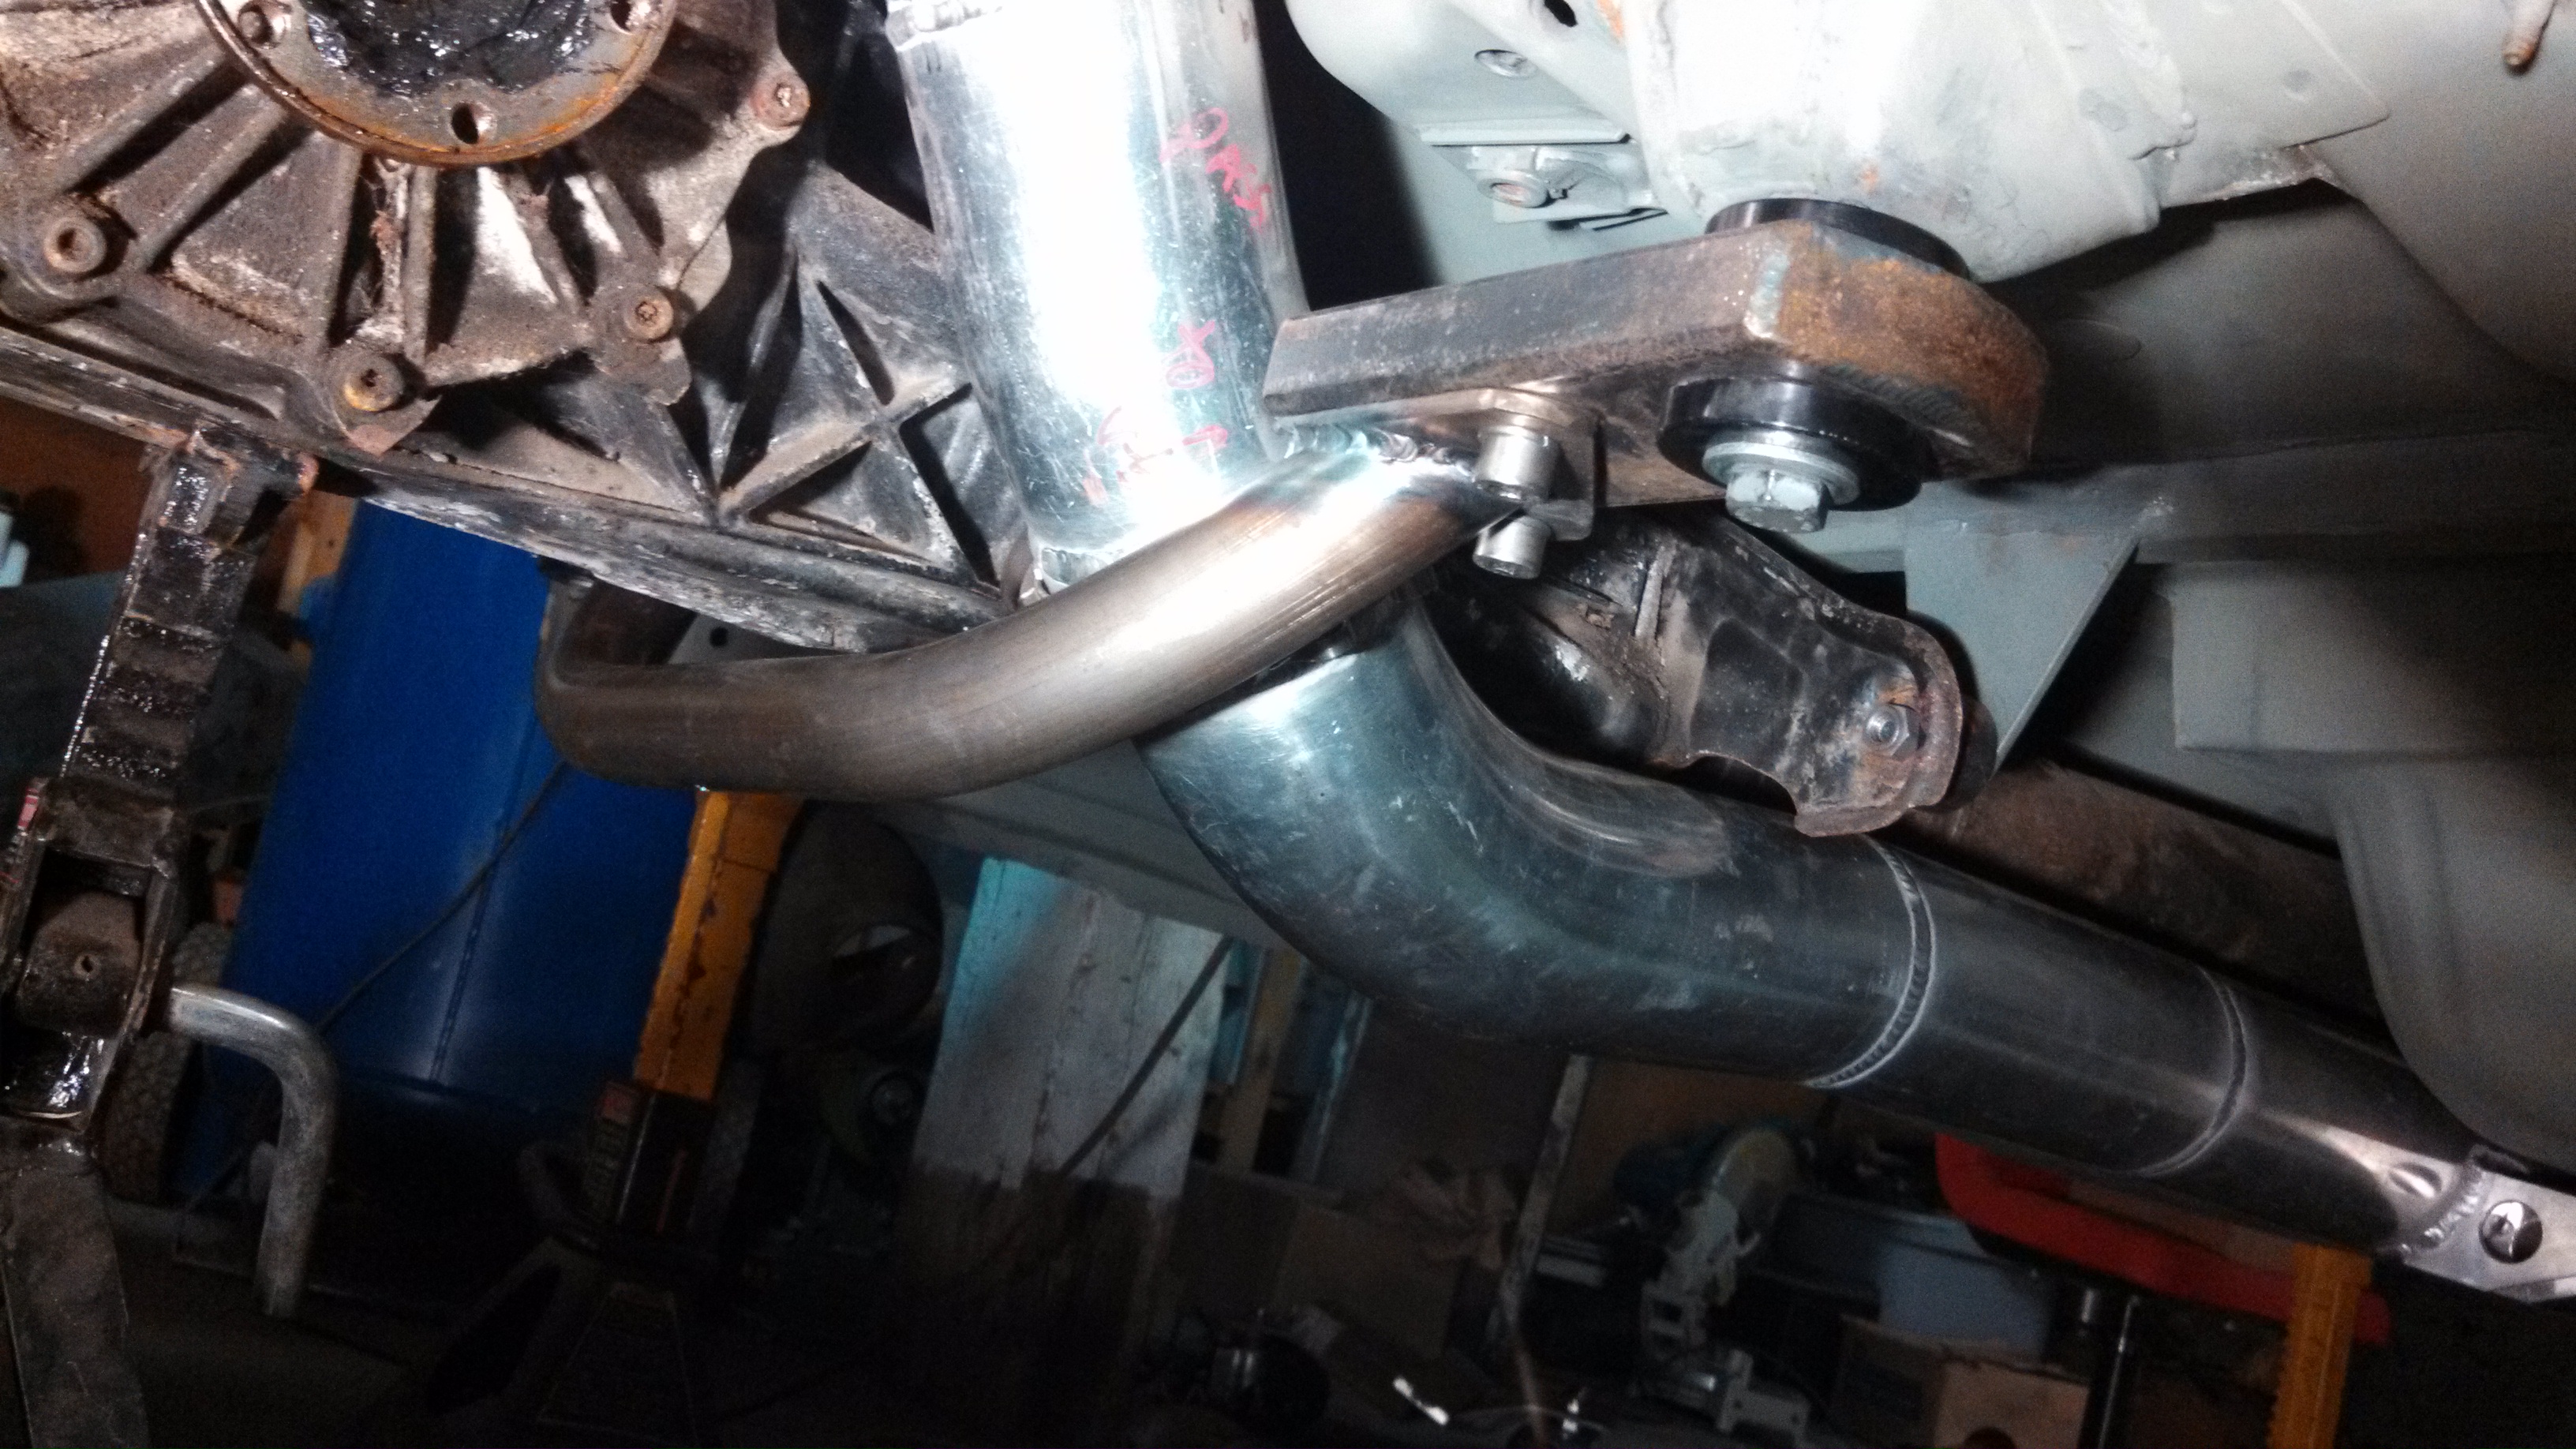
And here is the tranverse member that will go under the bellhousing. The trans is mounted pretty low, so I relieved the tubing and used a thick plate and some endcaps, welded it up and flappered it reasonably smooth. I’m just holding it in the pic, and might trim the bottom of the bellhousing fins down a bit.
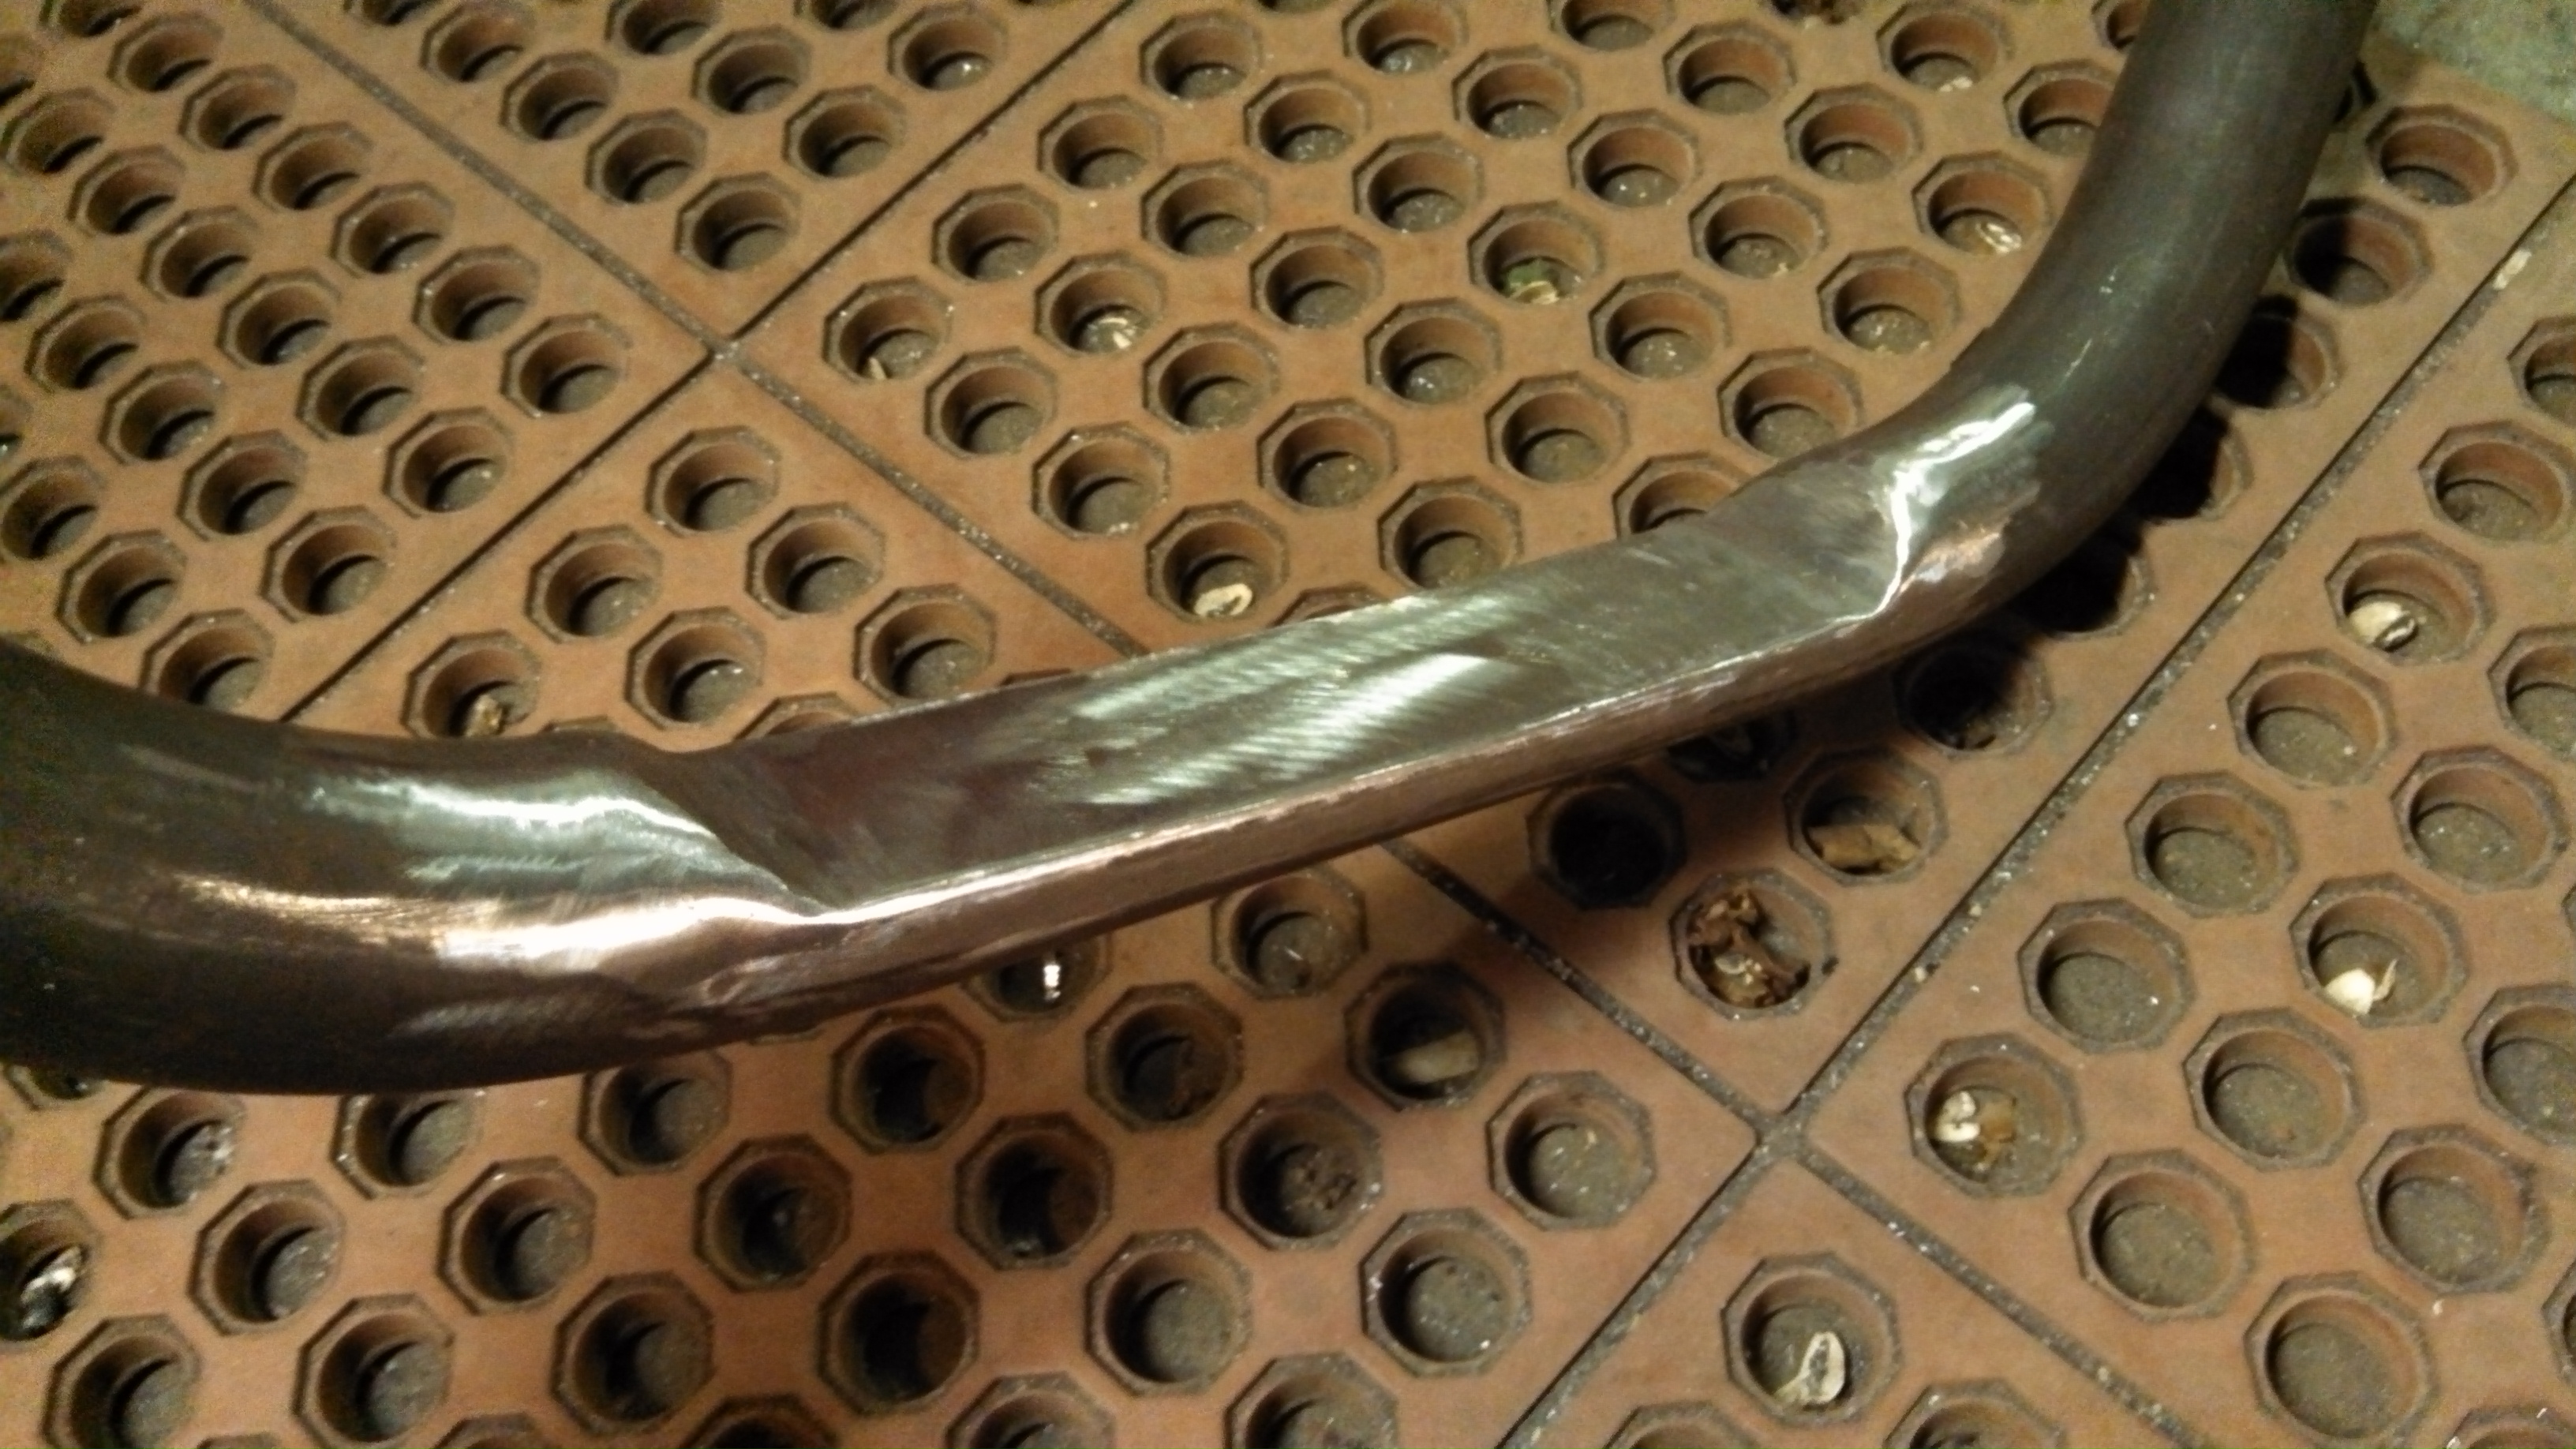
- front sf under trans relief.jpg (1.5 MiB) Viewed 45803 times
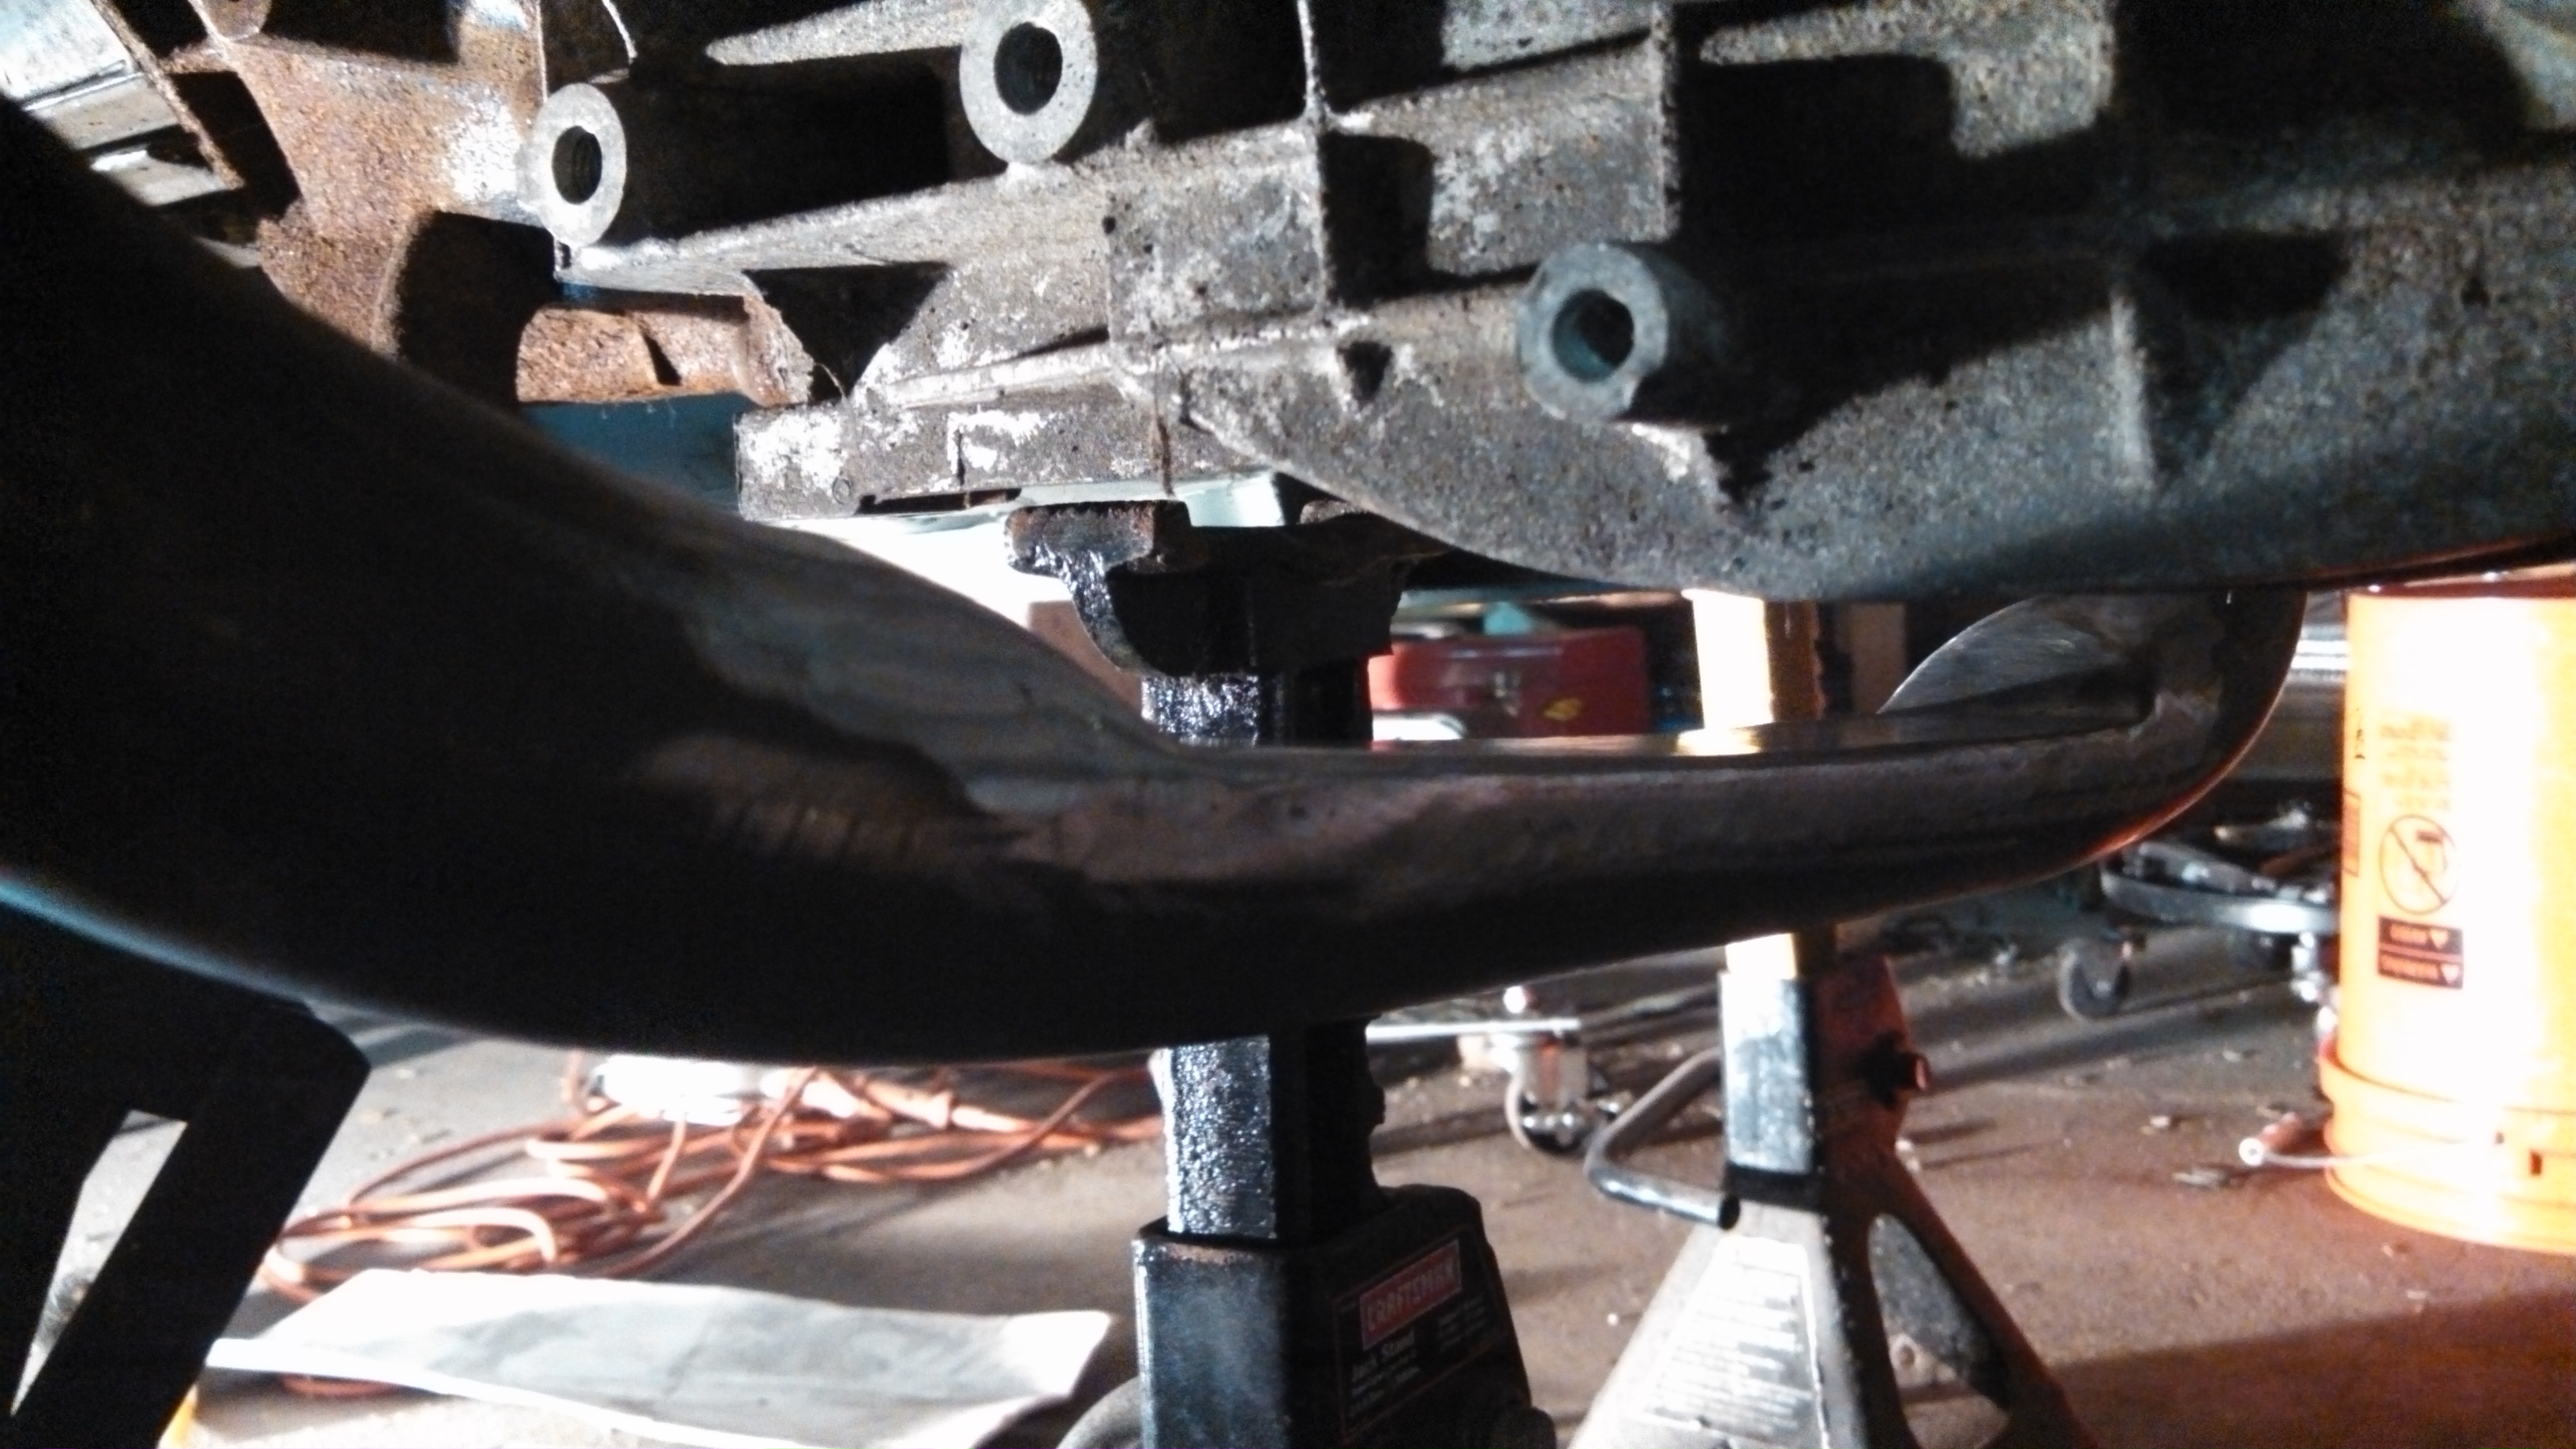
- front sf under trans relief to be mounted.jpg (1.41 MiB) Viewed 45803 times
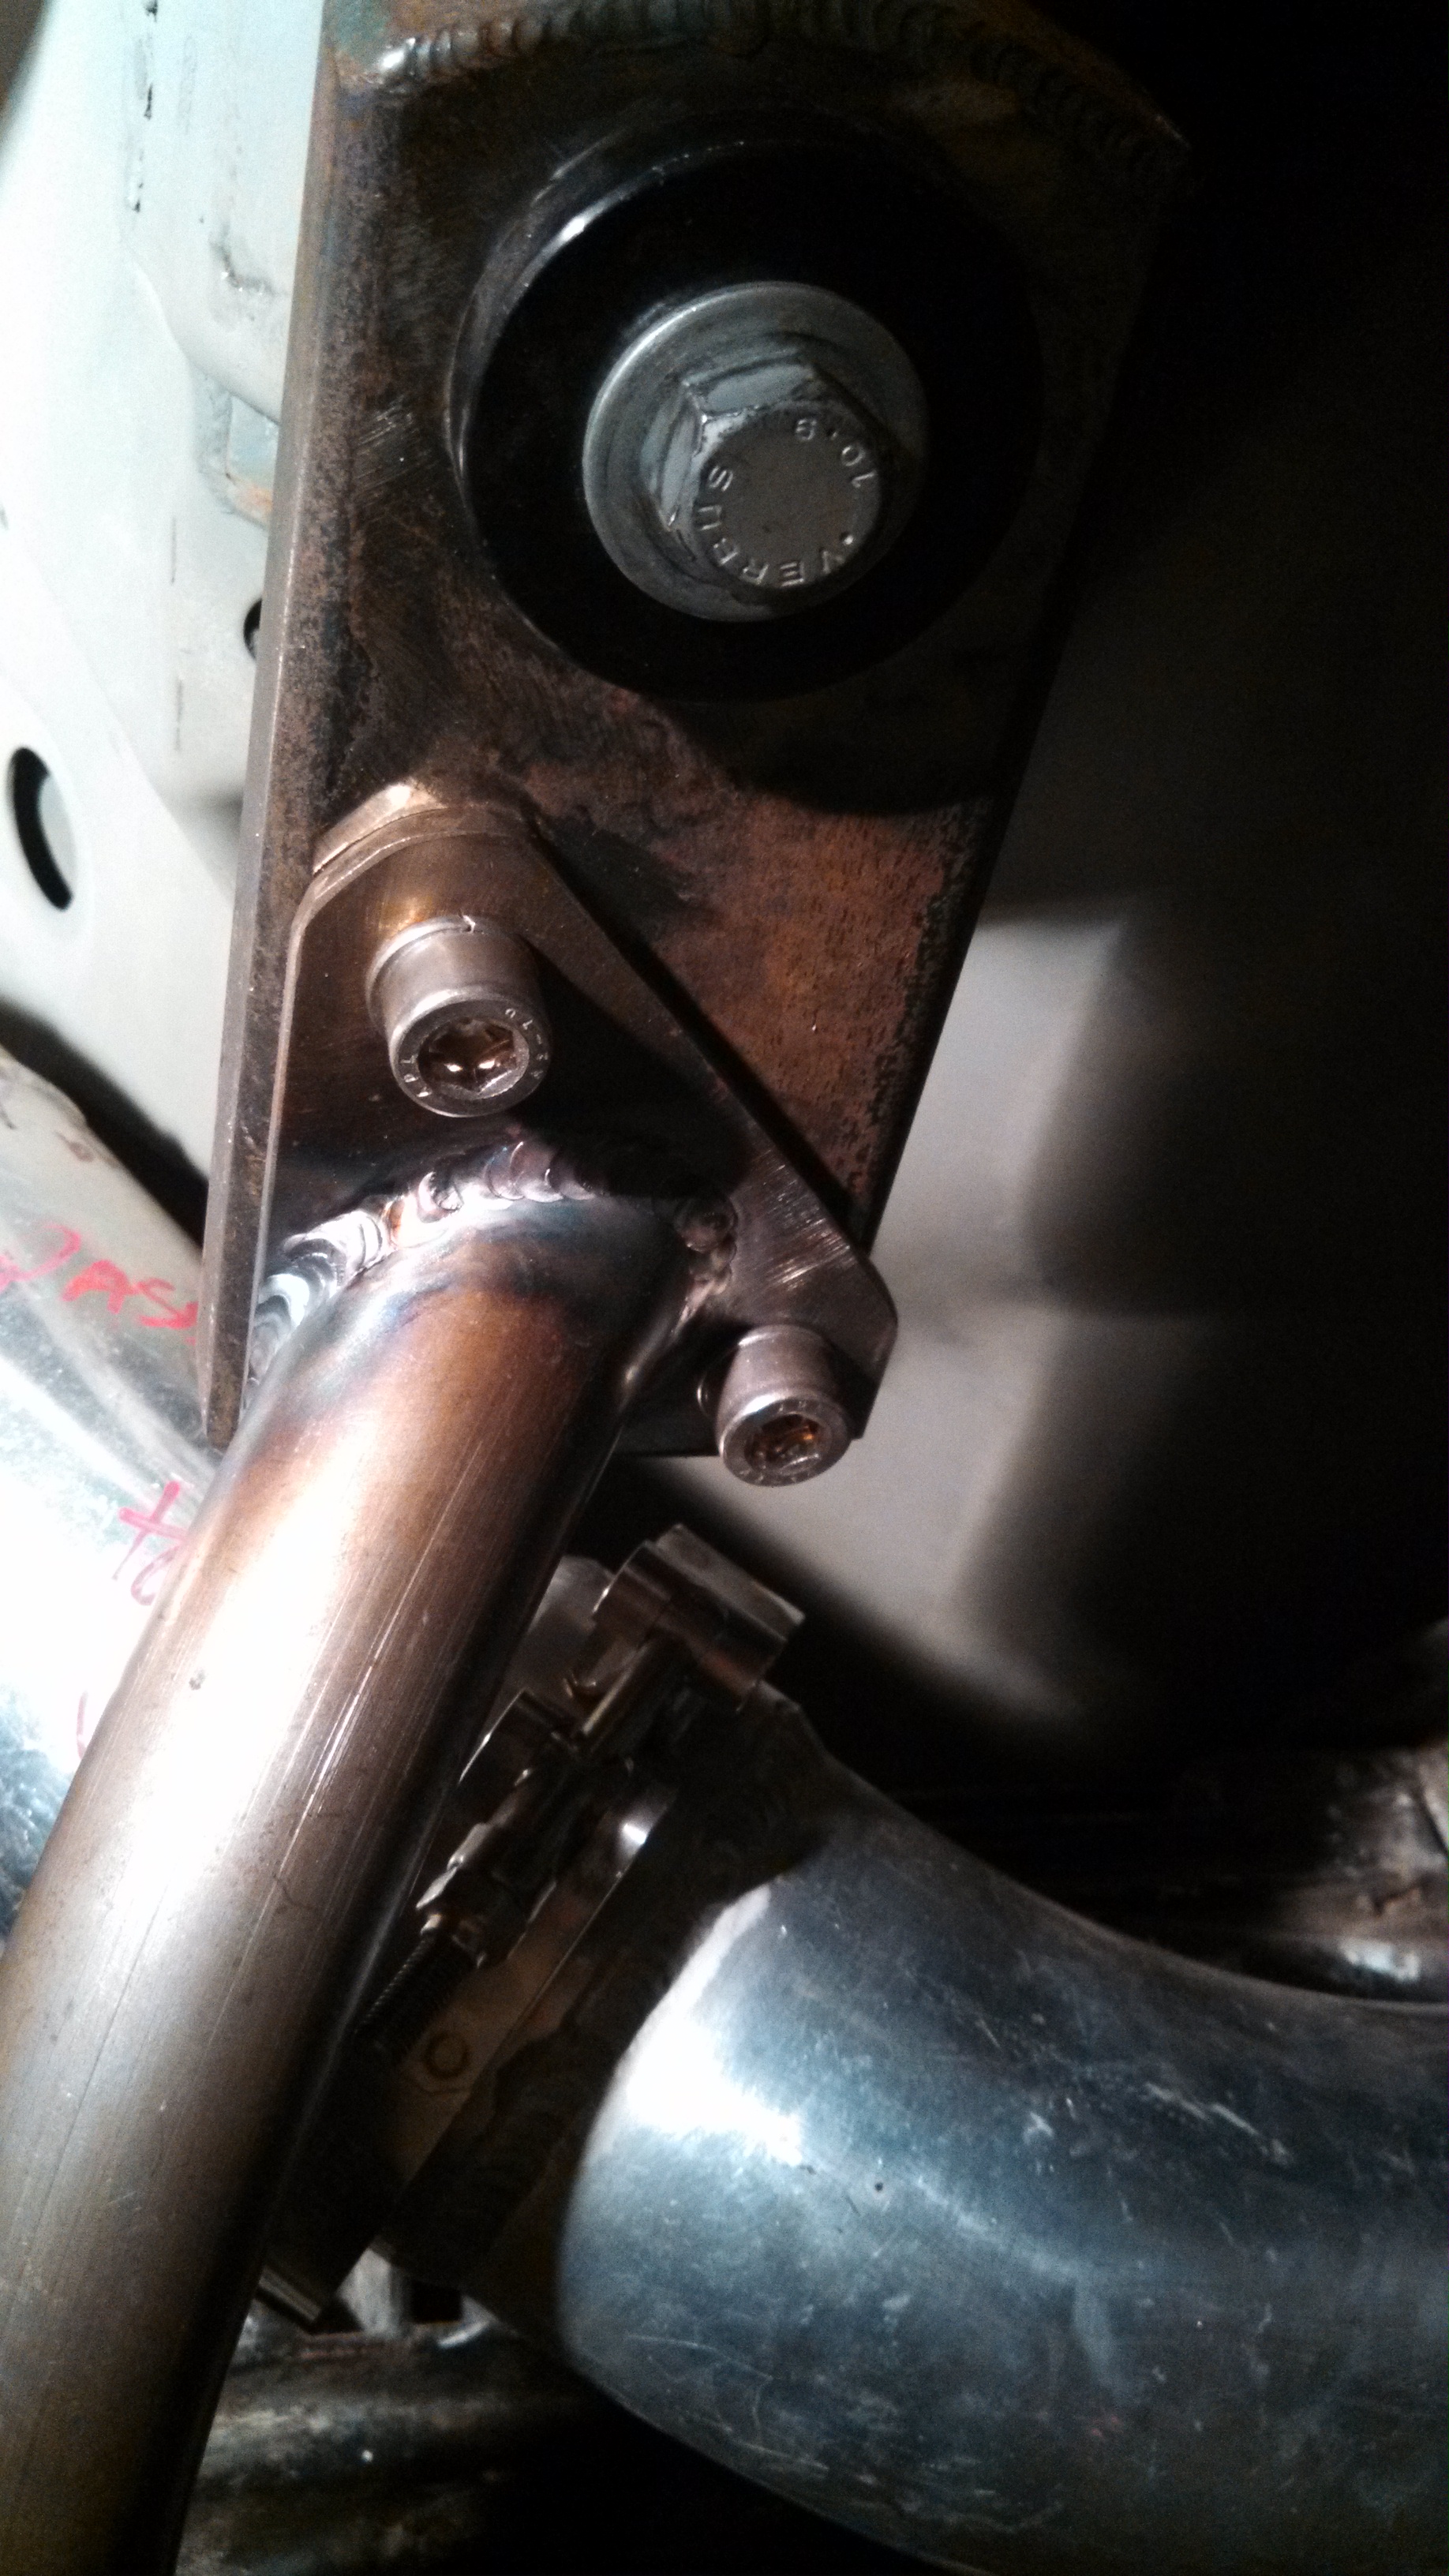
And lastly a pic of the top of the coupler nuts that were trimmed and welded into the rear subframe to mount the removable piece.
- rear sf removable nuts welded.jpg (1.83 MiB) Viewed 45803 times