Page 6 of 12

Re: Chris' BMW Projects

Posted: Fri Jan 03, 2014 12:56 am
by chaloux
Holy balls dude. First of all the interior/dash on the e24 is godlike. Second,I can't believe you thought that much about a steering wheel (but cool), and third, the e24 is literally super sex. What awesome lines.

Re: Chris' BMW Projects

Posted: Fri Jan 03, 2014 1:06 am
by 85oceanic
Dude, things are looking good! I am really digging that steering wheel and I am SERIOUSLY digging the stance of your E24. Droooooooool city.

Re: Chris' BMW Projects

Posted: Fri Jan 03, 2014 1:21 am
by scubadave
there's a reason why I like the beginning of lethal weapon 2. I like black better though. keep it coming Chris.

Re: Chris' BMW Projects

Posted: Fri Jan 03, 2014 2:07 am
by loxxrider
Glad you guys like it :)

Re: Chris' BMW Projects

Posted: Fri Jan 03, 2014 9:27 am
by dana
wow, that e24 looks amazing man. Honestly I never really gave those a second look, but a bit better stance and those wheels...... :drool: what a difference.
That steering wheel is pimp.

Re: Chris' BMW Projects

Posted: Sat Feb 08, 2014 12:05 am
by loxxrider
More progress has been made.

Firstly and most importantly, I have solved my steering shimmy! The Moosehead upper control arm bushings *mitigated* the problem.


I have concluded that the stock bushings were designed to be JUST on the edge of the appropriate stiffness to handle the loads encountered by stock sized wheels and QUALITY tires. With slightly out of round tires (as is the case with almost any non-domestic tire brand) the stock bushings simply do not provide enough damping and the result is a system which is stimulated at its natural frequency at around 45-50 mph and which can get out of control very quickly.

The Moosehead bushings are therefore not a solution to the problem, they are a mitigation.

As a plus, the car feels much more planted now. Steering feel is better as well and the wheels/tires don't rub on the fenders anymore either (it used to hit the front bumper while backing out of the driveway, etc.). The only downside is that things like reflectors, small, sharp bumps, etc. are much more harsh now. I don't mind it though. Hell, I don't have any carpet or sound deadening in the car and I've been driving it with holes you can stick a whole leg through for months now! A little harshness over a bump is a small price to pay for the ability to drive the car without the steering wheel trying to rip itself out of my hands.

I still have some very small vibration... almost undetectable when compared to what I had before (think 1% now compared to 100% before). I believe this is just from the tires as it seems to go away as the tires warm up/isn't as bad if the car is driven on a daily basis.

Sorry if this picture is offensive to some of you... but if you've ever had the shimmy problem, I think you will agree it is appropiate.

Image


This past weekend I also nearly finished welding up the rest of the floor/door sill repair I started a few months ago. I ran out of shielding gas before I could finish though, so the finished product will have to wait until this coming weekend. After that is finished, I still have to do a lot of work in the driver's foot well near the trans mounts/trans tunnel and then a little work on the front corner of the passenger door sill/footwell area. When those are finished up, I will be done with the major structural concerns I've wanted to address. The rest of the rust repair/body work is purely cosmetic.

Oh yeah, there is one hole in the passenger rear shock tower and one in the front driver's shock tower as well... LOL Those will be easy money though and I'm not super concerned about them structurally (they are small).


I wish I had better pictures of the floor, but these are all I have. The pieces I made aren't perfect, but they approximate the stock panels well enough where it counts structurally (especially at the door sills). Penetration was very good and all welded pieces were treated with POR-15 as a corrosion inhibitor. The section where the floor meets the sill will be filled with seam sealer. I still want to spray the inside of the door sill with wax, but for now everything is fairly thoroughly coated with weld through primer.


Image

Image

I'm almost done with the steering wheel adapter, but I've been waiting for access to a knee mill to make sure some of the parts are flat. This isn't really necessary, but I like to do things right! Will update with pics when it is finished.

*Update* Got the Momo hub and my big washer machined. Yesterday I jigged up the donor splines with the Momo hub/big washer and JB welded them together so I could take them off the next day (today) and weld them together from the other side. This ensured that the donor splines and adapter hub were square and concentric when welded.


This is what the assembly looks like now (donor splined shaft is welded to the big washer with countersunk screws).

Image

Image

I'll get better pictures later. If anyone has questions about how to do this, feel free to ask and I will go into more detail.


Finally, I (finally) ordered all of the power steering hoses (high and low pressure) on the car along with a pump rebuild kit. My steering pump has been growling VERY loudly ever since I bought the car and I'm really looking forward to being able to pull in and out of parking spots and my driveway in the mornings with some dignity.

Image

Oh, and did I mention that an MS3 is currently being built for this car? Turbo, high comp, euro 635csi coming sometime in the future Anyone have an NA tune for a high comp M30? If not, I'll just use a low comp M30 tune and decrease timing an appropriate amount as a starting point.

Image


Finally, here is little project pad exclusive. I just wanted to show the new addition to my awesome Viper toolbox set, the mid box.

Image

Earlier this year I went into sears looking for a good box. They had these viper boxes on the floor and they make all of the Craftsman stuff look terrible (and they are) aside from their very highest end stuff ($1000+). I am very, very happy with it. Solid construction is the name of the game. Made in China, but up to American standards in my opinion. Not very pricey either.

also upgraded to a bigger tank for the MIG now that I'm doing a significant amount of welding.

Image

:drive:

Re: Chris' BMW Projects

Posted: Sat Feb 08, 2014 12:37 pm
by alxdgr8
Viper makes some nice boxes for sure! I've got a 41" Masterforce (Menards) bottom chest and they're made by the same company. Nicer than the US General (HF) top chest I've got for it.

Re: Chris' BMW Projects

Posted: Sun Feb 09, 2014 1:09 am
by themagellan
As a man who has repaired a few rotten vw floors. This came out Awesome! The sealing job looks wonderful man.

Re: Chris' BMW Projects

Posted: Sun Feb 09, 2014 9:25 pm
by loxxrider
Well, I'm glad you think it looks good! I think the pictures make it look pretty ugly compared to what it really is. I'll try to get some better ones some time. If I ground down the welds I bet you wouldn't even know it wasn't stock except for the lack of creases in a few places that I deemed unecessary (and way too difficult to reproduce cleanly) without the pie plate things in there.

Yesterday I got deep into the powersteering overhaul. I meant to have it all done by the end of the day, but the one hose I had trouble finding for sale anywhere ended up being the one hose I actually needed to replace (I replaced all of the other ones just for the hell of it). Now I have to special order it from a dealer or get it from ECS Tuning which strangely seems to be the only place that carries it when I do a search for the part number. It is the one that goes from the pressure regulator to the hydraulic brake booster. I think that explains where much of my leak was coming from.

Image

I also rebuilt the power steering pump yesterday and found that 2/4 of the housing bolts were loose. That explains the groan I was hearing. I should have tried to tighten those a long time ago! Oh well, now everything is getting done the right way. It was cool learning how the impeller of the pump works too...

Image

The post up until this point was from last night.

Today I worked on the car some more. I mounted the pump, routed some hoses, and inspected the bay to see if there was anything else obvious I should order for preventative maintenance. I found that the (likely original) fuel lines were looking a bit cracked and "weathered" in general, so I ordered up some fuel line. I also ordered some vac line (you can never have enough of that) in silicone. Then I found that the hose from the brake fluid reservoir to the clutch master was not in the best shape either (though it was OEM at least). I ordered that as well as some new hose clamps for just about everything as some of the clamps on the car have been replaced by the crappy hardware store kind which cut the hoses up.

Lets see...

Oh, I went into the trunk searching for the new power steering filter I ordered several months ago and I found a big puddle of water in the corner of the trunk and an even bigger pool in the spare tire well.

Image

I have had the trunk carpet out of the car ever since I bought it because it was getting wet. I wasn't really sure how the water was getting in there so I did some inspecting today. The sunroof drains looked great, trunk seal seemed to be in good shape too. Finally I sprayed some water over the trunk area and BINGO there was my problem.

I think it is pretty easy to see where the leak is coming from (bottom right corner)! Well, I guess I know what the next rust repair I'll be doing is!

Image

In support of this effort to seal up the trunk, I've also ordered a NEW passenger side tail light lens as well as the seal for the lens. I also got another seal for the other lens, but will have to wait until I get a new lens for the driver's side too before I put it on. Both original lenses were cracked badly, so I kind of have to get new ones so they don't fall to pieces the next bump I hit! Luckily the previous owner got new bezels for the car as well as the seal that goes around the bezel so they are fresh enough that I don't need to buy them again.

One thing I took notice of... those bezels are solid metal! Not plastic like any modern car would use. I like it a lot, but they sure to have some weight to them haha. I'm just so used to trim pieces being plastic and easy to break that I was taken by surprise. The same goes for all of the trim on the car like the kidney grills as I'm sure you all know. I love it!


Ah, and I forgot to add that I got "new" fenders delivered on Saturday! Sold to me by a member here cdc84. I think I could probably fix the fenders that are on the car, but these were priced reasonably enough that they're well worth skipping the hassle of doing all of the body work on the original fenders. The ones currently on the car are very badly rusted all over.

Image


I'm gonna have to slow down on this thing soon, it's taking way too much weight out of my wallet I'm hoping to keep the work to purely labor-intensive stuff from here out as much as possible. The main big ticket items I'll have to deal with from here on out will be carpet and re-upholstered front seats, but I've still got quite a bit of welding to do before I'll be comfortable putting that stuff back in.

Look for more updates in the coming weeks Should be back on the road with fresh steering and a non-leaky trunk by the end of this coming week

Re: Chris' BMW Projects

Posted: Sun Feb 09, 2014 10:14 pm
by chaloux
Holy shamoly, helluvan update Chris. It always seems so clean in the pics. Where did it come from to have these rust issues?

Re: Chris' BMW Projects

Posted: Mon Feb 10, 2014 7:44 pm
by loxxrider
Yeah, that's the thing about this car... probably what made me fall for it. It is one hell of a looker from 10 feet! When you get close you can see the imperfections in the paint, dents, and rust pretty easily.

The car came out of Jersey and PA until just a few years ago when it ended up in south FL.

It probably wasn't worth the price I paid for it given the issues, but I may still come out on top in the end if I don't consider my time as worth anything. It keeps me busy, so I don't mind! The next buyer will get a fully sorted car which is the only way I feel comfortable selling a car. I will sure hate to see it go one day, but I think it'll probably happen. Then I will just have to buy an M635csi instead :D

I saw an S38B36 (E34 M5 engine) swapped M5 for sale earlier today for cheap... I wish I could justify buying it, but that would just be INSANE of me :)

Re: Chris' BMW Projects

Posted: Tue Feb 11, 2014 10:27 am
by 85oceanic
As always Chris, excellent, quality progress. :thumbsup: :thumbsup:

Re: Chris' BMW Projects

Posted: Tue Feb 11, 2014 12:30 pm
by WOMBAT
Damn dude, that's a ton of work! Nice job! That car is gorgeous...

Re: Chris' BMW Projects

Posted: Thu Feb 27, 2014 6:57 pm
by loxxrider
I've got some updates, but first a story :)

I was driving home from work today when I spotted a GTR. I could tell that it was modified even in my rear view mirror, just based off of it's stance, the headlights looked a little different, etc. So I waited for the guy to come by and gave him a thumbs up. He looked sort of professional sports player-ish... then I saw the plate, and yep, definitely a pro baseball player for a team I will not name.

Well, I was in the M5, so of course I gave it the go pedal right next to him (mostly to share the wonderful vocal cords of the M5 with him). Well, that got him excited (and me too) so we started playing around a bit. That GTR is LOUD. I don't think you understand what I mean though... it was the kind of loud that you can feel in your chest. He'd nail it and the car would just go, almost no lag at all. It seemed to me the car probably had between 7 and 800 whp.

I was wringing the M5's neck and this car had to slam his brakes to keep from rear-ending me... that is the kind of fast we are talking. Of course, this was just all fun and games since there was never a chance in hell the M5 could even compete with a stock GTR in terms of speed (I think it could on fun factor though ;) ). The thing was shooting flames, the whole bit.

I really needed some turbo in my life, so thank you Mr. baseball player. That really made my day! :wave:

I looked the car up later and found that my estimate of power was almost spot on.

:D :drive:

Re: Chris' BMW Projects

Posted: Thu Feb 27, 2014 7:22 pm
by alxdgr8
You'll just need to find him again with the revver ;)

Re: Chris' BMW Projects

Posted: Thu Feb 27, 2014 7:31 pm
by mushasho
loxxrider wrote: (I think it could on fun factor though ;) ).


Don't be soo harsh, actually believe your M5 beats it hands down in this category...

But Where's the update tho?

Sent from my HTC One using Tapatalk

Re: Chris' BMW Projects

Posted: Fri Feb 28, 2014 12:38 am
by Dutchbroracer
I can't wait till you find some GTR's when you are in the 200!

Re: Chris' BMW Projects

Posted: Fri Feb 28, 2014 4:55 pm
by loxxrider
I can't wait for that either!

Update coming soon (not for the 200 :( )

Re: Chris' BMW Projects

Posted: Thu Mar 13, 2014 9:57 pm
by loxxrider
Wow, sorry! I totally forgot I was going to update this haha. Well, here it goes.

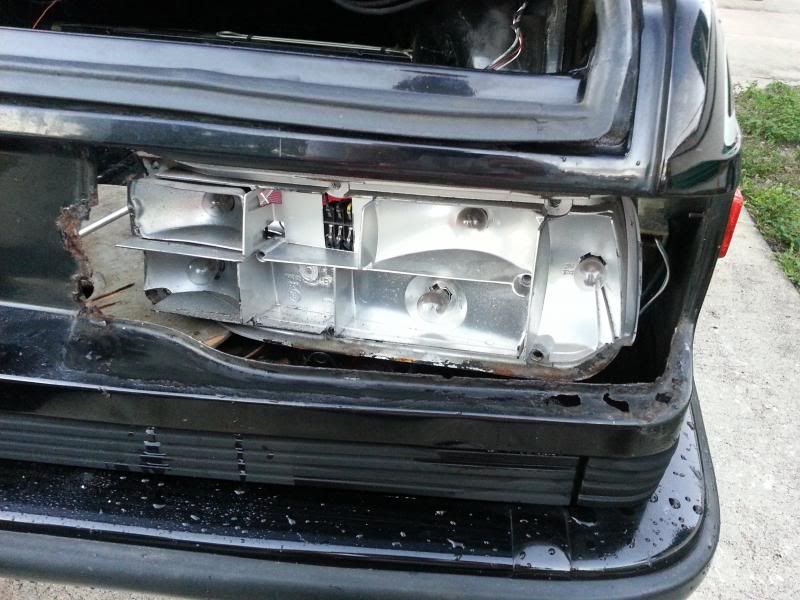
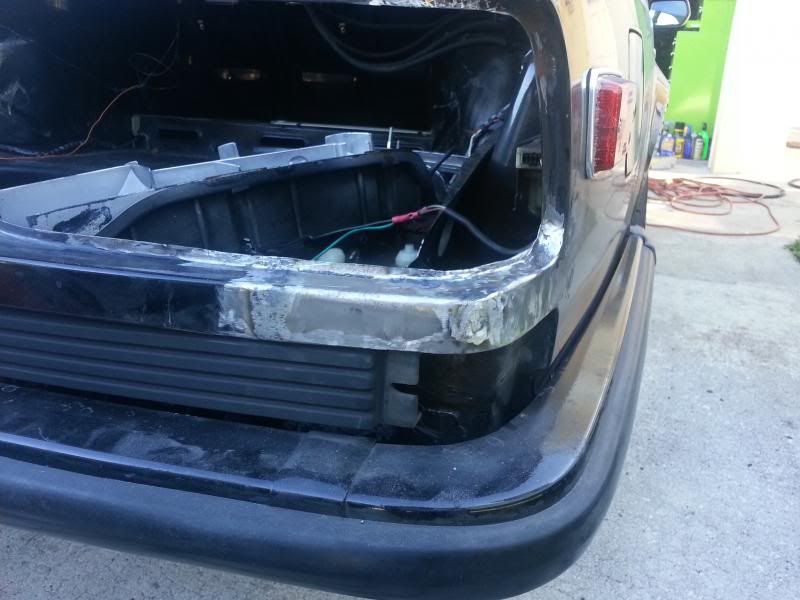
Remember the rusted out rear tail light area? Well, I got to work on that a few weeks ago. It didn't come out as planned, but it was good learning.

Keep in mind, I am making all of these panels by hand without any special tools at all. I got so close to getting this right, but in the end something made one of the edges of the part warp badly. I'm not sure if it was the grinding or warpage during welding.

Here was the start

Image

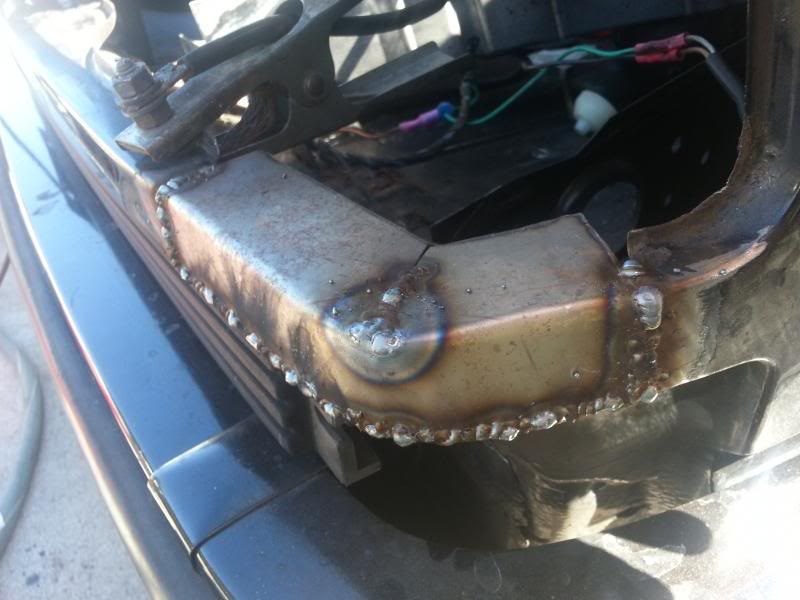
and here it is after grinding all the welds down. The curved area that faces up toward the sky is pretty badly misshapen. It was nearly perfect before I finished welding and grinding though :( Its OK as it has paint on it for the time being and seals the water out of the trunk well (though there is still one place where it is leaking a very small amount... probably due to a slight bump in the sealing surface somewhere along with old seals. I'll revisit this later to get the shape right so minimal filler will have to be used come paint time.

Image

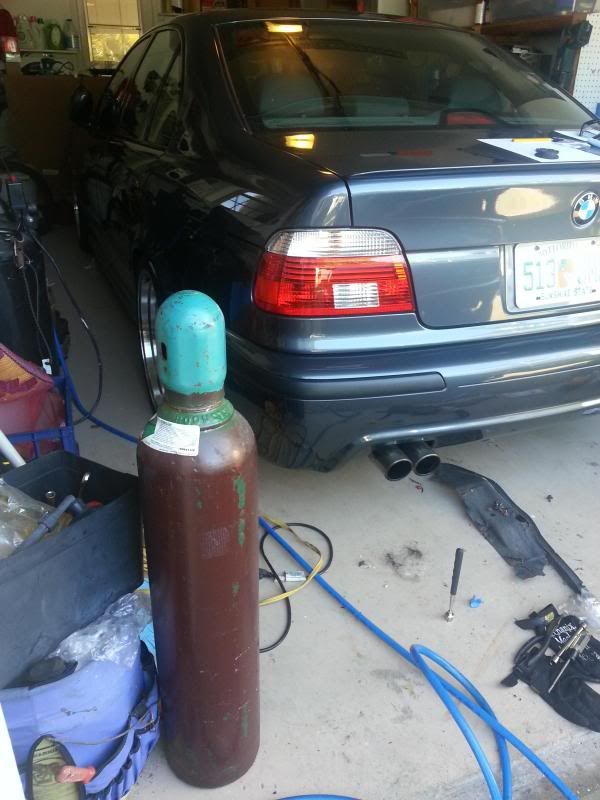
Since this repair, I decided to step away from the body work and rust repair for a few weeks and get some mechanical work in for a change. I'm almost back to the point where I'm ready to dive into the rust again though :)

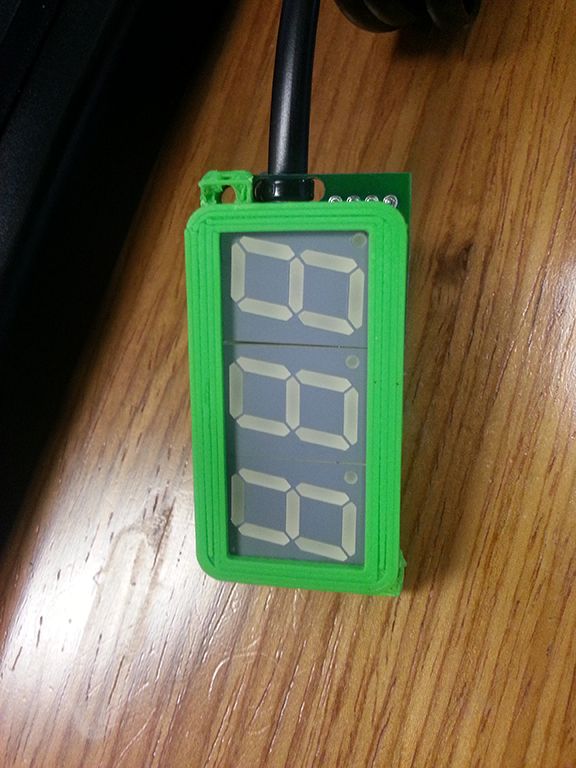
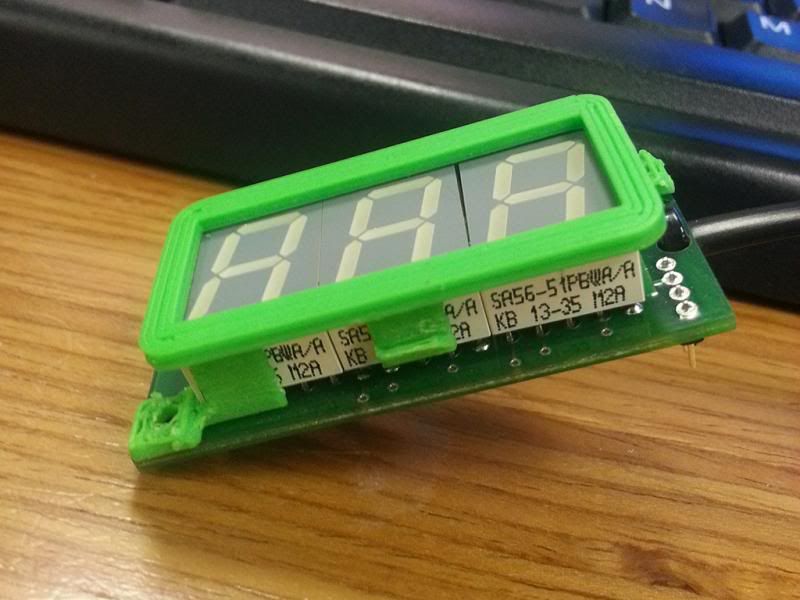
Next on the list was an on board computer (OBC) upgrade for my Dad's E36. His old 11 button version had a messed up screen, so I bought him an 18 button version for Christmas. Little did I know, the conversion isn't so simple if you want to have full functionality, and of course I can't do this without achieving anything but the best I possibly can :)

Since I knew this was going to be a pretty big job by the time I got started, my buddy Justin and I got prepared the best way we knew how. In the process, we found that the E36 has a nifty beer holder in the glovebox!

Image

Here's the computer

Image

This was the state of the car about half way through the install.

Image

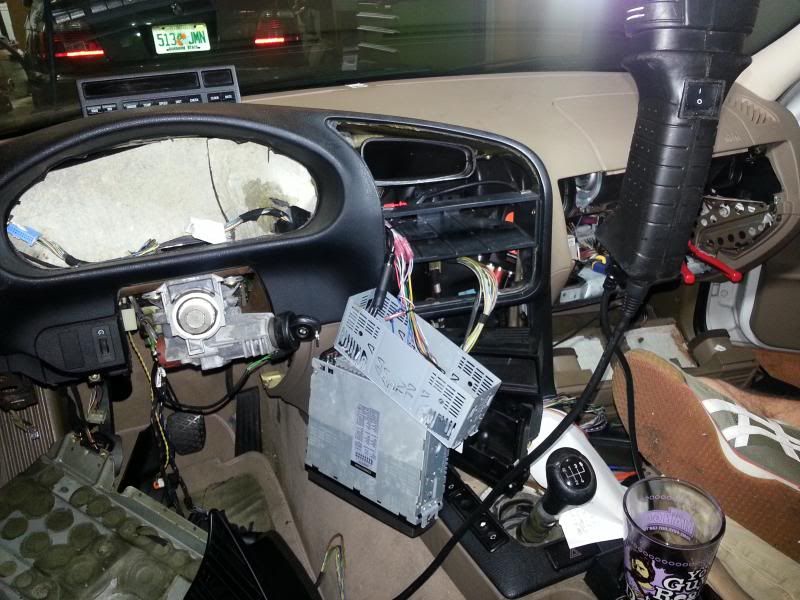
Eventually we got everything wired up and it all functioned properly the first time we tried it including the CODE function which requires a code to be entered to operate the ignition system of the car. That is usually what people can't figure out and leave unfinished. We also added a blinker stalk which will can be used to scroll through the functions of the on board computer.

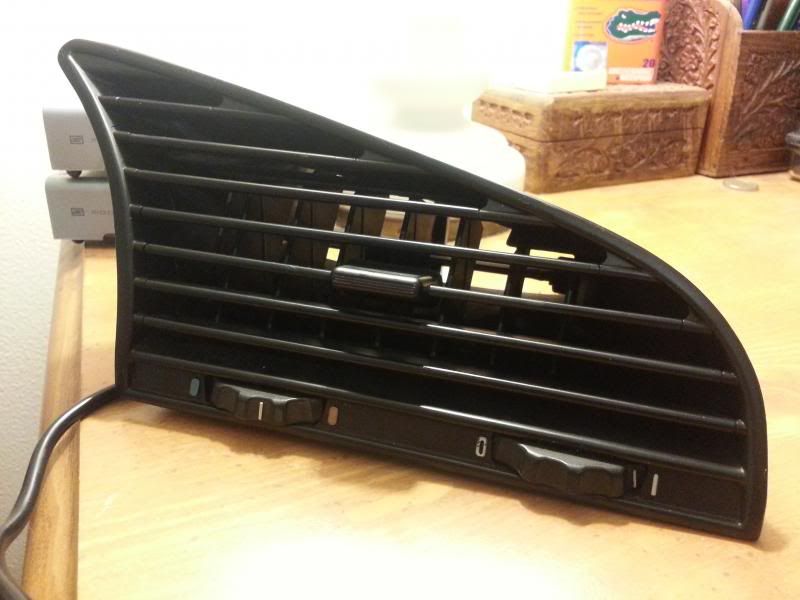
Also got a new air vent for the car at the junk yard as the old one was broken somehow.

Image

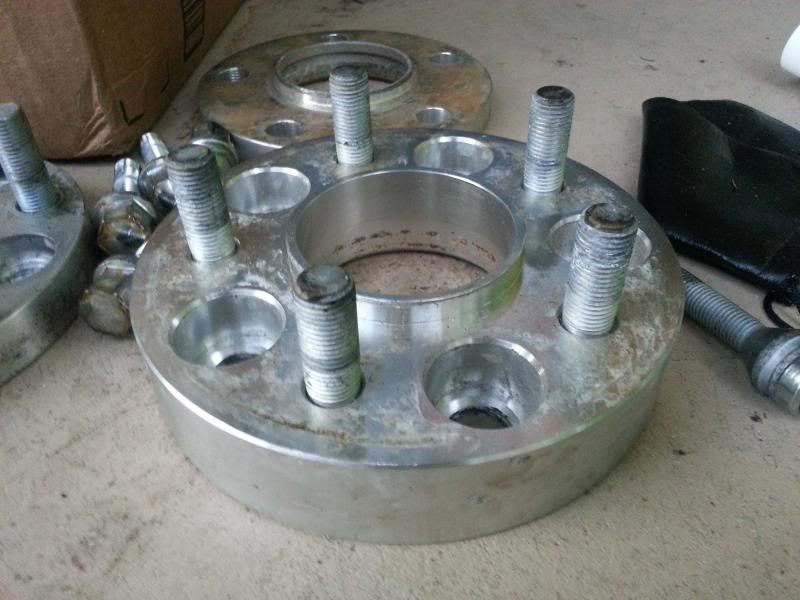
That wasn't the only thing I got at the yard... I also managed to find BMW fitment spacers. 5x120 31.5mm. Very nice pieces! And they were just hanging out on the car after someone took the wheels. They cost me $7.50 a piece and the guy at the cash register was jealous that he didn't find them first haha.

Image

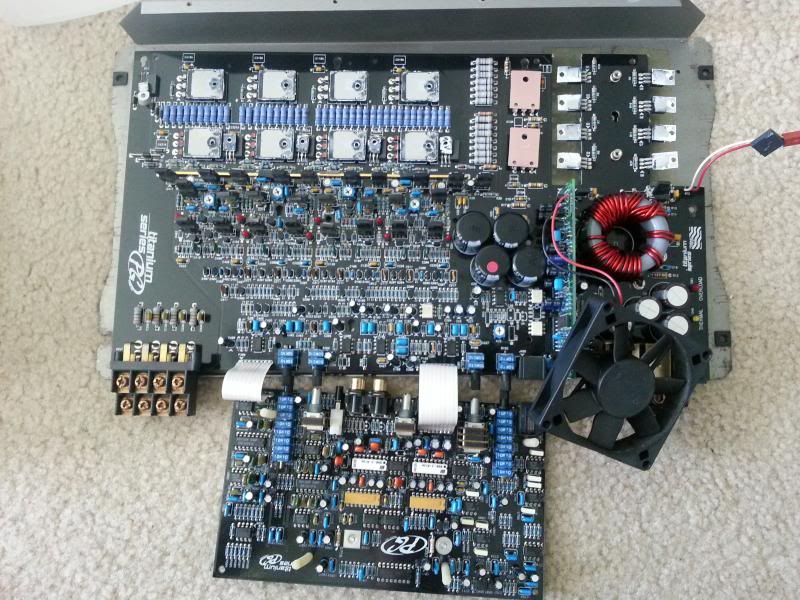
In other random news, my friend Justin fixed my old Phoenix Gold amp. I guess it just needed some FETs or something. Electronics aren't my cup of tea :huh: :oops: I just love this amp though because, well... look at it! That thing was hand built with pride in MERICA! Look at the American flags all over the boards. Love it. Noone makes anything like that anymore.

Image

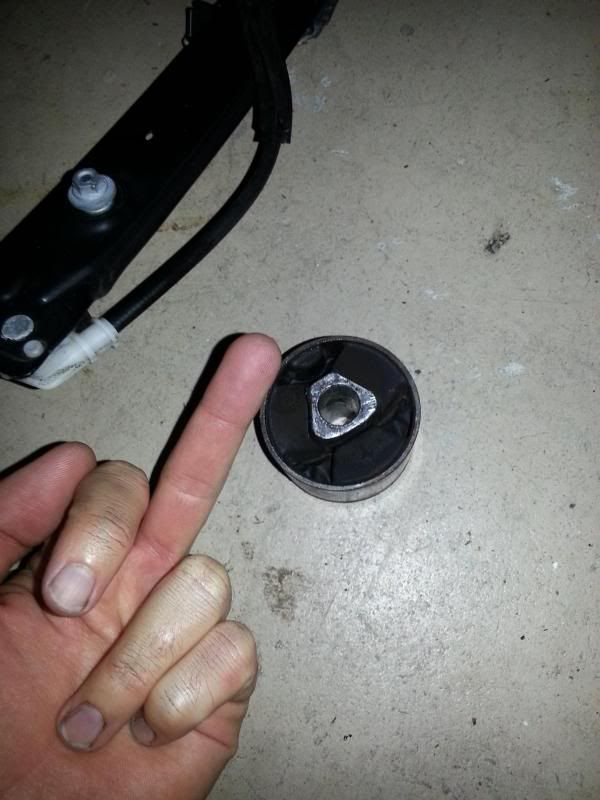
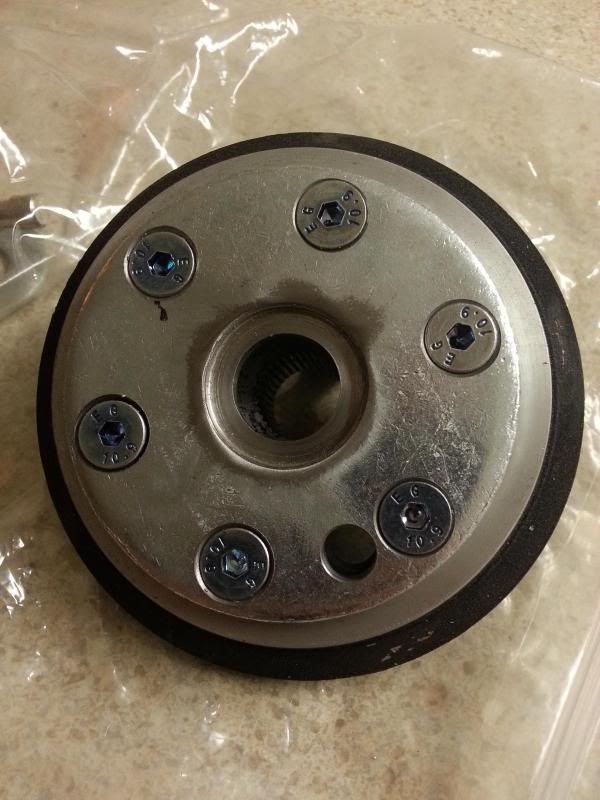
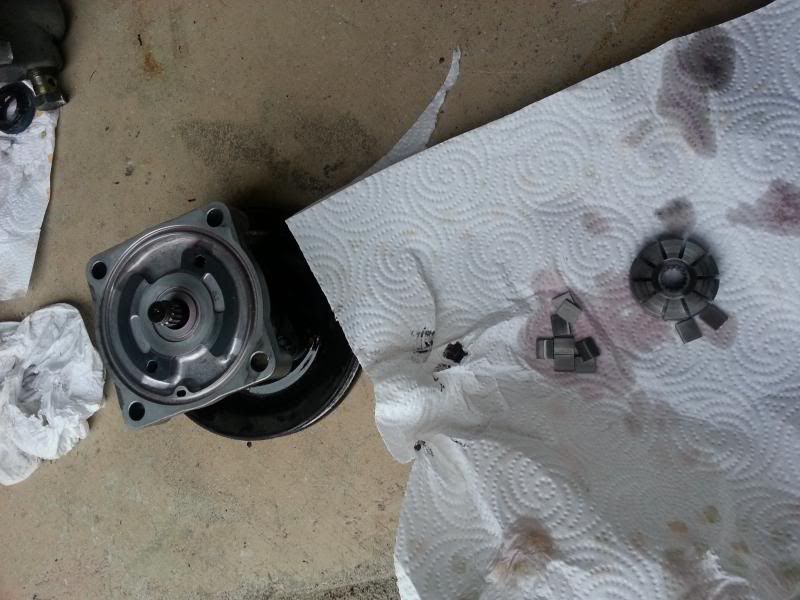
Back to the E36... one of the engine mount has completely failed as evidenced by a major clunk when accelerating in first gear. The clunk was the engine slamming back down after lifting off of the broken mount after peak torque lol. It has been doing that for years actually and I finally got the urge to figure it out once and for all.

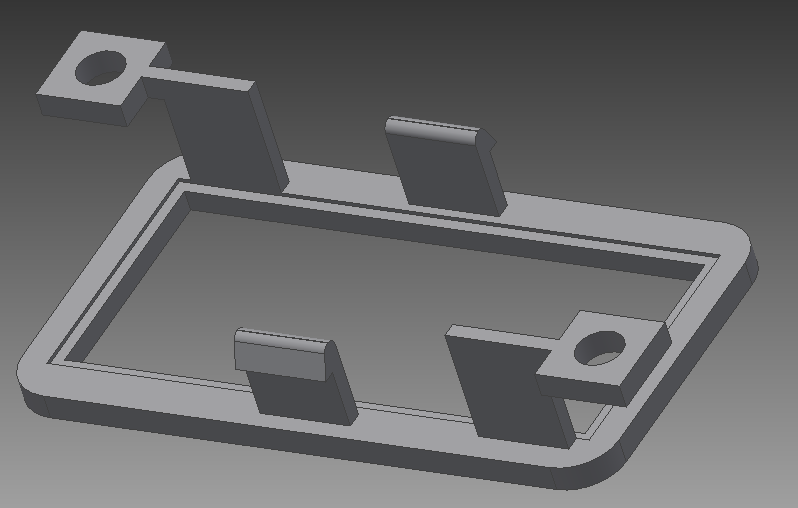
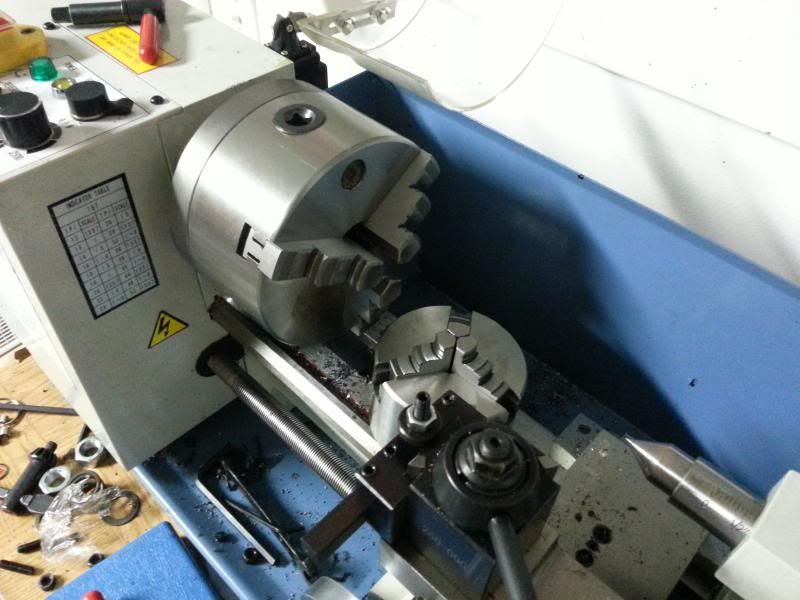
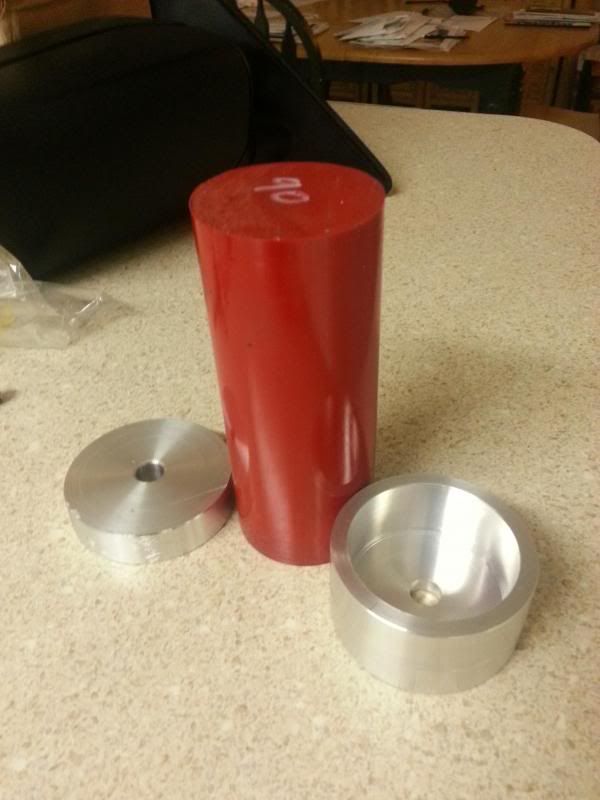
You know I wasn't going to spend the $60 for a new mount when I could just spend that money on a new lathe chuck to hold the large-ish material and make my own. So I set off to make my own mount. I wanted to test a concept. So I bought the chuck, came up with the conceptual design, finished up the final design/dimensions in a few nights, and then ordered up the materials and some hardware. A few days later and I had a 95% done, sweet mount. Thanks to Mr. Hersh for the Poly... do I still owe you for that dude? lol I'll take it off of the price of injectors if you want some :)

Here's the new 5" chuck vs the original 3" chuck

Image

Some poly and some half-way finished parts in aluminum

Image

90% finished mount next to the original fluid-filled mount

Image

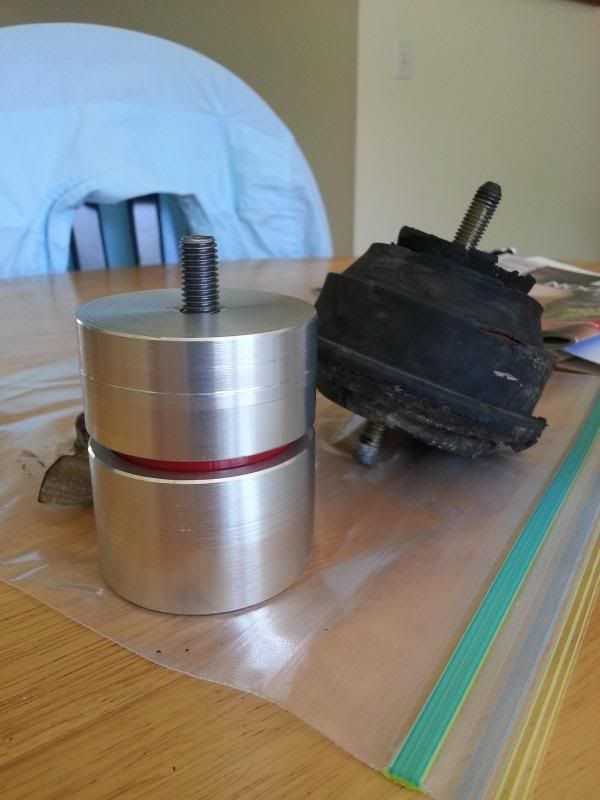
Now, this isn't a bolt-through design even though it might appear that it would be. Don't judge 'till you see and understand the x-section ;) Understanding how it works isn't all that easy. I struggled with it for quite some time, but you never have a condition where the poly isn't being engaged no matter how the mount is loaded (vibrations aren't just uni-directional).

Image

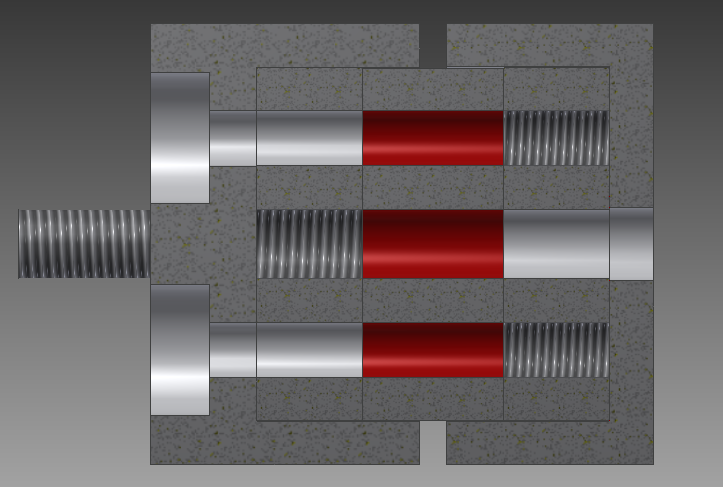
I'm sure it'll be pretty hard, but it will do a lot more to damp vibrations than a bolt-thru or solid aluminum design would. Various durometers (and thicknesses once I iron some details out) of poly can be swapped in or out to tune damping. Also, if the poly gets worn, it is easy and cheap to replace.

Bolts are used in the two outer threaded areas and one large stud is used in the center threaded area. See if you can figure out how everything is loaded.

Lastly, here are some glamour shots (taken with my phone)

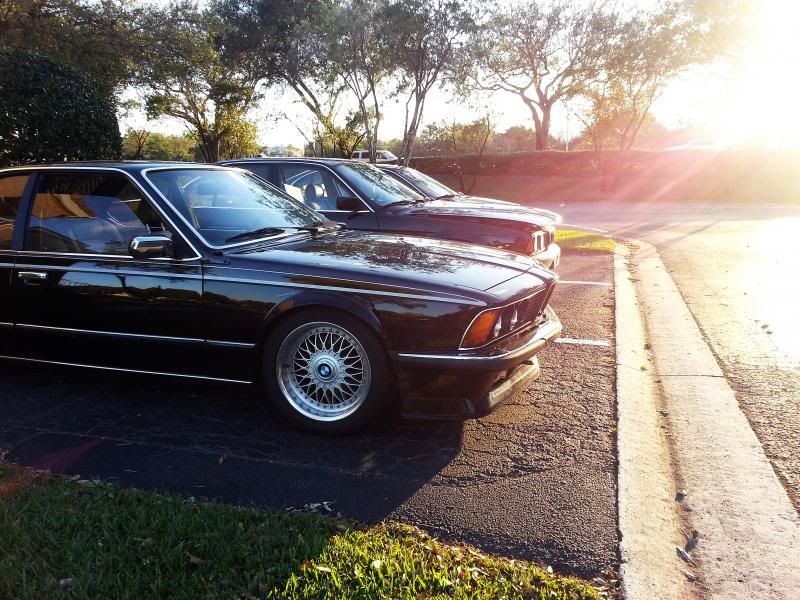
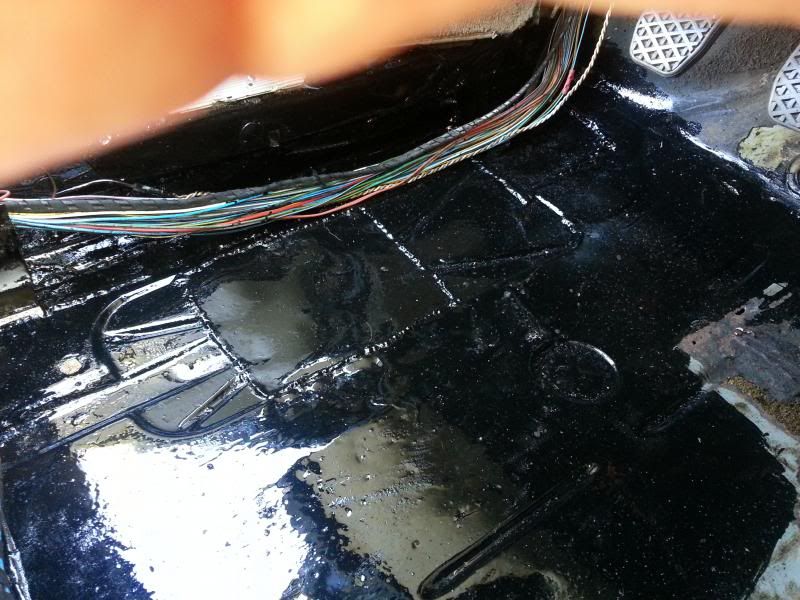
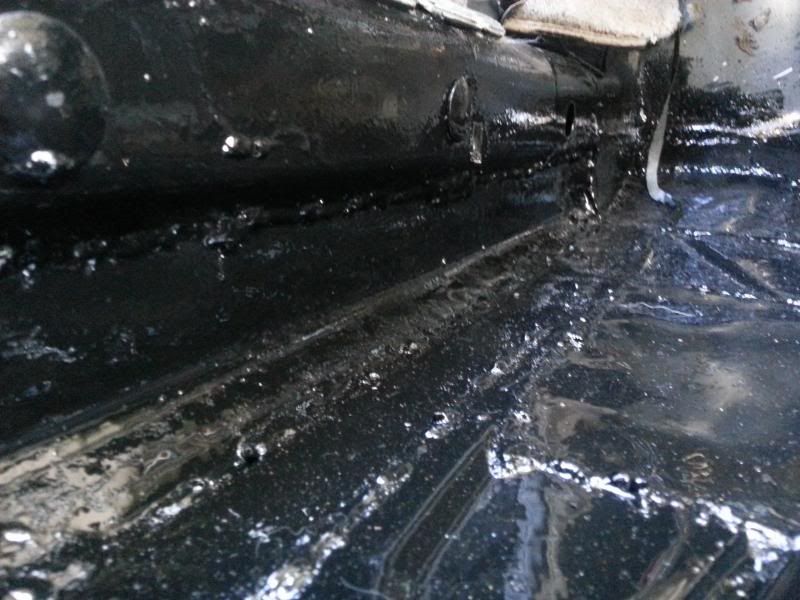
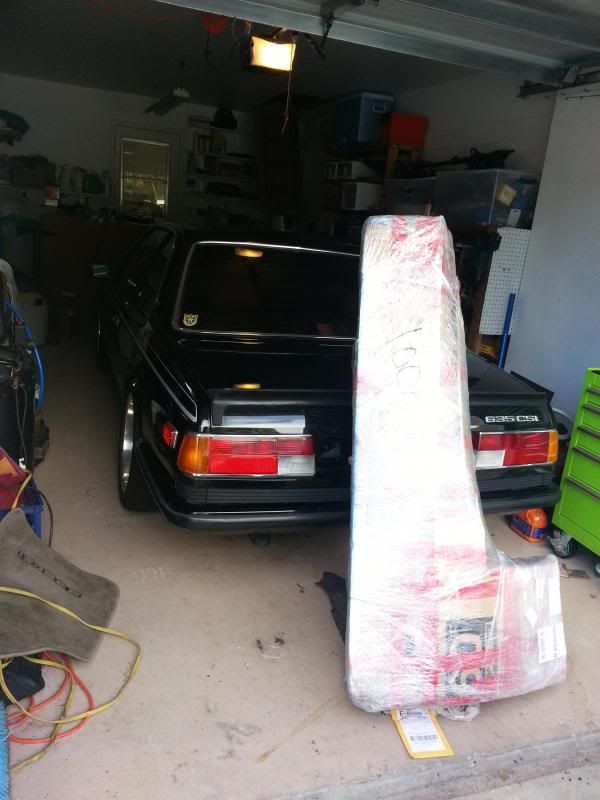
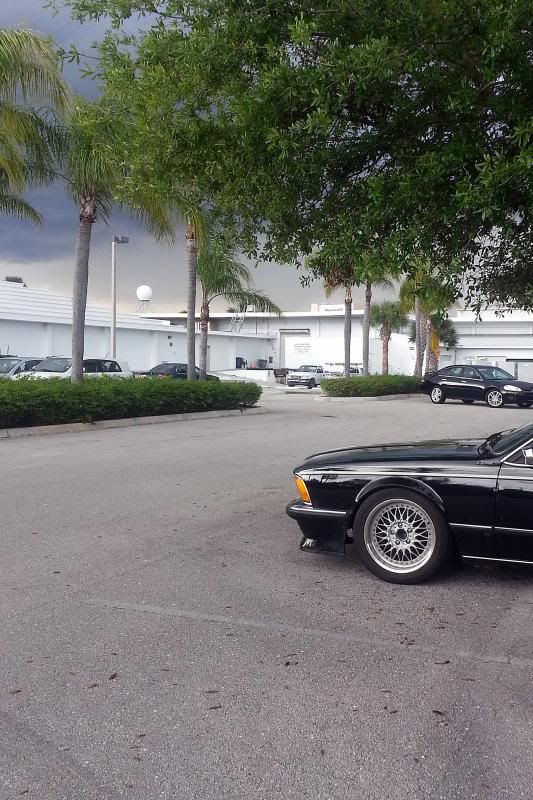
Here is the 635csi just before the worst rain/flooding I've seen in years. I almost got stranded on the way home. I managed to find a path that was less than 2 feet deep, but water still came inside the holes in the floor of the car lol. Good thing there is no carpet and I am in the midst of fixing it all. When I saw the sky I just thought, "Damn, I'm about to get soaked... IN the car." :D

Image

On a slightly nicer day. My company had a sweet beach party with some good beverages and I was really able to appreciate this sight on the way back to the car later.

Image

Oh, that reminds me, I lowered the car quite a bit after putting the spacers on. Unfortunately that side of the car still doesn't have center caps, but eh... still looks pretty good!

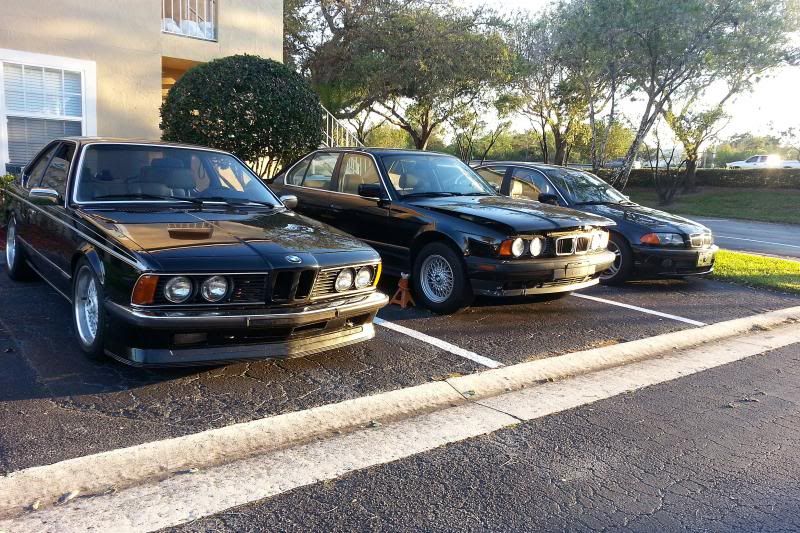
Lined up at Justin's place with the E34 and E46 too. E34 is jacked up for a new starter. It finally gave up the ghost at just under 360k miles (could be the second starter though) and years of making really weird noises while cranking LOL

Image

And I just discovered today how much I like this shot!

Image

Re: Chris' BMW Projects

Posted: Thu Mar 13, 2014 10:02 pm
by loxxrider
Ah, and how could I forget! I also just ordered a Zeitronix wideband for this car along with a little LCD to display the lambda rather than a gauge. That'll keep the install clean, you'll see.

Ah, and I will be finishing the rest of that mount on Justin's CNC router (for the parts which are off-axis). I really need a mill! Will update when that is finished.

Also, I will have an update for the 200 shortly...

Re: Chris' BMW Projects

Posted: Thu Mar 13, 2014 10:17 pm
by themagellan
car looks absolutely stunning in those shots

Re: Chris' BMW Projects

Posted: Thu Mar 13, 2014 10:22 pm
by 85oceanic
Looking fantastic Chris! I saw two of those 635s this weekend and it made me really really want one.

Re: Chris' BMW Projects

Posted: Thu Mar 13, 2014 10:35 pm
by loxxrider
Thanks guys! It is one of those very photogenic cars. It's a 15 footer haha. It'll be an any-footer by the time I'm done though hopefully :)

Re: Chris' BMW Projects

Posted: Thu Mar 20, 2014 9:41 pm
by loxxrider
I installed the finalized motor mount for the E36 tonight. Only took about 10 minutes :)

Before I put it in, I had the car running with the engine canted at a funny angle (because of some funky stuff I did to suspend the engine while the mount was out) which caused it to pretty much be hard mounted on that side of the car. It was quite harsh vibration-wise, so I think I know what a totally solid mount feels like now.

First impressions of the mount after installation is that, yes, vibration has been amplified over stock. However, the poly does a much better job at damping vibrations than a hard mount would. I'd compare it to other hard compound poly mounts. Similar to the difference one would feel with a stock dogbone mount in a 1.8t VW vs a billet one (with poly insert).

It is harder than stock for sure, and harder than soft, all-poly mounts, a little stiffer than a hard compound pure poly mount, but not as stiff as a solid delrin or aluminum mount. You'll definitely feel the vibrations in your butt at idle, but they aren't very noticeable (or not at all) in other portions of the rev range.

I think this design is a good option for someone who wants something a little less harsh than a solid mount, but doesn't want the problems that are often associated with a stock or conventional poly mount (both wear out). If the poly starts to degrade in this mount after several years, it is a matter of a few dollars and a few minutes to change out the insert.


I'm just happy to not have the engine trying to rip itself out of the car anymore :)

Re: Chris' BMW Projects

Posted: Thu Mar 27, 2014 9:25 pm
by loxxrider
Since this car will get turbo'd at some point in the near future, I have a need for a wideband. I like to keep things
stealth and as unflashy as possible, so I opted out of using a round gauge of any sort. Instead, I'm using a small LED
number display to be installed behind one of the "blanks" in the center stack area (right next to the OBC).

You can see the location I'm talking about circled in red here.

Image

Integrating the LCD screen provided by my wideband manufacturer of choice, Zeitronix, has proven to be quite a challenge
given the small envelope available to work for this particular location. I always seem to pick the most difficult ways of
doing things! Sometimes you have to do that to get the result you want though :)

I never intended to have to iterate on this design, but I'm having these 3D printed and the way I was envisioning this
working just wasn't jiving with the manufacturing processes capabilities. You can see the first design "Rev1" below.

Image

I know it is quite... green... but this is just a prototype ;)

Image

Image

The idea was for the little "feet" to be able to bend inward to get through the hole in the center stack. The feet are
wider than the opening due to the mounting points on the board for the LED display. With an injection molded part, I think
this would have worked fairly well. However, the layer adhesion from the 3D printer just wasn't good enough to allow that
to happen (in the feet or the mounting tabs). The tabs and feet just sheered right off the the rest of the part. Making
them thicker may have helped, but at the expense of flexibility making it much harder to get them through the hole. This
design can still be pursued, but I chose to try a different route for now.

"Rev2" incorporates a completely different mounting scheme. This time, wire will be run through the holes in the new
"blank" and the holes in the LED circuit board. This combined with the much larger indexing feature incorporated in this
revision should solve most problems.

Here's the model I whipped up for Rev 2.

Image

...and here it is in the printer.

Image

The only issue that will still remain will be manipulating the mounting wire behind the center stack. It shouldn't be too
bad with the OBD unit out for access. It will make more sense when things are finished up and I get some more pictures of
the final product.

Stay tuned for progress. Also keep in mind these are just ideas I came up with in about 15 minutes. I'd like to think they
are the best solutions possible given the design parameters, but I haven't really dedicated much time to brainstorming for
other options. Both designs have gone from concept to being manufactured in a matter of an hour or two. That is the beauty
of the latest tech available to the average consumer these days!

Oh! By the way, there will be a tinted film to cover the screen so that you can't see it when the car is off.