1983 URQ Alpine White/Mocha 20VT / VEMS / EFR

Document and share your build!
Afterthought
Posts: 1249
Joined: Thu Jan 16, 2014 5:43 pm
Location: Bellingham, Wa

Re: Pat's 1983 URQ Alpine white #603 , 20V in progress

Post by Afterthought »

Working on cleaning the interior and putting the rear of the front end together .
New hood release cable
Image

Trying to clean years of whatever dust and stuff is on the bumper . Since the fenders and everything have brand new L90E I need to do a real good cleanup and polish so the bumper , hood, doors etc are not darker .
Image
Haven’t polished the rear of the bumper yet but will get it this weekend .
Image
Image
mrdeye
Posts: 188
Joined: Sun Nov 13, 2016 10:05 am
Location: Colorado

Re: Pat's 1983 URQ Alpine white #603 , 20V in progress

Post by mrdeye »

:drive: :drive: :drive: :drive: :drive: :flag: :beer:
Mr.
Daily driver: '01 Toyota 4Runner
Project car: '84 Audi Coupe GT
Previous cars:
'95 S6 Avant, '87 5K TQ, '95 VW Golf, '84 VW Jetta turbo diesel, '84 VW GTI
Afterthought
Posts: 1249
Joined: Thu Jan 16, 2014 5:43 pm
Location: Bellingham, Wa

Re: Pat's 1983 URQ Alpine white #603 , 20V in progress

Post by Afterthought »

Didn’t quite finish what I wanted to do but I did get a hand from someone to bleed the clutch so I should be able to take the car in for alignment this week .
Replaced my mis-matched taillight .
And started cleaning up the hood . Rewarding process :) but time consuming and the entire car needs probably 12 hrs more of detail to look like the leading edge of this hood .
Image
Image
Image

Image

Tested against fenders
Image
the german
Posts: 720
Joined: Sat Feb 15, 2014 11:03 pm
Location: Bellevue, WA

Re: Pat's 1983 URQ Alpine white #603 , 20V in progress

Post by the german »

holy crap! that is am amazing difference from polishing.
Kirk

1990 ABZ CQ
1990 lifted CQ
2005 S4 6MT
2011 A4 2.0T Avant (ok, it's my wife's car but it's sexy and I love it)
User avatar
chaloux
Posts: 3167
Joined: Wed Feb 27, 2013 11:43 am
Location: Muskoka, Ontario, Canada

Re: Pat's 1983 URQ Alpine white #603 , 20V in progress

Post by chaloux »

Wow. Yuck lol
Matt

18 Silverado 1500 work pig, roof rack and tonneau cover
11 Jetta sedan TDI DSG, rear muffler delete
GONE :( 87 4ktq - 4 FOX SNAKES

Image
carl
Posts: 154
Joined: Thu Mar 07, 2013 11:05 am

Re: Pat's 1983 URQ Alpine white #603 , 20V in progress

Post by carl »

Damn, you have patience! Looking good though. Have you looked at a farecla gmop? Might be a quicker option if you don't mind cleaning the mess from the water and compound afterwards.
Afterthought
Posts: 1249
Joined: Thu Jan 16, 2014 5:43 pm
Location: Bellingham, Wa

Re: Pat's 1983 URQ Alpine white #603 , 20V in progress

Post by Afterthought »

the german wrote:holy crap! that is am amazing difference from polishing.
I think it was covered In paint overspray or something ? Maybe years of dust .
Either way that’s kind of beat case scenario because it looks bad at first and then I can clean in and realize that there’s nice paint underneath. See a huge difference , it’s a cool process .
Afterthought
Posts: 1249
Joined: Thu Jan 16, 2014 5:43 pm
Location: Bellingham, Wa

Re: Pat's 1983 URQ Alpine white #603 , 20V in progress

Post by Afterthought »

carl wrote:Damn, you have patience! Looking good though. Have you looked at a farecla gmop? Might be a quicker option if you don't mind cleaning the mess from the water and compound afterwards.
I have not seen it but maybe I’ll look into it . It really hasn’t been taking too long to get down to the paint and I’m not having to use an aggressive pad (like wool) with the buffing compound- so it saves me from having to do swirl removing . Only part that sucks is then having to go over again with glaze and wax.
Afterthought
Posts: 1249
Joined: Thu Jan 16, 2014 5:43 pm
Location: Bellingham, Wa

Re: Pat's 1983 URQ Alpine white #603 , 20V in progress

Post by Afterthought »

The euro look is coming together !

Got the front bumper on.
Got stuck on the rear ... couldn’t figure out how to mount the OE euro bumper to the back...

I did test fit the rear euro bumper (looks so good!!!) and took that opportunity to figure out how far it’ll stick out made my final tip for the exhaust so it’s not coming out at an angle

Image
Image
Image
Only issue is I don’t have turn signals and no idea where to get them either ..


Image

Still really struggling to make nice looking tig welds . As soon as I add more heat and rod the weld just turns bluish gray color not all cool and rainbow like you see on the internets.
Image
Image
Image

Image
Image

Looks wayyy better !
Image
Image
Image
Afterthought
Posts: 1249
Joined: Thu Jan 16, 2014 5:43 pm
Location: Bellingham, Wa

Re: Pat's 1983 URQ Alpine white #603 , 20V in progress

Post by Afterthought »

Here’s how I’m stuck on the rear . If I remove the bumper insert and factory bumper shocks . I’m left with three holes with a nut welded on the inside .

The euro bumper insider has two fixed studs in it . Obviously I can’t thread a fixed stud into a fixed nut.
So at first I thought I may need to drill out or remove two of the nuts , put the bumper on the support bar and then install the support bar and bolt on the inside accessing from the trunk .
B U T
Those nuts are not accessible from the trunk ( or anywhere ) they’re inside this frame rail thingy.
So I’m at a loss for now .
Fixed studs
Image
Non/removable nuts
Image

Studs line up with hole perfectly
Image

Nuts are inside this square welded tubing inside the trunk .
Image
FFF
Posts: 322
Joined: Fri Oct 31, 2014 10:35 pm

Re: Pat's 1983 URQ Alpine white #603 , 20V in progress

Post by FFF »

Afterthought wrote:Here’s how I’m stuck on the rear . If I remove the bumper insert and factory bumper shocks . I’m left with three holes with a nut welded on the inside .

The euro bumper insider has two fixed studs in it . Obviously I can’t thread a fixed stud into a fixed nut.
So at first I thought I may need to drill out or remove two of the nuts , put the bumper on the support bar and then install the support bar and bolt on the inside accessing from the trunk .
B U T
Those nuts are not accessible from the trunk ( or anywhere ) they’re inside this frame rail thingy.
So I’m at a loss for now .
Fixed studs
Image
Non/removable nuts
Image

Studs line up with hole perfectly
Image

Nuts are inside this square welded tubing inside the trunk .
Image
Could you use some of these (link below), weld them to the car side and then use nuts on the bumper?

https://www.jhpfasteners.com/weld-studs ... -l-en.html


Sent from my iPad using Tapatalk Pro
the german
Posts: 720
Joined: Sat Feb 15, 2014 11:03 pm
Location: Bellevue, WA

Re: Pat's 1983 URQ Alpine white #603 , 20V in progress

Post by the german »

Pretty weld recipe:

15 CFH + lanthinated tungsten + gas lens. Torch evenly and taste the rainbow.
Kirk

1990 ABZ CQ
1990 lifted CQ
2005 S4 6MT
2011 A4 2.0T Avant (ok, it's my wife's car but it's sexy and I love it)
the german
Posts: 720
Joined: Sat Feb 15, 2014 11:03 pm
Location: Bellevue, WA

Re: Pat's 1983 URQ Alpine white #603 , 20V in progress

Post by the german »

for the bumper, I would mod the bumper bar before the car. Can you just cut the studs off, drill holes, and bolt into the captured nuts already in the car?
Kirk

1990 ABZ CQ
1990 lifted CQ
2005 S4 6MT
2011 A4 2.0T Avant (ok, it's my wife's car but it's sexy and I love it)
Afterthought
Posts: 1249
Joined: Thu Jan 16, 2014 5:43 pm
Location: Bellingham, Wa

Re: Pat's 1983 URQ Alpine white #603 , 20V in progress

Post by Afterthought »

the german wrote:Pretty weld recipe:

15 CFH + lanthinated tungsten + gas lens. Torch evenly and taste the rainbow.
That’s what I had . 15 CFH and 2% lanthanated .Maybe I need to use a different rod or something . I can tell it’s when I add more rod that it turns gray.


Sent from my iPhone using Tapatalk
Afterthought
Posts: 1249
Joined: Thu Jan 16, 2014 5:43 pm
Location: Bellingham, Wa

Re: Pat's 1983 URQ Alpine white #603 , 20V in progress

Post by Afterthought »

On the bumper , since the European cars do not have bumper shocks it turns out they don’t even have that big square tube running to the bumper .
I really hate to cut anything on the car but it’s the only way that’s going to go on there Properly .
Once the bumper is on the car there is no way to access the bolts between the bumper and support bar because the bumper closes the gap .

The only other possible way I could think of is leave the nuts in the trunk but add an access hole to the bumper and use stock bumper plugs to fill it .
Imagem
Which would be ugly and the plugs wouldn’t fit right ! BecUse the shape is different .
User avatar
audifreakjim
Posts: 2142
Joined: Sun Mar 03, 2013 3:00 pm

Re: Pat's 1983 URQ Alpine white #603 , 20V in progress

Post by audifreakjim »

Any way you can make a bracket to use a pinch bolt from below like the newer cars?
Afterthought
Posts: 1249
Joined: Thu Jan 16, 2014 5:43 pm
Location: Bellingham, Wa

Re: Pat's 1983 URQ Alpine white #603 , 20V in progress

Post by Afterthought »

audifreakjim wrote:Any way you can make a bracket to use a pinch bolt from below like the newer cars?
Hmm that’s a great idea . Thanks !

I may be able to do something like that . I can’t access from directly below but I may be able to make a bracket off the car and then access from below the lower.

This is how it was done in one of my other cars . Once you posted that it made me think to look. 2 pc bracket like this would work.
Image
. Anything I can do to avoid drilling a hole in the car is a plus .


Sent from my iPhone using Tapatalk
Afterthought
Posts: 1249
Joined: Thu Jan 16, 2014 5:43 pm
Location: Bellingham, Wa

Re: Pat's 1983 URQ Alpine white #603 , 20V in progress

Post by Afterthought »

Spent a ton of time today feel like I accomplished little but everything is time consuming .

First I took care of the rest of the hood.
Then I polished the spoiler.
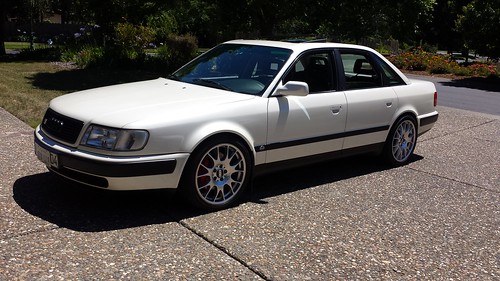
Then put the hood on and started the alignment process. I have the hood set in place now where t needs to be but one fender needs to come out just a smidgeon(see pics below) .
Also finished the headlight harness . Now everything works perfect and is properly relayed and grounded .
I used a 3 relay box so I have individual fuse and relay for each high bulb and the lows .

ImagemImage
Image

Cleaned bottom of hood while I had the opportunity . Replaced washer nozzle tubing with new.
Image
Image

Image
Image

Image
Image
Image


Sent from my iPhone using Tapatalk
User avatar
ringbearer
Posts: 1282
Joined: Wed Feb 27, 2013 12:50 pm
Location: Nor-Cal

Re: Pat's 1983 URQ Alpine white #603 , 20V in progress

Post by ringbearer »

Looks so good!
User avatar
audifreakjim
Posts: 2142
Joined: Sun Mar 03, 2013 3:00 pm

Re: Pat's 1983 URQ Alpine white #603 , 20V in progress

Post by audifreakjim »

Looking great Pat, is it coming to BBQ: :)
Afterthought
Posts: 1249
Joined: Thu Jan 16, 2014 5:43 pm
Location: Bellingham, Wa

Re: Pat's 1983 URQ Alpine white #603 , 20V in progress

Post by Afterthought »

audifreakjim wrote:Looking great Pat, is it coming to BBQ: :)
I’m not sure yet, that’s a long drive for me and I have a really busy year .
I want to get the car on the road and get it tuned and put it to the test soon and see what else needs attention.


Sent from my iPhone using Tapatalk
User avatar
dana
Posts: 951
Joined: Mon Oct 14, 2013 8:54 am

Re: Pat's 1983 URQ Alpine white #603 , 20V in progress

Post by dana »

drive it to BBQ!! I was so happy I made such an epic trip in an old audi. Been a dream for a long time, you won't regret it.
current:
-mk4 tdi wagon with some mods
-TDI b3 90q, holset turbo, be strong little connecting rods!
-the turbo tractor
past:
-11 second 90q junker
-20vt swapped 90q winter beater
-efi 20vt 4kq
-way too many other long gone urs's, 200's 4000's, b5's
Afterthought
Posts: 1249
Joined: Thu Jan 16, 2014 5:43 pm
Location: Bellingham, Wa

Pat's 1983 URQ Alpine white #603 , 20V in progress

Post by Afterthought »

dana wrote:drive it to BBQ!! I was so happy I made such an epic trip in an old audi. Been a dream for a long time, you won't regret it.
I remember talking to you about that . It’s a lot longer drive for you last time I drove to Vegas it took me about 22 hours to go the long way .

But we’ll see I need to get the car to a point where I can be confident in it’s mechanical abilities to go that far through the desert without passing any auto parts stores
Afterthought
Posts: 1249
Joined: Thu Jan 16, 2014 5:43 pm
Location: Bellingham, Wa

Re: Pat's 1983 URQ Alpine white #603 , 20V in progress

Post by Afterthought »

Haven’t done much on the car lately, unfortunately .
Road tested the car some .
Started assembling the interior and I’m still somewhat stuck on getting the hood/fenders/hood latch all adjusted properly .

I spent some time to get the gauges laid out but then realized that these nice auto meter gauges are just going to stand out , as in they don’t match the look of the car.

Found some more period correct gauges but of course they don’t come with any sending units so I will now have to backtrack I guess and figure out what sending unit goes with the VDO gauges for oil pressure and water temp. But it will be a more period correct appearance for sure .
Current gauges:
Image

New VDO instrumentation
Image
Image


Sent from my iPhone using Tapatalk
Post Reply