83 Ur Quattro complete restoration
-
the german
- Posts: 720
- Joined: Sat Feb 15, 2014 11:03 pm
- Location: Bellevue, WA
Re: Operation 686
Good progress update; the rocker panel and quarter panel look good!
Kirk
1990 ABZ CQ
1990 lifted CQ
2005 S4 6MT
2011 A4 2.0T Avant (ok, it's my wife's car but it's sexy and I love it)
1990 ABZ CQ
1990 lifted CQ
2005 S4 6MT
2011 A4 2.0T Avant (ok, it's my wife's car but it's sexy and I love it)
-
Nateflix56
- Posts: 35
- Joined: Wed Dec 27, 2017 1:57 pm
- Location: Puyallup, Wa
Re: Operation 686
^^^ x2 on both of Pry's points
My neighbor is doing a full resto on an old AMX. He borrowed a setup from a friend of his who did exactly that. Looks to be done using 2 engine hoists and 2 engine stands. I helped him mount it up, took a little finessing without a lift but should be a breeze for you.
 Untitled by nate pace, on Flickr
My neighbor is doing a full resto on an old AMX. He borrowed a setup from a friend of his who did exactly that. Looks to be done using 2 engine hoists and 2 engine stands. I helped him mount it up, took a little finessing without a lift but should be a breeze for you.
Untitled by nate pace, on Flickr90 CQ - 07k Swap Pending
15 2500HD Sierra Denali Duramax
01.5 B5 S4 (Sold)
98 Jetta VRT (Sold)
15 2500HD Sierra Denali Duramax
01.5 B5 S4 (Sold)
98 Jetta VRT (Sold)
-
Afterthought
- Posts: 1249
- Joined: Thu Jan 16, 2014 5:43 pm
- Location: Bellingham, Wa
Re: Operation 686
Looks like the engine hoist setup is pretty good .
I was kicking around the idea . Shop time is limited so 2 days to cut and weld one up is worth something but so is 1,300+. I figured if I could get one for 1000 shipped it would make sense to buy and hope that I could recoup half of the cost after I’m done maybe ?
I was looking around on places like HAMB and saw a few from engine stands and it looks like the cherry picker setup is better , because I’d have the jacks to raise and lower . So if I got two of those and then used the metal I already have (rectangular tubing that I bought pre-tariff ) so I think all I would need is some extra wheels , heavy duty metal casters or something .
I have seen Craig’s build but it’s always nice to look through it again. Not planning to do them but I have always wondered about those “ A2 reinforcement channels“ he put on there and what they do for handling . Looks like quite a bit of stiffness added.
The rockers came out ok but I need to figure it how to butt them together and weld on the bottom. The one is just welded on top and tacked on bottom. It’s almost like I need the whole piece from pinch weld to pinch weld for it to look perfect .
I have seen that AM cars makes them but they are L295 and some lead time . I wouldn’t mind the cost if they were perfect but never seen or heard of anyone that has run them and can comment on the fitment .
-
Afterthought
- Posts: 1249
- Joined: Thu Jan 16, 2014 5:43 pm
- Location: Bellingham, Wa
Operation 686
Good parts haul today ... I have acquired many of he crucial parts I need to make everything right .
Lower trunk area , not a perfect fit but a great start , got both sides


Front fender bolting area and triangle brace
Both sides as well


Lower trunk area , not a perfect fit but a great start , got both sides
Front fender bolting area and triangle brace
Both sides as well
-
the german
- Posts: 720
- Joined: Sat Feb 15, 2014 11:03 pm
- Location: Bellevue, WA
Re: Operation 686
Now the fun starts!
Kirk
1990 ABZ CQ
1990 lifted CQ
2005 S4 6MT
2011 A4 2.0T Avant (ok, it's my wife's car but it's sexy and I love it)
1990 ABZ CQ
1990 lifted CQ
2005 S4 6MT
2011 A4 2.0T Avant (ok, it's my wife's car but it's sexy and I love it)

Re: Operation 686
Looking good, giving me inspiration for my next project, hope to see more updates soon!
-Shawn C.
2001 S4 6spd Avant blk/blk - stock daily
2002 01E B6 A4 Built FYF, Built 1.8T, HX35 ~330whp
1989 MC-1 200 Avant- MS1 -Gone but will never forget her lessons
1987 5ktq Sedan - Best $500 beater ever
2001 S4 6spd Avant blk/blk - stock daily
2002 01E B6 A4 Built FYF, Built 1.8T, HX35 ~330whp
1989 MC-1 200 Avant- MS1 -Gone but will never forget her lessons
1987 5ktq Sedan - Best $500 beater ever
-
ringbearer

- Posts: 1282
- Joined: Wed Feb 27, 2013 12:50 pm
- Location: Nor-Cal
Re: Operation 686
Those “scraps” are gold, nice score! Take your time cutting everything to fit, no
Easy way to measure just cut and size it up.
Easy way to measure just cut and size it up.
-
Afterthought
- Posts: 1249
- Joined: Thu Jan 16, 2014 5:43 pm
- Location: Bellingham, Wa
Re: Operation 686
This is when the fun will start, once I get the glass out and it is upside down or on its side . Ha . But I need to figure out how to brace the car if it needs any sort of bracing addedthe german wrote:Now the fun starts!

Definitely a score on the parts . I was stoked to find them ! Most importantly I can make those parts but I can’t make those parts perfect stock, I don’t think, so better to go for an OEM fit and finish - I see it as worth the extra effort to source them and do it right
Re: Operation 686
Looking good - I can’t even dream about this type of project until the kids are off of the payroll...
-
the german
- Posts: 720
- Joined: Sat Feb 15, 2014 11:03 pm
- Location: Bellevue, WA
Re: Operation 686
sweet!! that rotisserie looks nice
Kirk
1990 ABZ CQ
1990 lifted CQ
2005 S4 6MT
2011 A4 2.0T Avant (ok, it's my wife's car but it's sexy and I love it)
1990 ABZ CQ
1990 lifted CQ
2005 S4 6MT
2011 A4 2.0T Avant (ok, it's my wife's car but it's sexy and I love it)

Re: Operation 686
^^^ agreed, and if you want to add bracing, t-bar or angle-iron is usually a good starting point.
Find me on Instagram @pry4sno
|| 2010 Golf Sportwagen TDI /// #farmenwagen
|| 2002 Dodge Ram 2500 24vt 4x4 #bertancummins
|| 1992 80 quattro 20v /// Eventual AAN'd Winter Sled
|| 1990 Coupe quattro /// Because Racecar
|| 2010 Golf Sportwagen TDI /// #farmenwagen
|| 2002 Dodge Ram 2500 24vt 4x4 #bertancummins
|| 1992 80 quattro 20v /// Eventual AAN'd Winter Sled
|| 1990 Coupe quattro /// Because Racecar
-
Afterthought
- Posts: 1249
- Joined: Thu Jan 16, 2014 5:43 pm
- Location: Bellingham, Wa
Re: Operation 686
So I have all the parts I need to get started with what I’m doing , but need to figure out the proper way to get the car on the rotisserie so I can fully clean off the undercoating .
Not looking forward to that but it needs to be done for it to be fixed right .
My intention was to remove the 3 studs on the front where the bumper shock mounts . I made a plate to fit that area. However, I am now thinking maybe I should use the subframe bolt holes as the main mounting points and run a brace up to the bumper mount instead. Don’t know if anyone has done this before , but where did you pick up the car and where did you add support or bracing if needed?
I am looking at the front and thinking I will use rectangular 1.5 “ steel to run straight to the subframe mounting bolt holes .
Rear plates
Re: Operation 686
I've never done this before, but if you were to tie the subrame holes together across the car I think that would be plenty. I'm thinking just two rectangular tubes with 2 holes and 2 bushing welded in to prevent the chassis from twisting. The long direction of the car never had any type of brace on the road, so you would think it would be stiff enough. Just a guess.
1988 Audi 90Q 1.8T swap
2003 VW Jetta TDI
1978 GMC High Sierra
2015 Touareg Lux
http://dubsinthebuff.com
2003 VW Jetta TDI
1978 GMC High Sierra
2015 Touareg Lux
http://dubsinthebuff.com
Re: Operation 686
I built a rotisserie for my old MK2 and bolted straight to the bumper mounting points and that didn't seem to cause any issues even with the car sitting in it for ~3yrs. All of the SQ replica guys seem to prefer subframe mounting points, although I think that's mostly to make the shortening process easier. Subframe mounts will get in the way of stripping undercoating, so I'd be tempted to keep the points you've already built.
-Shawn C.
2001 S4 6spd Avant blk/blk - stock daily
2002 01E B6 A4 Built FYF, Built 1.8T, HX35 ~330whp
1989 MC-1 200 Avant- MS1 -Gone but will never forget her lessons
1987 5ktq Sedan - Best $500 beater ever
2001 S4 6spd Avant blk/blk - stock daily
2002 01E B6 A4 Built FYF, Built 1.8T, HX35 ~330whp
1989 MC-1 200 Avant- MS1 -Gone but will never forget her lessons
1987 5ktq Sedan - Best $500 beater ever
-
Afterthought
- Posts: 1249
- Joined: Thu Jan 16, 2014 5:43 pm
- Location: Bellingham, Wa
Re: Operation 686
Still working on this when I can .
I have the rotisserie set up right now but I’m still at somewhat of a sticking point with the rockers.
I really wanted to purchase some so I could go from Seam to Seam but I just can’t find anywhere that makes it . Even if I could get a full replacement from Audi tradition I would .
Next step is to pull out the fuel tank and rear subframe , etc before I can rotate or do anything with it .

These are the attempts so far with the rockers .

Driver’s side

Passenger side in place but bottom is tacked not fully welded .


I guess what I have to do is see if I can go this route and get them perfect or otherwise keep looking around . It’s a difficult piece .
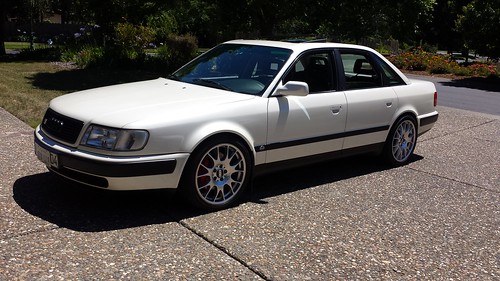
Also snagged a parts car . It’s fwd Auto but still turbo (MC) so I can use this engine and some of the wiring or sensors as spares


I have the rotisserie set up right now but I’m still at somewhat of a sticking point with the rockers.
I really wanted to purchase some so I could go from Seam to Seam but I just can’t find anywhere that makes it . Even if I could get a full replacement from Audi tradition I would .
Next step is to pull out the fuel tank and rear subframe , etc before I can rotate or do anything with it .
These are the attempts so far with the rockers .
Driver’s side
Passenger side in place but bottom is tacked not fully welded .
I guess what I have to do is see if I can go this route and get them perfect or otherwise keep looking around . It’s a difficult piece .
Also snagged a parts car . It’s fwd Auto but still turbo (MC) so I can use this engine and some of the wiring or sensors as spares