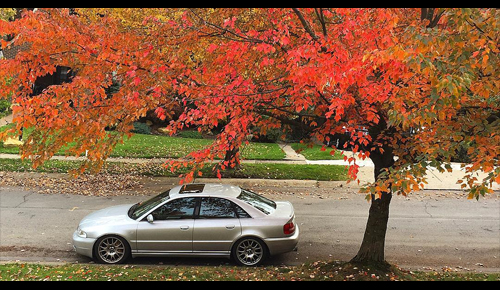
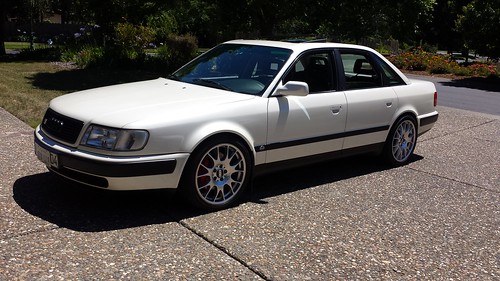
Josh's 2.5 200QT.
Re: Josh's 2.5 200QT
I believe so... Your thread was the first to come to mind.
Re: Josh's 2.5 200QT
anyone have any experience playing with instrument clusters? I got an A6 cluster to use the silver bevels to place on my gauge 200 Quattro cluster. I was also thinking about doing the white face gauges but am kind of worried about damaging the gauges when removing the needles to place the white faces down. Has anyone ever separated the front plastic from the cluster housing. I was thinking of using a razor blade knife the separate the two where it was glued/plastic welded together, but it didn't work too well. My next thought was to use a heat gun to release the too and slowly pry them apart. Any suggestions on installing the white face gauges or separating the screen from the cluster housing? 
- Attachments
-
- c1.JPG (633.05 KiB) Viewed 35492 times
-
- c2.JPG (550.59 KiB) Viewed 35492 times
-
- c3.JPG (583.15 KiB) Viewed 35492 times

Re: Josh's 2.5 200QT
I've had mine off (the needles). They should pull straight off. Just be careful not to bend them by twisting. It feels like you're going to break something when you pull, but they'll come off. It is good to use something to support the shaft if you can.
-Chris
'91 Audi 200 20v - Revver/BAT project
'91 Audi 200 20v Avant
'01 Anthracite M5
'90 M3
'85 Euro 635csi
'12 X3
E34 530i (maybe rear-mount soon)
'91 Audi 200 20v - Revver/BAT project
'91 Audi 200 20v Avant
'01 Anthracite M5
'90 M3
'85 Euro 635csi
'12 X3
E34 530i (maybe rear-mount soon)
Re: Josh's 2.5 200QT
Thanks Chris. Gave the S6 gauge a try first and it popped right off. I used the "two spoon" trick and made sure to keep equal pressure on both sides until the needle came off. Now if I can figure out how to seperated the clear face from the housing. I need to get in there to get those bevels out.
Re: Josh's 2.5 200QT
Yeah... that is another story. I don't think that part is quite as easy. I've never had good luck with it, sorry!
-Chris
'91 Audi 200 20v - Revver/BAT project
'91 Audi 200 20v Avant
'01 Anthracite M5
'90 M3
'85 Euro 635csi
'12 X3
E34 530i (maybe rear-mount soon)
'91 Audi 200 20v - Revver/BAT project
'91 Audi 200 20v Avant
'01 Anthracite M5
'90 M3
'85 Euro 635csi
'12 X3
E34 530i (maybe rear-mount soon)
Re: Josh's 2.5 200QT
i'm thinking of using a heat gun or a dremmel tool. Not sure yet. here is some progress. in case anyone runs across this that is curious about doing it. Make sure to take a picture of the needle position before removing the needle. You can not use the old face to make a mark for reference if you are changing the face out.
The next thing to do is get those A6 Bevels out. I'm thinking about having them chromed and putting them in.
2 watt light bulb change out, white face gauges, chromed gauge bezels, I think it's going to look pretty sweet. I might even try to figure out a clean factory look of using the clock from the A6 Cluster.
- Attachments
-
- upgrade in progress.JPG (643.53 KiB) Viewed 35485 times
-
- carefull.JPG (483.87 KiB) Viewed 35485 times

Re: Josh's 2.5 200QT
Nice, that is going to look awesome
Matt
18 Silverado 1500 work pig, roof rack and tonneau cover
11 Jetta sedan TDI DSG, rear muffler delete
GONE :( 87 4ktq - 4 FOX SNAKES

18 Silverado 1500 work pig, roof rack and tonneau cover
11 Jetta sedan TDI DSG, rear muffler delete
GONE :( 87 4ktq - 4 FOX SNAKES
Re: Josh's 2.5 200QT
why are you trying to separate the clear plastic? I'd be very surprised if you can remove and reinstall that piece cleanly at all. Just replace the housing if the plastic is cracked or scratched.
Ed
-
ringbearer

- Posts: 1282
- Joined: Wed Feb 27, 2013 12:50 pm
- Location: Nor-Cal
Re: Josh's 2.5 200QT
I used plastic polish on my cluster lens and got it very clear again
Re: Josh's 2.5 200QT
Removing the scratches is the easy part. If you look at the picture of the side by side view, you can see that there is a big difference in size between the A6 and the 200q. The length of the housing is longer due to the extra verticle warning lights on the right hand side. I can not use the cluster housing because it is about an 1 1/2" wider than the 200. So my whole point of this is to "extract" the silver bezels the encompass each individual gauge in the A6 and transplant them to the 200 cluster back ground. Once I extract these 7 bezels from the a6 I want to chrome the individual bezels and implant them to the 200 cluster background. That is where the issue comes in. I have to carefully remove the clear screen on my 200 so that I can put it back once I install the bezels. As for the donor A6, I could care less about. I can just break it open so that I can remove the silver rings. I don't know of a factory 200 cluster that came with the rings. So the goal was to put the white face gauges, install the 2 watt bulbs, and install the bezels or rings around each gauge once I get them chromed. If anyone knows a better way to get the bezels in the cluster and back into the dash, I'm all ears. From what I can tell, the have to be pulled from the top or the face. You can't pull them from the back.
Re: Josh's 2.5 200QT
ah, I see. The best solution is to just skip the chrome bezels because it looks better without them anyways 
Ed
Re: Josh's 2.5 200QT
I haven't seen one done yet to make a decision. Have you ever seen one with it done. I don't know of anyone that has ever done it. I think it will break up the contrast from the white gauges to the black background. Besides... I have nothing to play with while my project is at a stand still.
Re: Josh's 2.5 200QT
So I got lucky and was able to pop the bezels out without going in from the front. I just had to squeeze the speedometer and tach bezel a little out of shape and it came out. The smaller ones fell right out of the big hole. That will be how the go back into the 200 cluster. I am on the fence right now about getting them chromed. I think it will look pretty damn good and set the dash off. Although it doesn't look too bad the way it is now.
- Attachments
-
- d4.JPG (1.75 MiB) Viewed 35433 times
-
- d3.JPG (1.83 MiB) Viewed 35433 times
-
- d2.JPG (1.76 MiB) Viewed 35433 times
-
- d1.JPG (1.84 MiB) Viewed 35433 times
Re: Josh's 2.5 200QT
Oh dang. Leave it how it is now, that's sexy.
Re: Josh's 2.5 200QT
Thanks, it does look good, but it's never enough I still want to chrome them for the rare/uniqueness. We will see...
Re: Josh's 2.5 200QT
So here is what the final product looks like unless I send them to be chromed. It is pretty easy to do. You just have to have a steady hand with the dremmel when working with the bezels.
- Attachments
-
- image.jpg (673.27 KiB) Viewed 35428 times

Re: Josh's 2.5 200QT
Thank You!
- Attachments
-
- glass sanding 3.jpg (164.14 KiB) Viewed 35405 times
-
- glass sanding 2.jpg (90.59 KiB) Viewed 35405 times
-
- glass sanding 1.jpg (101.77 KiB) Viewed 35405 times
Last edited by 2.5TYPE44 on Sat Nov 23, 2013 11:09 pm, edited 2 times in total.
Re: Josh's 2.5 200QT
here is some goodies for my next upgrade.
Plan is to install Bi-Xenon projectors
grind and sand the lenses until they are clear
add white L.E.D. daytime running lights inside like the newer Audis.
Get the motorized height adjusters working with thumbwheel from European dash thumb wheel adjuster. I know the Bi-Xenon have electric shutters for high and low beam, but it will be cool anyway.
- Attachments
-
- Euro goodies.jpg (1.61 MiB) Viewed 35401 times
Re: Josh's 2.5 200QT
digging into the type 44 European headlight and trying to ''pimp'' it out and still keep it somewhat classy and factory like.
here is my research into the over complicated/over engineered headlight. Working on restoring/rebuilding/cleaning/refurbishing/modifying...
The possibilities are endless as far as lighting updates/upgrades. You can not do this with a sealed ''American'' 10 or 20 valve Type 44 headlight, I think this even fits a Audi 5000. My biggest challenge will be to acquire a water fed glass grinder/sander/polisher to make the lens clear. The plans are...
1. H.I.D. Bright light (Inner) reflector bucket.
2. Bi-Xenon projector standard driving light (outer reflector/bucket)
3. Bi-Xenon projector hi-beam light (Outer reflector/bucket)
4. (Bright lights) Bi-Xenon high beam with shutter open (Outer Bucket) and inner H.I.D. light relayed at same time
5. Day time running lights (white) L.E.D. lights on or off with ignition on surrounding bucket on inside of glass like newer Audi's
6. Yellow/Amber L.E.D. turn signals inside bucket as well and triggered with turn signal
7. Motorized headlight adjusters controlled from inside the car/dash with thumbwheel adjuster...
8. Clear glass lenses to show all of this lighting craziness ...
Re: Josh's 2.5 200QT
I posted another video of the ''just about final'' ultimate type 44 European headlight conversion. I have been bored without my car and I am ''tinkering'' with stupid things to keep motivated to keep moving forward on the car. The only other things I need to do is track down the correct thumbwheel adjusters, polish the lenses better, and I might add a amber turn signal halo that fits in the inner diameter of the white halo. I wanted to add the new style Audi L.E.D. running lights, but I think it would look too ''home made''. Right now, it could almost pass for a factory light. I think it looks good for a light going on a twenty five year old car. I'm pretty sure there weren't any cars with projectors, H.I.D.'s, or L.E.D.'s back then. The lighting improvement is massive. The video can't show how well these lights look. It brings a little more update and style to the car too.
The demonstration was done with my lawnmower battery and a small battery charger, so that is why you see the light dim a little when I have the H.I.D. ballast going, the solenoid for the high beams, the 100 watt incandescent bright, and the Halo. A normal automotive battery and the car running with the alternator should not effect the light.
Here is the video of the progress....
Re: Josh's 2.5 200QT
For some reason I can't watch videos right now, but sounds like you are making good progress. Nice!
I'm really glad you aren't going to do the LEDs. In my opinion, they would have looked *really* tacky on a car of this vintage. It's sort of a ricer thing if you ask me. Even on the new cars it is not always pulled off well.
Since you mentioned it, there were cars far before these which had projectors. Any higher end mid-late 80's BMW had them for example. The HIDs did start in the early 90s though. Either way, the 200 and V8 should have come with them
-Chris
'91 Audi 200 20v - Revver/BAT project
'91 Audi 200 20v Avant
'01 Anthracite M5
'90 M3
'85 Euro 635csi
'12 X3
E34 530i (maybe rear-mount soon)
'91 Audi 200 20v - Revver/BAT project
'91 Audi 200 20v Avant
'01 Anthracite M5
'90 M3
'85 Euro 635csi
'12 X3
E34 530i (maybe rear-mount soon)
Re: Josh's 2.5 200QT
Well there is L.E.D. Amber turn signals inside the bucket but they aren't visible even if you look directly into the housing. They are hidden and when they come on, they illuminate the reflector. I think it looks really nice. Once you are able to see videos, check out the last one. I got everything working including the electric motors. Once I am happy with the polishing, I am calling that project done and moving on to the next. 
Re: Josh's 2.5 200QT
So my next one is V8 Tail light... Any ideas? Just got these...
- Attachments
-
- V8Tails.JPG (3.02 MiB) Viewed 35289 times
Re: Josh's 2.5 200QT
I think the next mod will be to take these V8 Tail Lights and have them tinted a bright red and all one color. Then paint one solid black line that the top from the bottom. This will basically be a 1 1/4'' black line all the way across the light. I will see if my wife can Photoshop this first before I try it.
Then get rid of the incandescent brake, turn, and reverse lights and go with L.E.D. It would really be sweet to sneak in sequential L.E.D. turn signals and lights in each of these compartments. There is fourteen compartments in the V8 tail lights and it would look pretty cool if the dead areas lit up too.
Then get rid of the incandescent brake, turn, and reverse lights and go with L.E.D. It would really be sweet to sneak in sequential L.E.D. turn signals and lights in each of these compartments. There is fourteen compartments in the V8 tail lights and it would look pretty cool if the dead areas lit up too.